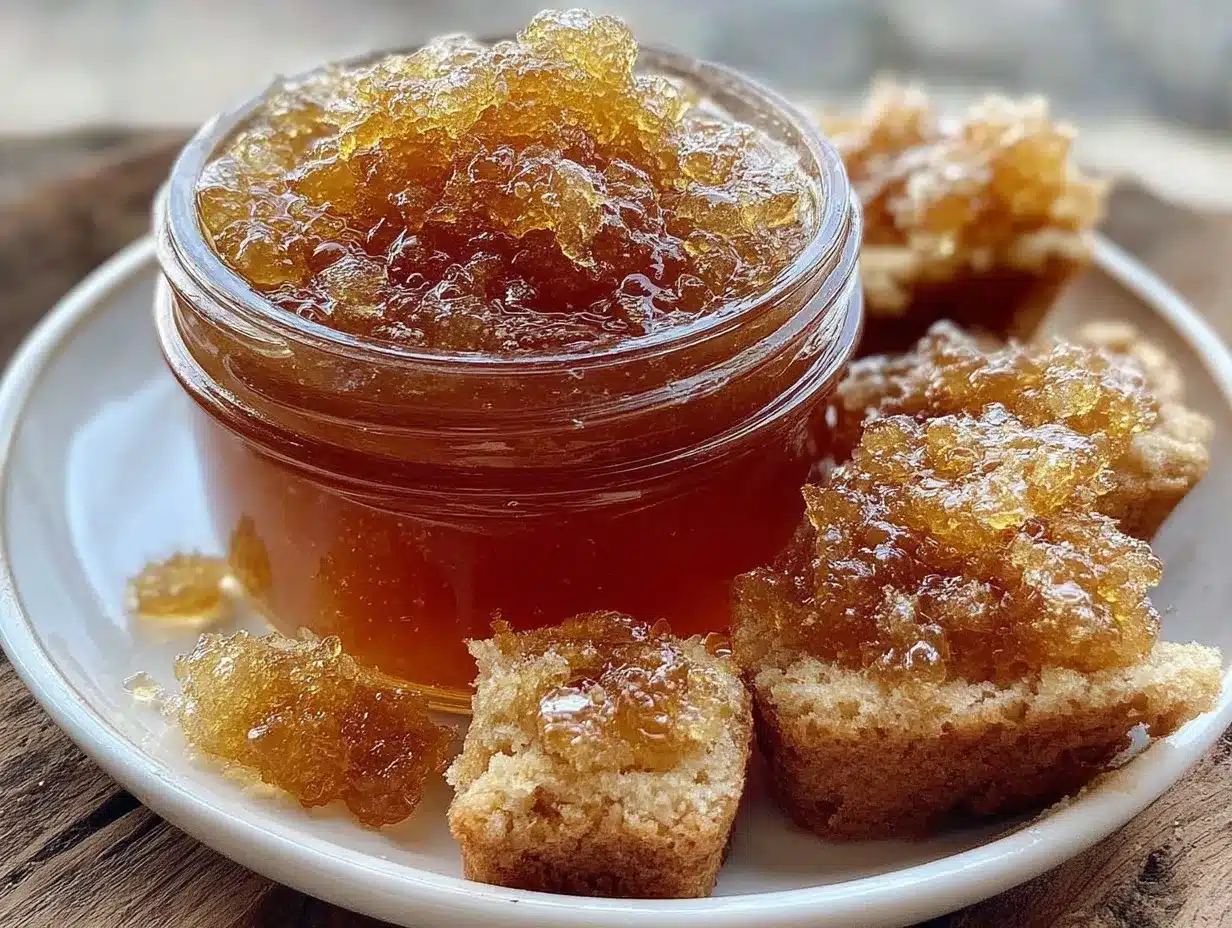
Let me tell you, the scent of warm, nutty clarified butter wafting from my kitchen is enough to make anyone’s mouth water instantly. The first time I made this easy homemade clarified butter recipe—also known as ghee—I was honestly hooked. It was the kind of moment where you pause, take a deep breath, and just smile because you know you’re onto something truly special. Years ago, when I was knee-high to a grasshopper, my grandma used to make ghee every few weeks, and that rich aroma would fill the whole house, promising comfort and tradition. I wish I’d stumbled upon this simple 3-step clarified butter recipe years earlier because it has since become a staple in my kitchen for everything from roasting veggies to drizzling over warm naan.
My family couldn’t stop sneaking spoonfuls off the counter (and I can’t really blame them). Honestly, this homemade clarified butter feels like a warm hug in a jar. Let’s face it, it’s dangerously easy to make, and it adds pure, nostalgic comfort to so many dishes. Whether you’re brightening up your breakfast, prepping for a cozy dinner, or aiming to impress guests with authentic flavor, this clarified butter recipe is perfect for you. After testing it multiple times in the name of research, of course, it’s become my go-to for gifting and family gatherings alike. You’re going to want to bookmark this one!
Why You’ll Love This Recipe
This easy homemade clarified butter recipe stands out because it’s truly foolproof and packed with flavor. Here’s why it’s a keeper:
- Quick & Easy: Comes together in under 30 minutes, perfect for busy weeknights or last-minute cooking adventures.
- Simple Ingredients: Just unsalted butter and a little patience—no fancy trips to specialty stores needed.
- Perfect for Every Meal: Whether you’re sautéing, roasting, or just adding a finishing touch, clarified butter brings out the best in your dishes.
- Crowd-Pleaser: Kids and adults alike love the rich, buttery flavor without the milk solids.
- Unbelievably Delicious: The process removes the impurities, leaving behind a silky, golden liquid that tastes nutty and pure.
What really sets this clarified butter apart is the gentle simmering technique I use, which avoids burning and keeps the flavor clean and smooth. Unlike some recipes that rush the process or skip filtering, this one patiently separates the milk solids, giving you perfect ghee every time. It’s comfort food reimagined—simple, wholesome, and ready to transform your cooking without any fuss. Plus, it’s great for impressing guests without stress or complicated steps.
What Ingredients You Will Need
This clarified butter recipe uses simple, wholesome ingredients to deliver bold flavor and satisfying texture without the fuss. Most are pantry staples, and substitutions are easy if needed.
- Unsalted Butter: 1 pound (450 grams) of good-quality unsalted butter—this is key for pure flavor and control over salt. I often use Kerrygold for its creamy texture and reliable taste.
- Optional: Ghee Spice Infusion: A pinch of turmeric or a few whole cardamom pods can be added during simmering for a subtle, aromatic twist (totally optional but lovely if you want to experiment).
That’s it! Just butter and, if you like, a little something extra for flavor. If you want to make a dairy-free version, you can try using vegan butter alternatives, but keep in mind the flavor and smoking point may vary.
Equipment Needed
- Heavy-Bottomed Saucepan: A sturdy 2-quart (2-liter) saucepan works best to evenly distribute heat and prevent scorching.
- Fine Mesh Strainer or Cheesecloth: For filtering out milk solids and impurities. Cheesecloth produces the clearest ghee but a fine strainer works just fine too.
- Heatproof Jar or Container: To store your clarified butter safely once cooled.
- Spoon or Ladle: For skimming off foam and transferring the liquid.
If you don’t have cheesecloth, a clean cotton kitchen towel can substitute. I find that using a medium saucepan rather than a large one helps keep the butter at a steady simmer, which is crucial for perfect clarified butter. Also, having a thermometer handy can help monitor the temperature, but it’s not a must.
Preparation Method
- Cut the Butter: Chop 1 pound (450 g) of unsalted butter into even cubes. This helps it melt evenly and prevents burning. Transfer to your heavy-bottomed saucepan.
- Melt Gently: Place the pan over low heat and let the butter melt slowly—this should take about 5-7 minutes. Stir occasionally to combine but don’t rush it. You’re looking for a clear liquid with white foam forming on top.
- Simmer and Separate: Once melted, keep the butter at a gentle simmer (around 200°F or 93°C) for about 20-25 minutes. You’ll notice milk solids sinking to the bottom and foam gathering on top. Resist the urge to stir too much—just skim off the foam as it builds.
- Check the Color and Aroma: The clarified butter will turn a beautiful golden amber with a nutty aroma. If you see it browning too fast or smelling burnt, lower the heat. This step is crucial and needs patience.
- Strain Carefully: Remove from heat and let it cool for a few minutes. Line a fine mesh strainer with cheesecloth and slowly pour the liquid through into a clean jar. This filters out milk solids and any residue.
- Cool and Store: Let the ghee cool completely at room temperature before sealing. It will solidify into a creamy, spreadable consistency but can also be kept in liquid form if refrigerated.
Pro tip: When skimming foam, a small spoon works wonders. Also, don’t toss the milk solids left in the pan—they’re fantastic for cooking or adding to rice for extra flavor!
Cooking Tips & Techniques
Here’s what I’ve learned over many batches of homemade clarified butter:
- Keep the Heat Low: High heat burns the milk solids and ruins flavor. Slow and steady wins this race.
- Patience is Key: Don’t rush the simmering phase. The longer you let it gently bubble, the clearer and more flavorful your ghee will be.
- Use Fresh Butter: Older or salted butter can give a bitter taste or cloudy appearance.
- Watch for Color Changes: Once the milk solids turn golden and the butter smells nutty, it’s time to strain. Letting it go too far makes it bitter.
- Storage Tips: Store in an airtight container at room temperature for up to 3 months or refrigerate for longer life.
- Test Small Batches First: If you’re new to making clarified butter, start with half a pound to get a feel for the simmering time and skimming process.
One time, I let the heat creep up and ended with a smoky mess—lesson learned! Since then, I always keep a close eye and a thermometer nearby, especially when multitasking in the kitchen.
Variations & Adaptations
This clarified butter recipe is wonderfully versatile. Here are some ways to tweak it:
- Infused Ghee: Add whole spices like cinnamon sticks, cloves, or dried chili during simmering for a warm, aromatic touch. Strain them out before storing.
- Dairy-Free Clarified Butter: Use vegan butter substitutes, but note the flavor and smoking point will differ. It won’t be traditional ghee but still useful.
- Smoky Ghee: Try a quick char of the milk solids at the bottom before straining for a deeper, smoky flavor (careful not to burn!).
I once added a pinch of saffron threads to the simmering butter—gave it a beautiful golden hue and a delicate floral note that my guests loved. Feel free to experiment with your pantry favorites.
Serving & Storage Suggestions
Clarified butter is delicious served warm or at room temperature. Drizzle it over steamed vegetables, roasted potatoes, or swirl into dal and lentil dishes. It’s fantastic melted over popcorn or stirred into rice for extra richness.
Store your homemade clarified butter in a sealed jar at room temperature—away from direct sunlight—for up to 3 months. Refrigeration extends shelf life to about 6 months but will solidify the ghee. To soften, simply warm a spoonful in your hands or microwave briefly.
Flavors develop beautifully over time, becoming more mellow and nutty. When reheating, avoid high heat to prevent burning the delicate fats.
Nutritional Information & Benefits
A 1-tablespoon (14 g) serving of clarified butter provides roughly 120 calories, 14 grams of fat (mostly saturated and healthy monounsaturated fats), and zero carbs or protein. It’s lactose-free since milk solids are removed, making it suitable for many with dairy sensitivities.
Clarified butter contains butyric acid, which supports gut health, and fat-soluble vitamins A, D, E, and K. It’s a great cooking fat due to its high smoke point (around 485°F or 252°C), making it ideal for frying and sautéing without breaking down into harmful compounds.
If you’re mindful of saturated fat, use it in moderation, but honestly, it’s a wholesome alternative to many processed cooking fats and oils.
Conclusion
This easy homemade clarified butter recipe is truly worth making yourself. It’s simple, rewarding, and adds a rich, buttery flavor that’s hard to beat. Whether you stick to the classic version or try one of the fun variations, it’s a kitchen staple that will elevate your cooking without fuss.
I love this recipe because it connects me to family memories and helps bring authentic flavor into everyday meals. Give it a try, customize it to your liking, and watch how it transforms your dishes. Please share your experiences or any twists you make—I’d love to hear how you use your homemade ghee!
Happy cooking and enjoy that golden goodness!
Frequently Asked Questions
What is clarified butter (ghee)?
Clarified butter, or ghee, is butter that’s been gently melted to separate and remove milk solids and water, leaving behind pure butterfat. It has a higher smoke point and longer shelf life than regular butter.
Can I use salted butter to make clarified butter?
It’s best to use unsalted butter to control the flavor and salt content. Salted butter can make the ghee taste salty or affect the texture.
How long does homemade clarified butter last?
Stored in an airtight container at room temperature, it can last up to 3 months. Refrigerated, it can keep for about 6 months.
Can I use clarified butter for high-heat cooking?
Yes! Clarified butter has a high smoke point (around 485°F/252°C), making it excellent for frying, sautéing, and roasting without burning.
Is clarified butter suitable for people with lactose intolerance?
Yes, because the milk solids containing lactose are removed, clarified butter is generally safe for those with lactose intolerance.
Pin This Recipe!
Easy Homemade Clarified Butter Recipe 3 Steps for Perfect Ghee

This easy homemade clarified butter recipe, also known as ghee, is a simple 3-step process that yields a rich, nutty, and pure butterfat perfect for cooking and adding authentic flavor to dishes.
- Prep Time: 10 minutes
- Cook Time: 25 minutes
- Total Time: 35 minutes
- Yield: About 1 1/2 cups (12 tablespoons) 1x
- Category: Condiment
- Cuisine: Indian
Ingredients
- 1 pound (450 grams) unsalted butter
- Optional: pinch of turmeric or a few whole cardamom pods for spice infusion
Instructions
- Cut the butter into even cubes and transfer to a heavy-bottomed saucepan.
- Place the pan over low heat and melt the butter slowly, stirring occasionally until clear liquid forms with white foam on top (about 5-7 minutes).
- Keep the butter at a gentle simmer (around 200°F or 93°C) for 20-25 minutes until milk solids sink and foam gathers on top; skim off foam as it builds.
- Check for a golden amber color and nutty aroma; lower heat if browning too fast or smelling burnt.
- Remove from heat and let cool for a few minutes; strain through a fine mesh strainer lined with cheesecloth into a clean jar.
- Let the ghee cool completely at room temperature before sealing and storing.
Notes
Keep heat low to avoid burning milk solids; patience during simmering is key. Milk solids left in the pan can be used for cooking or flavoring rice. Store in airtight container at room temperature up to 3 months or refrigerate for up to 6 months. Use fresh unsalted butter for best results. Optional spice infusions can add aromatic flavor.
Nutrition
- Serving Size: 1 tablespoon (14 g)
- Calories: 120
- Fat: 14
- Saturated Fat: 9
Keywords: clarified butter, ghee, homemade ghee, clarified butter recipe, cooking fat, dairy-free butter alternative