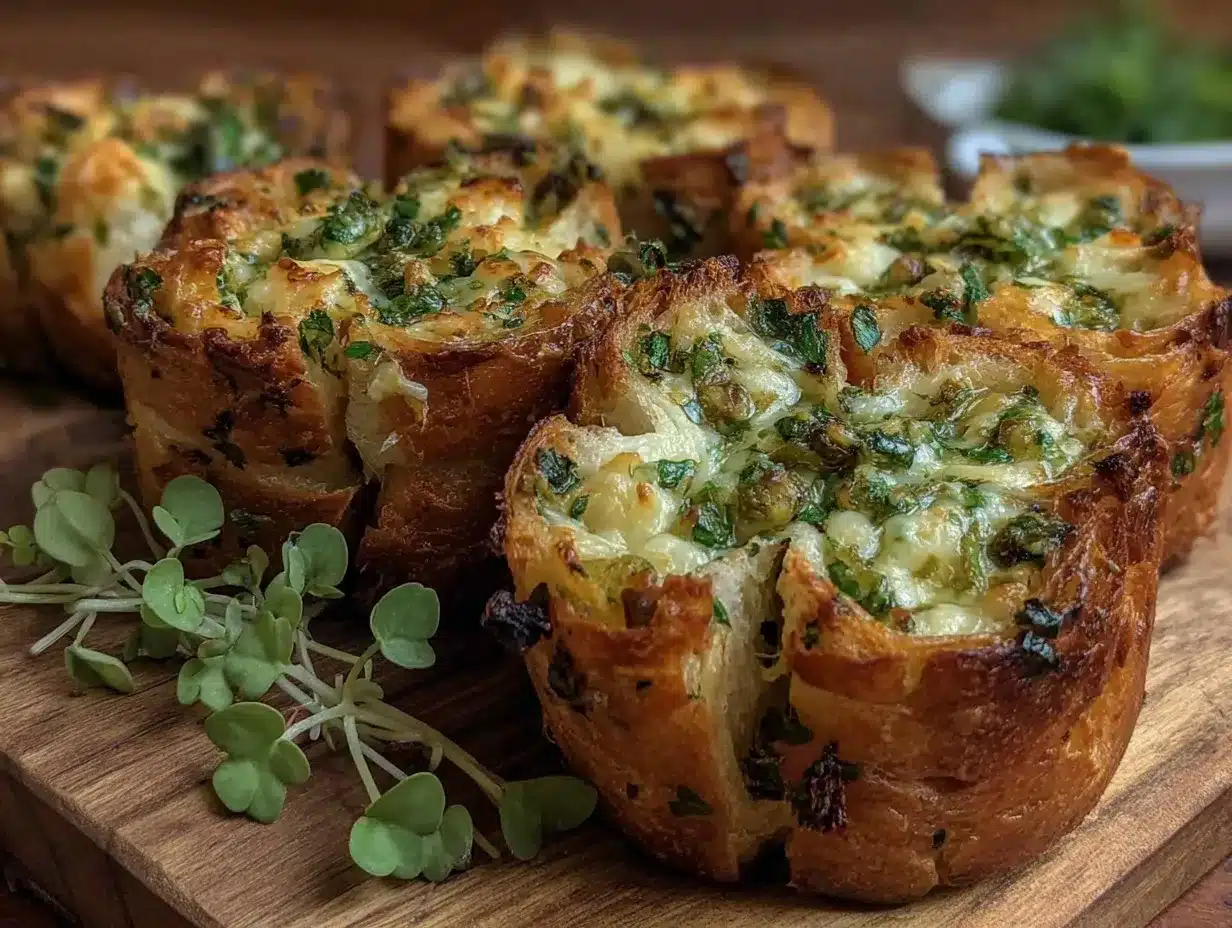
The unmistakable aroma of freshly baked garlic bread fills the kitchen, but with a twist—there’s a burst of bright green peeking out from the oven, and it’s not just parsley. The first time I pulled a tray of this Crispy St. Patrick’s Green Shamrock Garlic Bread from the oven, I actually laughed out loud at how adorable (and festive!) these little shamrocks looked. The tops were bubbling, golden, and crunchy, while the inside promised pillowy softness flavored with real Irish butter and just the right touch of garlicky goodness. This, my friends, is not your average party bread—it’s a St. Paddy’s Day showstopper.
I’ll never forget the look on my kids’ faces when they spotted the shamrock shapes. “Are those really bread?!” they asked, eyes wide, hands already reaching. My husband, who claims to be “off carbs” (at least until something like this comes along), couldn’t resist sneaking a piece or two right off the sheet pan. Honestly, that’s how you know you’ve got a winner—no leftovers, just a few stray green crumbs and a lot of happy bellies.
Growing up, my grandma always made a big deal out of St. Patrick’s Day. There’d be soda bread, corned beef, and shamrocks everywhere you looked. But I never saw anything quite like this—crisp, herby, and eye-catching enough to be the talk of the party. I wish I’d thought to make green garlic bread years ago (it would’ve saved me so many boring side dishes at potlucks!).
This recipe is dangerously easy, too. Perfect for class parties, dinner with friends, or just brightening up your Pinterest board with a pop of emerald green. And after several rounds of “testing” (all in the name of research, of course), it’s become a staple at our house for St. Paddy’s—and, honestly, any day we need a little extra luck. This bread feels like a warm hug from Ireland, and you’re going to want to bookmark this one for every festive feast.
Why You’ll Love This Crispy St. Patrick’s Green Shamrock Garlic Bread
From countless batches in my home kitchen to rave reviews at neighborhood parties, I can confidently say this Crispy St. Patrick’s Green Shamrock Garlic Bread is a keeper. Here’s what makes it stand out—and why you’ll be coming back for seconds (and probably thirds):
- Quick & Easy: Comes together in just 20 minutes, making it perfect for last-minute party prep or busy weeknights when you need that extra festive touch.
- Simple Ingredients: You probably have everything right in your pantry and fridge—no wild goose chases for specialty items.
- Perfect for Parties: Shamrock-shaped, golden, and green—these are a hit for St. Patrick’s celebrations, classroom treats, or any gathering where you want to impress (without the stress).
- Crowd-Pleaser: Kids love the fun shapes, and adults love the crispy, garlicky flavor. I’ve never seen leftovers last more than ten minutes.
- Unbelievably Delicious: The combination of real Irish butter, fresh garlic, and a hint of herbs creates next-level comfort food with each bite.
What really sets this recipe apart? Instead of just coloring the butter, I blend fresh spinach (yes, spinach!) right into the garlic spread—giving you that vibrant green hue without artificial dyes and sneaking in a little veggie goodness. The shamrock shapes are simple, but they always get a “wow” reaction. Honestly, it’s the kind of bread you make for the smiles… but you’ll love it for the flavor and crunch.
This isn’t just another garlic bread recipe—it’s a celebration on a baking sheet. The crispy edges, fragrant garlic, and playful shapes make it a hit for both seasoned bakers and kitchen newbies. And let’s face it: food that makes you smile just tastes better. Whether you’re hosting a big St. Patrick’s Day bash or just want dinner to feel a little more magical, this bread checks every box. Go ahead, make an extra batch—no one will judge.
What Ingredients You Will Need
This Crispy St. Patrick’s Green Shamrock Garlic Bread uses simple, wholesome ingredients that deliver bold flavor and a fun, festive look without any complicated steps. Most of these are pantry staples, and you can swap a few things to match your tastes or dietary needs.
- For the Shamrock Bread:
- 1 large French baguette or Italian loaf (about 16 oz / 450 g)—day-old bread works best for extra crunch
- 2 cups fresh baby spinach leaves (about 60 g)—washed and patted dry
- 1/4 cup fresh parsley (10 g)—stems removed
- For the Garlic Butter Spread:
- 1/2 cup (1 stick, 115 g) unsalted Irish butter—softened to room temperature (Kerrygold is wonderful here!)
- 3-4 cloves garlic—peeled and minced (use more if you love a strong garlic flavor)
- 1/4 teaspoon fine sea salt (plus more to taste)
- 1/4 teaspoon cracked black pepper
- 1 teaspoon dried Italian herbs (or just dried oregano or basil, whatever you have)
- 2 tablespoons grated Parmesan cheese (optional, but adds a lovely nuttiness)
- For Garnishing:
- Extra chopped parsley or chives—sprinkle on top for color
- A pinch of flaky sea salt—for that irresistible finish
Ingredient Notes & Tips:
- Bread: I love using a slightly stale baguette—holds its shape better and gets crispier. Gluten-free baguettes work, too (try Schär brand if you’re GF).
- Spinach: Adds color without a “green” taste. Baby spinach blends best, but you can use kale or arugula if that’s what you have.
- Butter: Real Irish butter gives this a rich flavor, but dairy-free spreads (like Miyoko’s) also work well if you need it vegan.
- Parmesan: You can skip it for dairy-free, or try nutritional yeast for a little cheesy flavor without the dairy.
- Herbs: Fresh basil or dill is a fun twist if you want to play with flavors.
- Food Coloring: Not needed here—spinach does the trick, but you can add a few drops of natural gel coloring for a deeper hue if you’re all-in on green.
Honestly, this recipe is all about flexibility. The real star is the green garlic butter—spread it on anything and it’s instantly party-ready.
Equipment Needed
- Shamrock Cookie Cutter: About 3-4 inches (7-10 cm) wide. If you don’t have one, you can use a sharp knife to cut freehand shapes—imperfections add charm!
- Baking Sheet: Standard half-sheet pan works great. Line with parchment for easy cleanup.
- Food Processor or Blender: For pureeing spinach, parsley, and butter together. If you don’t have one, just chop everything super fine and mix by hand.
- Mixing Bowl & Spoon: For stirring up the garlic butter spread.
- Basting Brush or Spatula: To slather that green goodness on every bread surface.
- Cooling Rack: Optional, but helps the bread stay crisp after baking.
I’ve made this recipe with everything from a hand-me-down food processor to a $10 thrift-store blender—it all works as long as you can mash the greens into the butter. If you’re using a nonstick baking sheet, skip parchment but watch closely to keep the bottoms from over-browning. No cookie cutter? Just trace a cardboard shamrock template and cut around it with a paring knife (kids love this part). And yes, I’ve even made these as “rustic” torn shapes—nobody complains when it tastes this good.
Preparation Method
-
Preheat the Oven: Set your oven to 400°F (200°C). Line a baking sheet with parchment paper for easy cleanup.
Tip: Preheating is key for even crisping—don’t rush this part! -
Prepare the Green Garlic Butter:
- Add spinach, parsley, softened butter, minced garlic, salt, pepper, and herbs to a food processor or blender.
- Blend until smooth and bright green—about 30 seconds. Scrape down sides as needed.
- Stir in Parmesan cheese if using.
Sensory cue: It should smell fresh, garlicky, and look like a vivid green paste.
-
Slice and Shape the Bread:
- Cut baguette into 1/2-inch (1.25 cm) thick slices.
- Press each slice with a shamrock-shaped cutter. Gather and re-press scraps as needed.
- If freehanding, use a sharp paring knife to cut out shamrock shapes—aim for fun, not perfection!
Note: Slightly stale bread is easier to cut without crumbling.
-
Spread the Green Butter:
- Lay shamrock-shaped pieces on the prepared baking sheet.
- Generously brush or spread green garlic butter on each piece—go all the way to the edges!
- Optional: Sprinkle with extra Parmesan or a pinch of flaky sea salt for extra crunch.
-
Bake:
- Bake for 8-10 minutes, until edges are crisp and tops are bubbly and golden.
- Rotate the tray halfway through for even browning.
If you like them extra crispy, broil for 1-2 minutes at the end—but watch closely to avoid burning!
-
Cool and Garnish:
- Transfer bread to a cooling rack for 2-3 minutes (if you can wait!).
- Sprinkle with more chopped herbs or a little extra cheese if you like.
Warning: Bread will be HOT right out of the oven. Let cool slightly for best texture and to avoid burned tongues (ask me how I know).
- Serve: Pile onto a platter and serve warm. Watch them disappear!
Troubleshooting Tips:
- Bread too soft? Bake a minute longer or try a slightly older loaf next time.
- Butter melting off? Chill bread with spread for 5 minutes before baking.
- No food processor? Just mince greens as fine as possible and mash by hand—still delicious.
Efficiency tip: Shape bread and make butter the night before. Bake fresh when guests arrive for maximum wow-factor.
Cooking Tips & Techniques
Here’s the inside scoop from my kitchen to yours—these tips will help you get the crispiest, tastiest shamrock garlic bread every single time:
- Use Day-Old Bread: Slightly stale bread slices hold their shape way better and soak up the butter without going soggy.
- Don’t Overload With Butter: It’s tempting to pile it on, but too much will make the bread greasy. A nice even layer is perfect.
- Chill for Cleaner Cutting: If your bread is super fresh, toss it in the freezer for 10 minutes before slicing and shaping—it makes the job way easier (trust me, I learned this the hard way after squashing a gorgeous loaf).
- Blend Greens Thoroughly: Pureeing the greens smooth ensures even color and no leafy bits—nobody wants a chewy spinach chunk in their garlic bread.
- Rotate for Even Baking: Ovens can be quirky. Rotating the tray halfway through baking gives you that consistent golden crunch on every piece.
- Watch the Broiler: If you broil for extra crisp, keep your eyes on the bread—garlic burns fast, and I’ve learned (the hard way) that one minute can mean the difference between crispy and charcoal.
Personal Lessons: The first time I tried making these, I crammed too many shamrocks on the tray—ended up with soft, steamy pieces. Spacing them out gives you that irresistible crunch. And don’t stress if your shamrocks aren’t perfect—imperfection is part of the charm (plus, they still taste amazing).
For multitasking, prep your green garlic butter while the oven is preheating and cut your bread while the butter is blending. That way, you’re ready to assemble as soon as everything’s chopped and mixed. For consistent results every time, always taste your butter spread before slathering—adjust salt or herbs as needed.
Variations & Adaptations
This recipe is all about having fun and making it your own. Here are some ways to switch it up for different tastes, dietary needs, or just for a little adventure:
- Gluten-Free Shamrocks: Use your favorite gluten-free baguette or rolls. I love Schär or Against the Grain brands for a great texture.
- Vegan Option: Swap Irish butter with a vegan butter (like Earth Balance or Miyoko’s) and use nutritional yeast instead of Parmesan.
- Cheesy Upgrade: Add a sprinkle of shredded mozzarella or cheddar on top before baking for a gooey, melty twist. Kids go wild for this!
- Spicy Kick: Mix a pinch of crushed red pepper or a dash of hot sauce into the garlic butter for a little heat.
- Herb Variations: Try basil, dill, or even cilantro for a different flavor profile. Tarragon with lemon zest is also delicious for spring gatherings.
- Shape It Up: No shamrock cutter? Make hearts for Valentine’s, stars for July 4th, or just classic rounds for year-round fun.
- Air Fryer Adaptation: Pop the shaped, buttered bread in your air fryer at 375°F (190°C) for 5-6 minutes for extra crispiness—watch closely!
My favorite “accidental” variation happened when I added a bit of pesto to the butter for extra herbiness. It was a hit (and an easy way to use up leftover pesto). The sky’s the limit—just don’t be afraid to experiment!
Serving & Storage Suggestions
This Crispy St. Patrick’s Green Shamrock Garlic Bread is best served fresh and warm, but you’ve got options for prepping ahead and storing leftovers (if there are any!).
- Serving: Arrange shamrock pieces on a big platter—stacked or fanned out. Garnish with extra parsley for a pop of color. Serve straight from the oven for that irresistible scent and crunch.
- Pairings: Pairs beautifully with soups (think creamy potato or carrot), classic Irish stew, or alongside your favorite pasta. A cold Irish beer or sparkling lemonade is a festive touch.
- Storage: Cool completely, then store in an airtight container at room temp for up to 1 day. For longer storage, freeze in a zip-top bag for up to 1 month.
- Reheating: To bring back the crunch, reheat in a 350°F (175°C) oven for 5-7 minutes. Skip the microwave—it makes the bread soft and chewy.
- Make Ahead: Slice and shape bread and prepare green butter a day in advance. Store separately, then assemble and bake just before serving for best results.
- Flavor Note: The garlic and herbs get even more fragrant after a few hours, but nothing beats the just-baked crunch.
This bread is a guaranteed conversation starter on any table—just watch it disappear!
Nutritional Information & Benefits
Here’s a quick look at what you’re getting with each serving (about 2 pieces):
- Calories: Approx. 130
- Fat: 6g (mainly from butter)
- Carbs: 16g
- Protein: 3g
- Fiber: 1g
Health Benefits: Thanks to the spinach and parsley, you get a little extra Vitamin K, iron, and antioxidants—plus fresh garlic supports immunity and heart health. Using real butter instead of margarine keeps things more natural. You can make it gluten-free or dairy-free as noted above. Contains wheat and dairy (unless adaptations are used), so always check with guests on allergies.
From a wellness perspective, I love that this bread packs in real greens and avoids artificial coloring. And you can feel good about sharing something festive that’s also made with whole, simple ingredients (and a bit of Irish luck, if you ask me).
Conclusion
If you’re searching for the perfect way to add some cheer to your St. Patrick’s Day—or just want to try something new for your next party—this Crispy St. Patrick’s Green Shamrock Garlic Bread is it. Fun to make, even more fun to eat, and guaranteed to draw a crowd around the table.
Don’t be afraid to mix it up—try a new herb, switch out the bread, or let your kids help cut the shapes. Recipes like this are all about bringing people together (and making a few happy kitchen memories along the way). Personally, I love how this bread is both playful and nostalgic—it takes me right back to family feasts when I was knee-high to a grasshopper, but with a Pinterest-worthy twist.
Give this recipe a try, and let me know how it goes! Leave a comment below if you make it, share your creative variations, or tag me on social media so I can see your shamrock creations. Here’s to good food, good company, and a little extra luck—Sláinte!
Frequently Asked Questions
Can I make this shamrock garlic bread ahead of time?
Absolutely! Slice and shape your bread, and prepare the green butter up to 24 hours in advance. Store them separately and assemble right before baking for the best crunch and color.
What if I don’t have a shamrock cookie cutter?
No problem—just use a sharp paring knife to carefully cut out shamrock shapes, or try other fun shapes for different occasions. Even rustic rounds or torn pieces still look festive and taste amazing!
Is there a way to make this gluten-free?
Yes! Use your favorite gluten-free baguette or roll, and follow all other steps as written. The green garlic butter works beautifully on gluten-free bread.
Can I freeze leftover garlic bread?
You can. Let bread cool completely, then freeze in an airtight bag for up to a month. Reheat in a hot oven for 5-7 minutes for crispy results—skip the microwave for best texture.
How do I get the green color without food coloring?
Blending fresh baby spinach and parsley right into the butter gives a vibrant green hue—no artificial dyes needed. If you want it even greener, add a few extra leaves or a touch of natural gel coloring.
Pin This Recipe!
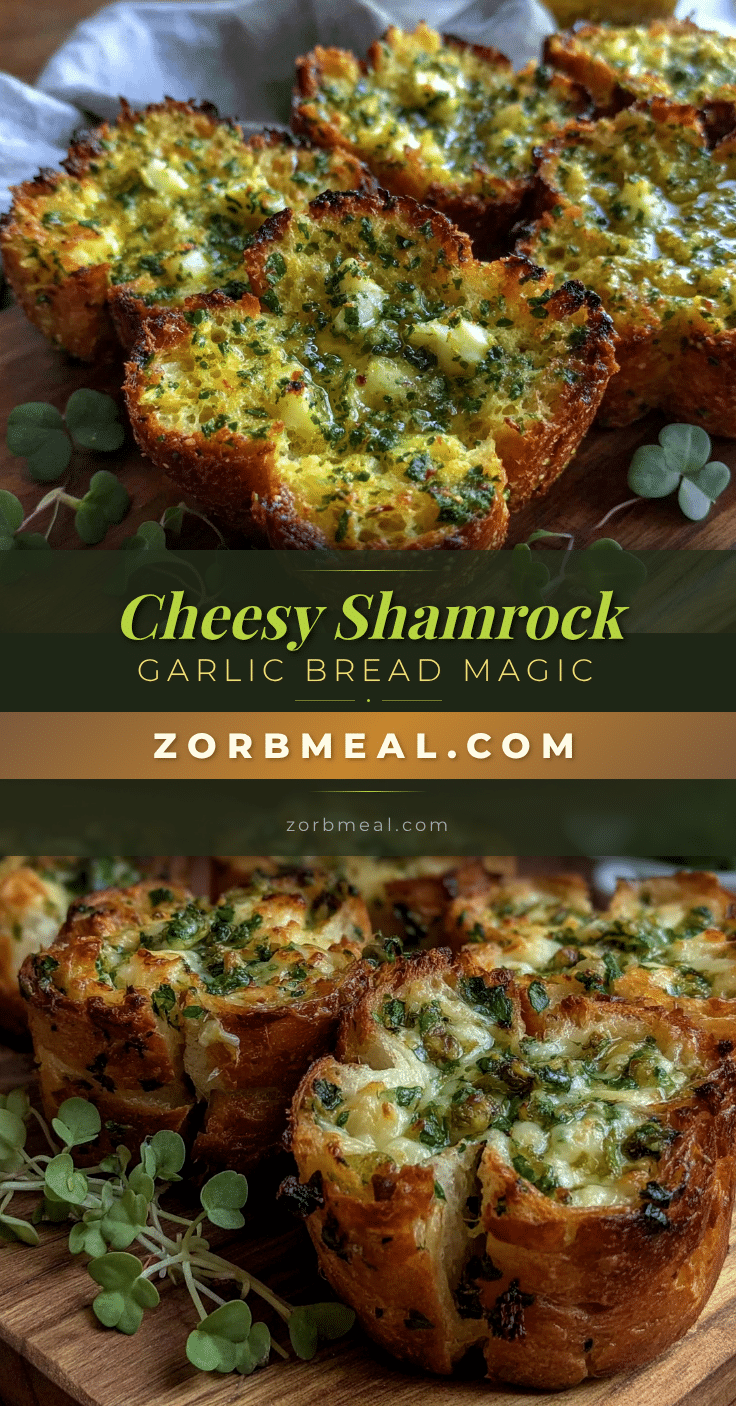
Crispy St. Patrick’s Green Shamrock Garlic Bread

This festive garlic bread features shamrock-shaped slices topped with a vibrant green, garlicky butter made from fresh spinach and parsley. Crispy, golden, and irresistibly fun, it’s the perfect party appetizer for St. Patrick’s Day or any occasion that needs a pop of color.
- Prep Time: 10 minutes
- Cook Time: 10 minutes
- Total Time: 20 minutes
- Yield: 8 servings 1x
- Category: Appetizer
- Cuisine: Irish-American
Ingredients
- 1 large French baguette or Italian loaf (about 16 oz)
- 2 cups fresh baby spinach leaves (about 2 oz), washed and patted dry
- 1/4 cup fresh parsley (stems removed)
- 1/2 cup (1 stick) unsalted Irish butter, softened to room temperature
- 3–4 cloves garlic, peeled and minced
- 1/4 teaspoon fine sea salt (plus more to taste)
- 1/4 teaspoon cracked black pepper
- 1 teaspoon dried Italian herbs (or dried oregano or basil)
- 2 tablespoons grated Parmesan cheese (optional)
- Extra chopped parsley or chives, for garnish
- A pinch of flaky sea salt, for garnish
Instructions
- Preheat oven to 400°F (200°C). Line a baking sheet with parchment paper.
- In a food processor or blender, combine spinach, parsley, softened butter, minced garlic, salt, pepper, and herbs. Blend until smooth and bright green. Stir in Parmesan cheese if using.
- Slice baguette into 1/2-inch thick slices. Use a shamrock-shaped cookie cutter (or a sharp knife) to cut each slice into shamrock shapes. Gather and re-press scraps as needed.
- Arrange shamrock-shaped bread pieces on the prepared baking sheet.
- Generously brush or spread the green garlic butter on each piece, covering to the edges. Optionally, sprinkle with extra Parmesan or flaky sea salt.
- Bake for 8-10 minutes, rotating the tray halfway through, until edges are crisp and tops are bubbly and golden. For extra crispiness, broil for 1-2 minutes at the end, watching closely.
- Transfer bread to a cooling rack for 2-3 minutes. Sprinkle with more chopped herbs or cheese if desired.
- Serve warm on a platter and enjoy!
Notes
For best results, use slightly stale bread for extra crunch. Gluten-free and vegan adaptations are easy—use GF bread and vegan butter. Shape and butter can be prepped ahead and baked fresh. Rotate tray for even baking and avoid overloading with butter to prevent sogginess.
Nutrition
- Serving Size: 2 pieces
- Calories: 130
- Sugar: 1
- Sodium: 180
- Fat: 6
- Saturated Fat: 3.5
- Carbohydrates: 16
- Fiber: 1
- Protein: 3
Keywords: St. Patrick's Day, garlic bread, party appetizer, green garlic bread, shamrock bread, festive bread, spinach garlic bread, Irish recipes