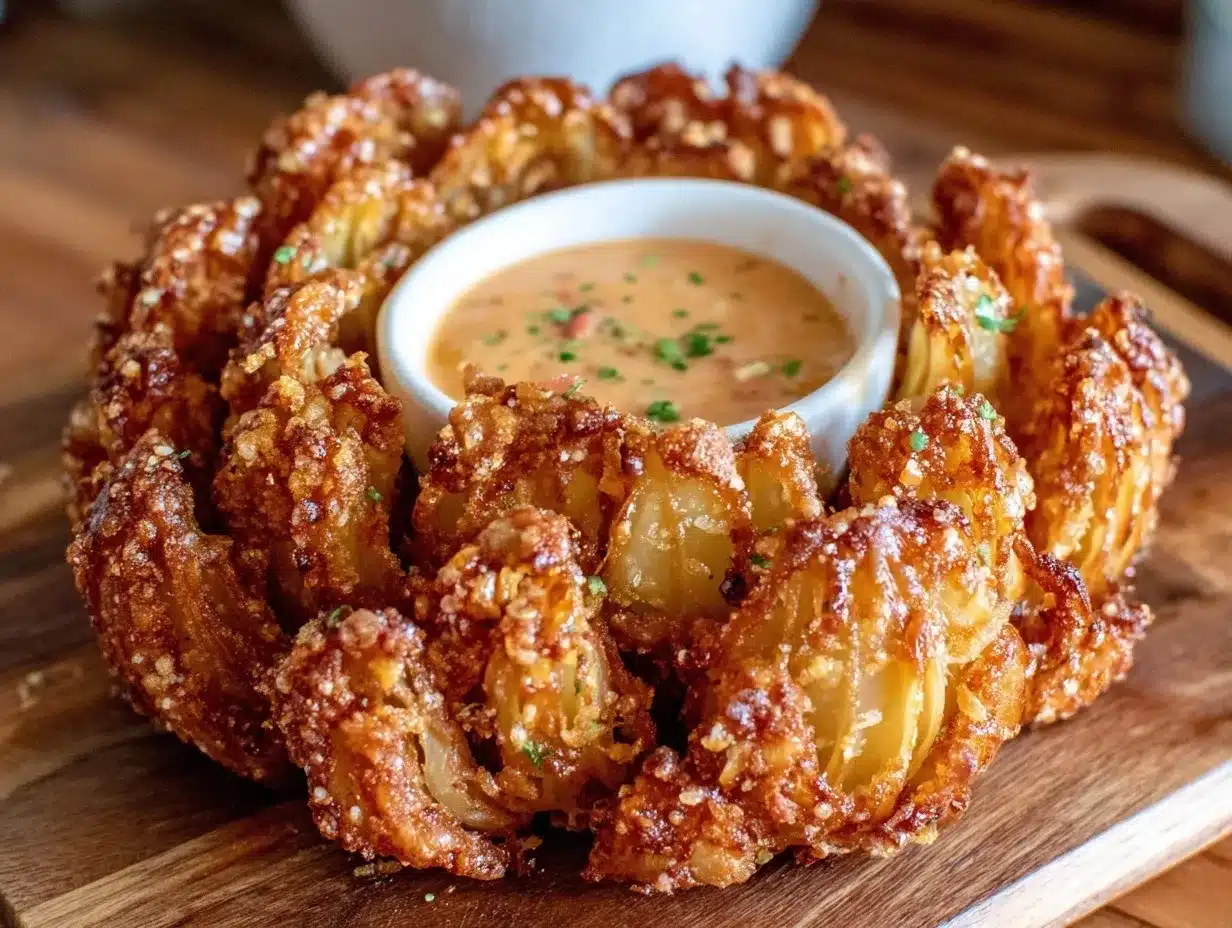
“You sure you can make that at home?” my buddy asked, eyeing the giant onion blooming on the plate like some crispy flower from another world. Honestly, I wasn’t sure either. The Outback Steakhouse Bloomin Onion always felt like a restaurant magic trick—no way to pull off that perfect crunch and golden glow without a deep fryer and a whole lot of patience. But after a few tries (and a minor kitchen explosion that I’d rather forget), I landed on this crispy Outback Steakhouse Bloomin Onion copycat recipe that nails that addictive crunch and bold flavor. It’s weirdly satisfying to slice that onion just so, batter it up, and watch it puff into the iconic “bloom.”
It wasn’t a planned project. Actually, it started on a slow Sunday when I had a leftover onion and way too much curiosity. I figured, “Why not try to replicate that blooming onion everyone raves about?” Turns out, the trick isn’t just the batter—it’s the layering, the seasoning, and a quick double fry that locks in the crunch. I still remember the first time I pulled that golden flower out of the oil, the kitchen heavy with that unmistakable fried onion aroma. And yeah, it’s just as good as it sounds.
What stuck with me is how this recipe bridges the gap between restaurant indulgence and home comfort. It’s the kind of treat that sparks a bit of nostalgia, maybe a casual night with friends or a spontaneous snack craving. If you’ve ever been hesitant about tackling this crispy Outback Steakhouse Bloomin Onion recipe, know that it’s doable, and the payoff is more than worth the effort. Plus, it’s fun to share—just like when I brought a batch to a game night and everyone asked for the recipe (including that same skeptical friend!).
So, if you’re ready to turn a humble onion into something crispy, savory, and impossibly fun to eat, let’s get going. This recipe has become my go-to for impressing guests without fuss and for satisfying that deep-fried craving with homemade flair. No fancy equipment required, just a little patience, and a love for that perfect crunch.
Why You’ll Love This Recipe
Trust me, this crispy Outback Steakhouse Bloomin Onion copycat recipe isn’t your average fried onion. I’ve spent enough evenings tweaking it—testing batter thickness, seasoning blends, and frying times—to know this version stands out. Here’s why you’ll want to make it again and again:
- Quick & Easy: The whole process takes about 40 minutes max, including prep and frying, making it perfect for a spontaneous snack or casual get-together.
- Simple Ingredients: No need to hunt down weird spices or specialty flours. Most ingredients are pantry staples you probably have on hand right now.
- Perfect for Sharing: Whether it’s game night, a casual dinner party, or a weekend hangout, this blooming onion steals the show every time.
- Crowd-Pleaser: Kids, adults, picky eaters—you name it, everyone loves the crispy edges and tender onion bites inside.
- Unbelievably Delicious: The batter is perfectly seasoned with a little kick of paprika and garlic powder, and the double frying makes it insanely crispy without an oily finish.
What makes this recipe different? I’ve found the secret is in the batter layering—dipping the onion twice and letting it rest before frying gives you that flaky, crunchy texture. Plus, the seasoning mix is balanced just right—not too salty, with a whisper of smoky paprika and a hint of cayenne that wakes up your taste buds. And the dipping sauce? Creamy, tangy, and slightly spicy—it’s the kind of combo that makes you close your eyes after the first bite.
This recipe isn’t just fried food; it’s a little celebration of comfort with a homemade touch. It’s the kind of dish that turns simple ingredients into something memorable, perfect for impressing guests or just treating yourself on a lazy Sunday. If you’ve ever been curious about replicating that iconic Outback Steakhouse Bloomin Onion at home, this is your chance to get it right without any fuss.
What Ingredients You Will Need
This crispy Outback Steakhouse Bloomin Onion recipe uses straightforward ingredients that come together to create layers of flavor and crunch. Everything here is easy to find, and many are pantry staples, so you might already have them on hand. The onion itself is the star, but the batter and seasoning do the heavy lifting for that perfect copycat taste.
- For the onion:
- 1 large sweet onion (Vidalia or Walla Walla recommended for their mild sweetness and size)
- Vegetable oil (for frying, about 4 cups or enough to fill a deep pot to 3 inches)
- For the batter:
- 1 cup all-purpose flour (I like King Arthur for consistent texture)
- 1 teaspoon paprika (smoked paprika adds a nice depth)
- 1 teaspoon garlic powder
- 1 teaspoon salt
- 1/2 teaspoon black pepper
- 1/4 teaspoon cayenne pepper (adjust for heat preference)
- 1 large egg (room temperature)
- 1 cup buttermilk (or substitute with 1 cup milk + 1 tablespoon lemon juice, let sit 5 minutes)
- For the dipping sauce:
- 1/2 cup mayonnaise
- 2 tablespoons ketchup
- 1 tablespoon horseradish (adds that signature tang)
- 1/2 teaspoon paprika
- 1/2 teaspoon garlic powder
- 1/4 teaspoon cayenne pepper
- Salt and pepper to taste
You can swap the all-purpose flour with gluten-free flour blend if you need a gluten-free option. For the dipping sauce, if you prefer a lighter version, Greek yogurt works well instead of mayo, keeping the tangy punch without the heaviness. In summer, I sometimes jazz it up by adding a splash of fresh lemon juice or chopped chives to the sauce for a fresh twist.
Equipment Needed
- A large sharp knife (essential for that precise onion cutting)
- Cutting board (preferably sturdy and non-slip)
- Large deep pot or heavy-bottomed Dutch oven for frying (I use a 5-quart Dutch oven, but a deep fryer works too)
- Cooking thermometer (to keep oil temperature steady around 350°F / 175°C)
- Large mixing bowls (for batter and for soaking the onion)
- Tongs or slotted spoon (for safely handling the hot onion)
- Wire rack with baking sheet (to drain excess oil and keep the onion crispy)
If you don’t have a thermometer, you can test the oil by dropping a small piece of bread in—if it browns in about 60 seconds, the oil is ready. I’ve tried frying without a thermometer, but it’s tricky to keep the right temperature, and the onion might come out greasy or undercooked. A budget-friendly alternative is an instant-read thermometer, which costs less but works perfectly.
Preparation Method
- Prepare the onion (10 minutes): Trim the top (stem end) of the onion and peel off the outer skin. Place the onion cut side down on your cutting board. Using a sharp knife, make 12-16 even vertical cuts from the root to the top, slicing almost all the way through but not cutting the root (this holds the onion together). Gently spread the onion petals outward, creating the “blooming” effect. Rinse under cold water to help separate the petals, then pat dry carefully with paper towels.
- Make the batter (5 minutes): In one large bowl, whisk together the flour, paprika, garlic powder, salt, black pepper, and cayenne pepper. In a separate bowl, combine the egg and buttermilk. Stir until smooth.
- Coat the onion (10 minutes): Dip the onion into the buttermilk mixture, making sure the petals are well coated. Then transfer to the flour mixture, shaking the onion gently to coat all petals evenly. For extra crunch, repeat the dipping in buttermilk and flour again. Set the onion on a plate and let it rest for about 10 minutes—this helps the batter stick better during frying.
- Heat the oil (5 minutes): Pour oil into your pot or Dutch oven to about 3 inches deep. Heat to 350°F (175°C), using a thermometer to monitor. Maintaining temperature is key—too hot and the onion burns; too cool and it absorbs oil and gets soggy.
- Fry the onion (5 minutes): Carefully place the onion into the hot oil, cut side down. Fry for about 3-4 minutes until golden, then gently flip and fry the other side for another 2-3 minutes. Use tongs or a slotted spoon to remove the onion and drain on a wire rack set over a baking sheet. Serve warm with the dipping sauce.
Tip: If you notice the oil temperature dipping too low when you add the onion, adjust your burner to keep it steady. Also, don’t overcrowd the pot; fry one onion at a time for even cooking. The batter should look crispy and hold firm to the onion petals without sogginess. If it feels too thick or clumpy, whisk in a tablespoon of buttermilk for a smoother texture.
Cooking Tips & Techniques
One lesson I learned the hard way: never skip the resting step after coating the onion. Letting it rest for 10 minutes before frying allows the batter to stick better and results in that iconic crunchy texture. I used to rush through this part, and the batter would peel off in the oil—such a bummer.
Maintaining the oil temperature is the other biggie. I’ve found that an instant-read thermometer is worth every penny here. It helps avoid that greasy, soggy mess you get when oil is too cool or the burnt edges when it’s too hot. Also, double frying is a game-changer—dip the onion twice in the batter and flour for that flaky coating.
When cutting the onion, be patient and use a sharp knife. If you cut too deep at the root, the onion falls apart; too shallow, and the petals won’t spread properly. Rinsing the onion under cold water after slicing helps separate the petals nicely, making for a dramatic presentation.
For the dipping sauce, mixing it a few hours ahead lets the flavors meld, but even fresh-made tastes great. I like to eat the blooming onion alongside something lighter like a fresh salad or even pair it with my easy crockpot salsa chicken for a full meal with contrasting flavors.
Variations & Adaptations
If you want to change things up, there are several ways to customize this crispy Outback Steakhouse Bloomin Onion recipe without losing its soul:
- Gluten-Free: Swap the all-purpose flour with a gluten-free blend like Bob’s Red Mill 1-to-1 baking flour. The texture will be just as crispy.
- Spice it Up: Add a pinch more cayenne or toss some chili powder into the batter for a smoky heat that wakes up the palate.
- Air Fryer Version: For a lighter twist, you can try air frying the onion at 360°F (182°C) for 15 minutes, flipping halfway. It won’t be quite the same as deep-fried but still delicious and crispy.
- Dairy-Free: Use almond milk or oat milk mixed with lemon juice instead of buttermilk, and swap mayo in the dipping sauce for a vegan mayo alternative.
- Herbed Dipping Sauce: Mix chopped fresh herbs like parsley or chives into the sauce for a fresh, green note that complements the fried onion beautifully. I sometimes add a dash of smoked paprika for an extra flavor layer.
One variation I adore is adding a sprinkle of grated Parmesan cheese to the batter—gives the onion a subtle savory kick. Also, if you want to enjoy this with some fresh, crisp veggies, try pairing it with my creamy cucumber salad with red onion and dill for a refreshing balance.
Serving & Storage Suggestions
This crispy Outback Steakhouse Bloomin Onion is best served hot and fresh—right after frying when every petal is crackling and golden. I like to place it on a wire rack to drain excess oil before serving to keep the crunch intact. Arrange it on a large platter with the dipping sauce in the center; it invites everyone to dig in, finger-food style.
For sides, it pairs well with cool, crisp salads or something hearty like creamy chicken and dumpling soup for a cozy contrast. If you want to keep it casual, a chilled beer or a sparkling lemonade complements the rich, fried flavors nicely.
Leftovers aren’t ideal, but if you must, store the onion in an airtight container in the refrigerator for up to 2 days. To reheat, pop it in a 375°F (190°C) oven for 8-10 minutes on a wire rack to bring back some crispness. Avoid microwaving—it makes the batter soggy. Note that the dipping sauce keeps well in the fridge for up to a week, so you can prep it ahead.
Flavors tend to mellow a bit after refrigerating, so for best results, enjoy this blooming onion fresh whenever possible. The contrast between warm, crispy bites and cool, tangy sauce is part of the charm.
Nutritional Information & Benefits
This crispy Outback Steakhouse Bloomin Onion is definitely a treat, so it’s good to be mindful of portions. Per serving (about 1/6 of the onion with sauce), here’s an estimate:
| Nutrient | Amount |
|---|---|
| Calories | 350 kcal |
| Fat | 22 g |
| Carbohydrates | 30 g |
| Protein | 6 g |
| Sodium | 700 mg |
Onions themselves are rich in antioxidants and have anti-inflammatory properties, plus they add a nice dose of fiber. Using fresh ingredients and controlling the oil temperature helps reduce excess grease. For those watching carbs, you could try almond flour or other low-carb flours for the batter.
This recipe is naturally dairy-free if you substitute the buttermilk and mayo, and gluten-free adaptations make it accessible for many dietary needs. It’s a fun indulgence that pairs well with balanced meals or lighter sides, making it a versatile addition to your recipe collection.
Conclusion
Making this crispy Outback Steakhouse Bloomin Onion copycat recipe at home turns out to be a rewarding project that’s both fun and delicious. There’s something satisfying about transforming a simple onion into a crunchy, flavorful centerpiece that invites sharing and smiles. Whether you’re craving a nostalgic restaurant classic or want to impress friends with a homemade snack, this recipe delivers on all fronts.
Feel free to tweak the seasoning or try the variations to match your taste buds—this recipe is flexible and forgiving. Honestly, it’s become one of my favorite appetizers to whip up when I want that crunchy, savory fix without leaving the house. I hope it becomes a go-to for you too, and I’d love to hear how you make it your own.
When you try it, don’t be shy—drop a comment or share your tweaks. And if you’re looking for more easy, crowd-pleasing recipes, you might enjoy the easy crockpot salsa chicken or the creamy chicken and dumpling soup that pair beautifully with this crunchy treat. Happy cooking!
FAQs
1. Can I use a different type of onion for the blooming onion?
Yes, but large sweet onions like Vidalia or Walla Walla work best because they’re mild and have thick layers that spread nicely. Yellow onions can be too sharp, and smaller onions won’t bloom properly.
2. What if I don’t have buttermilk for the batter?
No worries! You can make a quick substitute by mixing 1 cup of milk with 1 tablespoon of lemon juice or vinegar. Let it sit for 5 minutes, and it’ll mimic the tanginess and acidity of buttermilk.
3. How do I keep the bloomin onion crispy after frying?
Drain it on a wire rack set over a baking sheet rather than paper towels—this prevents steam from making it soggy. Also, serve it immediately or reheat in the oven for best crispness.
4. Can I make the dipping sauce ahead of time?
Absolutely! The sauce actually tastes better after chilling for a few hours or overnight, as the flavors meld together beautifully.
5. Is it possible to bake or air fry this instead of deep frying?
You can air fry at 360°F (182°C) for about 15 minutes, flipping halfway through. It won’t be quite as crispy as deep-fried but is a good, lighter alternative.
Pin This Recipe!
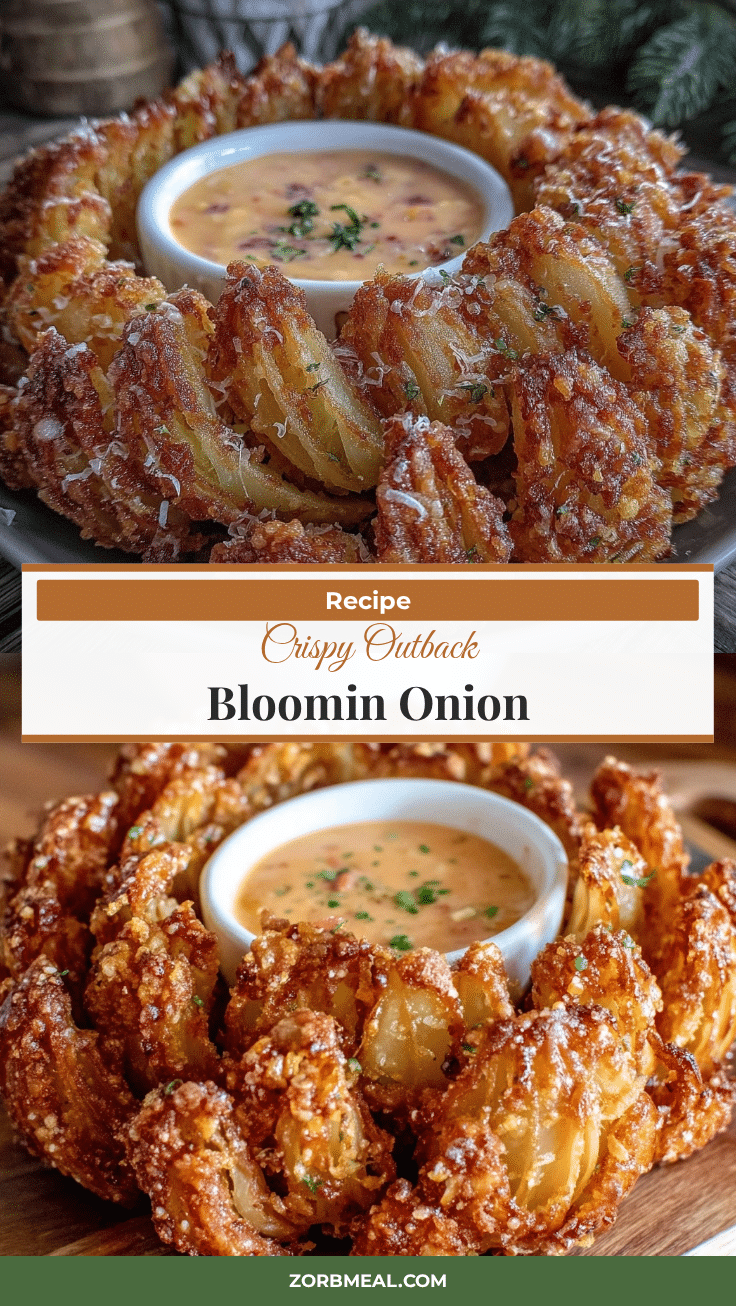
Crispy Outback Steakhouse Bloomin Onion Recipe

A copycat recipe that replicates the iconic crispy, golden Outback Steakhouse Bloomin Onion with a perfectly seasoned batter and double frying technique for an addictive crunch.
- Prep Time: 25 minutes
- Cook Time: 15 minutes
- Total Time: 40 minutes
- Yield: 6 servings 1x
- Category: Appetizer
- Cuisine: American
Ingredients
- 1 large sweet onion (Vidalia or Walla Walla recommended)
- Vegetable oil (about 4 cups or enough to fill a deep pot to 3 inches)
- 1 cup all-purpose flour
- 1 teaspoon paprika
- 1 teaspoon garlic powder
- 1 teaspoon salt
- 1/2 teaspoon black pepper
- 1/4 teaspoon cayenne pepper
- 1 large egg (room temperature)
- 1 cup buttermilk (or 1 cup milk + 1 tablespoon lemon juice, let sit 5 minutes)
- For the dipping sauce:
- 1/2 cup mayonnaise
- 2 tablespoons ketchup
- 1 tablespoon horseradish
- 1/2 teaspoon paprika
- 1/2 teaspoon garlic powder
- 1/4 teaspoon cayenne pepper
- Salt and pepper to taste
Instructions
- Trim the top (stem end) of the onion and peel off the outer skin. Place the onion cut side down on a cutting board.
- Make 12-16 even vertical cuts from root to top, slicing almost all the way through but not cutting the root. Gently spread the onion petals outward to create the bloom.
- Rinse the onion under cold water to separate the petals, then pat dry with paper towels.
- In one large bowl, whisk together flour, paprika, garlic powder, salt, black pepper, and cayenne pepper.
- In a separate bowl, combine the egg and buttermilk; stir until smooth.
- Dip the onion into the buttermilk mixture, coating the petals well.
- Transfer the onion to the flour mixture, shaking gently to coat all petals evenly.
- Repeat dipping in buttermilk and flour again for extra crunch.
- Set the onion on a plate and let it rest for 10 minutes to help the batter stick.
- Pour oil into a deep pot or Dutch oven to about 3 inches deep and heat to 350°F (175°C).
- Carefully place the onion cut side down into the hot oil and fry for 3-4 minutes until golden.
- Flip the onion and fry the other side for 2-3 minutes.
- Remove the onion with tongs or a slotted spoon and drain on a wire rack set over a baking sheet.
- Serve warm with the prepared dipping sauce.
Notes
Let the coated onion rest for 10 minutes before frying to help the batter stick better. Maintain oil temperature at 350°F (175°C) for best results. Fry one onion at a time to avoid overcrowding. Drain on a wire rack instead of paper towels to keep crispiness. Reheat leftovers in a 375°F oven for 8-10 minutes on a wire rack. The dipping sauce tastes better after chilling for a few hours.
Nutrition
- Serving Size: About 1/6 of the oni
- Calories: 350
- Sodium: 700
- Fat: 22
- Carbohydrates: 30
- Protein: 6
Keywords: bloomin onion, Outback Steakhouse, copycat recipe, fried onion, appetizer, crispy onion, dipping sauce