Let me tell you, the moment the aroma of garlic, sautéed onions, and tender arborio rice mingled with the rich scent of simmering broth in my kitchen, I knew this creamy pressure cooker risotto was something truly special. The first time I whipped up this recipe, I was knee-high to a grasshopper compared to my pressure cooker savvy today, but honestly, it blew my mind how effortlessly it came together. There was this pause—a deep breath moment—where I smiled, knowing I’d stumbled upon a game-changer in the world of risotto-making.
I remember trying to recreate my grandma’s slow-stirred risotto on a busy weekday, thinking it’d be impossible to get that silky texture without standing over the stove for half an hour. But nope! This pressure cooker version made it dangerously easy—pure, nostalgic comfort in a fraction of the time. My family couldn’t stop sneaking spoonfuls straight from the pot, and I can’t really blame them. It’s perfect for weeknights when you want something fancy but don’t have time to fuss. This creamy pressure cooker risotto recipe in 15 minutes has become a staple for family dinners, last-minute guests, and even those cozy weekends when you just want to feel like a kitchen rockstar without the usual stress.
You know what? If I’d known about this trick years ago, I’d have saved myself so many hours stirring and worrying about getting the texture just right. Whether you’re looking to impress at potlucks, make a sweet treat for your kids’ lunchbox, or simply brighten up your Pinterest recipe board with a show-stopping meal, this one’s a winner. I’ve tested and tweaked it over and over—in the name of research, of course—and it keeps delivering that creamy, dreamy risotto goodness every single time.
Why You’ll Love This Creamy Pressure Cooker Risotto Recipe
Honestly, this recipe isn’t just another risotto hack; it’s a little miracle in your kitchen. Here’s why it stands out and why you’re going to want to bookmark it ASAP:
- Quick & Easy: Ready in under 15 minutes, this creamy pressure cooker risotto is perfect for those busy nights when time’s tight but flavor can’t be compromised.
- Simple Ingredients: No need for fancy or hard-to-find items—just pantry staples and fresh basics you probably already have on hand.
- Perfect for Any Occasion: Whether it’s a cozy dinner, a weekend treat, or a last-minute meal to impress guests, this risotto fits the bill effortlessly.
- Crowd-Pleaser: Kids, adults, picky eaters – they all come back for seconds thanks to its velvety texture and comforting flavor.
- Unbelievably Delicious: The pressure cooker locks in flavor and creates an ultra-creamy texture that tastes like you spent hours stirring.
What sets this recipe apart? It’s the magic of the pressure cooker combined with the right technique to coax out the starch from arborio rice without the usual babysitting. I love blending in a touch of Parmesan cheese and butter at the end, which gives it that perfect rich finish. And here’s a little secret: adding a splash of white wine before pressure cooking lifts the flavor to a whole new level—something I picked up from my early days cooking in a trattoria.
It’s not just food; it’s a moment. The kind that makes you close your eyes after the first bite and smile because comfort food can be fast, fuss-free, and soul-satisfying all at once. Trust me, this creamy pressure cooker risotto recipe in 15 minutes will become your go-to when you want a home-cooked meal without the fuss.
What Ingredients You Will Need
This recipe uses simple, wholesome ingredients to deliver bold flavor and a satisfying, creamy texture without the fuss. Most of these are pantry staples, and substitutions are easy if you want to tweak it for dietary needs or what’s on hand.
- Arborio Rice – 1 ½ cups (about 300g); the star of creamy risotto, known for its high starch content.
- Chicken or Vegetable Broth – 4 cups (960ml); homemade or store-bought, low sodium preferred for better control over seasoning.
- Unsalted Butter – 3 tablespoons (about 42g); adds richness and helps create that silky texture.
- Olive Oil – 1 tablespoon; for sautéing onions and garlic.
- Yellow Onion – 1 small, finely chopped; brings sweetness and depth.
- Garlic Cloves – 2, minced; for that aromatic punch.
- Dry White Wine – ½ cup (120ml), optional but highly recommended for brightness and complexity.
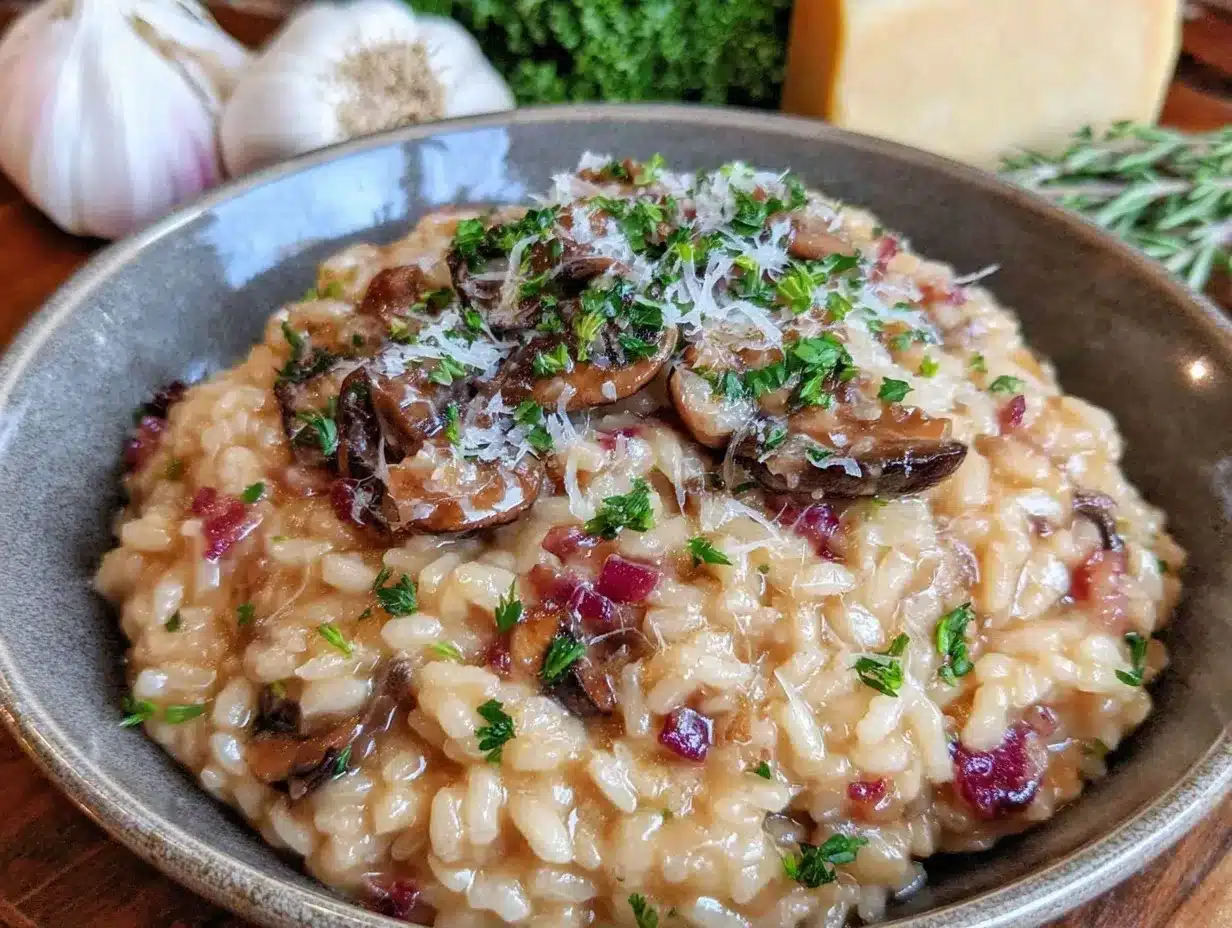
- Parmesan Cheese – ¾ cup, finely grated (about 75g); fresh is best for melt-in-your-mouth flavor.
- Salt & Pepper – to taste; freshly ground black pepper is my go-to.
- Fresh Parsley – 2 tablespoons, chopped; for garnish and a pop of color.
Ingredient tips: I recommend using a good quality arborio rice like Lundberg or Roland for the best texture. If you’re vegetarian or vegan, swap the broth for a rich vegetable stock, use olive oil instead of butter, and try nutritional yeast in place of Parmesan. In summer, tossing in fresh peas or asparagus tips right at the end gives a lovely seasonal twist.
Equipment Needed
- Electric Pressure Cooker or Instant Pot: This is the star tool that cuts down the cooking time dramatically. If you don’t have one, a stovetop pressure cooker works just fine.
- Wooden Spoon or Silicone Spatula: For sautéing and stirring without scratching your pot.
- Measuring Cups and Spoons: For precise ingredient amounts—risotto is all about balance!
- Fine Grater: To grate fresh Parmesan cheese for that melt-in-your-mouth finish.
- Chef’s Knife and Cutting Board: For prepping onions, garlic, and parsley.
If you’re on a budget, a basic stovetop pressure cooker will do the trick just as well, although an electric model offers more hands-off control. I’ve learned that cleaning the pot right after use keeps it in great shape and prevents any stubborn rice bits from sticking around for next time.
Preparation Method
- Prep Your Ingredients: Finely chop the yellow onion and mince the garlic cloves. Grate the Parmesan cheese and set aside. Have your broth warmed up in a separate pot or microwave (about 4 cups or 960ml) because cold broth will slow down cooking.
- Sauté Aromatics: Set your pressure cooker to ‘Sauté’ mode (if electric) or heat on medium if stovetop. Add 1 tablespoon olive oil and 2 tablespoons butter. Once the butter melts and starts to bubble, toss in the onions and cook for about 3-4 minutes until translucent but not browned. Add garlic and cook for 1 minute until fragrant.
- Toast the Rice: Add the arborio rice (1 ½ cups / 300g) to the pot. Stir constantly for 2-3 minutes until the edges of the rice grains become translucent. This toasting step helps develop deep flavor and prevents mushiness.
- Add Wine (Optional): Pour in ½ cup (120ml) dry white wine and stir until it’s mostly absorbed, about 1-2 minutes. The wine gives the risotto a lovely brightness and complexity that’s hard to beat.
- Add Broth and Pressure Cook: Pour in the warm broth (4 cups / 960ml). Add a pinch of salt and freshly ground black pepper. Seal the lid and set the pressure cooker to high pressure for 6 minutes. If using stovetop, bring to pressure then reduce heat to maintain and cook 6 minutes.
- Release Pressure and Stir: Once cooking time is up, carefully do a quick release of pressure (follow your device’s instructions). Open the lid and give everything a good stir. At this point, the risotto should look creamy and the rice tender but with a slight bite.
- Finish with Butter and Cheese: Stir in the remaining 1 tablespoon butter and the grated Parmesan cheese (¾ cup / 75g). This step makes the risotto ultra-creamy and rich. Taste and adjust salt and pepper if needed.
- Garnish and Serve: Sprinkle chopped fresh parsley on top for color and a fresh pop. Serve immediately for the best texture and flavor.
Pro tip: If your risotto looks a little too thick after resting, stir in a splash of warm broth or water until you hit your preferred creaminess. And don’t skip the quick release—holding pressure too long can overcook the rice.
Cooking Tips & Techniques
Risotto can be intimidating, but this pressure cooker method is a total game changer. Here are some lessons I picked up after more than a few trial runs:
- Warm Your Broth: Cold liquid shocks the rice and slows cooking down. Warming your broth helps keep everything moving smoothly.
- Don’t Skip Toasting: Toasting the rice in butter and oil before adding liquid adds nuttiness and keeps the grains separate.
- Use Quick Release: Letting the pressure release naturally can overcook the rice and make it mushy.
- Stir After Cooking: Stirring in butter and cheese off the heat creates that signature silky texture.
- Experiment with Liquids: While broth is standard, adding a splash of cream or coconut milk at the end can make for a decadent twist.
One time, I accidentally left the lid on for natural release and ended up with mushy risotto—not my favorite texture! Since then, I keep a timer handy and go straight to quick release. Also, multitasking is key: while the risotto cooks under pressure, I prep a simple side salad or garlic bread, so dinner comes together in a flash.
Variations & Adaptations
This creamy pressure cooker risotto recipe is a brilliant base that you can easily customize to your taste buds or dietary needs.
- Vegetable Boost: Stir in sautéed mushrooms, roasted butternut squash, or peas right after cooking for a hearty, colorful plate.
- Seafood Risotto: Add cooked shrimp or scallops at the end with a squeeze of lemon for a fresh, coastal flavor.
- Vegan Version: Swap butter for vegan margarine or olive oil, use vegetable broth, and nutritional yeast instead of Parmesan for cheesy flavor.
- Low-Carb Twist: Use cauliflower rice instead of arborio for a lighter, keto-friendly option but reduce cooking time significantly (pressure cooking not recommended here).
- Spicy Kick: Add a pinch of crushed red pepper flakes during the sauté step for a subtle heat that pairs beautifully with the creamy base.
Once, I tried adding roasted garlic and thyme for a rustic flair that had my family raving. The pressure cooker makes it easy to experiment because the base risotto cooks so quickly and reliably.
Serving & Storage Suggestions
Serve this creamy pressure cooker risotto hot and fresh for the best texture. It’s perfect as a main course or a decadent side dish paired with grilled chicken, roasted vegetables, or a crisp green salad. A glass of chilled white wine or a light sparkling water with lemon makes a lovely accompaniment.
If you have leftovers, store them in an airtight container in the refrigerator for up to 3 days. The risotto thickens as it cools, so when reheating, gently warm it on the stove or microwave, adding a splash of broth or water to loosen the texture. Flavors actually deepen after a day, so don’t hesitate to make extra for next-day enjoyment.
Risotto is one of those dishes that can feel fancy but is surprisingly forgiving with storage and reheating if you treat it right. Just remember, the creamy texture is best right after cooking, so try to plan servings accordingly.
Nutritional Information & Benefits
Each serving of this creamy pressure cooker risotto (recipe serves 4) contains approximately:
| Calories | 350-400 kcal |
|---|---|
| Protein | 10g |
| Carbohydrates | 55g |
| Fat | 10-12g |
| Fiber | 1-2g |
Arborio rice provides a good source of complex carbohydrates, giving you steady energy. The Parmesan cheese adds protein and calcium, while butter contributes healthy fats for satiety. Using homemade broth can boost the mineral content even more. For those watching gluten, this recipe is naturally gluten-free, just double-check your broth labels.
From a wellness perspective, it’s a balanced comfort food that satisfies cravings without overloading on processed ingredients. Plus, the addition of fresh parsley adds a touch of vitamin K and antioxidants. It’s the kind of recipe that feels like a treat but still fits into a mindful eating lifestyle.
Conclusion
This creamy pressure cooker risotto recipe in 15 minutes is a true lifesaver for anyone craving a warm, comforting meal without the usual fuss. It’s simple, fast, and yields a rich, velvety dish that tastes like you spent all evening stirring and coaxing flavor out of every grain. You can tweak it to match your mood or pantry—whether that means adding veggies, going vegan, or spicing it up.
I love this recipe because it brings back memories of slow Sunday dinners while fitting perfectly into today’s busy schedule. Give it a whirl, and I bet it’ll become your go-to, too. Don’t forget to let me know how you customize it or any tips you’ve discovered along the way—comments and shares are always welcome!
Here’s to fast, easy, and delicious meals that make you feel at home.
FAQs About Creamy Pressure Cooker Risotto
How do I prevent risotto from becoming mushy in the pressure cooker?
Make sure to follow the timing exactly—6 minutes at high pressure is usually perfect. Use quick release right when the timer ends to avoid overcooking. Also, toasting the rice before cooking helps keep the grains separate.
Can I make this risotto without white wine?
Absolutely! The wine adds brightness, but you can simply skip it and replace it with an extra ½ cup of broth. The risotto will still be creamy and delicious.
What type of rice is best for pressure cooker risotto?
Arborio rice is the classic choice because of its high starch content, which creates that creamy texture. Carnaroli or Vialone Nano rice also work well if you want to experiment.
Can I prepare this recipe vegan?
Yes! Use vegetable broth, replace butter with olive oil or vegan margarine, and swap Parmesan for nutritional yeast or a vegan cheese alternative.
How do I store and reheat leftover risotto?
Store leftovers in an airtight container in the fridge for up to 3 days. Reheat gently on the stove or microwave, adding a splash of broth or water to loosen the texture for creamy results.
Pin This Recipe!
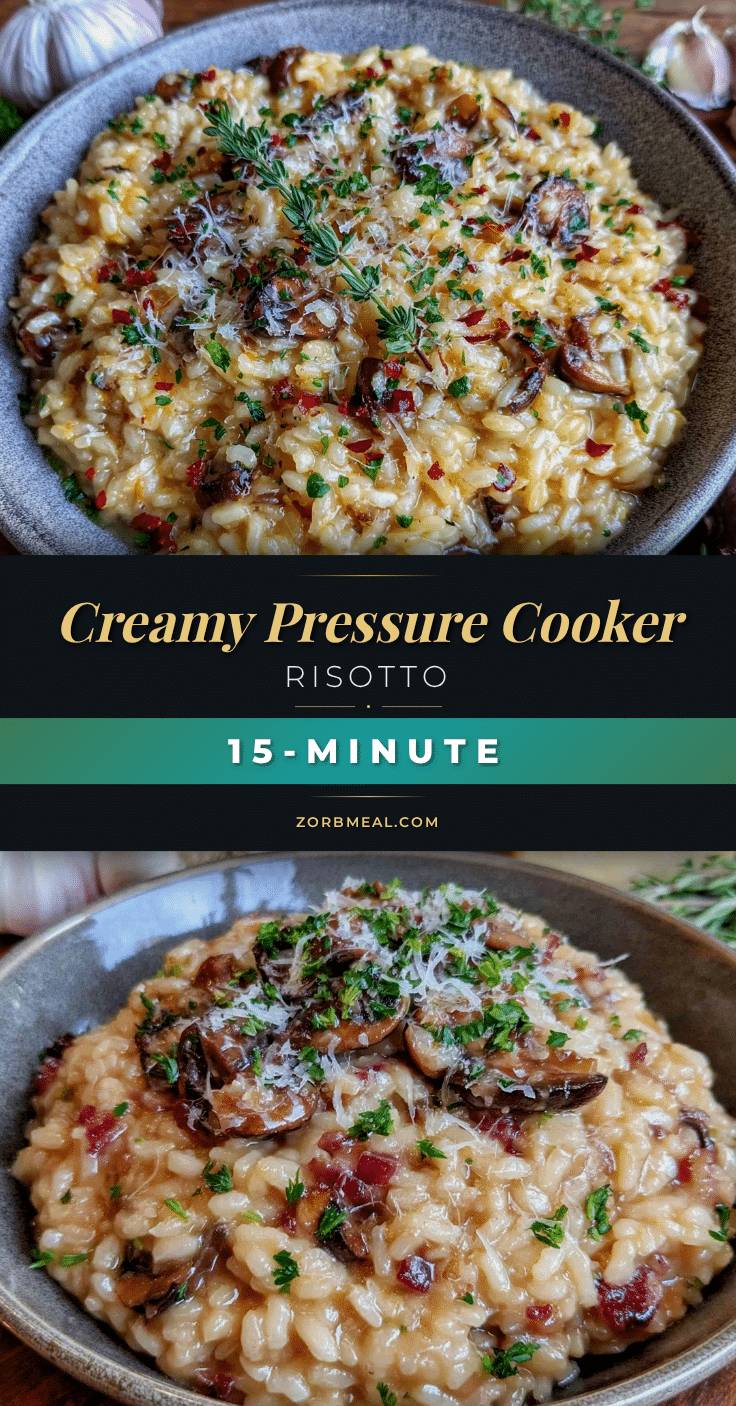
Creamy Pressure Cooker Risotto Recipe 15 Minutes Easy Perfect Meal

A quick and easy creamy risotto made in a pressure cooker, delivering rich, velvety texture in just 15 minutes. Perfect for busy weeknights or last-minute guests.
- Prep Time: 10 minutes
- Cook Time: 15 minutes
- Total Time: 25 minutes
- Yield: 4 servings 1x
- Category: Main Course
- Cuisine: Italian
Ingredients
- 1 ½ cups Arborio rice (about 300g)
- 4 cups chicken or vegetable broth (960ml), low sodium preferred
- 3 tablespoons unsalted butter (about 42g)
- 1 tablespoon olive oil
- 1 small yellow onion, finely chopped
- 2 garlic cloves, minced
- ½ cup dry white wine (120ml), optional
- ¾ cup Parmesan cheese, finely grated (about 75g)
- Salt and freshly ground black pepper, to taste
- 2 tablespoons fresh parsley, chopped
Instructions
- Finely chop the yellow onion and mince the garlic cloves. Grate the Parmesan cheese and set aside. Warm the broth in a separate pot or microwave.
- Set your pressure cooker to ‘Sauté’ mode (if electric) or heat on medium if stovetop. Add 1 tablespoon olive oil and 2 tablespoons butter. Once melted and bubbling, add onions and cook for 3-4 minutes until translucent. Add garlic and cook for 1 minute until fragrant.
- Add the Arborio rice to the pot. Stir constantly for 2-3 minutes until the edges of the rice grains become translucent.
- Pour in the dry white wine (if using) and stir until mostly absorbed, about 1-2 minutes.
- Add the warm broth, a pinch of salt, and freshly ground black pepper. Seal the lid and set the pressure cooker to high pressure for 6 minutes. For stovetop, bring to pressure then reduce heat to maintain and cook for 6 minutes.
- Carefully perform a quick release of pressure. Open the lid and stir the risotto; it should be creamy with tender rice that has a slight bite.
- Stir in the remaining 1 tablespoon butter and the grated Parmesan cheese. Taste and adjust seasoning if needed.
- Garnish with chopped fresh parsley and serve immediately.
Notes
Warm the broth before adding to the rice to speed cooking and improve texture. Toast the rice before pressure cooking to add nuttiness and prevent mushiness. Use quick release to avoid overcooking. If risotto is too thick after resting, stir in a splash of warm broth or water to loosen. For vegan version, use vegetable broth, olive oil or vegan margarine, and nutritional yeast instead of Parmesan.
Nutrition
- Serving Size: 1 cup risotto per se
- Calories: 375
- Sugar: 2
- Sodium: 400
- Fat: 11
- Saturated Fat: 6
- Carbohydrates: 55
- Fiber: 1.5
- Protein: 10
Keywords: pressure cooker risotto, creamy risotto, quick risotto, easy risotto recipe, arborio rice, weeknight dinner, comfort food