“You have to try these cheesecake cups,” my neighbor texted out of the blue one Saturday afternoon. Honestly, I was skeptical—no-bake desserts can be hit or miss, especially when you’re craving that perfect balance of creamy and crunchy. But curiosity got the better of me, and that evening, I whipped up a batch of these creamy no-bake s’mores cheesecake cups. The smell of chocolate and toasted marshmallow wafting through my kitchen was pure comfort. It reminded me of those long summer nights around a campfire, except this time, the treat was effortless and ready in under an hour.
What really sold me was how easy these cheesecake cups came together without the need to fire up the oven, and the texture was surprisingly indulgent. The graham cracker crust had just the right amount of crumble, while the cheesecake filling was silky and smooth with that nostalgic s’mores flavor that felt like a hug in dessert form. I found myself making them multiple times that week—yeah, it was that good. Plus, they’re perfect for those moments when you want something sweet but don’t want to fuss with complicated baking.
There’s something quietly satisfying about sitting down with a simple, rich dessert that doesn’t demand much effort but delivers on comfort. This recipe stuck with me because it’s a sweet little reset after hectic days. And honestly, I think you’ll find it just as easy and comforting to make as I did—without any of the usual baking stress.
Why You’ll Love This Recipe
This creamy no-bake s’mores cheesecake cups recipe is the kind of dessert that just fits into life’s busy moments. After testing it several times, here’s why it’s a keeper in my kitchen:
- Quick & Easy: Ready in about 45 minutes with minimal hands-on time—ideal for those last-minute dessert cravings or casual get-togethers.
- Simple Ingredients: Uses pantry staples like graham crackers, cream cheese, and marshmallow fluff—no need for specialty shopping.
- Perfect for Casual Entertaining: Whether it’s a weekend treat or a small party, these individual cups are crowd-pleasers every time.
- Crowd-Pleaser: The combo of chocolate, marshmallow, and cheesecake is a hit with kids and adults alike, always earning second helpings.
- Unbelievably Delicious: The texture is creamy, yet light, with just enough crunch from the crust and a sweet, toasty marshmallow finish.
What sets this recipe apart from your average no-bake cheesecake? It’s all in the layering and the method. Using marshmallow fluff folded gently into the cream cheese mixture creates a beautifully airy texture that melts in your mouth. Also, the crust is pressed firmly to hold up well without needing baking, which I’ve found tricky with other no-bake recipes. This method keeps the crust crisp and the filling perfectly creamy—a balance I didn’t think possible until I gave this a shot.
Honestly, this dessert feels like a little indulgence you can enjoy without guilt or hassle. It’s comforting and nostalgic but made for modern life’s pace. Plus, it’s a sweet way to impress guests without stress, turning a simple dessert into something memorable.
What Ingredients You Will Need
This recipe uses simple, wholesome ingredients to deliver bold flavor and a satisfying texture without any fuss. Most of these are staples you probably already have, and I’ll note some swaps if you want to tweak things a bit.
- Graham cracker crumbs: About 1 1/2 cups (150g) for the crust—try the classic Nabisco Honey Maid for the best flavor and crunch.
- Unsalted butter: 6 tablespoons (85g), melted—to bind the crust perfectly.
- Cream cheese: 16 ounces (450g), softened—use full-fat for that rich, creamy texture.
- Marshmallow fluff: 1 cup (240g)—this adds that signature s’mores marshmallow sweetness and fluffiness.
- Powdered sugar: 3/4 cup (90g), sifted—balances the tang of cream cheese with sweetness.
- Vanilla extract: 1 teaspoon—for a subtle depth of flavor.
- Heavy cream: 1/2 cup (120ml), cold—whipped to soft peaks to lighten the filling.
- Mini chocolate chips or chopped chocolate: 1 cup (175g)—adds those melty chocolate pockets.
- Large marshmallows (optional): For toasting on top, about 12 pieces (adds a campfire feel).
Feel free to swap graham cracker crumbs with gluten-free alternatives if needed, or use a dairy-free cream cheese and coconut cream for a vegan-friendly version. When fresh marshmallows are toasted on top, it brings that smoky, toasty vibe that just makes these cups special. In summer, you might even swap chocolate chips for fresh berries to add a fruity twist.
Equipment Needed
- Mixing bowls: A large bowl for the filling and a smaller one for the crust ingredients.
- Electric mixer or hand whisk: To whip the cream and cream cheese smoothly. A stand mixer helps, but a hand mixer is perfectly fine.
- Measuring cups and spoons: Accuracy matters here for balance, especially with sugar and cream.
- Spatula: For folding ingredients gently to keep that airy texture.
- Serving cups or small jars: I recommend clear glass cups so you can see the layers—about 6 to 8 ounces (180-240ml) in size.
- Optional kitchen torch: For toasting marshmallows on top. If you don’t have one, a quick broil in the oven works too.
Trust me, you don’t need fancy gadgets here. When I first made these, I used a simple whisk and a sturdy spoon, and the results were just as good. Just make sure your cream cheese is softened to room temperature—that’s key for smooth mixing.
Preparation Method
- Prepare the crust: In a medium bowl, combine 1 1/2 cups (150g) graham cracker crumbs with 6 tablespoons (85g) melted unsalted butter. Stir until the mixture resembles wet sand. This should take about 2 minutes.
- Assemble the crust in cups: Spoon about 2 tablespoons (20g) of the crust mixture into each serving cup. Press firmly with the back of a spoon or your fingers to create an even, compact base. Chill in the fridge while you prepare the filling (about 10 minutes).
- Make the cheesecake filling: In a large bowl, beat 16 ounces (450g) softened cream cheese with 3/4 cup (90g) powdered sugar and 1 teaspoon vanilla extract until smooth and creamy. This usually takes 3-4 minutes with an electric mixer.
- Fold in marshmallow fluff: Gently fold in 1 cup (240g) marshmallow fluff using a spatula, being careful not to deflate the mixture. It should stay light and fluffy.
- Whip the heavy cream: In a separate bowl, whip 1/2 cup (120ml) cold heavy cream until soft peaks form. This usually takes about 2-3 minutes.
- Combine whipped cream and cheesecake base: Fold the whipped cream into the cream cheese mixture gently until fully incorporated and airy.
- Add chocolate chips: Fold in 1 cup (175g) mini chocolate chips or chopped chocolate pieces for those melty surprises.
- Fill the cups: Spoon the cheesecake filling over the chilled crusts, smoothing the tops with a spatula or the back of a spoon.
- Chill to set: Refrigerate the cups for at least 3 hours, or until firm. Overnight chilling is best if you can wait.
- Optional marshmallow toast: Just before serving, top each cup with 1-2 large marshmallows. Use a kitchen torch to toast until golden and slightly melty. If you don’t have a torch, a quick 30-second broil in the oven works well—just watch closely.
Note: If the filling seems too soft at any point, adding a bit more powdered sugar can help firm it up. And don’t skip chilling; it’s the secret to that luscious texture.
Cooking Tips & Techniques
Getting creamy no-bake cheesecake cups just right takes a few simple tricks I’ve picked up:
- Softened cream cheese is essential. If it’s too cold, lumps will form, and your filling won’t be smooth. Leave it out for about 30-45 minutes before mixing.
- Fold, don’t whisk, the marshmallow fluff and whipped cream. You want to keep as much air as possible in the mixture for a light texture.
- Press the crust firmly. A loose crust leads to crumbling when you eat. I use the bottom of a small glass to press evenly.
- Chill long enough. Patience here pays off; the longer the set time, the creamier the texture.
- Watch your marshmallow toast. Marshmallows can burn quickly under a broiler or torch—go slow and steady for that perfect golden glow.
- Multitasking tip: While the crust chills, whip your cream and prepare the filling to save time. I usually start the crust, then prep the filling while it chills.
On my first try, I over-mixed the fluff and whipped cream, ending up with a dense filling. Now, I fold gently and it’s like clouds in a cup every time. Also, I like to use mini chocolate chips because they distribute evenly, giving chocolatey pockets in every spoonful.
Variations & Adaptations
I’ve played around with this recipe a lot, and here are some ways you can make it your own:
- Peanut Butter S’mores: Swirl in 1/4 cup creamy peanut butter into the filling before folding in the whipped cream for a nutty twist.
- Berry Twist: Add a layer of fresh raspberries or strawberries between the crust and filling for a tart contrast to the sweet marshmallow.
- Gluten-Free Crust: Swap graham crackers for gluten-free cookies or almond flour mixed with a bit of sugar and butter for a nutty base.
- Dairy-Free Version: Use vegan cream cheese and coconut whipped cream, with dairy-free chocolate chips, for allergy-friendly indulgence.
- Mini Cheesecake Pops: Spoon the filling into mini silicone molds and freeze for bite-sized frozen treats.
One of my favorite tweaks is adding a sprinkle of flaky sea salt on top of the toasted marshmallows—it brings out the chocolate flavor beautifully. If you’re curious about other easy party dips, I’ve had great success with the creamy BLT dip or the cheesesteak dip, both easy to whip up alongside these cheesecake cups for something savory to balance the sweetness.
Serving & Storage Suggestions
These cheesecake cups are best served chilled, right out of the fridge. The cold temperature heightens the creamy texture and balances the sweetness nicely. If you’ve toasted marshmallows on top, serve immediately so you get that warm, gooey contrast.
For a pretty presentation, garnish with a small piece of graham cracker or a sprinkle of crushed chocolate chips. They pair wonderfully with a cup of coffee or a cold glass of milk.
Store leftover cheesecake cups in an airtight container in the refrigerator for up to 4 days. The crust will soften slightly over time but remains delicious. Avoid freezing after assembly, as the texture can become grainy when thawed.
If refrigerated longer, the flavors meld and deepen, making them even more satisfying the next day. Just give them a few minutes at room temperature before serving for the best mouthfeel.
Nutritional Information & Benefits
Each serving (one cheesecake cup) contains approximately 350-400 calories, with a balance of fats, sugars, and protein mainly from cream cheese and heavy cream.
Key ingredients like cream cheese provide calcium and some protein, while the marshmallow fluff and chocolate contribute sugars—making this a dessert to enjoy in moderation. For those mindful of gluten, swapping the crust with gluten-free options keeps it inclusive.
This recipe is a treat that fits well within a balanced approach to eating. It’s low in prep stress and high in satisfaction, which I find makes it easier to enjoy mindfully rather than feeling deprived.
Conclusion
This creamy no-bake s’mores cheesecake cups recipe is a sweet little escape that’s easy to make and impossible not to love. It’s the kind of dessert you come back to again and again—not because it’s complicated, but because it just hits that perfect note of indulgence and comfort. The balance of creamy filling, crunchy crust, and that toasted marshmallow finish is a winning trio that I’ve found hard to resist.
You can customize it easily to suit your taste or dietary needs, making it a versatile go-to for any occasion. I hope you find it as satisfying and simple as I do—maybe even as a way to treat yourself after a long day, just like I’ve come to.
When you try it, I’d love to hear how you adapted it or any fun twists you come up with. Sharing those moments makes the kitchen feel a little more like home.
FAQs About Creamy No-Bake S’mores Cheesecake Cups
Can I make these cheesecake cups ahead of time?
Yes! They actually taste better after chilling overnight, which helps the flavors meld and the filling set firmly.
What if I don’t have marshmallow fluff?
You can substitute with whipped cream and melted marshmallows folded in, though the texture may be slightly different. The fluff keeps it airy and sweet.
Can these be made gluten-free?
Absolutely. Use gluten-free graham cracker crumbs or substitute with crushed gluten-free cookies for the crust.
How do I toast marshmallows without a kitchen torch?
Simply place marshmallows on top and broil in your oven for 30 seconds, watching carefully to avoid burning.
Can I double this recipe for a larger crowd?
Yes, just double all ingredients and assemble in more cups. These are great for parties, and individual servings make them easy to serve.
Pin This Recipe!
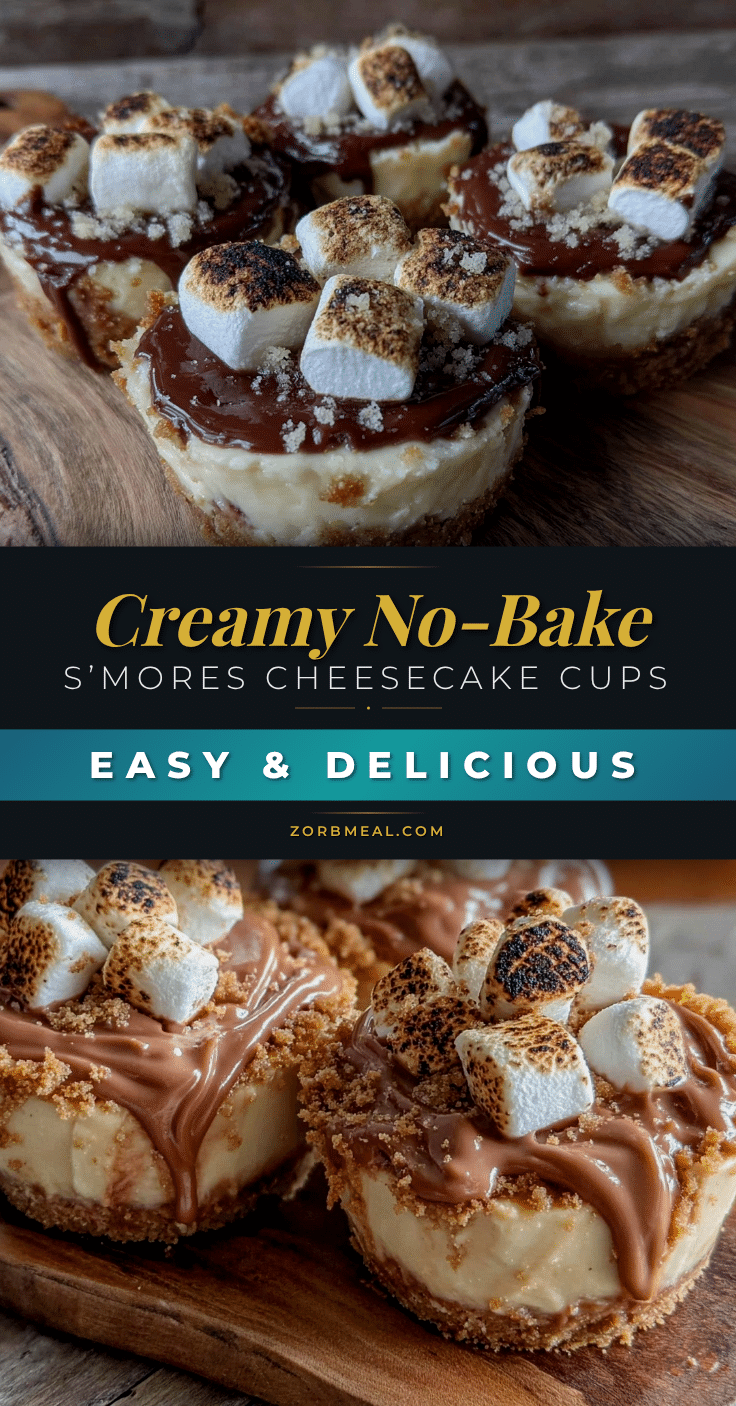
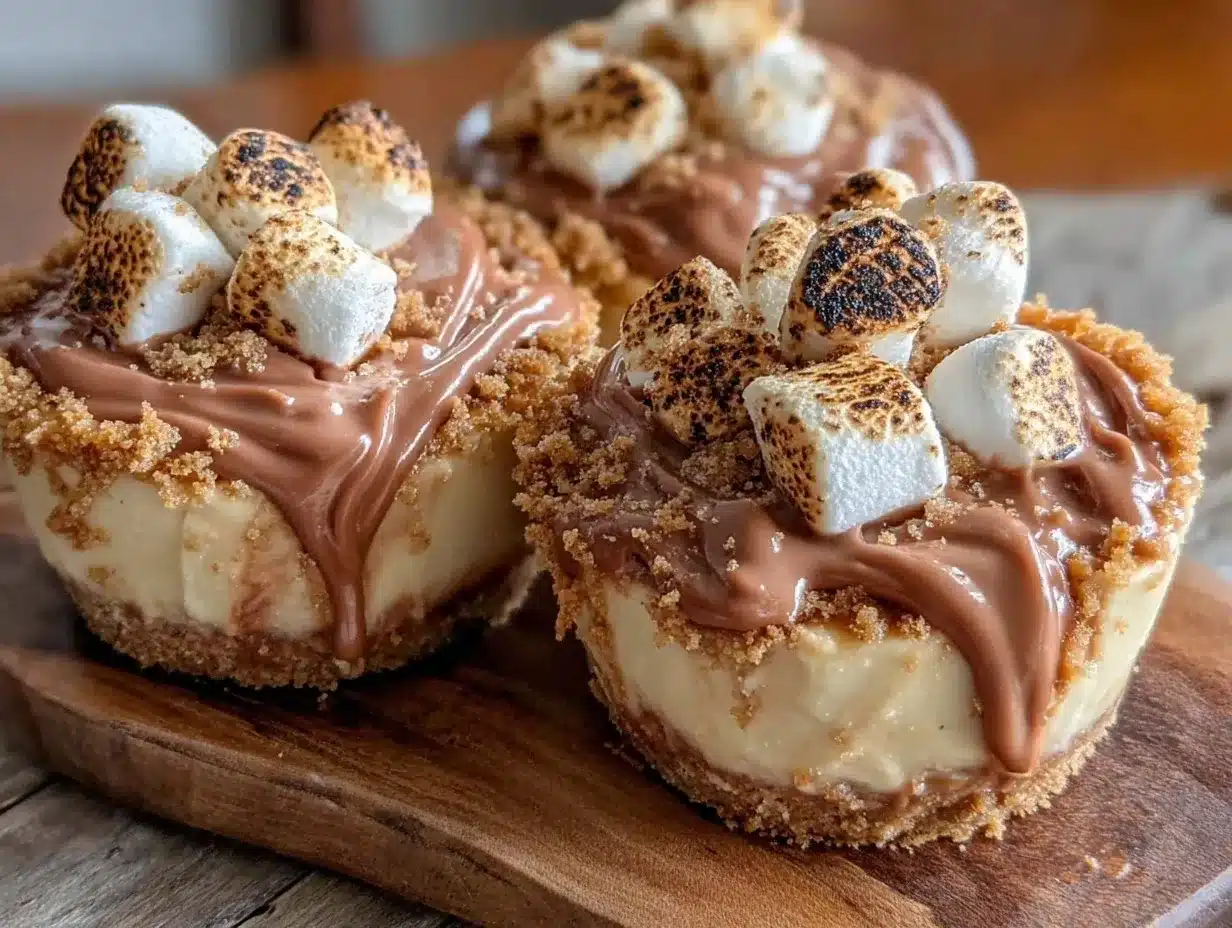
Creamy No-Bake S’mores Cheesecake Cups
These creamy no-bake s’mores cheesecake cups combine a crunchy graham cracker crust with a silky, fluffy cheesecake filling and a toasted marshmallow topping for an easy, indulgent dessert ready in under an hour.
- Prep Time: 15 minutes
- Cook Time: 0 minutes
- Total Time: 3 hours 15 minutes
- Yield: 6 servings 1x
- Category: Dessert
- Cuisine: American
Ingredients
- 1 1/2 cups (150g) graham cracker crumbs
- 6 tablespoons (85g) unsalted butter, melted
- 16 ounces (450g) cream cheese, softened
- 1 cup (240g) marshmallow fluff
- 3/4 cup (90g) powdered sugar, sifted
- 1 teaspoon vanilla extract
- 1/2 cup (120ml) heavy cream, cold
- 1 cup (175g) mini chocolate chips or chopped chocolate
- 12 large marshmallows (optional, for toasting on top)
Instructions
- Prepare the crust: In a medium bowl, combine graham cracker crumbs and melted unsalted butter. Stir until the mixture resembles wet sand, about 2 minutes.
- Assemble the crust in cups: Spoon about 2 tablespoons (20g) of the crust mixture into each serving cup. Press firmly to create an even, compact base. Chill in the fridge for about 10 minutes.
- Make the cheesecake filling: In a large bowl, beat softened cream cheese with powdered sugar and vanilla extract until smooth and creamy, about 3-4 minutes with an electric mixer.
- Fold in marshmallow fluff gently using a spatula, being careful not to deflate the mixture.
- Whip the heavy cream in a separate bowl until soft peaks form, about 2-3 minutes.
- Fold the whipped cream into the cream cheese mixture gently until fully incorporated and airy.
- Fold in mini chocolate chips or chopped chocolate pieces.
- Fill the cups: Spoon the cheesecake filling over the chilled crusts, smoothing the tops.
- Chill the cups for at least 3 hours or overnight until firm.
- Optional marshmallow toast: Just before serving, top each cup with 1-2 large marshmallows and toast with a kitchen torch until golden and melty, or broil in the oven for 30 seconds watching closely.
Notes
Softened cream cheese is essential for a smooth filling. Fold marshmallow fluff and whipped cream gently to keep the mixture airy. Press crust firmly to avoid crumbling. Chill long enough for best texture. Toast marshmallows slowly to avoid burning. If filling is too soft, add more powdered sugar.
Nutrition
- Serving Size: One cheesecake cup (
- Calories: 375
- Sugar: 22
- Sodium: 210
- Fat: 27
- Saturated Fat: 16
- Carbohydrates: 28
- Fiber: 1
- Protein: 5
Keywords: no-bake cheesecake, s'mores dessert, easy dessert, cheesecake cups, marshmallow fluff, graham cracker crust, chocolate dessert