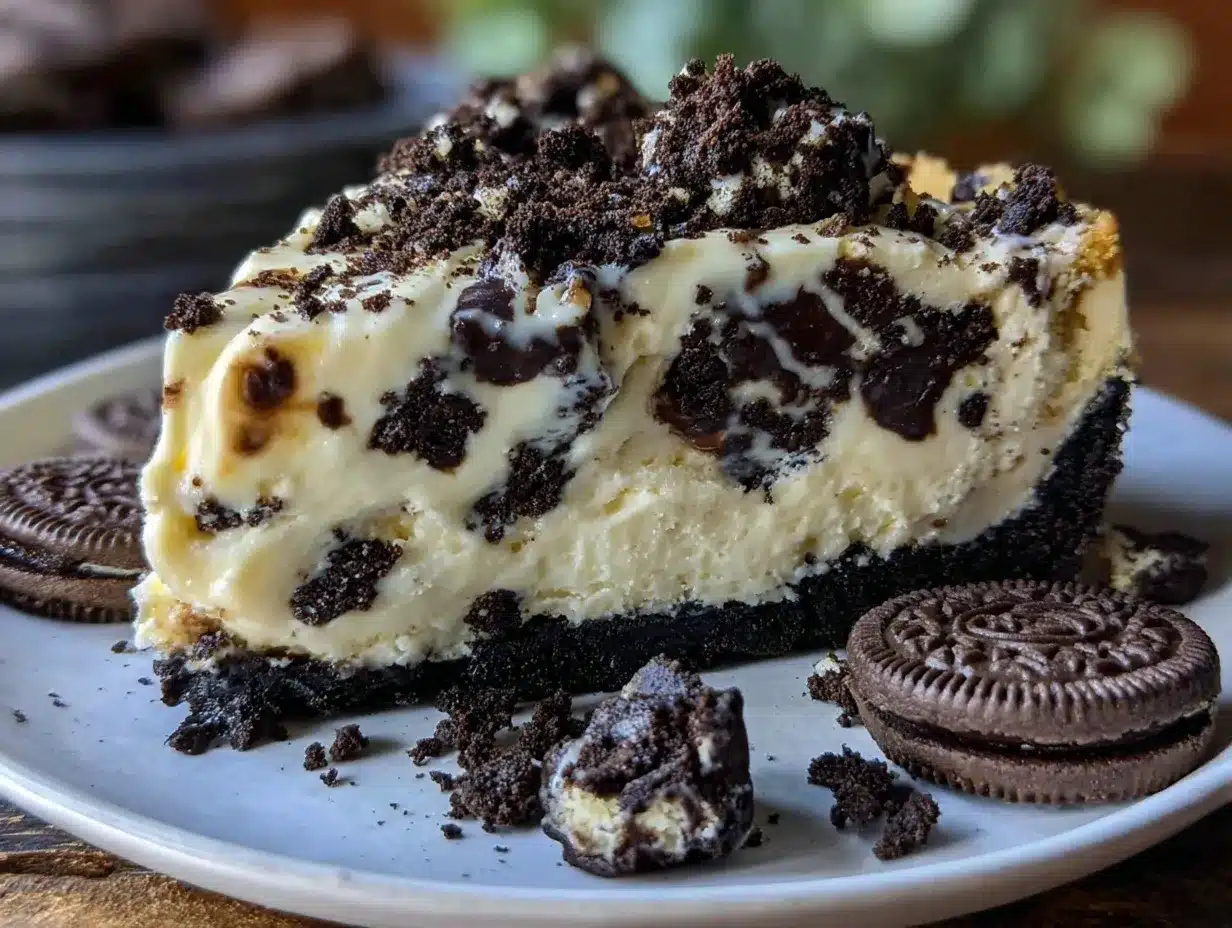
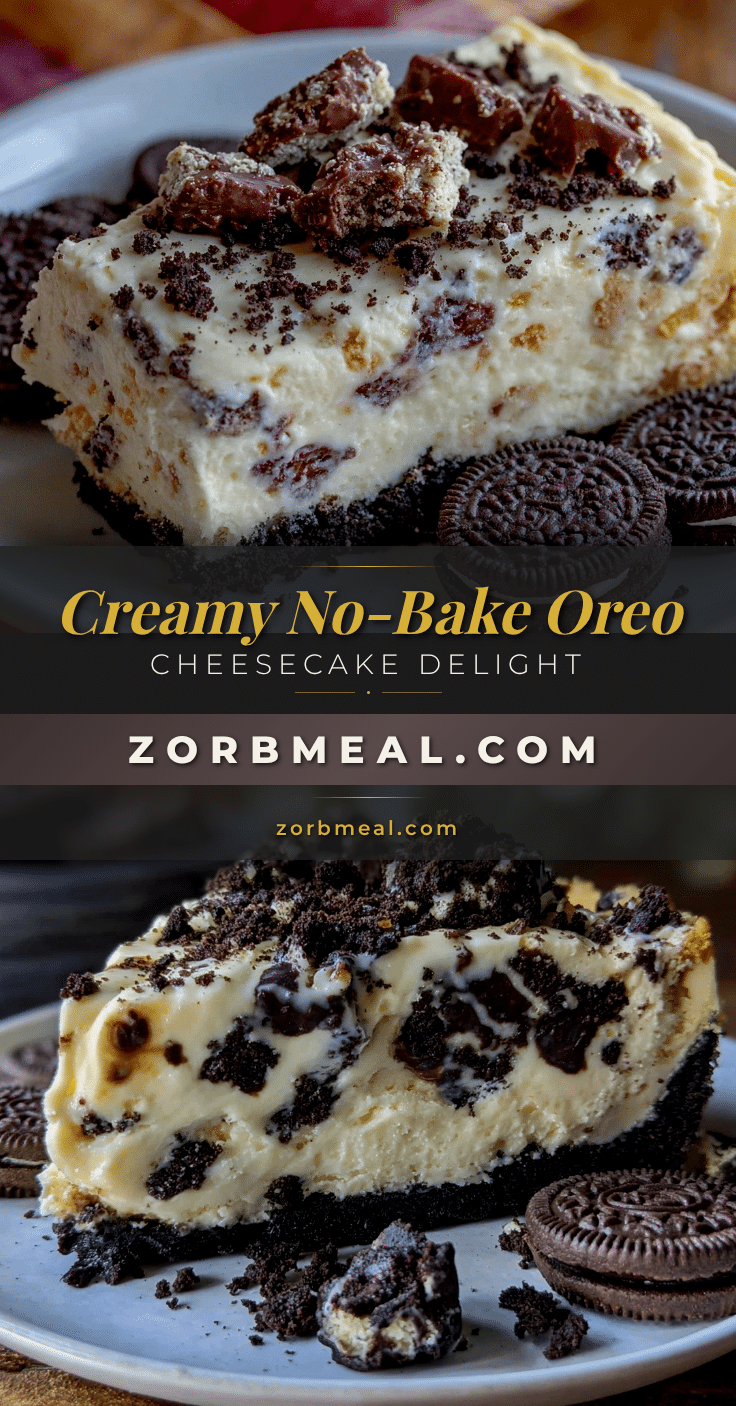
“You’ve got to try this,” my friend had said, waving a small container toward me during a casual weekend hangout. Honestly, I was skeptical—no-bake cheesecakes? Always seemed like a compromise on the real deal to me. But then I took a bite of this Creamy No-Bake Oreo Cheesecake Delight, and suddenly, I was a convert.
That afternoon, the kitchen was warm with sunlight, the hum of quiet chatter filling the room, and the unmistakable crunch of Oreo bits mingling with a smooth, luscious filling. It wasn’t just dessert; it was that little moment of peace and happiness you didn’t see coming on a busy day. Since then, I found myself making this cheesecake several times in a week, tweaking it just a bit here and there, but never straying from its creamy, dreamy core.
What really sold me was how effortlessly it came together—no oven, no fuss, just simple ingredients that felt familiar but delivered a treat that felt special. The cookie crust, the silky filling, and those Oreo chunks baked into every bite somehow made it feel like a celebration in every spoonful.
Looking back, I realize this recipe stuck with me because it reminded me that sometimes, the best things can come from the simplest ideas—like a no-bake cheesecake that’s rich, indulgent, and honestly, just the kind of dessert you want to savor slowly. So, if you’re a fan of easy, crowd-pleasing sweets that don’t skimp on joy, this Creamy No-Bake Oreo Cheesecake Delight might quietly become your new go-to.
Why You’ll Love This Creamy No-Bake Oreo Cheesecake Delight
After making this cheesecake more times than I can count (and sharing it with just about everyone I know), I can say it’s truly a recipe worth keeping close. Here’s the lowdown on why this one’s a winner:
- Quick & Easy: Ready in under 20 minutes, perfect for those last-minute dessert cravings or when unexpected guests pop by.
- Simple Ingredients: No fancy shopping trips here—just pantry staples like cream cheese, Oreos, and a few basics you probably already have.
- Perfect for Any Occasion: Whether it’s a casual family dinner, a weekend treat, or paired with a festive spread like a layered taco dip party platter, it fits right in.
- Crowd-Pleaser: Kids and adults alike can’t seem to get enough of the creamy texture combined with the crunchy Oreo bits.
- Unbelievably Delicious: The silky filling has just the right tang from cream cheese balanced perfectly with the sweetness of crushed Oreos.
This recipe stands out because it’s not just a quick fix—it’s thoughtfully balanced. The crust is crunchy but not crumbly, the filling is smooth without being overly sweet, and the Oreo pieces add that delightful textural contrast you didn’t know you needed. Plus, you don’t have to heat up your kitchen or wait hours for it to set.
Honestly, there’s something about this cheesecake that feels like comfort food reimagined—no-bake, fuss-free but still soul-soothing. It’s become my quiet secret for impressing guests without the stress, and a little indulgence I look forward to on hectic days.
What Ingredients You Will Need
This Creamy No-Bake Oreo Cheesecake Delight calls for simple, wholesome ingredients that combine for a bold flavor and satisfying texture. Most of these are pantry staples, and you can tweak a few to suit your needs.
- For the Crust:
- 24 Oreo cookies, crushed (about 2 cups of crumbs)
- 5 tbsp unsalted butter, melted (adds richness and binds the crust)
- For the Filling:
- 16 oz (450 g) cream cheese, softened (use full-fat for best creaminess)
- 1 cup (240 ml) heavy whipping cream, chilled (helps achieve that fluffy texture)
- ¾ cup (90 g) powdered sugar, sifted (adjust sweetness to taste)
- 1 tsp pure vanilla extract (adds depth)
- 8 Oreo cookies, roughly chopped (folded into the filling for texture)
Ingredient tips: I prefer using Kraft Philadelphia cream cheese for its smooth texture. If you want a lighter version, swap heavy cream for whipped topping, but it won’t be quite as rich. If Oreos aren’t your thing, you can try chocolate wafer cookies or gluten-free sandwich cookies. Just make sure to crush them finely for the crust and chunkier for the filling for that perfect bite contrast.
Equipment Needed
Putting this cheesecake together doesn’t require anything fancy, but having the right tools makes it easier and cleaner.
- 8-inch springform pan (or any 8-inch round pan with removable sides) – makes releasing the cheesecake smooth and easy
- Mixing bowls – at least two; one for crust and one for filling
- Electric hand mixer or stand mixer – helps whip the cream and cream cheese until silky
- Spatula – for folding Oreo chunks gently into the filling
- Measuring cups and spoons – for accuracy
- Food processor or ziplock bag and rolling pin – for crushing Oreos
If you don’t have a springform pan, a regular cake pan lined with parchment paper will work, but the sides might be trickier to remove cleanly. I’ve also found that using a chilled mixing bowl for whipping cream helps it whip faster and hold better. For budget-friendly options, a sturdy glass or metal bowl works just fine.
Preparation Method
- Crush the Oreos: Place 24 Oreo cookies into a food processor and pulse until fine crumbs form (about 1 cup). If you don’t have a processor, toss them in a ziplock bag and crush with a rolling pin, but be sure to get fine crumbs. This step should take about 5 minutes.
- Make the crust: In a medium bowl, combine the Oreo crumbs with 5 tablespoons melted butter. Stir until evenly moistened. Press the mixture firmly into the bottom of your 8-inch springform pan. Use the back of a spoon or bottom of a glass to smooth it out evenly. Place the crust in the fridge to chill while you prepare the filling (about 10 minutes).
- Whip the cream cheese: In a large bowl, beat the softened cream cheese with an electric mixer on medium speed until smooth and creamy (about 2-3 minutes). Scrape down the sides occasionally to avoid lumps.
- Add the powdered sugar and vanilla: Gradually add sifted powdered sugar and vanilla extract to the cream cheese, mixing on low to combine. Don’t overmix; just enough to blend smoothly.
- Whip the heavy cream: In a separate chilled bowl, whip the heavy cream until stiff peaks form (about 3-4 minutes). Watch closely here—it can turn into butter if overwhipped. The cream should be light, fluffy, and hold its shape.
- Fold whipped cream into cream cheese mixture: Using a spatula, gently fold the whipped cream into the cream cheese mixture in three parts. This preserves the airy texture and prevents deflating your filling.
- Add Oreo chunks: Roughly chop 8 Oreo cookies and fold them into the filling gently, leaving some visible chunks for that delightful crunch.
- Assemble the cheesecake: Remove your crust from the fridge and spread the filling evenly over the base. Smooth the top with an offset spatula or the back of a spoon.
- Chill: Cover the pan with plastic wrap and refrigerate for at least 4 hours, preferably overnight, so the cheesecake firms up and flavors meld. Patience is key here!
- Serve: When ready, release the springform pan sides carefully. Slice with a sharp knife dipped in hot water for clean cuts. Garnish with additional crushed Oreos or whipped cream if desired.
Pro tip: If your cream cheese isn’t soft enough, microwave it for 10 seconds at a time to avoid lumps. Also, don’t skip chilling the crust—it helps it set so that first bite has that perfect snap.
Cooking Tips & Techniques
One thing I learned quickly with this no-bake cheesecake is that timing and technique matter, even if it’s “no-bake.”
- Softening cream cheese: Let it sit at room temperature for at least 30 minutes. Cold cream cheese lumps up and can make your filling grainy.
- Whipping cream: Chill your bowl and beaters beforehand. Cold equipment helps the cream whip up faster and hold its shape better.
- Folding method: When combining whipped cream with cream cheese mixture, fold gently with a spatula. Overmixing deflates the air and leads to a dense dessert.
- Crust pressing: Press the crust firmly but evenly. I sometimes use a measuring cup bottom for a smooth finish. This prevents crumbling when slicing.
- Chilling time: Don’t rush the fridge time. The cheesecake needs those hours to firm up; otherwise, it’s too soft to slice nicely.
- Cutting: Run your knife under hot water, dry it, then slice. Repeat between cuts for clean edges that look as good as they taste.
I once skipped chilling the crust one day—big mistake. The base fell apart completely when I served it, turning a luscious dessert into a crumbly mess. Lesson learned! Also, I often multitask by whipping the cream while pressing the crust, which saves time and keeps the flow smooth.
Variations & Adaptations
This recipe is a solid base, and you can customize it to suit your preference or dietary needs easily.
- Chocolate Lover’s Twist: Add 2 tablespoons of unsweetened cocoa powder to the cream cheese mixture for a chocolatey spin. Swap Oreos for chocolate wafer cookies in the crust.
- Fruit Infused: Fold in fresh raspberries or strawberries right before chilling, adding a fresh pop of flavor and color.
- Gluten-Free Option: Use gluten-free sandwich cookies for the crust and filling. I’ve tried Glutino brand, which works beautifully.
- Dairy-Free Version: Substitute cream cheese with dairy-free cream cheese and heavy cream with coconut cream. Texture changes slightly but still satisfying.
- Personal Favorite: I sometimes sprinkle a pinch of espresso powder into the filling. It gives a subtle mocha note that pairs wonderfully with the Oreos and makes it feel a bit more grown-up.
If you want to get creative with serving, try layering this cheesecake in small jars, adding a drizzle of chocolate sauce or caramel on top.
Serving & Storage Suggestions
This cheesecake is best served chilled, straight from the fridge. The creamy texture and Oreo crunch really shine when cool, making it a refreshing treat.
For presentation, sprinkle a few crushed Oreos or a dollop of whipped cream on top. If you want to make it extra festive, add some chocolate shavings or a drizzle of chocolate ganache.
This dessert pairs wonderfully with a cup of rich coffee or a glass of cold milk, balancing the sweetness perfectly.
Store leftovers in an airtight container or cover the springform pan tightly with plastic wrap and keep refrigerated for up to 4 days. For longer storage, you can freeze it for up to 2 months—just thaw in the fridge overnight before serving.
Reheating isn’t recommended since it’s meant to be enjoyed chilled, but letting it sit out for 10-15 minutes before serving softens the texture slightly without losing that creamy goodness.
Flavors tend to meld and deepen after a day, so sometimes I make it a day ahead to let it develop that extra richness.
Nutritional Information & Benefits
Here’s an approximate nutrition snapshot per serving (based on 12 servings):
| Calories | 320 kcal |
|---|---|
| Fat | 22 g |
| Carbohydrates | 28 g |
| Protein | 4 g |
| Sugar | 20 g |
This cheesecake provides a good dose of calcium thanks to the cream cheese and heavy cream. The Oreos add flavor and texture but also contribute to the sugar content, so moderation is key if you’re watching sugar intake.
For those with gluten sensitivities, swapping the Oreos for gluten-free cookies can make this dessert accessible without losing its charm. It’s not a low-calorie dessert, but it’s a satisfying treat that fits well into balanced eating when shared.
Conclusion
This Creamy No-Bake Oreo Cheesecake Delight is more than just a dessert; it’s a simple, delicious way to bring a little happiness to your table without the stress. Its smooth texture, Oreo crunch, and easy assembly make it a recipe that’s stuck around in my kitchen and heart.
Feel free to make it your own—add your favorite mix-ins, swap cookies, or serve it in unique ways. It’s forgiving and flexible, just like a good dessert should be.
If you try it, I’d love to hear how it turns out for you. Maybe with a side of something savory like the creamy cheesesteak dip or alongside a fresh veggie platter with creamy BLT dip, it’ll make your next gathering memorable.
Here’s to sweet moments made simple and delicious!
FAQs About Creamy No-Bake Oreo Cheesecake Delight
Can I make this cheesecake without a springform pan?
Yes! A regular 8-inch round pan lined with parchment paper works fine, but removing the cheesecake might be a bit trickier. Chill well and use a sharp knife to loosen edges before serving.
How long can I store this no-bake cheesecake?
Store it covered in the refrigerator for up to 4 days. For longer storage, freeze for up to 2 months and thaw overnight in the fridge before serving.
Can I use low-fat cream cheese or milk instead of heavy cream?
Low-fat cream cheese can be used but may alter the creaminess and texture slightly. Milk won’t whip like heavy cream, so it’s best to stick with heavy cream or a whipped topping alternative.
Is it possible to make this recipe vegan?
With substitutions like vegan cream cheese, coconut cream in place of heavy cream, and dairy-free Oreos, you can make a vegan version. The texture and taste will differ a bit but still tasty.
Can I prepare this cheesecake a day ahead?
Absolutely! In fact, chilling it overnight helps the flavors meld and the texture set perfectly, making it even better the next day.
Pin This Recipe!
Creamy No-Bake Oreo Cheesecake Delight
A rich and indulgent no-bake cheesecake featuring a crunchy Oreo crust and a silky, fluffy cream cheese filling with Oreo chunks. Perfect for quick, fuss-free dessert lovers.
- Prep Time: 15 minutes
- Cook Time: 0 minutes
- Total Time: 4 hours 15 minutes
- Yield: 12 servings 1x
- Category: Dessert
- Cuisine: American
Ingredients
- 24 Oreo cookies, crushed (about 2 cups of crumbs)
- 5 tbsp unsalted butter, melted
- 16 oz (450 g) cream cheese, softened (full-fat recommended)
- 1 cup (240 ml) heavy whipping cream, chilled
- 3/4 cup (90 g) powdered sugar, sifted
- 1 tsp pure vanilla extract
- 8 Oreo cookies, roughly chopped
Instructions
- Crush 24 Oreo cookies into fine crumbs using a food processor or by crushing in a ziplock bag with a rolling pin (about 5 minutes).
- In a medium bowl, combine Oreo crumbs with melted butter and stir until evenly moistened. Press firmly into the bottom of an 8-inch springform pan. Chill in fridge for 10 minutes.
- Beat softened cream cheese with an electric mixer on medium speed until smooth and creamy (2-3 minutes), scraping sides occasionally.
- Gradually add sifted powdered sugar and vanilla extract to cream cheese, mixing on low until combined.
- In a separate chilled bowl, whip heavy cream until stiff peaks form (3-4 minutes).
- Gently fold whipped cream into cream cheese mixture in three parts to preserve airy texture.
- Fold in roughly chopped 8 Oreo cookies gently, leaving visible chunks.
- Spread filling evenly over chilled crust and smooth the top.
- Cover pan with plastic wrap and refrigerate for at least 4 hours or overnight to firm up.
- Release springform pan sides carefully, slice with a knife dipped in hot water for clean cuts, and garnish with crushed Oreos or whipped cream if desired.
Notes
Use full-fat cream cheese for best creaminess. Chill the crust well to prevent crumbling. Whip cream until stiff peaks but avoid overwhipping to prevent butter formation. Fold whipped cream gently to keep filling airy. For clean slices, dip knife in hot water between cuts. Variations include adding cocoa powder for chocolate twist or using gluten-free cookies for dietary needs.
Nutrition
- Serving Size: 1 slice (1/12th of c
- Calories: 320
- Sugar: 20
- Fat: 22
- Carbohydrates: 28
- Protein: 4
Keywords: no-bake cheesecake, Oreo cheesecake, easy dessert, creamy cheesecake, no oven dessert, Oreo dessert, quick cheesecake