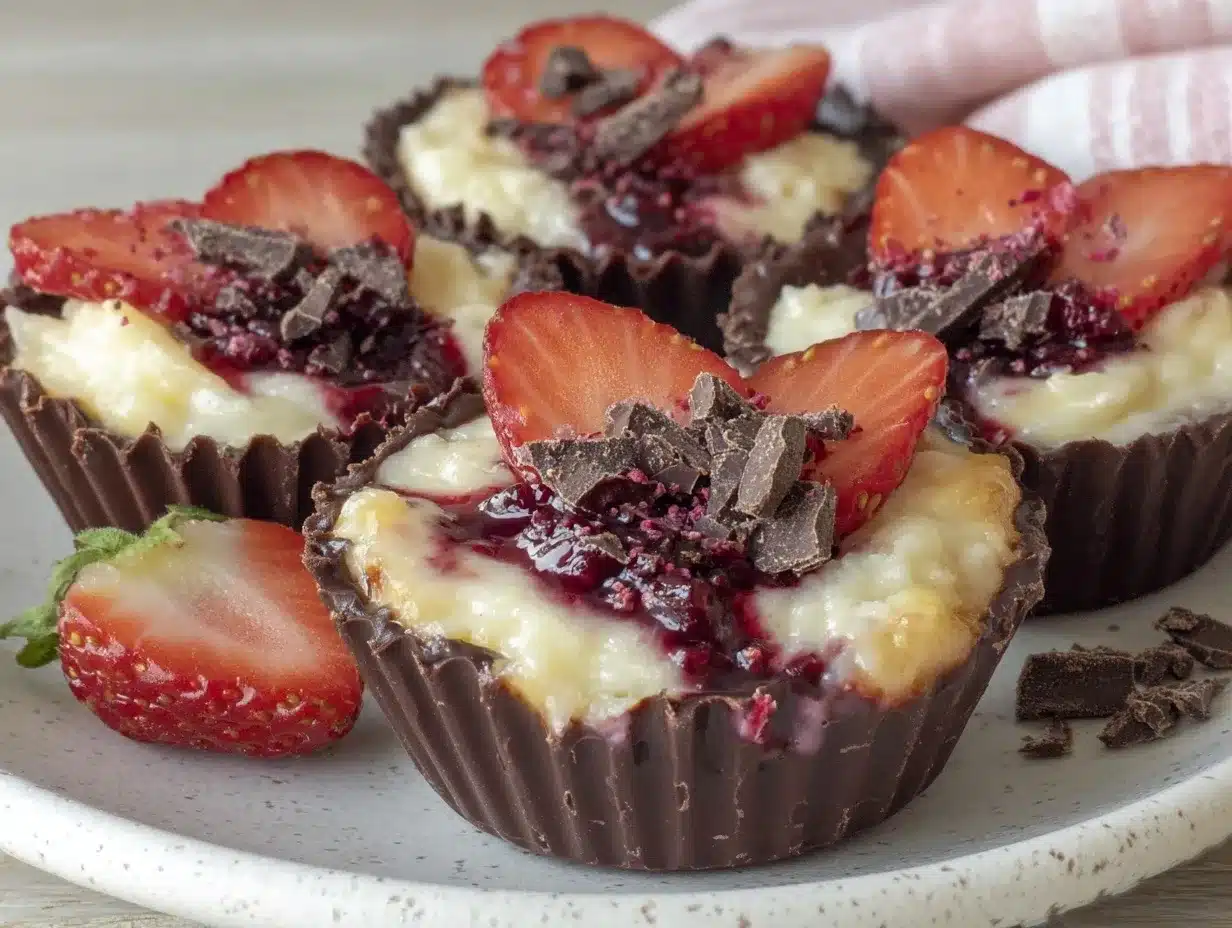
Picture this: you walk into your kitchen and are instantly greeted by the dreamy aroma of melted chocolate swirling through the air, blending with the fresh, juicy scent of ripe strawberries. The kind of scent that makes your heart skip a beat—yep, that’s what happens every time I whip up a batch of my Creamy Chocolate-Covered Strawberry Yogurt Cups. The glossy sheen of dark chocolate on top of a creamy, pillowy yogurt and strawberry filling is enough to make anyone pause, spoon in hand, just to admire the treat before diving in.
The first time I tried making these, it was a sticky summer afternoon—one of those days when turning on the oven was absolutely out of the question. I was craving something sweet but didn’t want a sugar bomb, so I started experimenting with what I had on hand. Honestly, I was instantly hooked. There’s something magical about the contrast of silky yogurt, sweet-tart strawberries, and a snap of chocolate that just works. That first bite? It was the kind of moment where you pause, take a deep breath, and just smile because you know you’re onto something truly special.
My grandma would always say, “Simple is best,” and these yogurt cups are proof. When I was knee-high to a grasshopper, she used to sneak me chocolate-dipped strawberries from her garden (a little secret between us). Now, I get to pass that same nostalgic comfort on to my own family—only with a creamy twist! My kids can’t stop sneaking them from the fridge (and honestly, neither can I). They disappear at lightning speed at potlucks and have become a staple for gifting around Valentine’s Day. If you’ve been searching for a dessert that’s as pretty as a Pinterest board, dangerously easy, and full of pure, happy comfort, you’re going to want to bookmark this one.
And yes, I’ve tested this recipe more times than I can count—in the name of research, of course. It’s perfect for those last-minute cravings, family gatherings, or when you just need a sweet hug in dessert form.
Why You’ll Love These Creamy Chocolate-Covered Strawberry Yogurt Cups
Let’s face it, there are a million chocolate and strawberry recipes out there, but this one? It’s become my go-to because it checks every box for easy, crave-worthy, and crowd-pleasing. Here’s why you’ll want to make these Creamy Chocolate-Covered Strawberry Yogurt Cups again and again:
- Quick & Easy: Comes together in under 25 minutes (plus chilling time)—no oven required, no fancy steps, just simple layering and chilling. Great for busy weeknights or when you need a fuss-free dessert.
- Simple Ingredients: Uses basic, wholesome ingredients—most are pantry and fridge staples. If you’ve got Greek yogurt, chocolate chips, and some strawberries, you’re halfway there!
- Perfect for Any Occasion: These look stunning for brunches, parties, or holidays. They’re also a sweet treat for after-school snacks or a bright addition to your summer dessert table.
- Crowd-Pleaser: Kids, adults, picky eaters—everyone loves the classic combo of strawberries and chocolate, especially with the extra creamy yogurt layer. I’ve never seen leftovers last long!
- Unbelievably Delicious: The contrast of rich chocolate, fresh strawberries, and the tangy-sweet yogurt is pure comfort food—light yet decadent, and so satisfying.
What sets these apart? Instead of just sandwiching fruit in chocolate, I blend diced strawberries right into the yogurt for a pink, creamy filling that tastes like strawberry cheesecake (without the baking). The chocolate shell cracks perfectly with each bite, and the sprinkle of freeze-dried strawberries on top adds a little fancy crunch.
This recipe has been tested, tweaked, and taste-approved by my family, friends, and even the skeptical neighbors. It’s the sort of dessert that makes you close your eyes after that first spoonful. Comfort food that’s lighter, quicker, and still has all the nostalgia of chocolate-dipped strawberries from childhood. There’s no need to stress over complicated directions, either. These yogurt cups are meant to impress—without the mess or the marathon kitchen session.
Whether you’re making them for date night, a backyard BBQ, or just a Tuesday night treat, these cups are proof that dessert doesn’t have to be complicated to be memorable. And, honestly, I wish I’d discovered this trick years ago!
What Ingredients You Will Need
This recipe uses simple, wholesome ingredients to deliver bold flavor and that signature creamy-crunchy texture—without the fuss. Most of them are regular pantry or fridge items, and you can easily swap in what you have on hand.
- For the Yogurt Filling:
- 2 cups (480g) Greek yogurt (plain or vanilla; I love using full-fat for extra creaminess)
- 1/4 cup (60g) honey or pure maple syrup (for natural sweetness—adjust to taste)
- 1 teaspoon vanilla extract (adds warmth—try a splash of almond extract if you’re feeling fancy!)
- 1 cup (150g) fresh strawberries, finely diced (the juicier, the better; pat dry if overly wet)
- For the Chocolate Shell:
- 1 1/2 cups (255g) semisweet or dark chocolate chips (I use Ghirardelli or Enjoy Life for dairy-free)
- 2 tablespoons (30g) coconut oil (gives that perfect crack and shine—refined for no coconut taste)
- Optional Toppings:
- Freeze-dried strawberries, crushed (for a pop of color and extra strawberry flavor)
- White chocolate drizzle (just melt and zigzag—totally optional, but makes them look fancy!)
- Chopped nuts (pistachios or almonds for crunch; skip for nut allergies)
Ingredient Tips:
- Any thick, creamy yogurt works—dairy-free coconut or almond-based yogurts are great for vegan or lactose-free needs.
- If strawberries aren’t in season, use frozen (just thaw and drain excess liquid) or try raspberries for a twist.
- For a lower-sugar version, swap honey for a little monk fruit sweetener, or just use vanilla yogurt and skip the extra sweetener.
- Milk chocolate chips work if you prefer a sweeter shell; bittersweet chocolate gives a deeper flavor (my personal favorite!).
Honestly, you can get creative—add a dash of cinnamon, swirl in some peanut butter, or toss in a handful of mini chocolate chips for extra crunch. The best part is there’s no wrong way to layer these flavors, so use what you love and what’s handy.
Equipment Needed
- Muffin Tin (Standard 12-cup): This gives your yogurt cups their shape. If you don’t have one, use silicone muffin molds—makes popping them out a breeze.
- Paper or Silicone Cupcake Liners: For easy removal and less mess. Trust me, don’t skip these or the chocolate will stick.
- Mixing Bowls: One for the yogurt filling, another for melting chocolate. Any medium-sized bowl works.
- Small Saucepan or Microwave-Safe Bowl: For melting chocolate and coconut oil together. I’ve used both—microwave is fastest, but stovetop gives more control.
- Spoon or Cookie Scoop: For portioning out the layers. I usually use a standard soup spoon, but a small ice cream scoop makes it neater.
- Sharp Knife and Cutting Board: For dicing strawberries. A paring knife works best for small berries.
- Toothpick or Skewer (optional): For swirling or creating a marbled chocolate effect on top.
No muffin tin? You can use small ramekins or even mini mason jars, but the chocolate shell may be trickier to unmold. If you’re using metal tins, a quick spritz of nonstick spray under the liner helps. For easy cleanup, I always rinse bowls right after using—hardened chocolate can be stubborn!
If you’re on a budget, dollar store silicone liners work perfectly, and you can reuse them for endless batches of yogurt cups, muffins, or even frozen treats.
How to Make Creamy Chocolate-Covered Strawberry Yogurt Cups
- Prep Your Muffin Tin: Line a standard 12-cup muffin tin with paper or silicone cupcake liners. (If using silicone molds, set them on a baking sheet for stability.)
- Make the Yogurt Filling:
- Add 2 cups (480g) Greek yogurt, 1/4 cup (60g) honey, and 1 teaspoon vanilla extract to a medium mixing bowl. Stir until smooth and creamy.
- Gently fold in 1 cup (150g) finely diced strawberries. The filling should look pale pink and slightly flecked with berries.
- Taste and add more honey for sweetness, if desired.
- Melt the Chocolate:
- Place 1 1/2 cups (255g) chocolate chips and 2 tablespoons (30g) coconut oil in a microwave-safe bowl.
- Heat in 30-second bursts, stirring each time, until smooth and fully melted (about 1–1.5 minutes total). If using a saucepan, melt over low heat, stirring constantly.
- Let the chocolate cool slightly—this helps it coat the liners evenly without melting the yogurt.
- Assemble the Cups:
- Spoon about 1 heaping teaspoon of melted chocolate into the bottom of each cupcake liner. Tilt and swirl to coat the bottom evenly (use the back of the spoon to spread it up the sides).
- Chill the tin in the freezer for 5–8 minutes, until the chocolate hardens.
- Add 2–3 tablespoons of the strawberry yogurt filling on top of the chocolate base in each liner. Leave a little room at the top for sealing with more chocolate.
- Seal with Chocolate:
- Spoon another teaspoon (or more, if desired) of melted chocolate over the yogurt filling to cover completely. Use a spoon to gently spread it to the edges so no yogurt peeks out.
- If you’re feeling creative, drizzle with white chocolate or sprinkle crushed freeze-dried strawberries or nuts on top.
- Chill and Set:
- Place the muffin tin back in the freezer for 25–30 minutes, or until the chocolate is firm and the cups are solid.
- To check, gently press the top—if it feels hard and doesn’t give, they’re ready.
- Unmold and Serve:
- Carefully peel off the paper or silicone liners. If they stick, let the cups sit at room temperature for 2–3 minutes and try again.
- Serve chilled for the best snap and creamy bite!
Notes & Troubleshooting:
- If the chocolate is too thick to spread, warm it for 10 seconds more or add a tiny bit more coconut oil.
- If your yogurt layer is too runny, try straining it through a cheesecloth for 15 minutes to remove excess liquid.
- Don’t overfill the liners—leave space for the top chocolate layer to seal in all the goodness.
- For extra-straight sides, use silicone molds. They pop out cleaner than paper liners.
I find that cleaning as you go (especially the chocolate bowl) makes the whole process smoother. And don’t worry if your tops aren’t perfectly smooth—homemade means a little character!
Cooking Tips & Techniques for Foolproof Strawberry Yogurt Cups
Here’s what I’ve learned through trial, error, and a few chocolatey messes along the way:
- Don’t Rush the Chilling: Let each chocolate layer set completely before adding the yogurt or sealing the top. If you try to rush, the layers mix, and you won’t get that crisp chocolate shell. Patience is key (even if it’s hard)!
- Melt Chocolate Slowly: Overheating chocolate makes it seize or turn grainy. Always use short bursts in the microwave, stirring in between, or a gentle double boiler on the stove.
- Dab Strawberries Dry: Wet berries can water down the yogurt and cause icy pockets. After dicing, pat them with a paper towel—trust me, your texture will thank you.
- Layer Evenly: Use a cookie scoop for the yogurt layer for uniform cups. Uneven layers can mean some cups are all yogurt and barely any chocolate (not the worst thing, but balance is best!).
- Seal the Edges: Make sure the top chocolate layer spreads all the way to the liner’s edge. This prevents leaks and keeps the yogurt fresh longer.
Common mistakes? Overfilling the cups (they burst when you try to unmold), using thin yogurt (turns runny), or forgetting to chill between steps. I’ve done all three, and honestly, the “failures” are still delicious—just a little messier!
If you want to multitask, prep the yogurt and dice the berries while the first chocolate layer chills. And if you’re making a big batch, keep an assembly line: one person melts chocolate, another fills, and a third tops and chills. It’s a fun family project that gets everyone involved—and sneaking extra strawberries while you work is basically required.
Consistency is all about good prep and not rushing. If you keep your ingredients cold and use quality chocolate, you’ll get that perfect snap and creamy center every time. Don’t sweat the little imperfections—homemade means lots of love (and a few chocolatey fingerprints) along the way.
Variations & Adaptations
One of my favorite things about these Creamy Chocolate-Covered Strawberry Yogurt Cups is how easy they are to customize. Here are some fun twists I’ve tried (and loved!):
- For Different Dietary Needs:
- Gluten-Free: This recipe is naturally gluten-free—just double-check your chocolate chips and toppings for hidden gluten.
- Dairy-Free/Vegan: Use coconut or almond-based yogurt and dairy-free chocolate chips. Maple syrup works great for sweetness.
- Low-Sugar: Swap honey for monk fruit or stevia, or use unsweetened yogurt and just a handful of diced berries.
- Switch Up the Fruit:
- Try raspberries, blueberries, or mango instead of strawberries for a new flavor profile. In winter, use pomegranate arils for a festive twist.
- Fun Flavor Add-Ins:
- Add a tablespoon of peanut butter or almond butter to the yogurt layer (tastes like a peanut butter cup meets strawberry shortcake!).
- Mix in a pinch of ground cinnamon or orange zest for a grown-up flavor boost.
- Different Methods:
- Layer in small glass jars for a no-mess, spoonable parfait that’s perfect for picnics.
- Freeze in silicone popsicle molds for Chocolate-Covered Strawberry Yogurt Pops (so fun for kids in the summer!).
- Personal Favorite: I once swirled homemade strawberry jam into the yogurt before layering—wow, it tasted just like a fancy patisserie dessert and looked so pretty marbled in pink and red.
Don’t be afraid to play around. Allergic to strawberries? Swap for kiwi or banana (just dry well). Want it even richer? Use mascarpone or whipped cream cheese mixed into the yogurt. These cups are a blank canvas for whatever you’re craving!
Serving & Storage Suggestions
These yogurt cups are best served chilled, straight from the fridge. I love arranging them on a pretty platter with extra fresh strawberries and a dusting of powdered sugar for a “wow” factor—perfect if you’re hosting brunch or a special occasion.
They pair really well with a cup of strong coffee, a glass of cold milk, or even a light sparkling wine for an adults-only treat. For a summery dessert board, serve alongside fresh fruit, nuts, and a few extra pieces of chocolate.
To store, keep the yogurt cups in an airtight container in the fridge for up to 4 days. The chocolate shell keeps the yogurt and strawberries fresh, but after a couple of days, the fruit can release a little juice—still tasty, just a bit softer. For longer storage, these freeze beautifully! Layer parchment between each cup and freeze in a zip-top bag for up to 2 months. Let thaw in the fridge for about an hour before serving for the best creamy texture.
Reheating isn’t needed (and will melt your chocolate shell), but if you want a softer bite, just let the cups sit at room temperature for 5–7 minutes. Honestly, the flavors get even better on day two—the chocolate and yogurt meld together, and the strawberry flavor deepens. It’s like a little bit of magic with every bite.
Nutritional Information & Benefits
Here’s a quick look at what you’re getting in each Creamy Chocolate-Covered Strawberry Yogurt Cup (based on a batch of 12):
- Calories: ~160 per cup
- Protein: 5g (thanks to Greek yogurt!)
- Fat: 8g (mostly from healthy coconut oil and dark chocolate)
- Sugar: 12g (mainly natural sugars from honey and strawberries)
Greek yogurt is a great source of calcium, probiotics, and protein, while fresh strawberries bring vitamin C and antioxidants. If you use dark chocolate (70% cacao or more), you get extra health perks like antioxidants and a little fiber.
This recipe can easily fit a gluten-free or vegetarian diet (and vegan with dairy-free swaps). Major allergens to watch for: dairy (yogurt, chocolate chips), and coconut (in the oil). Always check your chocolate chips for potential nut or soy traces if allergies are a concern.
From a wellness perspective, I love that these cups satisfy a dessert craving without the sugar rush or heaviness of traditional chocolate treats. You get a bit of indulgence, a bit of nutrition, and a whole lot of happiness in every bite!
Conclusion
If you’re searching for a dessert that’s easy, beautiful, and guaranteed to make everyone smile, these Creamy Chocolate-Covered Strawberry Yogurt Cups are your new secret weapon. They’re proof that a few simple ingredients—when treated with a bit of love—can turn into something truly special. Whether you stick to the classic version or experiment with your own twists, you’ll find yourself making these again and again.
I love how these bring together the nostalgia of chocolate-dipped strawberries with the modern creaminess of yogurt—plus, they’re no-bake and practically foolproof. Don’t be afraid to swap in your favorite fruit or toppings. That’s part of the fun!
I’d love to hear how yours turn out. Did you try a new variation? Did your family gobble them up before you could take a photo? Drop a comment below, share your pictures, or tag me if you post your yogurt cups on Pinterest or Instagram. Let’s keep the sweet inspiration going—because everyone deserves a little creamy, chocolatey joy.
Happy (no-)baking, friends!
FAQs About Creamy Chocolate-Covered Strawberry Yogurt Cups
How long do these yogurt cups last in the fridge?
They’ll stay fresh for up to 4 days in an airtight container. After a couple of days, the strawberries may release a bit of juice, but the cups will still taste delicious.
Can I use frozen strawberries instead of fresh?
Yes! Thaw the frozen strawberries and drain off any excess liquid before dicing and mixing into the yogurt. This keeps your filling from getting watery.
Are these yogurt cups gluten-free?
They are naturally gluten-free as long as you use gluten-free chocolate chips and double-check any toppings. No flour or wheat in sight!
Can I make these ahead and freeze them?
Absolutely. Layer with parchment in a freezer-safe bag and freeze for up to 2 months. Thaw in the fridge for best texture before serving.
What can I use instead of coconut oil in the chocolate shell?
Melted butter or a neutral oil like avocado oil works in a pinch, but coconut oil gives the best snap and shine. If you skip it, your chocolate may set a bit harder but will still taste great.
Pin This Recipe!
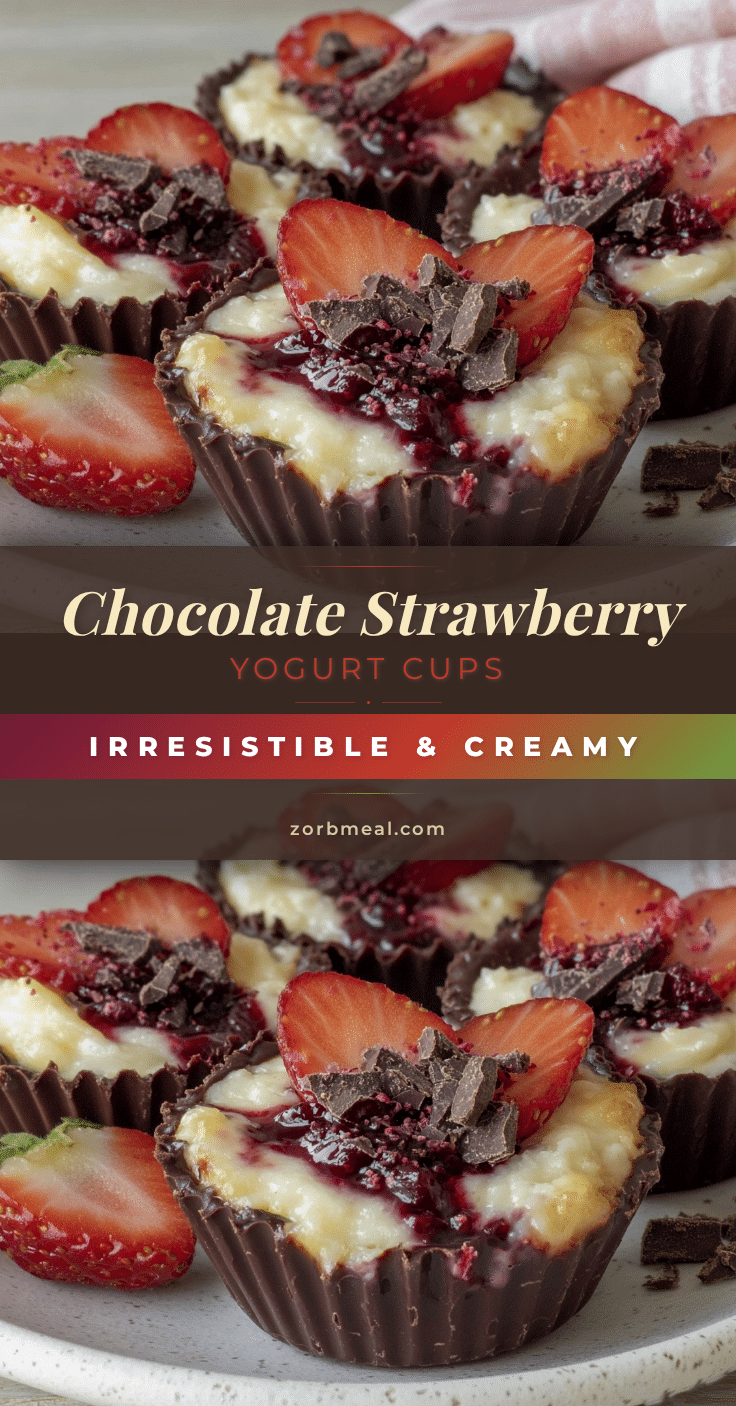
Creamy Chocolate-Covered Strawberry Yogurt Cups

These no-bake yogurt cups feature a creamy strawberry Greek yogurt filling encased in a crisp chocolate shell. They’re quick, easy, and perfect for a light, crowd-pleasing dessert or snack.
- Prep Time: 15 minutes
- Cook Time: 10 minutes
- Total Time: 25 minutes (plus 30 minutes chilling time)
- Yield: 12 cups 1x
- Category: Dessert
- Cuisine: American
Ingredients
- 2 cups Greek yogurt (plain or vanilla, full-fat preferred)
- 1/4 cup honey or pure maple syrup
- 1 teaspoon vanilla extract
- 1 cup fresh strawberries, finely diced
- 1 1/2 cups semisweet or dark chocolate chips
- 2 tablespoons coconut oil
- Optional: Freeze-dried strawberries, crushed
- Optional: White chocolate, melted for drizzling
- Optional: Chopped nuts (pistachios or almonds)
Instructions
- Line a standard 12-cup muffin tin with paper or silicone cupcake liners.
- In a medium mixing bowl, combine Greek yogurt, honey, and vanilla extract. Stir until smooth and creamy.
- Gently fold in the diced strawberries. Taste and add more honey if desired.
- Place chocolate chips and coconut oil in a microwave-safe bowl. Heat in 30-second bursts, stirring each time, until melted and smooth. Let cool slightly.
- Spoon about 1 heaping teaspoon of melted chocolate into the bottom of each cupcake liner. Tilt and swirl to coat the bottom evenly and up the sides.
- Chill the tin in the freezer for 5–8 minutes, until the chocolate hardens.
- Add 2–3 tablespoons of the strawberry yogurt filling on top of the chocolate base in each liner, leaving room at the top.
- Spoon another teaspoon (or more) of melted chocolate over the yogurt filling to cover completely. Spread to the edges.
- Optionally, drizzle with white chocolate or sprinkle with freeze-dried strawberries or nuts.
- Return the muffin tin to the freezer for 25–30 minutes, or until the chocolate is firm and the cups are solid.
- Carefully peel off the liners. If they stick, let the cups sit at room temperature for 2–3 minutes and try again.
- Serve chilled.
Notes
For best results, use thick Greek yogurt and pat strawberries dry to avoid a runny filling. Let each chocolate layer set completely before adding the next. These cups can be made dairy-free and vegan with coconut or almond yogurt and dairy-free chocolate. Store in the fridge for up to 4 days or freeze for up to 2 months.
Nutrition
- Serving Size: 1 yogurt cup
- Calories: 160
- Sugar: 12
- Sodium: 30
- Fat: 8
- Saturated Fat: 5
- Carbohydrates: 18
- Fiber: 2
- Protein: 5
Keywords: chocolate covered strawberry yogurt cups, no-bake dessert, Greek yogurt, easy dessert, gluten-free, Valentine’s Day, summer dessert, healthy treat