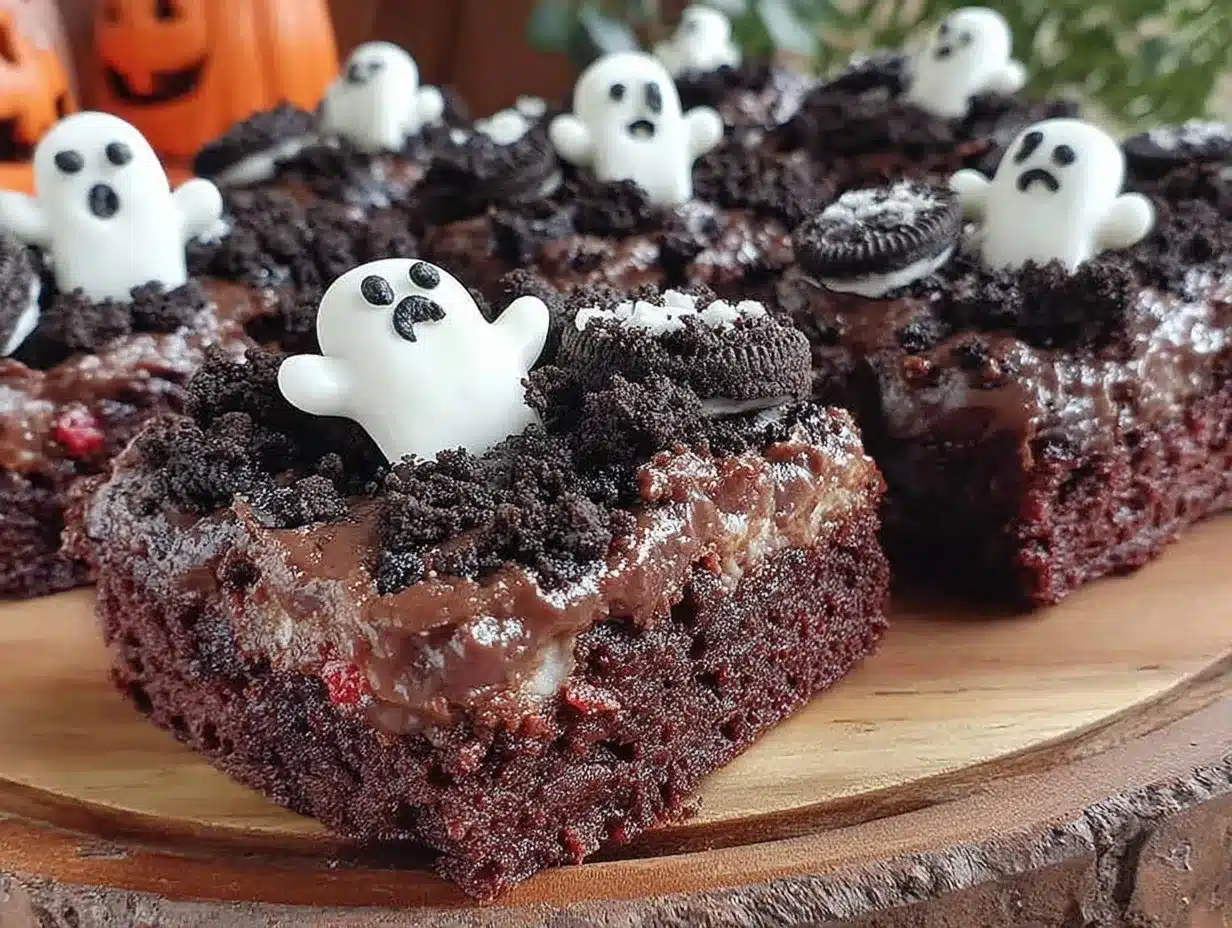
I figured Halloween treats would be all about spooky decorations and complicated techniques. It took about five minutes for that to fall apart completely when I ended up with my first batch of these Perfect Halloween Graveyard Brownies with Oreo Dirt and Fondant Ghosts. Honestly, I expected a sticky mess, but what I got was this ridiculously fun, almost too-cute-to-eat dessert that somehow nailed the creepy-cute vibe without any fuss.
It started late one October evening when I was rummaging through my pantry for something quick but festive. I had a box of brownies, some Oreos, and a handful of fondant leftover from another project. Throwing them together felt like a wild experiment (and, yes, a little bit of a cheat), but the result was this charming graveyard scene that was equal parts creepy and delicious. The crunch of the Oreo “dirt” combined with the fudgy brownie made me pause — and then go back for a second bite.
What really hooked me, though, was how simple it was to turn something as humble as brownies into a Halloween centerpiece. The fondant ghosts? They’re easy to shape, and you don’t need to be a pro decorator to make them spooky enough. It’s funny how a small detail like that can make the whole dessert feel like it belongs in a Halloween party spread alongside classics like creamy buffalo chicken dip or even an unexpected sweet like fresh red, white, and blue fruit pizza. It’s that sort of playful vibe that makes this recipe stick in my mind every October.
So, if you’re looking for a Halloween dessert that feels special without the stress, this might be the one that sneaks up on you and becomes a new tradition. It’s not perfect-looking, but it’s perfectly fun, and that’s what counts around here.
Why You’ll Love This Recipe
Honestly, these Perfect Halloween Graveyard Brownies with Oreo Dirt and Fondant Ghosts have become my go-to for last-minute spooky baking. I’ve tested and tweaked this recipe over several Halloweens, and here’s what makes it stand out:
- Quick & Easy: You can pull this together in under an hour, including baking and decorating, which is a lifesaver when you’re juggling costume prep and pumpkin carving.
- Simple Ingredients: No obscure baking supplies here. If you’ve got brownies, Oreos, and fondant (or even marshmallows as a backup), you’re good to go.
- Perfect for Halloween Parties: Whether it’s a kid’s school event or a grown-up gathering, this recipe fits right in with spooky themes without being over the top.
- Crowd-Pleaser: I swear, both kids and adults disappear into these brownies like they’re enchanted. The Oreo dirt adds that perfect crunch everyone loves.
- Unbelievably Delicious: The fudgy brownie base combined with that crumbly Oreo topping and sweet, soft ghosts? It’s a texture and flavor combo that’s kinda addicting.
This isn’t just another Halloween brownie recipe — the Oreo dirt topping creates a realistic graveyard effect that’s fun to build and even more fun to eat. And those fondant ghosts? They’re not just decoration; they add a little chewy sweetness that balances the rich chocolate perfectly.
Plus, it’s the kind of recipe that lets you play around. I’ve swapped in gluten-free brownies, used store-bought fondant, or even made mini versions for bite-sized treats. No stress, just fun. And if you’ve ever tried fussier Halloween desserts that end up more frustrating than festive, you’ll appreciate how forgiving this one is. It’s basically Halloween magic in a pan.
What Ingredients You Will Need
This recipe uses simple, wholesome ingredients to deliver bold flavor and a satisfying spooky texture without the fuss. Most of these are pantry staples or easy to find at your local grocery store.
- For the Brownies:
- 1 box brownie mix (about 18.3 oz / 520g) or your favorite homemade brownie batter
- Eggs (usually 2 large, room temperature, check your mix instructions)
- Vegetable oil or melted butter (per box instructions, usually ½ cup / 120ml)
- Water (as required, generally ¼ cup / 60ml)
- For the Oreo Dirt:
- 15-20 Oreo cookies (regular or double-stuff, crushed finely)
- Optional: 1 tablespoon cocoa powder (for extra dark “dirt” color and richness)
- For the Fondant Ghosts:
- 8 oz (225g) white fondant (available at most baking supply stores or online)
- Black edible marker or black gel icing for ghost faces
- Optional: a tiny bit of cornstarch or powdered sugar for dusting
Ingredient tips: I prefer the Ghirardelli brownie mix for the best fudgy texture, but any good-quality mix works. For Oreos, the classic kind gives the best “dirt” effect, but feel free to try flavored ones for a twist. When picking fondant, Wilton brand tends to be the easiest to work with for beginners.
Substitutions? You can swap the brownie mix for a gluten-free version or homemade batter, and if fondant isn’t your thing, marshmallows make a fun substitute for ghosts (just shape and draw faces the same way). For a dairy-free option, check the brownie mix and fondant labels carefully or try vegan alternatives.
Equipment Needed
Here’s what you’ll want on hand to make these Halloween graveyard brownies:
- 9×13 inch (23×33 cm) baking pan — a standard size for brownie mixes, but an 8×8 inch (20×20 cm) pan works if you want thicker brownies.
- Mixing bowls — one large for brownie batter, one small for Oreo crushing.
- Electric mixer or sturdy whisk — to mix the brownie batter smoothly.
- Rolling pin or heavy bottle — for crushing Oreos into “dirt.”
- Fondant modeling tools or just your hands — for shaping ghosts. A small knife or toothpick helps with details.
- Baking parchment or non-stick spray — to line or grease the pan.
- Sharp knife — for cutting brownies into grave shapes or squares.
Don’t have a rolling pin? No worries — a heavy glass or even a can of beans will do for Oreo crushing. If fondant seems intimidating, using your hands to pinch and shape the ghosts is totally fine (the imperfections add character!). I’ve found that a silicone baking mat helps keep fondant from sticking too much.
Preparation Method
- Preheat your oven to 350°F (175°C). Line your 9×13 inch pan with parchment paper or lightly grease it to prevent sticking.
- Prepare the brownie batter. Follow the instructions on your brownie mix box or use your homemade recipe. Usually, this means mixing the brownie mix, eggs, oil (or melted butter), and water until smooth — about 2-3 minutes with a mixer.
- Pour the batter into your prepared pan and spread it evenly. Bake for 25-30 minutes or until a toothpick inserted in the center comes out with just a few moist crumbs. Avoid overbaking; fudgy is the goal.
- While brownies bake, crush the Oreos. Place the cookies in a zip-top bag and crush with a rolling pin until you have a mix of fine crumbs and small chunks resembling dirt clumps. For extra dark dirt, sift in a tablespoon of cocoa powder and mix.
- Cool the brownies completely in the pan on a wire rack before decorating — this is key so the Oreo dirt sticks well.
- Prepare the fondant ghosts. Knead the fondant until soft and pliable. Pinch off small pieces (about 1 inch / 2.5 cm) and roll them into teardrop shapes. Flatten slightly and pinch the bottom to form a ghostly drape look.
- Use a black edible marker or gel icing to draw eyes and mouths on each ghost. Be playful — some can be spooky, some silly.
- Assemble the graveyard. Sprinkle a generous layer of Oreo dirt over the cooled brownies. Arrange the fondant ghosts on top, pressing gently so they stick.
- Optional: Use broken pretzel sticks or chocolate wafer cookies to create “grave markers” by sticking them upright in the Oreo dirt.
- Serve at room temperature. The brownies will keep for 3-4 days in an airtight container. The Oreo dirt softens a little over time, but it’s still delicious.
Pro tip: If your fondant feels too sticky, dust your hands lightly with cornstarch or powdered sugar before shaping. Also, if you want cleaner brownie squares for your graveyard, chill the brownies for 30 minutes after baking before cutting.
Cooking Tips & Techniques
Let’s get real about making these brownies perfect (or at least close enough!).
- Don’t overbake your brownies. It’s tempting to leave them in longer “just to be safe,” but that ruins the fudgy texture. Start checking at 25 minutes.
- Crush Oreos unevenly. If you make all crumbs too fine, it looks less like dirt. A mix of fine crumbs and small chunks gives a more natural graveyard effect.
- Fondant handling. Fondant can dry out quickly, so keep it wrapped in plastic wrap when not shaping. Knead it well to make it soft and easier to mold.
- Multitasking tip: While brownies bake and cool, get your Oreo dirt and fondant ghosts ready so assembly is quick and fun.
- Storage advice: Assemble close to serving time to keep the ghosts looking fresh. If you make ahead, store decorating elements separately and combine before serving.
I learned the hard way that skipping the cooling step makes Oreo dirt slide right off. Also, using a dull knife to cut brownies will cause less crumbling. These little tricks save you from a crumbly graveyard disaster!
Variations & Adaptations
This recipe is super flexible, which is great if you want to switch things up or accommodate dietary needs.
- Dietary swaps: Use gluten-free brownie mix and gluten-free Oreos for a safe treat. Dairy-free fondant is also available, or try marshmallows shaped into ghosts instead.
- Flavor twists: Add a pinch of cinnamon or chili powder to the brownie batter for a subtle spicy kick. Or swap Oreo crumbs for crushed chocolate graham crackers for a different “dirt” flavor.
- Alternative decorations: Instead of fondant ghosts, pipe ghost shapes with whipped cream or cream cheese frosting, then add candy eyes.
- Mini graveyards: Make individual servings in cupcake liners with brownie bites, Oreo dirt, and tiny fondant ghosts for a party platter.
- Personal favorite: I once added gummy worms crawling out from the Oreo dirt — it was a hit with the kids and made the scene look extra eerie.
For a unique twist, you can try layering a thin spread of peanut butter or caramel over the brownies before adding Oreo dirt. It adds a gooey surprise under the “graveyard.”
Serving & Storage Suggestions
These graveyard brownies are best served at room temperature, so the fudgy texture and Oreo crunch really shine through. Display them on a dark platter or a rustic wooden board to set the Halloween mood.
They go wonderfully with a cold glass of milk or even a warm cup of cider, especially if you want to sneak in some cozy fall vibes alongside the spooky fun.
Store leftovers in an airtight container at room temperature for up to 2 days, or refrigerate for up to 5 days — just bring them back to room temp before serving for the best flavor and texture.
If you want to freeze them, wrap tightly in plastic wrap and foil, then thaw overnight in the fridge before decorating and serving. The Oreo dirt can soften a bit over time, but that’s part of the charm.
Flavors tend to meld and mellow a bit if stored overnight, making the brownies even more decadent. So, if you can wait, it’s worth prepping the day before your party.
Nutritional Information & Benefits
Here’s a rough estimate for one serving (1/12 of the pan):
| Calories | 320 |
|---|---|
| Fat | 16g |
| Carbohydrates | 42g |
| Protein | 3g |
While these brownies are definitely a treat, the dark chocolate in the brownies provides antioxidants, and Oreos add a crunch without overwhelming sweetness. The fondant ghosts are mostly sugar, so enjoy them as a fun garnish.
For those watching dietary restrictions, this recipe can be made gluten-free and dairy-free with ingredient swaps, making it more inclusive for party guests. And hey, sometimes a little indulgence is part of the fun, especially on Halloween!
Conclusion
Perfect Halloween Graveyard Brownies with Oreo Dirt and Fondant Ghosts are proof that you don’t need complicated recipes to make a memorable, fun, and delicious dessert. This recipe keeps things playful, approachable, and just spooky enough to delight guests of all ages.
Feel free to customize the ghosts or dirt to match your style or dietary needs. I love how this recipe brings a little theatrical flair to the table without any fuss — plus, it pairs well with an array of party snacks like the honey bourbon baked beans or even a fresh appetizer like fresh Caprese skewers.
So, grab your brownie mix, Oreos, and fondant, and get ready to make a Halloween dessert that’s both spooky and sweet — without the headache. I’m betting you’ll find yourself making this one year after year.
FAQs
Can I use homemade brownies instead of a boxed mix?
Absolutely! A rich, fudgy homemade brownie works wonderfully here. Just make sure they’re fully cooled before decorating.
What can I use if I don’t have fondant for the ghosts?
Marshmallows shaped and decorated with edible markers or piped frosting ghosts are great alternatives.
How far ahead can I prepare these brownies?
You can bake the brownies and crush Oreos a day ahead. Shape the fondant ghosts the same day you plan to assemble for best texture.
Can I make this recipe gluten-free?
Yes! Use a gluten-free brownie mix and gluten-free Oreos. Check fondant ingredients if you have gluten sensitivities.
How do I store leftover graveyard brownies?
Store in an airtight container at room temperature for up to 2 days or refrigerate up to 5 days. Bring to room temperature before serving.
Pin This Recipe!
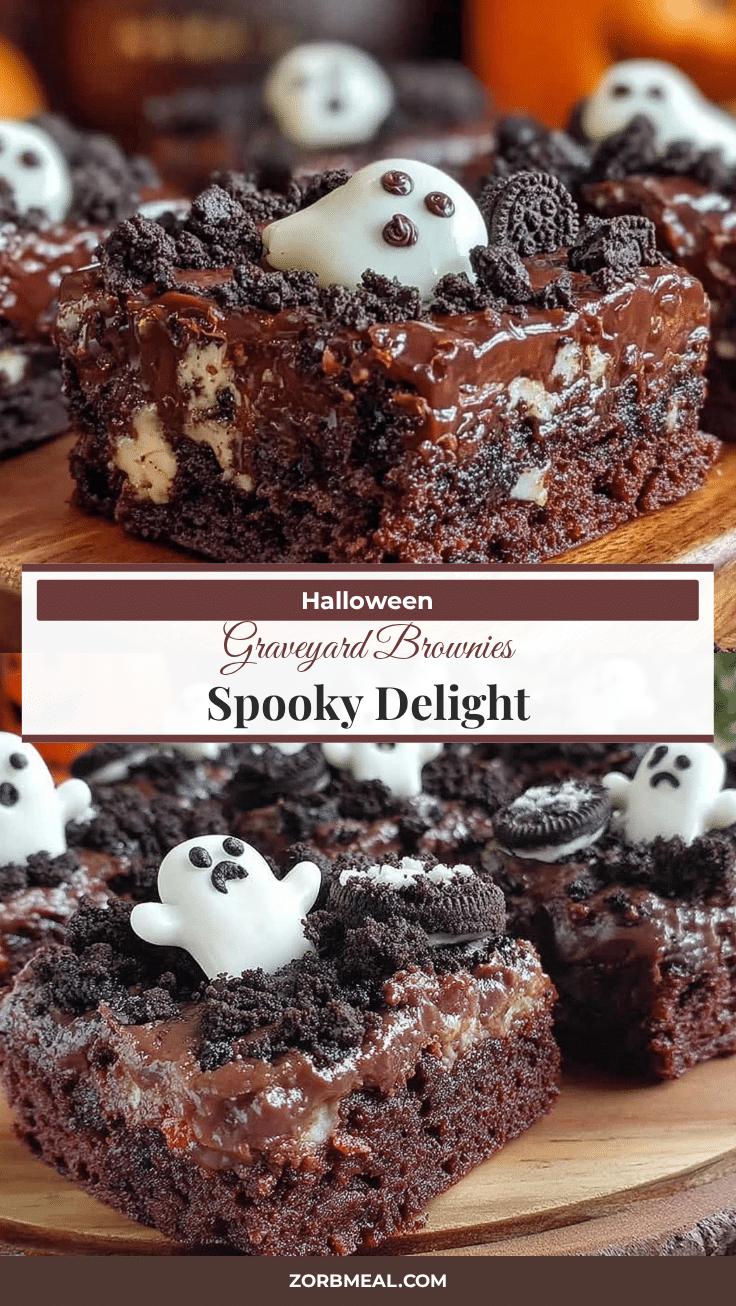
Perfect Halloween Graveyard Brownies Recipe with Oreo Dirt and Fondant Ghosts
A fun and easy Halloween dessert featuring fudgy brownies topped with crunchy Oreo dirt and cute fondant ghosts, perfect for parties and last-minute spooky baking.
- Prep Time: 15 minutes
- Cook Time: 30 minutes
- Total Time: 45 minutes
- Yield: 12 servings 1x
- Category: Dessert
- Cuisine: American
Ingredients
- 1 box brownie mix (about 18.3 oz / 520g) or your favorite homemade brownie batter
- 2 large eggs, room temperature (or as per mix instructions)
- 1/2 cup vegetable oil or melted butter (120 ml, or as per mix instructions)
- 1/4 cup water (60 ml, or as per mix instructions)
- 15–20 Oreo cookies (regular or double-stuff, crushed finely)
- Optional: 1 tablespoon cocoa powder (for extra dark dirt color and richness)
- 8 oz (225g) white fondant
- Black edible marker or black gel icing for ghost faces
- Optional: a tiny bit of cornstarch or powdered sugar for dusting
Instructions
- Preheat your oven to 350°F (175°C). Line a 9×13 inch baking pan with parchment paper or lightly grease it.
- Prepare the brownie batter according to the box instructions or your homemade recipe by mixing brownie mix, eggs, oil (or melted butter), and water until smooth (about 2-3 minutes).
- Pour the batter into the prepared pan and spread evenly. Bake for 25-30 minutes or until a toothpick inserted in the center comes out with a few moist crumbs. Avoid overbaking for fudgy brownies.
- While brownies bake, crush Oreos in a zip-top bag using a rolling pin or heavy bottle until you have a mix of fine crumbs and small chunks. Mix in cocoa powder if using.
- Cool the brownies completely in the pan on a wire rack before decorating.
- Knead the fondant until soft and pliable. Pinch off small pieces (about 1 inch) and roll into teardrop shapes. Flatten slightly and pinch the bottom to form ghost shapes.
- Use a black edible marker or gel icing to draw eyes and mouths on each fondant ghost.
- Sprinkle a generous layer of Oreo dirt over the cooled brownies. Arrange the fondant ghosts on top, pressing gently to stick.
- Optional: Use broken pretzel sticks or chocolate wafer cookies as grave markers by sticking them upright in the Oreo dirt.
- Serve at room temperature. Store leftovers in an airtight container for 3-4 days.
Notes
Do not overbake brownies to maintain fudgy texture. Crush Oreos unevenly for a natural dirt effect. Keep fondant wrapped when not shaping to prevent drying. Chill brownies 30 minutes before cutting for cleaner shapes. Assemble close to serving time for freshest ghosts. Store decorating elements separately if making ahead.
Nutrition
- Serving Size: 1/12 of the pan
- Calories: 320
- Fat: 16
- Carbohydrates: 42
- Protein: 3
Keywords: Halloween brownies, Oreo dirt, fondant ghosts, spooky dessert, easy Halloween treats, fudgy brownies, Halloween party dessert


