Early July morning, and the light streams softly through the kitchen window, casting a warm glow on the counter. The quiet hum of the refrigerator is the only sound as I unwrap a slab of rich, red velvet batter resting patiently in the mixing bowl. It’s that moment — the calm before the flurry of summer celebrations — when I reach for my recipe for Perfect Red Velvet Flag Brownies with White Chocolate Stars. You know, those simple, quiet rituals that feel like a small act of care before a busy day of friends, laughter, and fireworks. This recipe isn’t flashy or rushed; it’s the kind of dessert that asks for a little time, a little focus, and rewards you with something nostalgic, sweet, and a little bit special.
There’s a softness to red velvet that feels like summer itself — velvet smooth and just a touch indulgent — while the white chocolate stars add a delicate crunch and a whimsical nod to the flag I remember from childhood cookouts. I stumbled upon this recipe years ago during a Fourth of July picnic, where the brownies disappeared so fast that I had to promise myself I’d master them. Over time, it became less about impressing guests and more about the quiet satisfaction of making something that feels like the holiday — bright, homey, and thoughtfully crafted.
For me, these red velvet flag brownies aren’t just a dessert; they’re that subtle, comforting pause in the middle of summer’s chaos. The kind of treat that feels like a personal celebration in itself, a moment to savor before the fireworks start. And honestly, once you make them, you’ll understand why they’ve stuck around in my kitchen — and maybe your heart — for good.
Why You’ll Love This Recipe
What makes these Perfect Red Velvet Flag Brownies with White Chocolate Stars stand out isn’t just their patriotic charm, but how they come together with ease and deliver that classic red velvet flavor with a fun, festive twist. I’ve tested this recipe through multiple summer gatherings and quiet evenings, and here’s why it’s become a favorite:
- Quick & Easy: The batter comes together in under 20 minutes, making it perfect when you need a last-minute dessert for a summer party or picnic.
- Simple Ingredients: You likely have everything on hand — no need for fancy or hard-to-find items. Pantry staples like cocoa powder, white chocolate chips, and a touch of buttermilk do all the work.
- Perfect for Patriotic Occasions: Whether it’s Fourth of July, Memorial Day, or just a sunny summer weekend, these flag brownies bring the right amount of festive spirit without being over the top.
- Crowd-Pleaser: Kids love the bright red color and white chocolate stars, while adults appreciate the moist texture and subtle cocoa flavor. They always vanish fast!
- Unbelievably Delicious: The combination of tender, fudgy red velvet with the creamy crunch of white chocolate stars is truly a match made in dessert heaven.
This recipe isn’t your average red velvet brownie. The secret lies in balancing the cocoa and buttermilk just right, achieving that unmistakable tang and richness without being too sweet. Plus, the white chocolate stars aren’t just decoration — they add texture and a little pop of flavor that makes every bite interesting. I’ve tried other versions, but this one always feels like the perfect harmony.
It’s also a recipe that feels approachable but special. You don’t need to be a pro baker to make these look and taste amazing — that’s part of the charm. Honestly, there’s just something quietly satisfying about laying out those white chocolate stars in neat rows, knowing you’re about to share a little edible flag with the people you care about.
What Ingredients You Will Need
This recipe uses simple, wholesome ingredients to deliver bold flavor and satisfying texture without the fuss. Most of these are pantry staples, and if you want to make small swaps, I’ve got you covered below.
- For the Red Velvet Brownie Batter:
- All-purpose flour (1 ½ cups / 190 grams) – I prefer unbleached for better texture
- Unsweetened cocoa powder (¼ cup / 25 grams) – Dutch-processed works best for that deep color
- Baking powder (1 teaspoon)
- Salt (½ teaspoon)
- Granulated sugar (1 cup / 200 grams)
- Unsalted butter (½ cup / 115 grams), melted and slightly cooled (adds richness)
- Large eggs (2), room temperature
- Buttermilk (½ cup / 120 milliliters), room temperature – this brings the tangy flavor that makes red velvet special
- Vanilla extract (1 teaspoon)
- Red food coloring (2 tablespoons) – I use gel for vivid color without thinning the batter
- For the White Chocolate Stars:
- White chocolate chips (¾ cup / 130 grams) or chopped white chocolate – I like Ghirardelli for smooth melting
- Optional: A small pinch of powdered sugar to dust stars if you want a little extra sparkle
Substitution notes: Use almond flour or gluten-free flour blend for a gluten-free option, but expect a slightly different texture. Swap buttermilk with plain yogurt thinned with milk if needed. For dairy-free, try coconut oil instead of butter and a plant-based milk with a splash of vinegar for tang.
In summer, if you want to add a little extra flair, serve alongside fresh berries or layer with a dollop of whipped cream. I’ve also paired these brownies with the Fresh Red, White, and Blue Fruit Pizza for a fully themed dessert table that’s a hit every time.
Equipment Needed
- 9×9 inch (23×23 cm) square baking pan – a metal pan gives a nice crust, but glass works too
- Mixing bowls – one large for dry ingredients, another for wet
- Electric mixer or sturdy whisk – to combine wet ingredients thoroughly
- Rubber spatula – perfect for folding and scraping the batter cleanly
- Measuring cups and spoons – accuracy matters for baking
- Cooling rack – to cool brownies evenly without sogginess
- Star-shaped cookie cutter or small silicone mold (optional) – if you want perfectly shaped white chocolate stars; otherwise, simple dollops of white chocolate chips work fine
Personally, I’ve found that a silicone spatula is best for folding in the cocoa and red food coloring without losing volume. If you don’t have a star-shaped cutter, no worries — just scatter white chocolate chips to mimic stars. I once forgot my star cutter and improvised with a toothpick to dot stars on the melted white chocolate — not perfect, but it worked! For budget-friendly options, check thrift stores for pans or use what you have in the kitchen; this recipe is forgiving.
Preparation Method
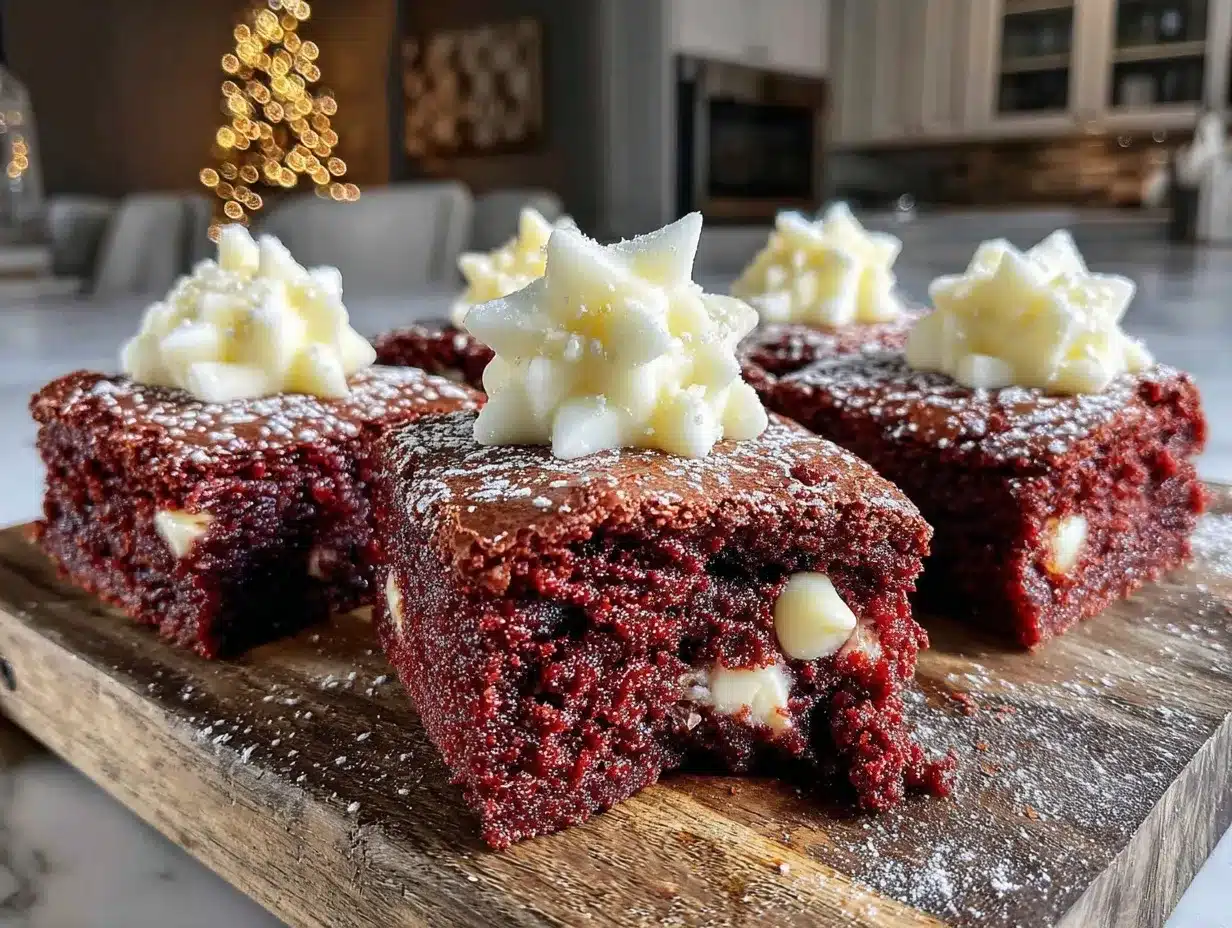
- Preheat your oven to 350°F (175°C). Grease your 9×9 inch pan or line it with parchment paper, leaving an overhang for easy removal. This step ensures your brownies don’t stick and come out cleanly.
- Mix the dry ingredients: In a large bowl, sift together the flour, cocoa powder, baking powder, and salt. Sifting helps avoid lumps and evenly distributes the cocoa and leavening, which is key for that tender crumb.
- Combine the wet ingredients: In another bowl, whisk the melted butter and sugar until just combined. Add the eggs one at a time, whisking well after each. Then stir in the buttermilk, vanilla extract, and red food coloring. The batter will look bright and glossy — a good sign!
- Fold wet into dry: Pour the wet mixture into the dry ingredients and gently fold with a spatula until just combined. Don’t overmix — you want a few streaks of flour to disappear but keep the batter light. Overmixing can make brownies tough.
- Pour and smooth: Transfer the batter into your prepared pan and smooth the top with the spatula. This helps the brownies bake evenly and look neat for decorating.
- Bake: Place in the oven and bake for 25–30 minutes. Start checking at 25 minutes by inserting a toothpick in the center — it should come out with a few moist crumbs but not wet batter. If overbaked, the brownies will dry out.
- Cool completely: Remove from oven and let the brownies cool in the pan on a wire rack for at least 30 minutes. Cooling is crucial before adding the white chocolate stars, so they don’t melt or slide off.
- Create white chocolate stars: Melt the white chocolate chips gently in a double boiler or microwave in 20-second bursts, stirring often. If using a star-shaped cutter, pour a thin layer on parchment, chill until firm, then cut out stars. Alternatively, pipe small star shapes or scatter chips on top of the cooled brownies for a rustic look.
- Decorate: Arrange the white chocolate stars on the top of the cooled brownies to resemble the flag’s stars section. You can lightly press them in or let them sit on top. Dust with powdered sugar if you want a little sparkle.
- Serve: Slice into squares, wipe your knife between cuts for clean edges, and enjoy!
Pro tip: To speed up cooling, place the pan on a wire rack away from direct drafts. Also, if your white chocolate thickens while melting, stir in a teaspoon of vegetable oil to smooth it out. I’ve learned that patience with cooling and decorating makes the difference between a crumbly mess and a neat patriotic treat.
Cooking Tips & Techniques
Red velvet brownies can be a little tricky because you want that perfect balance of moistness and crumb without the texture turning cakey or dry. Here’s what I’ve learned over several batches:
- Use room temperature eggs and buttermilk: This helps the batter emulsify better, creating a smooth texture.
- Don’t skip sifting the dry ingredients: Cocoa powder especially tends to clump, and lumps can ruin the evenness of the batter.
- Be gentle when folding: Overmixing activates gluten, which makes brownies tough. Fold just until combined.
- Watch baking time carefully: Ovens vary, so start checking a few minutes early. The toothpick test is your best friend here.
- For the white chocolate stars: Melt slowly over low heat to avoid scorching. If you want perfectly shaped stars, chilling the chocolate layer before cutting is key.
- Let brownies cool completely: Adding decorations too soon will cause melting and smudging.
One time I baked these and got distracted, pulling them out too early — the middle was gooey, and the top cracked in a way that looked more like a desert than a flag. Learned my lesson! Now, timing and patience are my allies. Also, if you want a more intense red color, gel food coloring is a game changer. Liquid can thin the batter and affect texture.
Multitasking tip: While brownies bake, I usually prep a quick savory like honey bourbon baked beans or assemble fresh appetizers like Caprese skewers. Keeps the kitchen buzzing and the party ready!
Variations & Adaptations
While the classic red velvet and white chocolate star combo is a winner, I’ve played around with these brownies to suit different tastes and occasions:
- Dietary Variation: Use almond flour or gluten-free flour blends with a bit more baking powder for a gluten-free treat. Swap butter for coconut oil and use dairy-free yogurt instead of buttermilk for a dairy-free version.
- Flavor Twist: Add a teaspoon of espresso powder to the batter to deepen the chocolate flavor without making it taste like coffee. Or swirl in a cream cheese layer for a richer, tangy contrast.
- Seasonal Adaptation: In summer, sprinkle fresh blueberries or raspberries along with the white chocolate stars for a burst of freshness. In cooler months, top with chopped pecans or toasted coconut for texture.
- Cooking Method: These brownies also work well baked in mini muffin tins for bite-sized treats — reduce baking time to about 15-18 minutes. Great for parties where finger food reigns.
- Personal Variation: Once, I tried adding a thin layer of homemade cherry jam between two layers of the batter for a surprise center. It was messy but delicious — a fun way to add a little extra fruitiness.
Serving & Storage Suggestions
Serve these Perfect Red Velvet Flag Brownies at room temperature for the best texture and flavor. The white chocolate stars hold their shape nicely when the brownies are fully cooled, making for a beautiful presentation. I like to plate them alongside fresh fruit or a simple scoop of vanilla ice cream if it’s an evening treat.
They pair wonderfully with chilled lemonade or iced tea, keeping the patriotic vibe light and fresh. For summer barbecues, they hold their own against savory mains like BBQ pulled pork sliders or a crisp garden salad.
To store, wrap brownies tightly in plastic wrap or keep in an airtight container at room temperature for up to 3 days. For longer life, refrigerate up to a week or freeze for 2-3 months. When freezing, separate layers with parchment paper so stars don’t stick together.
Reheat refrigerated brownies briefly in the microwave (10-15 seconds) to soften the texture without melting the stars. Over time, the flavors meld, and the red velvet taste deepens — I often find they taste even better the next day.
Nutritional Information & Benefits
Each serving of these Perfect Red Velvet Flag Brownies with White Chocolate Stars offers a comforting treat with moderate sweetness and a satisfying texture. Here’s an approximate breakdown per 2-inch square piece:
| Calories | 220 |
|---|---|
| Fat | 12g (mostly from butter and white chocolate) |
| Carbohydrates | 27g |
| Protein | 3g |
| Sugar | 18g |
The key ingredients like cocoa powder provide antioxidants, and buttermilk adds a touch of calcium and protein. While these brownies aren’t low-calorie, they’re a reasonable indulgence when enjoyed in moderation. For those watching gluten, swapping in gluten-free flour blends makes this a safe option. Note that the recipe contains dairy and eggs, so it’s not suitable for vegans or those with dairy allergies without modifications.
From a personal wellness perspective, I appreciate recipes like this that bring joy and connection without complicated ingredients or fuss. Good food is about balance, you know? Sometimes that means a sweet treat that feels like a little celebration.
Conclusion
These Perfect Red Velvet Flag Brownies with White Chocolate Stars have quietly become one of my go-to patriotic desserts. They’re straightforward enough for a casual cook but special enough to bring a little wow to the table. Whether you’re marking the Fourth of July or just craving a red velvet fix, this recipe hits the spot with its tender crumb, vibrant color, and charming white chocolate star detail.
Feel free to adjust the sweetness, add your own twists, or pair them with other favorites like creamy buffalo chicken dip for a full party spread. Honestly, these brownies have a way of making any gathering feel a little more thoughtful — and that’s what keeps me coming back to them year after year.
So go ahead, give this recipe a try, and let the simple ritual of baking these red velvet flag brownies become a small, sweet tradition in your kitchen too.
FAQs
Can I make these brownies ahead of time?
Yes! These brownies actually taste better after a day or two when the flavors have melded. Store them in an airtight container at room temperature for up to 3 days or refrigerate for a week.
What can I use instead of white chocolate stars if I don’t have a star cutter?
No star cutter? No problem. You can scatter white chocolate chips or pipe small star shapes using melted white chocolate and a toothpick for a rustic look.
Is it possible to make these brownies gluten-free?
Absolutely. Substitute the all-purpose flour with a gluten-free flour blend. You might want to add a little extra baking powder to help with rise, but the texture will still be delicious.
How do I prevent the red velvet brownies from drying out?
Be careful not to overbake. Start checking at 25 minutes and use the toothpick test — it should come out with moist crumbs, not wet batter. Also, don’t overmix the batter to keep it tender.
Can I use regular cocoa powder instead of Dutch-processed?
You can, but Dutch-processed cocoa gives a smoother, less bitter flavor and richer red color. If using natural cocoa, add a pinch of baking soda to balance acidity and help with leavening.
Pin This Recipe!

Perfect Red Velvet Flag Brownies with White Chocolate Stars
These red velvet flag brownies combine a tender, fudgy texture with festive white chocolate stars, perfect for patriotic celebrations like the Fourth of July. The recipe is easy to make with simple pantry ingredients and delivers a nostalgic, sweet treat.
- Prep Time: 15 minutes
- Cook Time: 25-30 minutes
- Total Time: 45 minutes
- Yield: 16 servings 1x
- Category: Dessert
- Cuisine: American
Ingredients
- 1 ½ cups (190 grams) all-purpose flour (unbleached preferred)
- ¼ cup (25 grams) unsweetened cocoa powder (Dutch-processed preferred)
- 1 teaspoon baking powder
- ½ teaspoon salt
- 1 cup (200 grams) granulated sugar
- ½ cup (115 grams) unsalted butter, melted and slightly cooled
- 2 large eggs, room temperature
- ½ cup (120 milliliters) buttermilk, room temperature
- 1 teaspoon vanilla extract
- 2 tablespoons red food coloring (gel preferred)
- ¾ cup (130 grams) white chocolate chips or chopped white chocolate
- Optional: small pinch of powdered sugar for dusting
Instructions
- Preheat your oven to 350°F (175°C). Grease a 9×9 inch (23×23 cm) square baking pan or line it with parchment paper, leaving an overhang for easy removal.
- In a large bowl, sift together the flour, cocoa powder, baking powder, and salt to avoid lumps and evenly distribute ingredients.
- In another bowl, whisk the melted butter and sugar until just combined. Add the eggs one at a time, whisking well after each addition.
- Stir in the buttermilk, vanilla extract, and red food coloring until the batter looks bright and glossy.
- Pour the wet mixture into the dry ingredients and gently fold with a spatula until just combined. Avoid overmixing to keep the batter light.
- Transfer the batter into the prepared pan and smooth the top with a spatula.
- Bake for 25–30 minutes, starting to check at 25 minutes by inserting a toothpick in the center. It should come out with a few moist crumbs but no wet batter.
- Remove from oven and let the brownies cool completely in the pan on a wire rack for at least 30 minutes.
- Melt the white chocolate chips gently in a double boiler or microwave in 20-second bursts, stirring often.
- If using a star-shaped cutter, pour a thin layer of melted white chocolate on parchment, chill until firm, then cut out stars. Alternatively, pipe small star shapes or scatter chips on top of the cooled brownies.
- Arrange the white chocolate stars on top of the cooled brownies to resemble the flag’s stars section. Lightly press them in or let them sit on top. Dust with powdered sugar if desired.
- Slice into squares, wiping your knife between cuts for clean edges, and serve.
Notes
Use room temperature eggs and buttermilk for better batter emulsification. Sift dry ingredients to avoid lumps. Fold batter gently to prevent toughness. Start checking brownies at 25 minutes to avoid drying out. Melt white chocolate slowly to prevent scorching. Cool brownies completely before decorating to avoid melting stars. Gel food coloring is preferred for vivid color without thinning batter. For gluten-free, substitute flour with gluten-free blend and add extra baking powder. Dairy-free options include coconut oil and plant-based milk with vinegar.
Nutrition
- Serving Size: 1 piece (2-inch squa
- Calories: 220
- Sugar: 18
- Fat: 12
- Carbohydrates: 27
- Protein: 3
Keywords: red velvet brownies, patriotic dessert, Fourth of July dessert, white chocolate stars, easy brownies, summer dessert, flag brownies


