“You’ve got dessert on the brain, but honestly, the last thing you want is to turn on the oven in this heat.” That was me last Saturday afternoon, swiping through my phone while the kitchen felt like a sauna. I needed something cool, simple, and no-fuss—but not the usual fruit salad or store-bought pudding. Then it hit me: why not whip up some Easy No-Bake Blueberry Cheesecake Cups? No baking, no mess of a big pan, and perfect portions that I could chill while binge-watching my favorite shows.
Funny thing is, I wasn’t sure if it would actually taste like cheesecake or just a sad attempt at one. But after the first spoonful, the creamy texture and fresh blueberry burst completely won me over. Since then, I’ve made these cups a handful of times—sometimes swapping the crust or adding a hint of lemon zest for a little zing. It’s become my go-to for those moments when I crave dessert but really don’t want to fuss.
Honestly, there’s just something comforting about a chilled cheesecake cup that feels like a little celebration in every bite. Whether you’re hosting a casual get-together or just sneaking a treat after dinner, this recipe sticks around in your mind as an easy win. No stress, no heat, just sweet, creamy bliss.
Why You’ll Love This Recipe
After testing several versions of no-bake treats, these Easy No-Bake Blueberry Cheesecake Cups stand out because they strike the perfect balance of flavor, texture, and simplicity. Here’s what makes them a keeper:
- Quick & Easy: Ready in under 20 minutes, they’re ideal for those lazy summer afternoons or last-minute dessert plans.
- Simple Ingredients: No complicated or obscure items—you probably have most of these in your pantry or fridge already.
- Perfect for Summer: Light, refreshing, and served chilled, these cheesecake cups are a breeze for picnics, BBQs, or casual family dinners.
- Crowd-Pleaser: Kids love the sweet blueberry topping, and adults appreciate the creamy, slightly tangy filling.
- Unbelievably Delicious: The creamy filling is smooth but light, with just enough sweetness and a fresh blueberry pop that feels like a mini indulgence.
What sets this recipe apart? It’s the no-bake method that keeps things fuss-free without sacrificing that classic cheesecake mouthfeel. The graham cracker crust is buttery but crumbly, and the blueberry topping is fresh or gently cooked to bring out natural sweetness. I like to add a tiny splash of vanilla extract to the filling for a subtle warmth that rounds out the flavor beautifully. This isn’t just another cheesecake cup—it’s a simple recipe that tastes thoughtful and homemade with minimal effort, which is exactly what summer dessert dreams are made of.
What Ingredients You Will Need
This recipe uses simple, wholesome ingredients to bring together bold flavor and creamy texture without any fuss. Most are pantry staples or easy to find fresh in summer markets.
- For the Crust:
- Graham cracker crumbs (1 1/2 cups / 150g) – I prefer using the classic honey-flavored ones for that nostalgic crunch.
- Unsalted butter (6 tbsp / 85g), melted – adds richness and helps bind the crumbs nicely.
- Granulated sugar (2 tbsp) – balances the butter’s richness with a touch of sweetness.
- For the Cheesecake Filling:
- Cream cheese (8 oz / 225g), softened – room temperature is key for smooth blending.
- Powdered sugar (1 cup / 120g) – for that delicate sweetness that dissolves perfectly.
- Heavy cream (1 cup / 240ml), chilled – whipped until soft peaks for airy texture.
- Vanilla extract (1 tsp) – a little warmth that makes the filling feel homemade.
- Fresh lemon juice (1 tbsp) – brightens and balances the cream cheese richness.
- For the Blueberry Topping:
- Fresh blueberries (1 1/2 cups / 225g) – the star here, choose firm and ripe for best flavor.
- Honey or maple syrup (2 tbsp) – gently sweetens the berries without overpowering.
- Fresh lemon zest (optional, 1 tsp) – adds a subtle citrus twist I love.
You can swap the graham cracker crumbs with crushed digestive biscuits if you prefer, or use a gluten-free cracker for a gluten-free crust. For a lighter version, swap heavy cream with coconut cream or Greek yogurt (though the texture will change slightly). When choosing cream cheese, brands like Philadelphia offer consistent smoothness, but I’ve had good results with local dairy brands, too.
Equipment Needed
- Mixing bowls – one large for the filling, one medium for the crust.
- Electric mixer or stand mixer – for whipping the cream and blending the cream cheese smoothly. (A hand whisk can work, but it takes elbow grease!)
- Measuring cups and spoons – accuracy helps get the balance just right.
- Spatula – for folding the whipped cream into the cream cheese mixture gently.
- Individual serving cups or small jars – any clear glass or plastic cups work great for layering and presentation.
- Spoon or small ice cream scoop – to portion out filling evenly.
If you don’t have an electric mixer, I recommend chilling your mixing bowl and whisk in the freezer for 10 minutes before whipping cream by hand to get better volume. For budget-friendly versions, a sturdy fork and a bowl work for mixing the crust, though the texture won’t be as fine.
Preparation Method
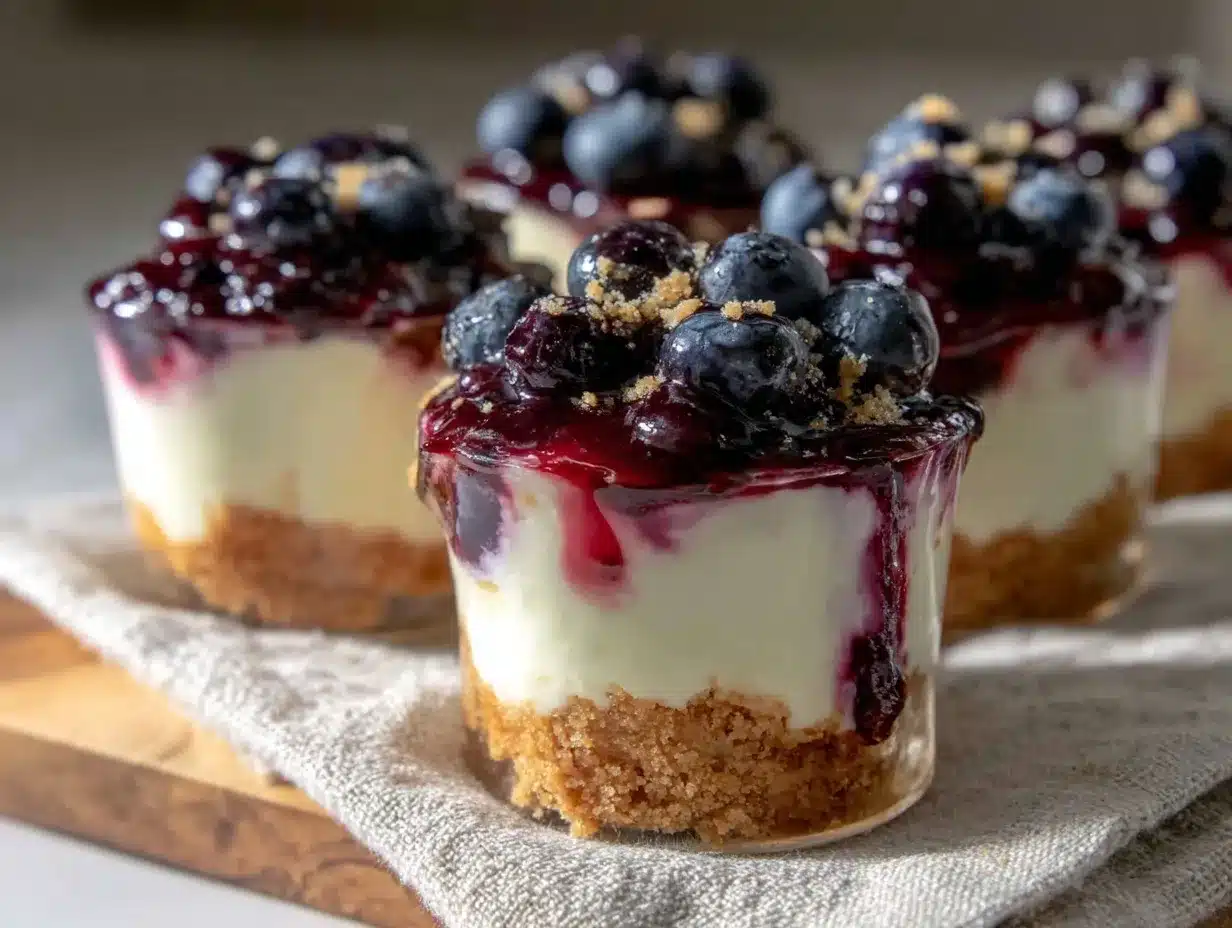
- Make the crust: In a medium bowl, combine 1 1/2 cups graham cracker crumbs, 2 tablespoons granulated sugar, and 6 tablespoons melted unsalted butter. Stir with a spoon until all crumbs are moistened and the mixture holds together when pressed. This should take about 3 minutes.
- Press crust into cups: Spoon about 2 tablespoons of crust mixture into each serving cup. Use the back of a spoon or your fingers to press down firmly and evenly, creating a solid base. Place the cups in the refrigerator to chill while preparing the filling (10 minutes minimum).
- Prepare the filling: In a large bowl, beat 8 oz softened cream cheese with 1 cup powdered sugar until smooth and creamy (about 2-3 minutes on medium speed). Add 1 teaspoon vanilla extract and 1 tablespoon fresh lemon juice, mixing just until combined.
- Whip the heavy cream: In a separate chilled bowl, whip 1 cup heavy cream until soft peaks form (about 3-4 minutes). Be careful not to overwhip—it should be fluffy but not grainy.
- Fold whipped cream into cream cheese: Gently fold the whipped cream into the cream cheese mixture using a spatula. Fold slowly to keep the airy texture, stopping when no white streaks remain. This step is key for that light, creamy mouthfeel.
- Assemble the cups: Spoon or scoop the cheesecake filling evenly over the chilled crust in each cup, filling to about ¾ full. Smooth the tops gently with the back of a spoon.
- Prepare the blueberry topping: In a small bowl, toss fresh blueberries with 2 tablespoons honey (or maple syrup) and optional 1 teaspoon lemon zest. Let sit for 5 minutes to macerate, drawing out natural juices.
- Add blueberry topping: Spoon a generous layer of the blueberry mixture over each cheesecake cup. The juices will mingle with the creamy filling and crust—pure bliss.
- Chill before serving: Refrigerate the assembled cups for at least 2 hours, ideally 4, to let the flavors meld and the filling set up firmly. Overnight works great if you want to prep ahead.
Pro tip: If the crust feels too crumbly after chilling, press it down again gently before adding the filling. Also, if your cream cheese is too cold and lumpy, let it sit a few more minutes at room temperature to avoid a grainy filling.
Cooking Tips & Techniques
Making no-bake desserts like these cheesecake cups can seem straightforward, but a few tips make the difference between “meh” and “wow.”
- Softened cream cheese is key. If it’s too cold, you’ll get lumps—soften by leaving it out 30 minutes or microwaving in 10-second bursts.
- Whip the cream just right. Soft peaks give the filling lift; overwhipping means it can separate and become grainy.
- Folding is gentle work. Fold the whipped cream into the cream cheese mix slowly with a spatula to keep the airiness intact.
- Press the crust firmly. No one wants a crumbly mess; a tight crust base is the foundation of texture here.
- Chill time matters. Even though it’s no-bake, the fridge sets the filling and lets flavors marry—don’t rush it.
Once, I forgot to chill the crust and filling properly and ended up with cups that slumped when scooped. Lesson learned: patience pays off. Also, when adding the blueberry topping, balance sweet and tart well—sometimes fresh berries need a little extra drizzle of honey depending on ripeness.
If you want to multitask, start by prepping the crust while the cream cheese softens, then whip the cream and assemble; it saves a bit of time. For a little extra flair, a sprinkle of toasted coconut or chopped pistachios on top adds crunch and color.
Variations & Adaptations
These Easy No-Bake Blueberry Cheesecake Cups are versatile and welcome tweaks for different tastes or dietary needs:
- Fruit swaps: Replace blueberries with fresh strawberries, raspberries, or a mixed berry combo for seasonal variety.
- Gluten-free crust: Use almond flour or gluten-free cookie crumbs instead of graham crackers. I’ve tried crushed gluten-free vanilla wafers with great results.
- Dairy-free option: Swap cream cheese and heavy cream with coconut cream and a dairy-free cream cheese alternative. The texture shifts a bit but still delicious.
- Flavor twists: Add lemon or orange zest to the crust or filling for a citrusy lift. A dash of cinnamon or nutmeg in the crust can add warmth.
Personally, I made a batch using a baked oats crust once—crumbled and toasted it lightly for an oat-forward crunch that paired surprisingly well with the creamy filling. It’s a fun spin if you want to experiment!
Serving & Storage Suggestions
Serve these cheesecake cups chilled straight from the fridge for the best creamy texture. They look beautiful in clear cups or small mason jars, especially when layered neatly with the crust and blueberry topping.
Pair with a cup of iced tea or sparkling lemonade for a refreshing summer treat. They also make a lovely light finish after a hearty meal like a King Ranch chicken casserole.
Store leftovers covered tightly in the refrigerator for up to 3 days. If you want to make them ahead, assembling the crust and filling a day before and adding the blueberry topping the day of serving keeps everything fresh. Avoid freezing as the texture may become grainy upon thawing.
Reheat is not recommended—these are best enjoyed cold. Over time, the flavors meld nicely, and the crust softens just enough to complement the creamy filling without losing its crumbly character.
Nutritional Information & Benefits
Each Easy No-Bake Blueberry Cheesecake Cup provides a satisfying treat with roughly 250-300 calories, depending on portion size and exact ingredients used. The cream cheese and heavy cream provide protein and calcium, while blueberries add antioxidants and vitamin C.
This dessert fits well into balanced diets and can be adapted to gluten-free or dairy-free needs with simple swaps. While indulgent, the portion-controlled cups help keep serving sizes reasonable, making it easier to enjoy a sweet treat without overdoing it.
From a wellness perspective, including real fruit and minimizing refined sugars (using honey or maple syrup) feels like a small win. It’s dessert that doesn’t feel like a total splurge, which is nice on those days when you want something sweet but still a bit wholesome.
Conclusion
Easy No-Bake Blueberry Cheesecake Cups are a simple, delicious dessert that fits perfectly into warm-weather menus and last-minute plans. They bring a fresh, creamy burst of flavor without any oven time or stress, making them a reliable favorite in my kitchen.
Feel free to adjust the crust, topping, or sweetness to suit your taste or dietary needs—this recipe is forgiving and happy to be personalized. I love how these cups feel both fancy enough to serve guests and easy enough for a quiet night treat.
If you try them, I’d love to hear how you customize your cups or what flavors you add! Sharing recipes and twists is part of the fun. Here’s to cool, creamy desserts that make summer a little sweeter.
FAQs About Easy No-Bake Blueberry Cheesecake Cups
Can I make these cheesecake cups ahead of time?
Yes! You can prepare the crust and filling up to 24 hours in advance. Add the blueberry topping just before serving for the freshest taste.
What can I use instead of graham cracker crumbs for the crust?
Digestive biscuits, crushed vanilla wafers, or gluten-free cookie crumbs all work well. You can also try crushed nuts or oats for a different texture.
Is it necessary to whip the cream separately?
Yes, whipping the cream separately and folding it in creates a light, airy filling that mimics traditional cheesecake texture without baking.
Can I substitute frozen blueberries for fresh ones?
Frozen blueberries can be used but thaw and drain them well to avoid excess liquid that could make the topping runny.
How long do these cheesecake cups keep in the fridge?
They keep well for 2-3 days in an airtight container. After that, the crust may soften too much and the filling texture can change.
Pin This Recipe!
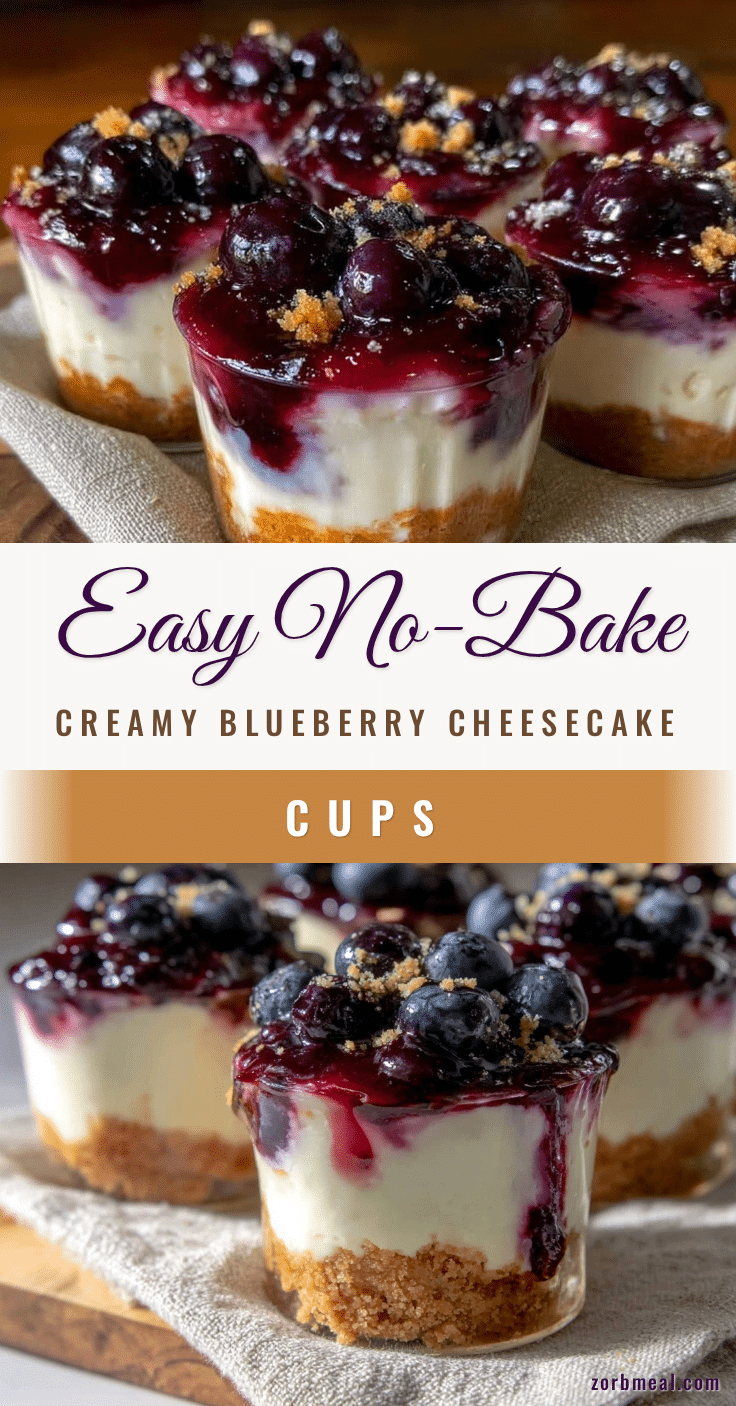
Easy No-Bake Blueberry Cheesecake Cups
A simple, no-bake dessert featuring creamy cheesecake filling, a buttery graham cracker crust, and fresh blueberry topping. Perfect for summer and ready in under 20 minutes.
- Prep Time: 15 minutes
- Cook Time: 0 minutes
- Total Time: 2 hours 15 minutes
- Yield: 6 servings 1x
- Category: Dessert
- Cuisine: American
Ingredients
- 1 1/2 cups graham cracker crumbs (150g)
- 6 tablespoons unsalted butter, melted (85g)
- 2 tablespoons granulated sugar
- 8 oz cream cheese, softened (225g)
- 1 cup powdered sugar (120g)
- 1 cup heavy cream, chilled (240ml)
- 1 teaspoon vanilla extract
- 1 tablespoon fresh lemon juice
- 1 1/2 cups fresh blueberries (225g)
- 2 tablespoons honey or maple syrup
- 1 teaspoon fresh lemon zest (optional)
Instructions
- In a medium bowl, combine graham cracker crumbs, granulated sugar, and melted unsalted butter. Stir until crumbs are moistened and mixture holds together when pressed, about 3 minutes.
- Spoon about 2 tablespoons of crust mixture into each serving cup. Press down firmly and evenly to create a solid base. Refrigerate cups for at least 10 minutes.
- In a large bowl, beat softened cream cheese with powdered sugar until smooth and creamy, about 2-3 minutes on medium speed. Add vanilla extract and fresh lemon juice, mixing until combined.
- In a separate chilled bowl, whip heavy cream until soft peaks form, about 3-4 minutes. Avoid overwhipping.
- Gently fold whipped cream into cream cheese mixture using a spatula until no white streaks remain.
- Spoon or scoop cheesecake filling evenly over chilled crust in each cup, filling about 3/4 full. Smooth tops gently.
- In a small bowl, toss fresh blueberries with honey or maple syrup and optional lemon zest. Let sit for 5 minutes to macerate.
- Spoon blueberry topping over each cheesecake cup.
- Refrigerate assembled cups for at least 2 hours, ideally 4 hours or overnight, to let flavors meld and filling set.
Notes
Softened cream cheese is key to avoid lumps. Whip cream to soft peaks only to maintain airy texture. Press crust firmly to avoid crumbly base. Chill assembled cups for at least 2 hours for best texture. Can substitute crust with gluten-free or dairy-free options. Add lemon zest or toasted nuts for flavor variations.
Nutrition
- Serving Size: 1 cheesecake cup
- Calories: 275
- Sugar: 14
- Sodium: 150
- Fat: 20
- Saturated Fat: 12
- Carbohydrates: 18
- Fiber: 1
- Protein: 4
Keywords: no-bake cheesecake, blueberry dessert, summer dessert, easy cheesecake cups, no oven dessert, creamy cheesecake, blueberry topping


