“You sure you want those tiny sliders?” my friend teased over the phone as I nervously prepared for a last-minute game night. Honestly, I wasn’t expecting much myself. It started as a rushed plan—grab something easy, quick, and filling. But that night, those little cheeseburger sliders with caramelized onions turned into the star of the evening. The smell alone—sweet onions slowly melting into golden-brown perfection, mingling with juicy, perfectly seasoned beef—had everyone hovering near the kitchen counter, waiting for their turn.
At first, I was skeptical about making sliders instead of full-sized burgers. Would they satisfy? Would the caramelized onions really shine in such small bites? Turns out, the balance was just right. The buns were soft yet sturdy, the cheese melted just enough to envelope the savory patties, and those onions? They added a depth that made every bite feel like a little celebration. I must have made this recipe three times that week—each time tweaking the seasoning or cheese, but never straying far from the original magic.
Sometimes, the best recipes come from those chaotic nights when you just need something that works—and works well. These sliders stuck with me because they’re easy, flavorful, and a bit nostalgic, reminding me that even simple meals can feel special. Now, whenever I hear friends planning a casual get-together, I suggest these sliders without hesitation. They’re just that good.
Why You’ll Love This Ultimate Cheeseburger Sliders Recipe
Honestly, this recipe has become my go-to for when I want something hearty but fuss-free. After testing it multiple times, here’s what I’ve learned makes it stand out:
- Quick & Easy: You can have these sliders on the table in about 30 minutes, making them perfect for busy weeknights or unexpected guests.
- Simple Ingredients: No need for exotic shopping trips. Most items are pantry staples or easy to find in any grocery store.
- Perfect for Parties: These sliders are a hit at game nights, casual dinners, and even holiday gatherings.
- Crowd-Pleaser: The combination of juicy beef, melted cheese, and sweet caramelized onions always wins over kids and adults alike.
- Unbelievably Delicious: The caramelized onions bring a rich sweetness that balances the savory burger flavor, making these sliders addictive.
What really sets this recipe apart is the technique behind the onions. Slowly caramelizing them in butter until golden and tender brings out a flavor depth you don’t get with raw or quickly sautéed onions. Plus, using a blend of sharp cheddar and American cheese keeps the texture creamy without overpowering the beef.
This isn’t just another slider recipe; it’s the kind of dish that makes you pause mid-bite, savoring the perfect blend of flavors. It’s comfort food without the guilt, quick enough for a weeknight, but special enough to impress anyone at your table. If you want a taste experience that’s familiar yet thoughtfully crafted, this recipe’s where it’s at.
What Ingredients You Will Need
This recipe uses straightforward, wholesome ingredients that come together to create big flavor without any fuss. The caramelized onions add a sweet, rich contrast to the savory beef, and the cheese melts just right to bind it all together. Most ingredients are staples, but I’ve included tips for selecting the best quality to make your sliders shine.
- For the Sliders:
- 1 lb (450 g) ground beef, preferably 80/20 for juicy patties
- Salt and freshly ground black pepper, to taste
- 1 tsp garlic powder (optional, adds subtle depth)
- 8 slider buns, soft but sturdy (I like King’s Hawaiian for that sweet contrast)
- 4 slices sharp cheddar cheese, halved for topping
- 4 slices American cheese, halved (for extra creaminess)
- For the Caramelized Onions:
- 2 large yellow onions, thinly sliced (sweet varieties like Vidalia work great)
- 2 tbsp unsalted butter (adds richness)
- 1 tbsp olive oil (helps with even caramelization)
- 1 tsp brown sugar (optional, enhances sweetness)
- Pinch of salt
- Extras & Garnishes:
- Dill pickle slices (for tangy crunch)
- Yellow mustard or ketchup (classic condiments)
- Fresh lettuce or baby spinach leaves (adds a fresh bite)
If you want to swap things up, you can try ground turkey or chicken for a lighter option, but I prefer beef for that classic cheeseburger flavor. Also, if you’re gluten-free, look for slider buns made from almond or coconut flour to keep things safe without missing out.
Equipment Needed
- Large skillet or frying pan – a heavy-bottomed pan works best for even cooking and caramelizing onions evenly.
- Spatula – for flipping patties and stirring onions gently.
- Sharp knife and cutting board – for slicing onions thinly.
- Mixing bowl – to season and mix the ground beef gently.
- Baking sheet or oven-safe dish – if you want to melt the cheese on the sliders in the oven (optional but recommended).
I usually use a cast iron skillet for caramelizing onions because it holds heat well and gives that nice even browning. If you don’t have one, a non-stick pan works fine, just keep an eye on the onions so they don’t scorch. For budget-friendly options, a simple stainless steel pan will do the trick.
Preparation Method
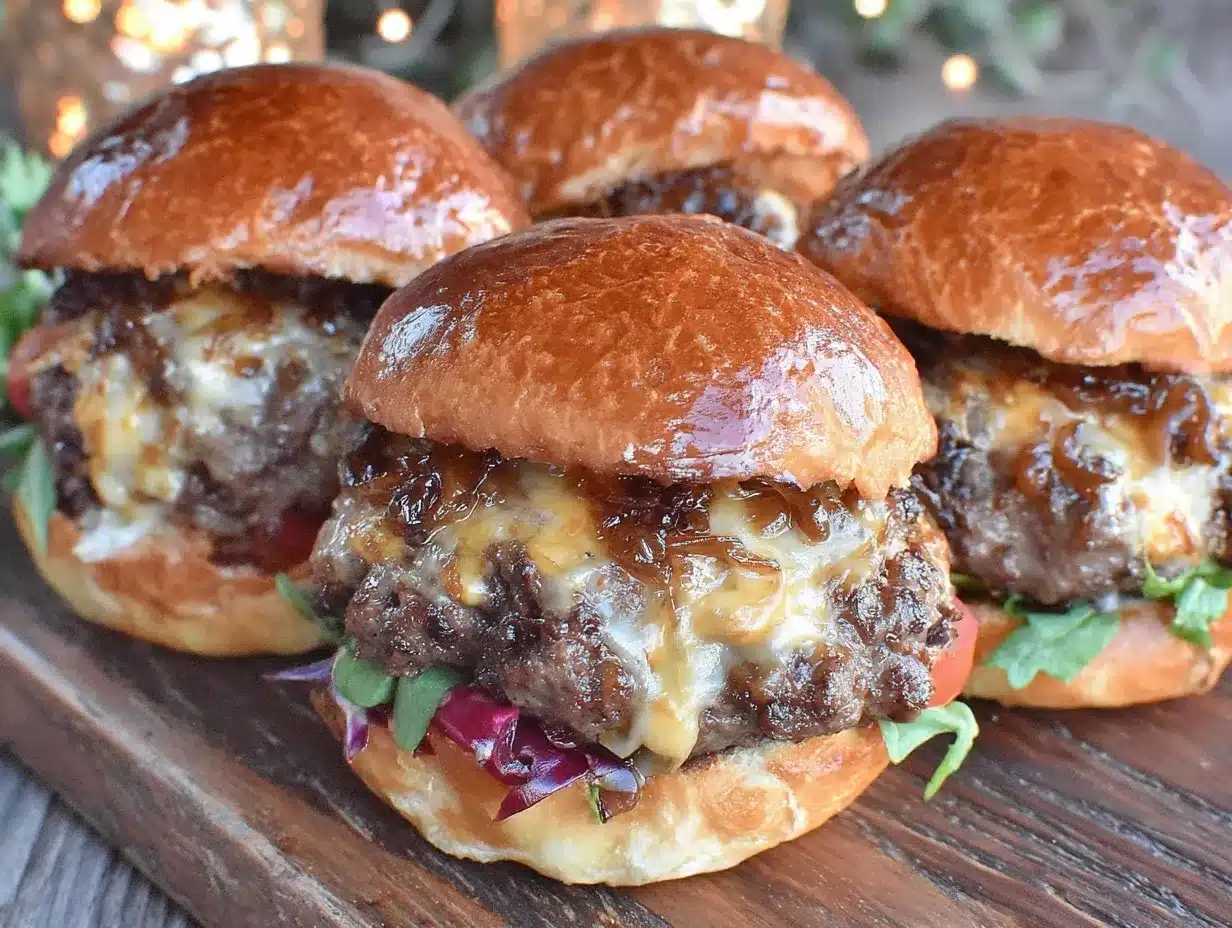
- Prepare the caramelized onions: Heat the butter and olive oil in a large skillet over medium-low heat. Add the sliced onions and a pinch of salt. Stir occasionally, letting them cook slowly for 25-30 minutes until they’re soft, golden, and sweetly fragrant. About halfway through, sprinkle the brown sugar to help with caramelization. Keep the heat low enough to avoid burning but high enough to brown gently.
- Season and form the patties: In a mixing bowl, combine the ground beef with salt, pepper, and garlic powder. Mix gently — don’t overwork the meat or your sliders will be tough. Form 8 small patties, about 2-3 inches in diameter, slightly larger than your slider buns since they’ll shrink during cooking.
- Cook the patties: Heat a skillet over medium-high heat. Add the patties and cook for about 3-4 minutes per side for medium doneness, or adjust to your preferred level. Just before finishing, place half slices of cheddar and American cheese on each patty, cover with a lid or foil briefly to melt.
- Toast the buns: Lightly butter the slider buns and toast them in a clean pan or under a broiler until golden and slightly crispy. This helps prevent sogginess from the juicy patties and onions.
- Assemble the sliders: Spread mustard or ketchup on the buns if you like. Add the cheesy patty, a generous spoonful of caramelized onions, pickles, and fresh lettuce. Top with the bun and get ready to enjoy.
Pro tip: When caramelizing onions, patience is key. Rushing the process will give you bitter, burnt bits instead of that sweet, luscious flavor. Also, don’t press down on the patties while cooking — it squeezes out the juices and dries them out. Let them cook undisturbed for a nice crust.
Cooking Tips & Techniques for Perfect Sliders
From my many attempts, here are some tips that saved me frustration:
- Don’t overmix your ground beef: Handling it too much makes dense, chewy patties. Mix just until combined.
- Use a combination of cheeses: The sharp cheddar gives flavor punch, while American cheese melts beautifully for that classic gooey texture.
- Caramelize onions slowly: Low and slow is the mantra. If you crank the heat, they’ll burn before they soften.
- Toast buns well: I learned the hard way that untoasted buns soak up juices and fall apart quickly.
- Multitask: Start caramelizing onions first; while they cook, prep patties and buns. It saves time and keeps everything warm.
- Rest patties briefly: Let cooked patties rest 2-3 minutes before assembling. Juices redistribute, making each bite juicy.
Honestly, when I first tried the caramelized onions, I thought it might overpower the sliders—but it perfectly balanced the savory beef and melty cheese. If you’re curious about other easy weeknight meals that bring big flavor, you might enjoy my Mediterranean stuffed chicken breast or quick creamy coconut curry shrimp recipes.
Variations & Adaptations to Suit Your Taste
One of the best things about this slider recipe is how easy it is to tweak:
- Vegetarian option: Swap beef for seasoned black bean patties or plant-based ground meat alternatives. Top with caramelized onions and cheese substitutes like vegan cheddar.
- Spicy kick: Add diced jalapeños into the beef mix or spread chipotle mayo on the buns for smoky heat.
- Different cheeses: Try Swiss or pepper jack for a flavor twist. Blue cheese crumbles on top add boldness for those who like strong flavors.
- Gluten-free buns: Use gluten-free slider buns or lettuce wraps to keep it light and allergen-friendly.
- Seasonal variations: In summer, toss in some fresh tomato slices and basil leaves. In winter, swap out lettuce for sautéed mushrooms or roasted red peppers.
Personally, I once swapped out cheddar for smoked gouda and added a dollop of tangy barbecue sauce. That combo got rave reviews at a casual backyard BBQ, pairing nicely with grilled sides like grilled chimichurri shrimp skewers. Feel free to get creative and make these sliders your own.
Serving & Storage Suggestions
These sliders shine best served fresh and warm right off the pan, but if you have leftovers, here’s how to keep the magic alive:
- Serving Temperature: Warm sliders maintain the melty cheese and juicy patties. If you must hold them for a bit, cover loosely with foil to trap heat without making buns soggy.
- Complementary Sides: Classic fries or sweet potato wedges are always winners. A crisp coleslaw or fresh cucumber salad offers a refreshing counterpoint.
- Storage: Store leftover sliders in an airtight container in the fridge for up to 2 days. Keep buns separate if possible to avoid sogginess.
- Reheating: Reheat covered in a 350°F (175°C) oven for about 10-12 minutes until warmed through and cheese is melty again. Avoid microwaving if you want to keep buns from turning chewy.
- Flavor Development: Leftover caramelized onions actually taste even richer the next day, so don’t hesitate to make extra!
Nutritional Information & Benefits
Each slider (with bun and toppings) clocks in around 250-300 calories, depending on cheese and condiments used. Here’s a quick look at what you’re getting:
- Protein: Ground beef is an excellent source of complete protein, helping keep you full and energized.
- Healthy fats: Butter and cheese provide satisfying fats, while caramelized onions add fiber and antioxidants.
- Vitamins & minerals: Onions bring vitamin C and B6, plus the cheese adds calcium.
- Dietary considerations: Easily adapted to gluten-free or low-carb diets by swapping buns for lettuce wraps or gluten-free bread.
- Allergens: Contains dairy and gluten unless substitutions are made.
From a wellness perspective, these sliders are a balanced treat—comfort food with quality ingredients that fuel your body without feeling heavy or greasy.
Conclusion
These flavorful ultimate cheeseburger sliders with caramelized onions have earned their spot in my regular recipe rotation for good reason. They’re quick, satisfying, and hit just the right note between simple and special. I love how the sweet onions marry with the savory beef and melty cheese, creating little bites that feel thoughtfully crafted without any fuss.
Feel free to adjust the toppings, seasoning, or cheese to suit your cravings. Whether you’re feeding a crowd or cooking for one, these sliders deliver big flavor in a small package. I’m excited to hear how you put your spin on them—please share your favorite twists or questions below. Here’s to cozy, delicious meals that bring people together!
Frequently Asked Questions About Ultimate Cheeseburger Sliders
How do I keep the sliders from falling apart?
Make sure not to overwork the beef when forming patties and avoid pressing down during cooking. Toasting the buns also helps them hold together better against juicy fillings.
Can I make the caramelized onions ahead of time?
Absolutely! Caramelized onions store well in the fridge for up to 3 days and taste even richer when reheated gently.
What’s the best cheese for sliders?
A mix of sharp cheddar and American cheese works great for flavor and meltability. You can experiment with Swiss, gouda, or pepper jack for different tastes.
Can I freeze these sliders?
You can freeze cooked patties without buns for up to 2 months. Reheat patties thoroughly before assembling sliders fresh.
How do I make these sliders healthier?
Use lean ground turkey or chicken, swap buns for whole-grain or lettuce wraps, and load up on fresh veggies as toppings.
Pin This Recipe!
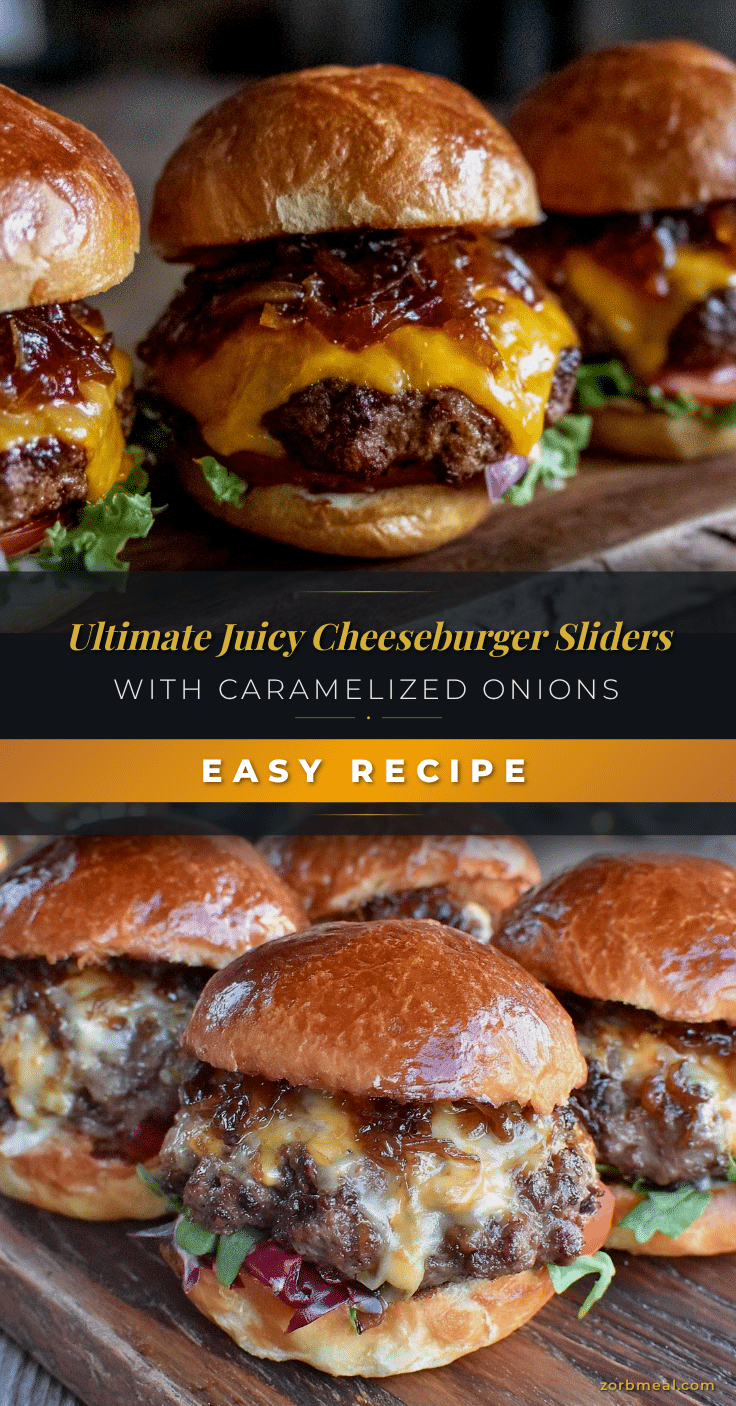
Ultimate Cheeseburger Sliders Recipe Easy 5-Step Guide with Caramelized Onions
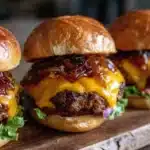
These ultimate cheeseburger sliders with caramelized onions are quick, flavorful, and perfect for game nights or casual gatherings. The sweet onions complement juicy beef patties and melted cheese for a delicious bite-sized treat.
- Prep Time: 10 minutes
- Cook Time: 25-30 minutes
- Total Time: 35-40 minutes
- Yield: 8 sliders 1x
- Category: Main Course
- Cuisine: American
Ingredients
- 1 lb (450 g) ground beef, preferably 80/20 for juicy patties
- Salt and freshly ground black pepper, to taste
- 1 tsp garlic powder (optional)
- 8 slider buns, soft but sturdy (e.g., King’s Hawaiian)
- 4 slices sharp cheddar cheese, halved
- 4 slices American cheese, halved
- 2 large yellow onions, thinly sliced
- 2 tbsp unsalted butter
- 1 tbsp olive oil
- 1 tsp brown sugar (optional)
- Pinch of salt
- Dill pickle slices
- Yellow mustard or ketchup
- Fresh lettuce or baby spinach leaves
Instructions
- Prepare the caramelized onions: Heat butter and olive oil in a large skillet over medium-low heat. Add sliced onions and a pinch of salt. Stir occasionally and cook slowly for 25-30 minutes until soft and golden. Halfway through, sprinkle brown sugar to aid caramelization. Keep heat low to avoid burning.
- Season and form the patties: In a mixing bowl, combine ground beef with salt, pepper, and garlic powder. Mix gently to avoid tough patties. Form 8 small patties about 2-3 inches in diameter.
- Cook the patties: Heat a skillet over medium-high heat. Cook patties for 3-4 minutes per side for medium doneness. Just before finishing, place half slices of cheddar and American cheese on each patty, cover briefly to melt cheese.
- Toast the buns: Lightly butter slider buns and toast in a pan or under broiler until golden and slightly crispy.
- Assemble the sliders: Spread mustard or ketchup on buns if desired. Add cheesy patty, a spoonful of caramelized onions, pickles, and fresh lettuce. Top with the bun and serve.
Notes
Caramelize onions slowly over low heat to avoid burning and achieve sweetness. Do not overmix ground beef to keep patties tender. Toast buns to prevent sogginess. Let patties rest 2-3 minutes before assembling to retain juices. Leftover caramelized onions taste richer the next day.
Nutrition
- Serving Size: 1 slider
- Calories: 275
- Sugar: 4
- Sodium: 450
- Fat: 18
- Saturated Fat: 8
- Carbohydrates: 18
- Fiber: 1
- Protein: 15
Keywords: cheeseburger sliders, caramelized onions, game night recipe, easy sliders, party food, quick dinner