“Hey, you HAVE to try these cookie bars!” my friend texted me one hectic afternoon, and honestly, I was skeptical. I mean, monster cookies? Bars? With M&Ms? It sounded like a sugar overload waiting to happen. But that afternoon, juggling work emails and a never-ending to-do list, I needed something quick, comforting, and a little bit fun. I gave in and made them—twice in a week, actually.
The first bite was a revelation. The chewy texture wasn’t just your average cookie bar chewiness—it was like biting into a soft, sugary hug. The M&Ms poked through the golden dough like colorful little gems, adding bursts of chocolatey joy that made me pause for a moment amidst the chaos. It wasn’t just a snack; it was a mini celebration in every square.
These Chewy Monster Cookie Bars with M&Ms quickly became my go-to for those days when I want something homemade but without fussing over dropping tiny cookie dough balls onto a tray. Plus, I discovered they’re perfect for sharing—whether it’s with coworkers, kids after school, or even a quick bite before diving into dinner prep. What really stuck with me is how they turned a stressful afternoon into something a bit more manageable, a bit more joyful. I guess that’s the quiet magic of a good cookie bar.
Why You’ll Love This Recipe
After testing this recipe multiple times (and tweaking it in little ways), I can say this version of Chewy Monster Cookie Bars with M&Ms is truly a standout. Not just because it’s delicious, but because it fits right into real life—the kind of life that’s busy and a little messy.
- Quick & Easy: The whole recipe comes together in under 30 minutes, no fancy equipment or complicated steps, so it’s fantastic for busy weeknights or unexpected guests.
- Simple Ingredients: You don’t need a special grocery run—chances are you have the pantry staples and M&Ms waiting to be used.
- Perfect for Snack Time: These bars are just right for lunchboxes, afternoon pick-me-ups, or even a casual dessert after dinner.
- Crowd-Pleaser: I’ve brought these to everything from kid’s birthday parties to casual potlucks, and they’re always a hit.
- Unbelievably Delicious: The chewy texture paired with the bursts of chocolate from M&Ms creates a flavor and feel that’s both nostalgic and new.
What sets these bars apart? The secret is in balancing the chewy base with the colorful candy bits without making it overly sweet or crumbly. Plus, I use a blend of oats and a touch of peanut butter that gives the bars a hearty, satisfying feel. It’s a twist I learned after trying countless recipes that ended up either too dry or too cakey. Honestly, these bars make me close my eyes after the first bite—comfort food, but made easy and fun.
What Ingredients You Will Need
This recipe uses simple, wholesome ingredients to deliver chewy, flavorful bars that are anything but boring. Most are pantry staples, with M&Ms adding that playful twist. Here’s what you’ll want to gather:
- For the Base:
- 1 cup (227 g) unsalted butter, melted (adds richness and chewiness)
- 1 cup (200 g) packed light brown sugar (for that deep caramel flavor)
- ½ cup (100 g) granulated sugar (balances sweetness)
- 2 large eggs, room temperature (helps bind everything)
- 1 tsp pure vanilla extract (classic flavor enhancer)
- Dry Ingredients:
- 1 ½ cups (190 g) all-purpose flour (you can swap for gluten-free flour blend if needed)
- 1 tsp baking soda (for a slight lift)
- ½ tsp salt (heightens flavors)
- 2 cups (180 g) old-fashioned rolled oats (adds hearty texture)
- Mix-ins:
- 1 cup (260 g) peanut butter (creamy or chunky, your call—adds richness and flavor)
- 1 ½ cups (270 g) M&Ms (regular or peanut, depending on preference)
- Optional: ½ cup (90 g) semi-sweet chocolate chips (for extra chocolate goodness)
I prefer using a good-quality natural peanut butter like Smucker’s Natural for the best flavor and texture. For the M&Ms, the classic candy-coated chocolate ones work great, but you can swap in peanut M&Ms or even colorful mini chocolate chips if you want a different look. When fresh oats are in season, I sometimes swap a portion with quick oats for a slightly softer bite.
Equipment Needed
- 9×13-inch (23×33 cm) baking pan – a standard size that gives you perfect thickness for chewy bars
- Mixing bowls – one large for wet ingredients, one medium for dry
- Measuring cups and spoons – accurate measurements are key for texture
- Rubber spatula or wooden spoon – for folding ingredients without overmixing
- Electric mixer (optional) – speeds up creaming butter and sugars, but a sturdy whisk works fine
- Parchment paper or non-stick spray – for easy removal and cleanup
Personally, I like using parchment paper to line my pan; it makes lifting the bars out a breeze and keeps the bottoms from getting too dark. If you don’t have a 9×13 pan, an 8×8-inch pan works too, but your bars will be thicker and baking time may need adjusting. No fancy gadgets here—just simple tools that you probably already own.
Preparation Method
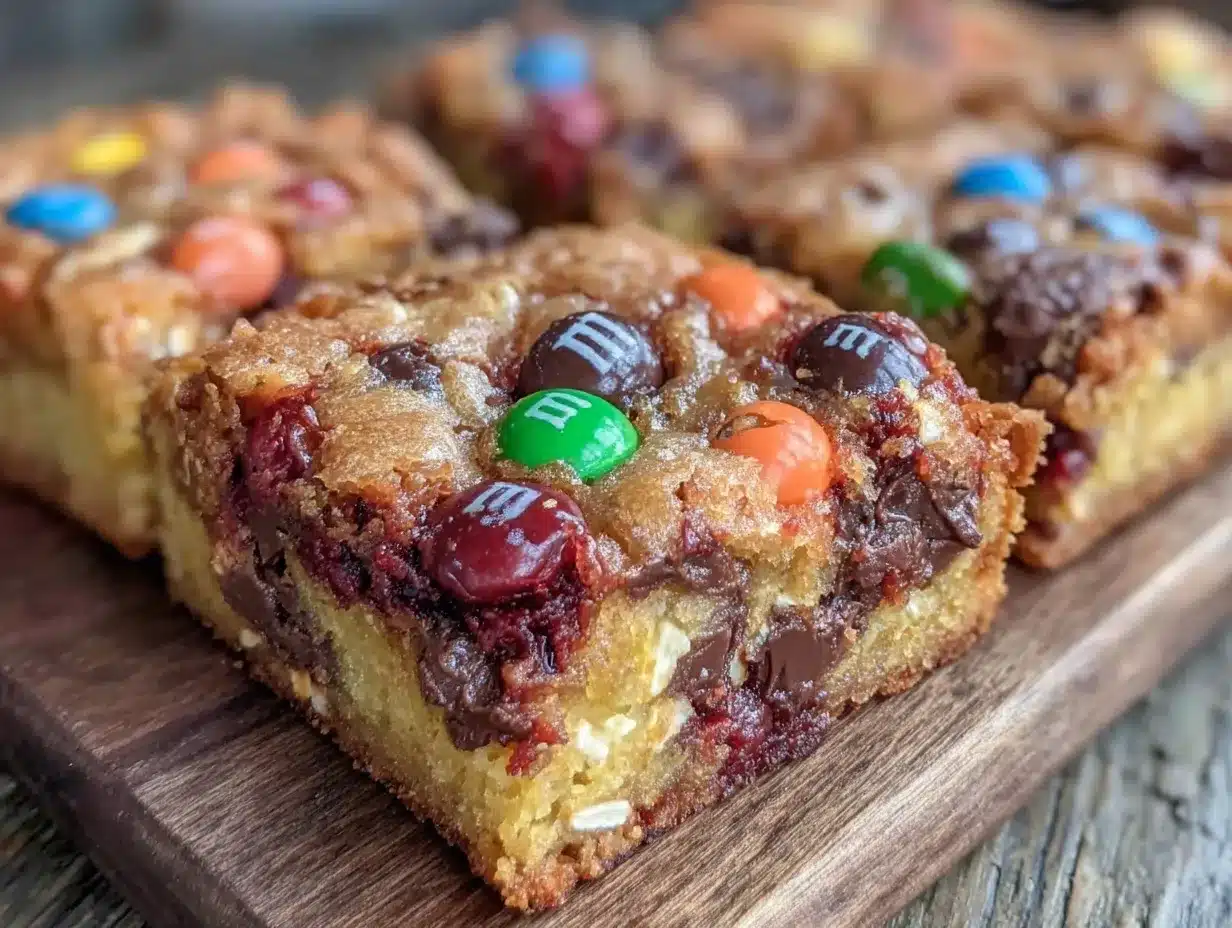
- Preheat your oven to 350°F (175°C). Line your 9×13-inch baking pan with parchment paper, leaving an overhang on the sides, or grease it well. This step makes cleanup easier and keeps your bars from sticking.
- Mix the wet ingredients: In a large bowl, combine the melted unsalted butter, light brown sugar, and granulated sugar. Use a whisk or electric mixer on medium speed to blend until smooth and shiny, about 2 minutes. This creaming process is key for that chewy texture.
- Add eggs and vanilla: Crack in the eggs one at a time, mixing well after each addition. Then stir in the vanilla extract. The batter will look glossy and a bit thick, like cookie dough should.
- Combine dry ingredients: In a separate bowl, whisk together the all-purpose flour, baking soda, and salt. This keeps the leavening evenly distributed so your bars rise just right.
- Add oats and peanut butter: Stir the oats into the dry mix. Then dollop in the peanut butter and gently fold it into your wet mixture. Don’t worry if it looks chunky; it’ll even out when combined.
- Incorporate dry mix into wet: Gradually add the dry ingredients to the wet bowl. Use a rubber spatula to fold everything together until just combined—avoid overmixing to keep the bars tender.
- Fold in M&Ms and optional chocolate chips: Gently stir in the candy-coated chocolates and chocolate chips, saving a few to sprinkle on top if you like a colorful finish.
- Transfer to pan: Spread the batter evenly into your prepared pan using the spatula. Smooth the surface, then press those reserved M&Ms on top for visual appeal.
- Bake: Place in the oven and bake for 25-28 minutes. The edges should be golden brown, and the center set but still soft—don’t let it overbake or it’ll lose that chewy magic.
- Cool completely: Remove from oven and let cool in the pan for at least 30 minutes before slicing. This rest time lets the bars firm up for perfect squares.
If your bars come out too soft in the center, a few more minutes in the oven usually does the trick. And if you accidentally overbake, no worries—warm with a scoop of ice cream turns out delicious too. Trust me, I’ve tested this recipe enough times to know all the quirks.
Cooking Tips & Techniques
Getting these monster cookie bars just right is mostly about timing and texture. Here’s what I’ve learned:
- Measure flour correctly: Too much flour makes bars dry and crumbly. I scoop the flour with a spoon into my measuring cup and level it off for accuracy.
- Don’t skip melting the butter: This creates that dense, chewy bite that sets these bars apart from crumbly cookies.
- Mix gently: Overmixing after adding the dry ingredients activates gluten, leading to tough bars. Fold just until no flour streaks remain.
- Use room temperature eggs: They blend more evenly, helping with texture and rise.
- Watch your oven closely: Every oven bakes differently, so start checking at 24 minutes. You want that center just set.
- Cooling is key: Cutting bars too hot leads to crumbling. Patience pays off here.
One time, I got impatient and sliced the bars right out of the oven. The mess was worth the lesson—now I always wait, and the bars hold together beautifully every time. Also, if you’re juggling dinner like I often do, you can prep the batter earlier in the day and bake just before serving—makes life easier.
Variations & Adaptations
This recipe is flexible, so you can tailor it to your taste or dietary needs:
- Gluten-Free: Swap the all-purpose flour for a 1:1 gluten-free baking flour. Make sure your oats are certified gluten-free too.
- Nut-Free: Leave out the peanut butter and replace it with sunflower seed butter or an extra ½ cup of melted butter for richness.
- Seasonal Twist: Swap M&Ms for dried cranberries and white chocolate chips during the holidays for a festive feel.
- Double Chocolate: Add ¼ cup cocoa powder to the dry ingredients and use chocolate M&Ms for an intense chocolate version.
- Personal Favorite: I sometimes throw in chopped walnuts or pecans for crunch, which balances the chewiness nicely.
For different cooking methods, I’ve even tried these bars in a toaster oven with success—just watch the time carefully as it bakes faster. If you want to make these vegan, use flax eggs and dairy-free butter; results are chewy but slightly different in flavor.
Serving & Storage Suggestions
These bars are best served at room temperature, which really lets the chewy texture shine. I like to present them in colorful squares on a simple platter, perfect for casual sharing. They pair beautifully with a cold glass of milk or a cup of coffee for an afternoon treat.
Leftovers store well in an airtight container at room temperature for up to 4 days. For longer storage, pop them in the fridge for up to a week or freeze for up to 3 months. When reheating, a quick 10-15 seconds in the microwave softens them back up nicely—just avoid overheating or they might dry out.
Interestingly, the flavors deepen a bit after a day, so if you can wait, slicing the bars the next day actually makes them taste even better. These bars also travel well, making them a great companion for picnics or packed lunches.
Nutritional Information & Benefits
Each chewy monster cookie bar (assuming 12 bars per pan) contains approximately:
| Calories | ~250 kcal |
|---|---|
| Fat | 12 g (mostly from butter and peanut butter) |
| Carbohydrates | 32 g |
| Protein | 5 g (thanks to oats and peanut butter) |
| Fiber | 2 g |
Beyond being a tasty snack, the oats in this recipe offer heart-healthy fiber, and the peanut butter adds protein and healthy fats, making these bars a more balanced treat than typical cookies. If you’re mindful of allergens, note the presence of nuts and gluten unless swapped as suggested. Overall, these bars fit well as an occasional indulgence that also provides some nutritious benefits.
Conclusion
Chewy Monster Cookie Bars with M&Ms are more than just a sweet fix—they’re a reliable friend on busy days, a treat that brings a little color and fun to the kitchen without fuss. I love that you can customize them to your taste, and honestly, they’ve saved me more than once when I needed a quick homemade snack that everyone would enjoy.
Whether you stick to the classic or try a variation, these bars offer the kind of chewy, chocolatey satisfaction that makes you smile with every bite. Go ahead, make a batch, and watch how fast they disappear. If you try your own take on this recipe, I’d love to hear about it!
Frequently Asked Questions
- Q: Can I use crunchy peanut butter instead of creamy?
A: Yes, crunchy peanut butter works well and adds a nice texture contrast in the bars. - Q: How do I make these bars gluten-free?
A: Substitute all-purpose flour with a gluten-free 1:1 baking flour and make sure your oats are certified gluten-free. - Q: Can I freeze these cookie bars?
A: Absolutely! Wrap them tightly and freeze for up to 3 months. Thaw at room temperature before serving. - Q: What’s the best way to cut the bars neatly?
A: Use a sharp knife and cut after the bars have completely cooled (or chilled slightly) to avoid crumbling. - Q: Can I substitute M&Ms with other candies?
A: Yes, mini chocolate chips, dried fruit, or chopped nuts all make great alternatives depending on your preference.
For a hearty dinner after you snack on these bars, you might enjoy the Mediterranean stuffed chicken breast—it’s a perfect balance to sweet treats. And if you’re craving something flavorful and healthy for seafood night, the quick creamy coconut curry shrimp is a fantastic choice that comes together swiftly.
Pin This Recipe!
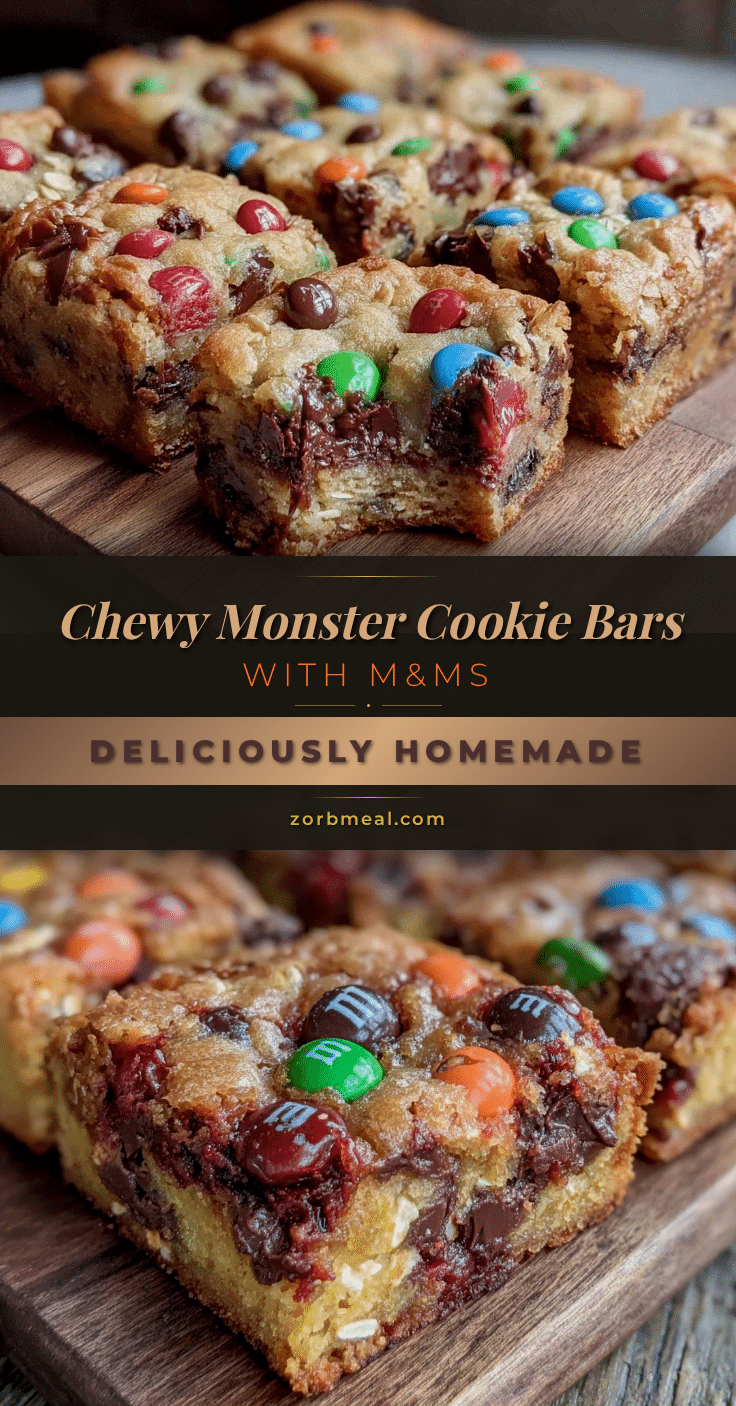
Chewy Monster Cookie Bars with M&Ms
These chewy monster cookie bars with M&Ms offer a soft, sugary hug with bursts of chocolatey joy, perfect for a quick, comforting snack or casual dessert.
- Prep Time: 10 minutes
- Cook Time: 25-28 minutes
- Total Time: 40 minutes
- Yield: 12 bars 1x
- Category: Snack
- Cuisine: American
Ingredients
- 1 cup (2 sticks, 227 g) unsalted butter, melted
- 1 cup (200 g) packed light brown sugar
- ½ cup (100 g) granulated sugar
- 2 large eggs, room temperature
- 1 tsp pure vanilla extract
- 1 ½ cups (190 g) all-purpose flour (or gluten-free flour blend)
- 1 tsp baking soda
- ½ tsp salt
- 2 cups (180 g) old-fashioned rolled oats
- 1 cup (260 g) peanut butter (creamy or chunky)
- 1 ½ cups (270 g) M&Ms (regular or peanut)
- Optional: ½ cup (90 g) semi-sweet chocolate chips
Instructions
- Preheat your oven to 350°F (175°C). Line a 9×13-inch baking pan with parchment paper, leaving an overhang, or grease it well.
- In a large bowl, combine melted unsalted butter, light brown sugar, and granulated sugar. Whisk or mix on medium speed until smooth and shiny, about 2 minutes.
- Add eggs one at a time, mixing well after each addition. Stir in vanilla extract until batter is glossy and thick.
- In a separate bowl, whisk together all-purpose flour, baking soda, and salt.
- Stir oats into the dry mix. Then add peanut butter and gently fold into the wet mixture.
- Gradually add dry ingredients to the wet bowl, folding with a rubber spatula until just combined. Avoid overmixing.
- Fold in M&Ms and optional chocolate chips, reserving a few to sprinkle on top.
- Spread batter evenly into prepared pan and smooth the surface. Press reserved M&Ms on top for decoration.
- Bake for 25-28 minutes until edges are golden and center is set but soft. Avoid overbaking.
- Cool completely in the pan for at least 30 minutes before slicing into bars.
Notes
Use parchment paper for easy removal and cleaner bottoms. Avoid overmixing to keep bars tender. Let bars cool completely before slicing to prevent crumbling. For gluten-free, use gluten-free flour and certified gluten-free oats. Peanut butter can be swapped for sunflower seed butter for nut-free version. Bars can be frozen up to 3 months.
Nutrition
- Serving Size: 1 bar (1/12th of pan
- Calories: 250
- Fat: 12
- Carbohydrates: 32
- Fiber: 2
- Protein: 5
Keywords: monster cookie bars, chewy cookie bars, M&Ms cookie bars, peanut butter cookie bars, easy snack recipe, homemade cookie bars


