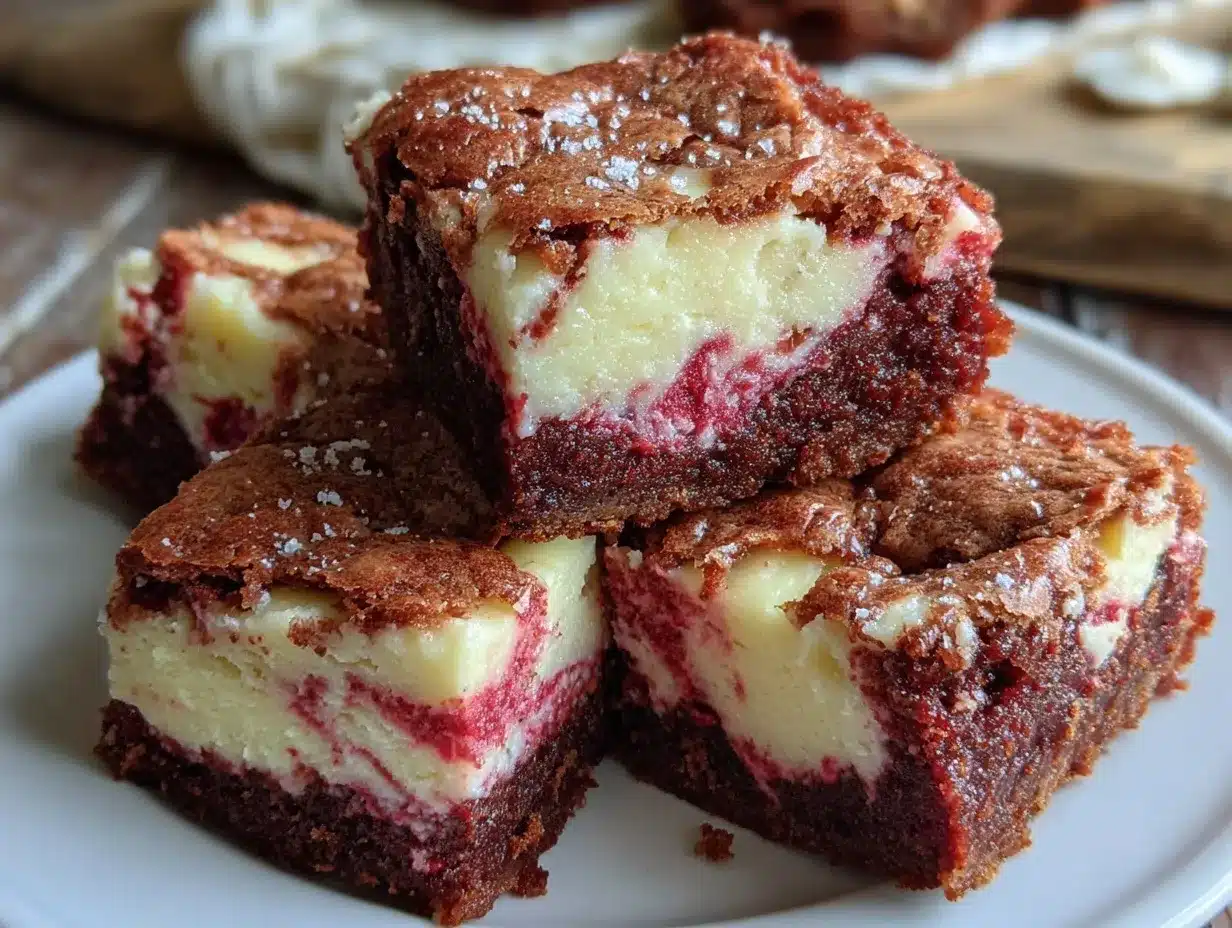
“Wait, you made those from scratch?” My coworker’s incredulous voice caught me off guard as I pulled a pan of these vibrant red velvet flag brownies from the oven. Honestly, I wasn’t expecting much either when I first tossed together this recipe on a hectic Sunday afternoon. I’d planned a simple batch of brownies to bring to a friend’s barbecue, but a last-minute craving for something festive and fun took over. The cream cheese swirl? That was a happy accident—my cream cheese filling was thicker than usual, so I just swirled it in without much thought. The result? A dazzling red and white checkerboard that looked almost too good to eat (almost!).
This recipe stuck with me because it’s that kind of dessert you don’t see often but can’t stop thinking about once you do. The rich, velvety chocolate-red base paired with the tangy cream cheese swirl feels like a cozy hug wrapped in a showstopper. Plus, it’s surprisingly simple, which is a win when juggling a busy schedule. It’s not just a treat—it’s a statement on the dessert table, perfect for celebrations or just an everyday moment that needs a splash of color and sweetness. I keep coming back to it, tweaking the swirls and timing here and there, but the core of this ultimate red velvet flag brownies with cream cheese swirl recipe remains a comforting classic with a bit of flair.
What makes it special to me? It’s honest, a little indulgent without being fussy, and delivers that classic red velvet flavor with a creamy twist. I trust it’ll find a cozy spot in your recipe box, too.
Why You’ll Love This Recipe
From my kitchen to yours, this recipe has been tested over and over, winning over skeptical friends and dessert lovers alike. Here’s why it’s become an all-time favorite:
- Quick & Easy: Ready in under 45 minutes, it fits perfectly into busy afternoons or last-minute dessert plans.
- Simple Ingredients: No need for specialty items — just pantry basics and a few fridge staples.
- Perfect for Celebrations: Whether it’s a holiday, birthday, or just a red-themed party, these brownies bring the wow-factor.
- Crowd-Pleaser: Kids and adults alike rave about the moist texture and creamy swirl.
- Unbelievably Delicious: The balance of cocoa-rich red velvet with tangy cream cheese is next-level comfort food.
- Unique Presentation: The flag-like swirl pattern isn’t just pretty—it’s a creative twist that makes this recipe stand out from your typical red velvet brownies.
Unlike other recipes that can feel dry or overly sweet, this one nails the texture and flavor balance. The cream cheese layer adds moisture and a subtle tang that cuts through the sweetness, making every bite feel fresh. Honestly, it’s the kind of recipe that’ll have your friends asking for the secret behind those perfect swirls. Plus, if you want to impress without the stress, this recipe makes it easy to create a dessert that looks fancy but is totally do-able.
What Ingredients You Will Need
This recipe uses simple, wholesome ingredients to deliver bold flavor and satisfying texture without the fuss. Most are pantry staples, but if you want the best results, here’s what I recommend:
- For the Brownie Base:
- All-purpose flour, 1 cup (125g) — sifted for lightness
- Unsweetened cocoa powder, 2 tablespoons — I prefer Hershey’s for consistency
- Granulated sugar, 1 cup (200g) — regular white sugar works fine
- Unsalted butter, 6 tablespoons (85g), melted — adds richness
- Large eggs, 2, room temperature — helps with smooth batter
- Buttermilk, 1/4 cup (60ml) — adds moisture and tang (sub with milk + 1 tsp vinegar if needed)
- Vanilla extract, 1 teaspoon — use pure for best aroma
- Red food coloring, 2 tablespoons — gel or liquid, your choice (gel gives more vivid color)
- Baking powder, 1/2 teaspoon — leavens slightly
- Salt, 1/4 teaspoon — balances sweetness
- For the Cream Cheese Swirl:
- Cream cheese, 8 ounces (225g), softened — Philadelphia brand works well for smoothness
- Granulated sugar, 1/3 cup (65g)
- Large egg, 1, room temperature
- Vanilla extract, 1/2 teaspoon
You can swap the all-purpose flour for a gluten-free blend if needed, just check that it’s one-to-one substitution. For a dairy-free twist, try coconut cream cheese and a plant-based butter alternative. The red food coloring is key for that signature red velvet look, but I’ve also played with natural beet powder for a more subtle hue. In case you’re curious, fresh buttermilk really makes a difference in tender crumb, but if you’re in a pinch, the vinegar-milk combo works just fine.
Equipment Needed
For these ultimate red velvet flag brownies, you don’t need much beyond standard kitchen essentials:
- 9×9-inch (23×23 cm) square baking pan — a metal pan gives a crisper edge, but glass works too
- Mixing bowls — one large and one medium for separating brownie and cream cheese batters
- Hand mixer or stand mixer — helps achieve smooth cream cheese swirl; a whisk works but takes longer
- Rubber spatula — perfect for folding ingredients without deflating your batter
- Measuring cups and spoons — accuracy matters here for texture
- Toothpick or skewer — for creating the flag swirl pattern
If you don’t have a hand mixer, no worries — just mix the cream cheese filling thoroughly with a sturdy spoon. I’ve also baked this in a 9×13-inch pan when feeding a crowd (just watch the bake time closely). For cleanup, lining the pan with parchment paper saves a lot of scrubbing time.
Preparation Method
- Preheat your oven to 350°F (175°C). Grease your 9×9-inch baking pan or line it with parchment paper, leaving some overhang for easy removal later. This step saves a lot of hassle after baking.
- Make the brownie base: In a large bowl, whisk together 1 cup (125g) sifted flour, 2 tablespoons cocoa powder, 1/2 teaspoon baking powder, and 1/4 teaspoon salt. Set aside.
- In another bowl, combine wet ingredients: Beat 6 tablespoons (85g) melted butter with 1 cup (200g) sugar until smooth. Add 2 large eggs, 1/4 cup (60ml) buttermilk, 1 teaspoon vanilla extract, and 2 tablespoons red food coloring. Mix until well combined.
- Gradually add dry ingredients to wet: Fold the flour mixture into the wet ingredients in batches, mixing gently until just combined. Avoid overmixing to keep brownies tender.
- Prepare the cream cheese swirl: In a separate medium bowl, beat 8 ounces (225g) softened cream cheese with 1/3 cup (65g) sugar until light and fluffy. Add 1 large egg and 1/2 teaspoon vanilla extract, beating until smooth.
- Layer the batters: Pour half of the red velvet batter into the prepared pan, spreading evenly. Dollop half of the cream cheese mixture over the top in spoonfuls. Repeat layers with remaining red velvet and cream cheese mixtures.
- Create the flag swirl pattern: Use a toothpick or skewer to gently swirl the cream cheese into the red velvet batter, making a checkerboard or flag-like design. Don’t over-swirl—keep some contrast for visual impact.
- Bake for 35-40 minutes: The edges should be set and a toothpick inserted in the center comes out mostly clean with a few moist crumbs. Overbaking dries out the cream cheese swirl, so keep an eye on it after 30 minutes.
- Cool completely in the pan: Let brownies cool for at least 1 hour before slicing. This helps the cream cheese set and makes cutting cleaner.
- Slice and serve: Use a sharp knife, wiping it between cuts for neat pieces. Enjoy slightly chilled or at room temperature.
Pro tip: If you want ultra-smooth swirls, soften the cream cheese well and mix until no lumps remain. Also, mixing the red velvet batter gently keeps it from becoming too dense. I learned the hard way that overmixing can lead to cakey brownies rather than that fudgy texture I adore. For a festive touch, you can dust the top with a little powdered sugar just before serving.
Cooking Tips & Techniques
Making these red velvet flag brownies come out perfect every time takes a little know-how. Here’s what I’ve learned:
- Softened cream cheese is key: Cold cream cheese lumps ruin the swirl. Let it sit at room temp for at least 30 minutes, or microwave in 10-second bursts until pliable.
- Don’t overmix the batter: Folding the flour gently maintains a tender crumb. You want smooth batter but no more than necessary.
- Use gel food coloring if possible: It gives a richer, deeper red without altering batter consistency like liquid dyes can.
- Swirling technique: Drag the toothpick lightly in a grid pattern to create the flag effect without blending everything together. Too much swirling blends the colors, losing that eye-catching contrast.
- Watch your bake time: The cream cheese layer can dry out if baked too long. Start checking at 35 minutes and test with a toothpick.
- Chill before slicing: Cooling thoroughly helps the cream cheese firm up and prevents crumbly slices.
For a smoother cream cheese swirl, I sometimes add a teaspoon of sour cream or heavy cream to the filling. Also, prepping ingredients ahead (like sifting dry goods and softening butter/cream cheese) speeds up the process and makes mixing easier. When I’m pressed for time, I’ve even thrown together a quick one-pot meal earlier in the day so I can focus on baking these brownies later without rushing.
Variations & Adaptations
These red velvet flag brownies are super versatile. Here are some ways to make them your own:
- Gluten-Free: Swap all-purpose flour for a 1:1 gluten-free blend. I’ve had great results with Bob’s Red Mill gluten-free flour.
- Vegan Version: Use flax eggs (2 tbsp ground flax + 6 tbsp water), dairy-free cream cheese, and coconut oil instead of butter. The texture will be slightly different but still delicious.
- Flavor Twists: Add a teaspoon of espresso powder to the brownie batter to deepen the chocolate notes. Or sprinkle white chocolate chips into the batter for pockets of sweetness.
- Seasonal Spins: During the holidays, top with crushed peppermint candies or swirl in some raspberry jam with the cream cheese for a fruity surprise.
- Presentation Change: Instead of the flag swirl, pour the cream cheese filling in stripes or dots for a modern twist on the design.
Personally, I once swapped the cream cheese for mascarpone mixed with a bit of honey and cinnamon—totally changed the vibe but kept that creamy allure. I’d recommend trying one variation at a time so you can appreciate what each change brings to the table.
Serving & Storage Suggestions
These brownies are best served slightly chilled or at room temperature to showcase the creamy swirl and moist crumb. I like cutting them into small squares for parties—perfect finger food alongside a cup of coffee or milk.
Pair them with fresh berries or a scoop of vanilla ice cream for a decadent dessert. They also make a festive finish to any meal, especially when you want something that feels special but isn’t fussy.
To store, keep them in an airtight container in the refrigerator for up to 5 days. They actually taste better after a day or two when the flavors meld. You can freeze brownies wrapped tightly in plastic wrap and foil for up to 3 months—just thaw overnight in the fridge before serving.
Reheating is easy: a quick 15-second zap in the microwave revives that soft texture without drying out the cream cheese. If you want to serve them warm, just watch closely so they don’t get soggy.
Nutritional Information & Benefits
Each serving of these ultimate red velvet flag brownies contains approximately:
| Calories | 280 |
|---|---|
| Fat | 15g |
| Carbohydrates | 32g |
| Protein | 4g |
| Sugar | 22g |
The cream cheese adds a good dose of calcium and protein, while the cocoa powder provides antioxidants. Using buttermilk contributes to a tender texture and a subtle boost in vitamin B12. If you opt for whole wheat or gluten-free flours, you can add fiber and accommodate dietary needs.
Keep in mind these brownies do contain dairy and eggs, which are allergens for some. For a lower-sugar version, try cutting back on sugar slightly or using a sugar substitute suitable for baking.
From a wellness angle, I see these brownies as a perfect treat when you want something indulgent but made with real ingredients and no mystery additives. They’re a nice occasional dessert that balances taste and texture without going overboard.
Conclusion
These ultimate red velvet flag brownies with cream cheese swirl are more than just a dessert—they’re a little celebration in every bite. The way the rich red velvet contrasts with the tangy cream cheese is honestly a joy to experience. Whether you’re baking for a party, a holiday, or just because, this recipe is flexible and forgiving enough to become a regular in your baking routine.
I love how it brings people together. After all, food that looks this fun and tastes this good naturally sparks conversation and smiles. Feel free to tweak the swirls, add your favorite mix-ins, or serve alongside a comforting cup of coffee or tea. And if you ever need a simple, flavorful dinner to pair with these brownies, my Mediterranean stuffed chicken breast recipe is a perfect match for a balanced meal.
Let me know how your batch turns out, or if you’ve played with any fun variations! Baking is always better when shared.
Frequently Asked Questions About Ultimate Red Velvet Flag Brownies
Can I make these brownies ahead of time?
Absolutely! They actually taste better after chilling for a few hours or overnight. Just store them in an airtight container in the fridge.
What’s the best way to get a vibrant red color?
Gel food coloring works best for a rich, deep red without thinning the batter. If you prefer natural, beet powder is an option but results will be lighter.
Can I freeze these brownies?
Yes, wrap tightly in plastic wrap and foil, then freeze for up to 3 months. Thaw in the fridge overnight before serving.
How do I make the cream cheese swirl without lumps?
Make sure the cream cheese is fully softened and beat it well with sugar and egg until smooth before swirling into the batter.
Can I use a different pan size?
You can use a 9×13-inch pan but reduce the baking time to about 30 minutes and check for doneness often to avoid overbaking.
Pin This Recipe!
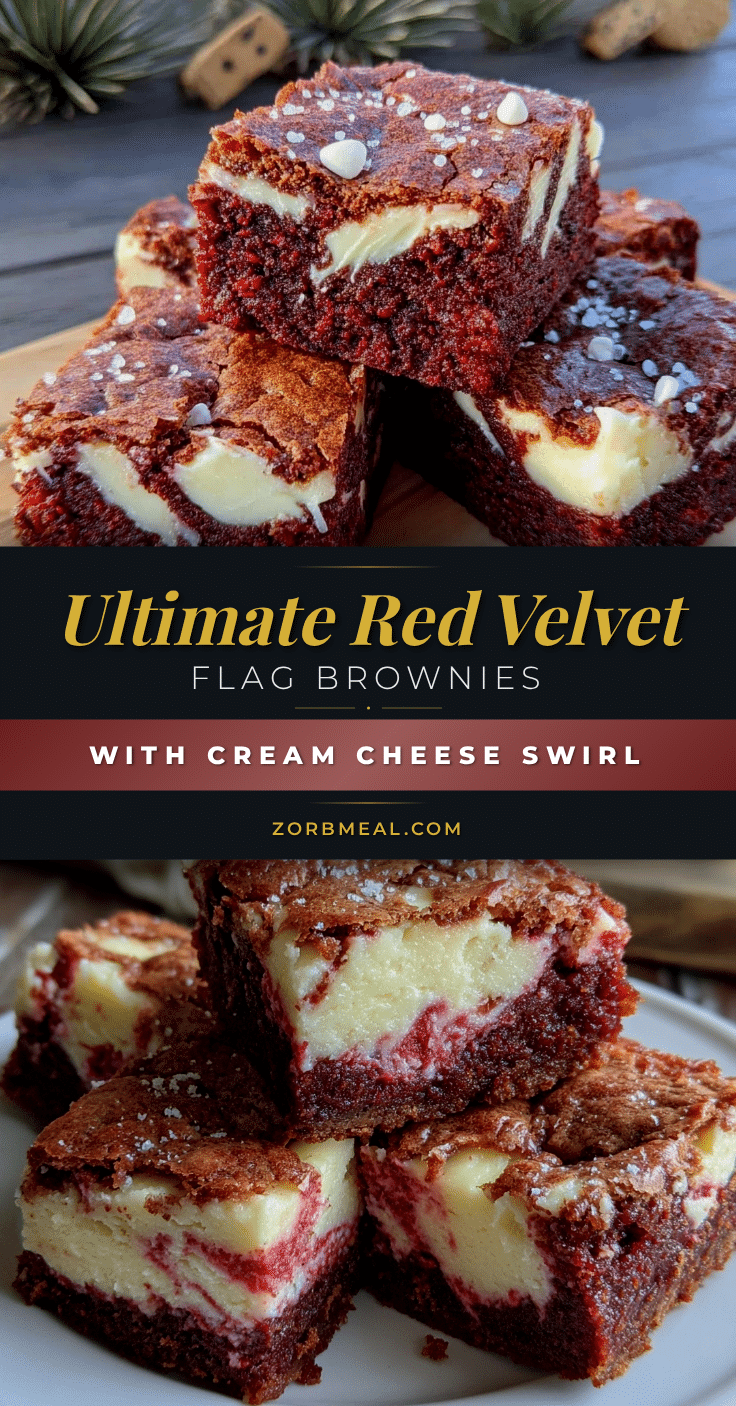
Ultimate Red Velvet Flag Brownies Recipe Easy Homemade Cream Cheese Swirl
These ultimate red velvet flag brownies feature a rich, velvety chocolate-red base paired with a tangy cream cheese swirl, creating a festive and delicious dessert perfect for celebrations or everyday treats.
- Prep Time: 15 minutes
- Cook Time: 35-40 minutes
- Total Time: 50-55 minutes
- Yield: 16 servings 1x
- Category: Dessert
- Cuisine: American
Ingredients
- 1 cup (125g) all-purpose flour, sifted
- 2 tablespoons unsweetened cocoa powder
- 1 cup (200g) granulated sugar
- 6 tablespoons (85g) unsalted butter, melted
- 2 large eggs, room temperature
- 1/4 cup (60ml) buttermilk (or milk + 1 tsp vinegar)
- 1 teaspoon vanilla extract
- 2 tablespoons red food coloring (gel or liquid)
- 1/2 teaspoon baking powder
- 1/4 teaspoon salt
- 8 ounces (225g) cream cheese, softened
- 1/3 cup (65g) granulated sugar
- 1 large egg, room temperature
- 1/2 teaspoon vanilla extract
Instructions
- Preheat your oven to 350°F (175°C). Grease a 9×9-inch baking pan or line it with parchment paper, leaving some overhang for easy removal.
- In a large bowl, whisk together sifted flour, cocoa powder, baking powder, and salt. Set aside.
- In another bowl, beat melted butter with sugar until smooth. Add eggs, buttermilk, vanilla extract, and red food coloring. Mix until well combined.
- Gradually fold the dry ingredients into the wet ingredients in batches, mixing gently until just combined. Avoid overmixing.
- In a separate medium bowl, beat softened cream cheese with sugar until light and fluffy. Add egg and vanilla extract, beating until smooth.
- Pour half of the red velvet batter into the prepared pan, spreading evenly. Dollop half of the cream cheese mixture over the top in spoonfuls. Repeat layers with remaining red velvet and cream cheese mixtures.
- Use a toothpick or skewer to gently swirl the cream cheese into the red velvet batter, creating a checkerboard or flag-like design. Do not over-swirl.
- Bake for 35-40 minutes until edges are set and a toothpick inserted in the center comes out mostly clean with a few moist crumbs. Start checking at 35 minutes to avoid overbaking.
- Cool completely in the pan for at least 1 hour before slicing to allow the cream cheese to set.
- Slice with a sharp knife, wiping it between cuts for neat pieces. Serve slightly chilled or at room temperature.
Notes
Use gel food coloring for a richer red color. Soften cream cheese well to avoid lumps in the swirl. Avoid overmixing the batter to keep brownies tender. Cool brownies completely before slicing for cleaner cuts. You can line the pan with parchment paper for easier removal and cleanup.
Nutrition
- Serving Size: 1 brownie (approxima
- Calories: 280
- Sugar: 22
- Fat: 15
- Carbohydrates: 32
- Protein: 4
Keywords: red velvet brownies, cream cheese swirl, flag brownies, easy brownies, festive dessert, homemade brownies, chocolate dessert


