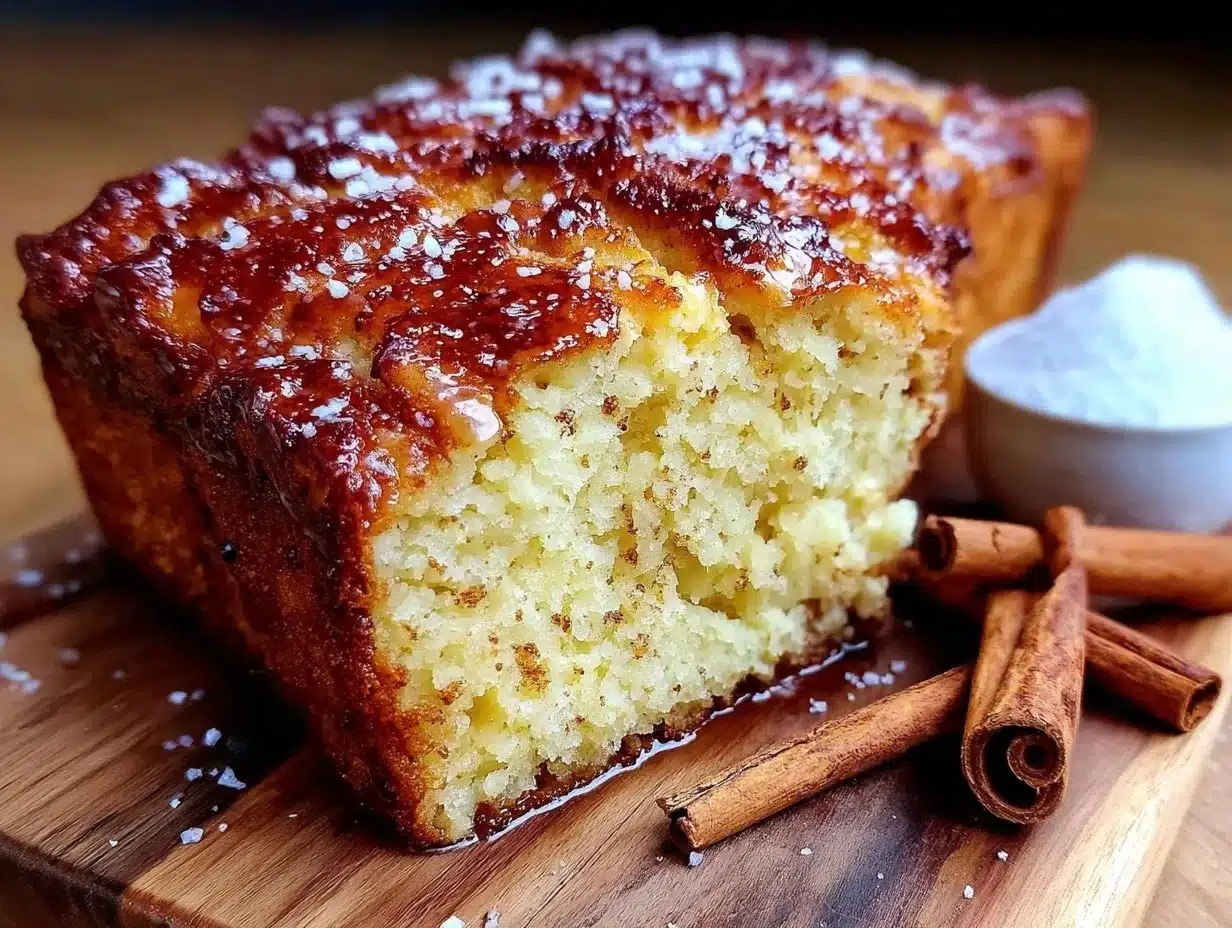
“Hey, did you forget to feed the starter again?” my neighbor teased from across the fence one crisp autumn morning. I laughed, juggling my coffee cup and the little bowl of bubbly dough in my hands. Honestly, I wasn’t sure what to expect the first time I tried making Amish friendship bread starter—mostly because it felt like a quirky kitchen experiment that somehow turned into a weekly ritual. That first loaf, dense and sweet with just the right tang, surprised me enough to keep coming back for more.
It wasn’t planned, really. I got the starter from a friend who swore it was foolproof, but I was skeptical. Yeast starters always intimidated me—too many steps, too much fuss. But this? It’s forgiving, cozy, and honestly, it made my kitchen smell like a little bakery every week. After a few tries, I realized this easy Amish friendship bread starter wasn’t just a recipe; it was a warm, ongoing story shared between neighbors and new friends. And whenever I pull out that thick, sweet batter, I remember that chilly morning and that unexpected, perfect loaf.
This starter is the kind of thing you keep around for comfort, for those days when you want something homemade but easy, something that brings a little sweetness and calm to the chaos. It stuck with me because it’s simple, reliable, and—let’s face it—delicious. Plus, it’s a gentle way to connect with a tradition that feels both old-fashioned and perfectly suited to today’s cozy baking moments.
Why You’ll Love This Recipe
After making this easy Amish friendship bread starter a handful of times, I can say it’s one of those recipes that quietly earns its place in your kitchen routine. Here’s why it could become yours, too:
- Quick & Easy: The starter is straightforward to maintain and takes just minutes to feed each day, perfect for busy schedules.
- Simple Ingredients: No need for specialty shops—flour, sugar, yeast, and milk are likely hanging out in your pantry right now.
- Perfect for Cozy Baking: Whether it’s a lazy weekend or a spontaneous baking afternoon, this starter preps you for warm loaves or muffins with that signature sweet tang.
- Crowd-Pleaser: Friends, family, or neighbors will always ask for your next batch—because it’s that good.
- Unbelievably Delicious: The flavor has depth and that slightly yeasty, tender crumb that feels like a hug in bread form.
What sets this starter apart is its forgiving nature. You don’t have to be a baking genius to get it right, and you can tweak it to suit your schedule or tastes. Unlike other starters that demand perfect timing or fancy ingredients, this one feels like a gentle nudge to keep baking simple and joyful. It’s the kind of recipe that turns baking from a chore into a cozy habit, the kind that fills your home with warmth and invites you back every time.
What Ingredients You Will Need
This easy Amish friendship bread starter relies on basic, wholesome ingredients to get that distinctive sweet and tangy flavor going without any fuss. Here’s what you’ll want to have ready:
- All-purpose flour: About 2 cups (240g) for the starter; unbleached is my go-to for best consistency.
- Granulated sugar: 2 cups (400g) – the sugar helps feed the yeast and adds that subtle sweetness.
- Milk: 2 cups (480ml), whole milk preferred for richness, but 2% works well too. You can swap with almond or oat milk if dairy-free.
- Active dry yeast: 1 packet (2 1/4 teaspoons or 7g) – make sure it’s fresh for a lively rise.
- Optional vanilla extract: 1 teaspoon – this adds a subtle depth to the starter’s aroma.
The beauty of this starter is how flexible it is. I usually keep mine simple, but if you want to experiment, you can switch out some of the all-purpose flour for whole wheat or spelt for a nuttier flavor. Just remember, the original recipe thrives on simplicity and consistency.
Pro tip: When purchasing yeast, I trust brands like Fleischmann’s or Red Star for reliable results. Also, fresh milk from your local dairy or grocery store works perfectly—the fresher, the better for that lively starter culture.
Equipment Needed
Setting up your Amish friendship bread starter doesn’t require any fancy gadgets—just some basic kitchen tools you probably already own:
- Large mixing bowl: A glass or plastic bowl with a wide mouth works best for stirring and allowing the starter to breathe.
- Measuring cups and spoons: Accuracy helps, especially with yeast and flour amounts.
- Wooden spoon or silicone spatula: For mixing the starter without damaging it.
- Plastic or glass container with a loose-fitting lid: You want the starter to breathe but not dry out. I often use a large mason jar or a plastic container with the lid loosely set on top.
- Kitchen scale (optional): If you want to be precise, weighing flour and sugar can make a difference in your starter’s consistency.
If you don’t have a kitchen scale, no worries—measuring cups work fine, just try to be consistent. I’ve found that using a glass container helps me see the bubbles forming, which is a good sign your starter is healthy. Plus, it’s easier to clean and doesn’t hold onto odors like plastic sometimes can.
Preparation Method
- Activate the yeast: In a small bowl, warm 1/2 cup (120ml) of milk to about 110°F (43°C) – warm, not hot! Sprinkle the active dry yeast over the milk and stir gently. Let it sit for 5-10 minutes until foamy. This step wakes up the yeast and ensures it’s alive.
- Mix the starter base: In your large mixing bowl, combine 2 cups (240g) all-purpose flour and 2 cups (400g) granulated sugar. Stir to blend the dry ingredients evenly.
- Add liquids: Pour the remaining 1 1/2 cups (360ml) of milk and the yeast mixture into the flour and sugar. Add 1 teaspoon vanilla extract if using. Stir everything together with a wooden spoon or silicone spatula until fully combined into a thick, smooth batter.
- Transfer to container: Spoon the starter into your glass or plastic container. Leave some room at the top because it will expand as it ferments.
- Cover and rest: Set the lid loosely on the container or cover with a clean kitchen towel. Place it in a warm spot (around 70-75°F / 21-24°C) for 24 hours. You’ll start to see bubbles forming—the sign of the starter coming alive.
- Feed the starter daily: For the next 9 days, you’ll feed the starter once each day. Stir the starter, then add 1 cup (120g) flour, 1 cup (200g) sugar, and 1 cup (240ml) milk. Mix well and cover again.
- Use or share: On day 10, the starter is ready to use in your favorite Amish friendship bread recipes. Don’t forget to save a cup of starter to begin the next batch! This is the magic of friendship bread—passing along a living recipe.
Note: If your starter ever smells funky or develops mold, it’s best to start fresh. But honestly, that’s rare if you keep feeding it regularly. The bubbling, sweet aroma is your cue that it’s happy and healthy.
Cooking Tips & Techniques
Keeping your Amish friendship bread starter thriving isn’t complicated, but a few tips can make a big difference:
- Temperature matters: Yeast loves warmth but not heat. Around 70-75°F (21-24°C) is ideal. If your kitchen is cold, try placing the starter near a radiator or inside an oven with just the light on.
- Consistency is key: Feed the starter around the same time daily. Missing a day isn’t the end of the world, but regular feeding keeps the yeast happy and active.
- Stir well: Mixing the starter thoroughly when feeding ensures even yeast distribution and prevents clumps.
- Watch the bubbles: Tiny bubbles on the surface and throughout the mixture mean your starter is alive and ready. If bubbles slow down, try warming the starter slightly or check your yeast’s freshness.
- Don’t stress about exact measurements: While precision helps, this starter is forgiving. I’ve had success using slightly less milk or flour without issues, just keep it a thick batter.
One time, I accidentally used cold milk during feeding, and my starter took a day longer to bubble up. Lesson learned—temperature really does influence yeast activity. Also, don’t be shy about adjusting feeding amounts if you want a bigger starter for more loaves or muffins.
Variations & Adaptations
The easy Amish friendship bread starter is versatile, letting you tweak it depending on preferences or dietary needs:
- Gluten-free option: Replace all-purpose flour with a gluten-free blend. Use xanthan gum if your blend doesn’t include it to help with texture.
- Dairy-free version: Swap milk for almond, oat, or coconut milk. Just make sure it’s unsweetened to avoid throwing off the sugar balance.
- Flavor infusions: Adding a teaspoon of cinnamon or nutmeg during feeding can subtly flavor your bread later on.
- Whole grain boost: Use half whole wheat flour for a nuttier, heartier starter. This adds fiber and a richer taste to your baked goods.
- Personal favorite: I’ve tried adding a tablespoon of honey instead of sugar during feeding—results in a slightly floral sweetness that’s lovely in muffins.
For those curious about different cooking methods, this starter works beautifully in bread machines, slow cookers (for bread pudding or cakes), or classic oven baking. It’s a friendly recipe that adapts to your kitchen style.
Serving & Storage Suggestions
Once your Amish friendship bread is baked—soft, sweet, and just a little tangy—here’s how to enjoy and keep it fresh:
- Serving temperature: Best served warm or at room temperature. A quick zap in the microwave (10-15 seconds) revives that fresh-baked feel.
- Presentation: Slice thick for toast or thinner for sandwiches. The bread pairs wonderfully with butter, cream cheese, or jam.
- Complementary dishes: This bread is a perfect match for cozy breakfasts or afternoon tea. Try it alongside a bowl of fresh chia seed pudding parfait or a cup of strong coffee.
- Storage: Keep leftover bread in an airtight container at room temperature for up to 3 days. For longer storage, freeze slices in a zip-top bag for up to 3 months.
- Reheating: Toast frozen slices directly or warm gently in the oven wrapped in foil.
- Flavor development: The bread’s flavor deepens slightly over a day or two, making it even better the next day.
Nutritional Information & Benefits
This Amish friendship bread starter and its resulting baked goods offer a comforting treat with moderate nutritional value. A typical slice contains roughly:
| Nutrient | Amount (per slice) |
|---|---|
| Calories | 180-220 kcal |
| Carbohydrates | 35-40g |
| Protein | 4-5g |
| Fat | 2-4g |
| Fiber | 1-2g |
Key benefits come from using real, simple ingredients without preservatives or additives. The yeast starter promotes natural fermentation, which can aid digestion and contribute to a tender crumb. You can customize it for dietary needs, such as gluten-free or dairy-free, making it accessible for many.
Be mindful that the bread contains gluten and dairy (unless substituted), so it’s not suitable for those with allergies or intolerances. From a wellness perspective, I appreciate how this recipe turns pantry staples into a homemade comfort food without unnecessary complexity or artificial ingredients.
Conclusion
This easy Amish friendship bread starter isn’t just a recipe—it’s a small tradition that invites warmth, simplicity, and a bit of sweetness into your kitchen. It’s the kind of baking that feels approachable, even if you don’t consider yourself a baker, and it has a way of turning ordinary days into special moments.
Feel free to play around with the starter, make it your own, and share it with friends—that’s the real joy behind this recipe. For me, it’s become a quiet source of comfort and connection, and I hope it finds a place in your home the same way.
If you’ve tried this starter, I’d love to hear about your favorite variations or how you’ve enjoyed your friendship bread. Sharing stories and tweaks is what keeps these recipes alive and well!
FAQs About Easy Amish Friendship Bread Starter
How long does it take to prepare the Amish friendship bread starter?
Initial preparation takes about 15 minutes, but the starter needs 10 days of daily feedings before it’s ready to use in recipes.
Can I skip feeding the starter every day?
It’s best to feed it daily for optimal yeast activity, but if you miss a day, the starter may take longer to become bubbly and ready.
What if my starter develops a bad smell or mold?
Discard the starter if you notice mold or a foul odor. A healthy starter should smell sweet and slightly yeasty, like bread dough.
How do I store leftover Amish friendship bread?
Store it in an airtight container at room temperature for up to 3 days or freeze slices for up to 3 months.
Can I use this starter for other baked goods?
Absolutely! The starter works well for muffins, cakes, and quick breads in addition to the traditional Amish friendship bread loaf.
Pin This Recipe!
Easy Amish Friendship Bread Starter Recipe for Perfect Homemade Baking

This easy Amish friendship bread starter is a simple, forgiving yeast starter that creates a sweet, tangy batter perfect for cozy homemade breads and muffins. It requires daily feeding for 10 days and is ideal for bakers of all levels.
- Prep Time: 15 minutes
- Cook Time: 0 minutes
- Total Time: 10 days (including daily feedings)
- Yield: Starter for multiple loaves or batches (varies by recipe)
- Category: Baking
- Cuisine: American
Ingredients
- 2 cups (240g) all-purpose flour
- 2 cups (400g) granulated sugar
- 2 cups (480ml) milk (whole milk preferred, 2% or dairy-free alternatives like almond or oat milk can be used)
- 1 packet (2 1/4 teaspoons or 7g) active dry yeast
- 1 teaspoon vanilla extract (optional)
Instructions
- Activate the yeast: Warm 1/2 cup (120ml) of milk to about 110°F (43°C). Sprinkle the active dry yeast over the milk and stir gently. Let it sit for 5-10 minutes until foamy.
- Mix the starter base: In a large mixing bowl, combine 2 cups (240g) all-purpose flour and 2 cups (400g) granulated sugar. Stir to blend evenly.
- Add liquids: Pour the remaining 1 1/2 cups (360ml) of milk and the yeast mixture into the flour and sugar. Add 1 teaspoon vanilla extract if using. Stir until fully combined into a thick, smooth batter.
- Transfer to container: Spoon the starter into a glass or plastic container, leaving room at the top for expansion.
- Cover and rest: Set the lid loosely or cover with a kitchen towel. Place in a warm spot (70-75°F / 21-24°C) for 24 hours until bubbles form.
- Feed the starter daily for 9 days: Stir the starter, then add 1 cup (120g) flour, 1 cup (200g) sugar, and 1 cup (240ml) milk. Mix well and cover again.
- Use or share: On day 10, the starter is ready to use in Amish friendship bread recipes. Save 1 cup of starter to begin the next batch.
Notes
Keep the starter at 70-75°F for best yeast activity. Feed daily at the same time for consistency. If the starter smells bad or molds, discard and start fresh. You can substitute dairy and gluten ingredients for dietary needs. The starter is forgiving and can be adjusted for size and flavor.
Nutrition
- Serving Size: 1 slice of bread mad
- Calories: 180220
- Fat: 24
- Carbohydrates: 3540
- Fiber: 12
- Protein: 45
Keywords: Amish friendship bread, bread starter, yeast starter, homemade bread, easy baking, sweet bread, cozy baking, bread starter recipe