“I swear, if one more thing falls apart today,” I muttered under my breath, staring at the clock while juggling a million little tasks. That’s exactly when I remembered those pre-packaged Uncrustable sandwiches my kid had once devoured in seconds during a school lunch. But honestly, the store-bought ones always left me wondering about all the preservatives and mystery ingredients. So, with the clock ticking and my energy low, I grabbed some simple ingredients and made my own version. The result? A quick, no-fuss sandwich that felt like a little victory in a chaotic day.
What surprised me most was how easy it was to whip up a batch of these homemade Uncrustable sandwiches for meal prep, saving me from those last-minute lunch scrambles later in the week. The sealed edges keep everything neat, there’s no crust to pick at, and the fillings can be swapped out for whatever suits your family’s taste. I found myself making them multiple times in one week—not just for lunchboxes, but as quick snacks when time vanished faster than expected.
That quiet realization that a homemade fix could be both simple and satisfying? It stuck with me. This recipe isn’t about fancy techniques or complicated steps—it’s about practical, real food that fits right into busy lives. If you’ve ever wished for a homemade alternative to those classic sealed sandwiches or needed a reliable meal prep idea that works for everyone, this is it. No fuss, just comfort and convenience wrapped into one.
Why You’ll Love This Recipe
After testing this easy homemade Uncrustable sandwich recipe several times, I can confidently say it’s a game-changer for meal prep and quick lunches. Here’s why it’s become a staple in my kitchen:
- Quick & Easy: Each sandwich comes together in about 10 minutes, making it perfect for busy mornings or last-minute meal prep sessions.
- Simple Ingredients: You likely have everything on hand—soft sandwich bread, your favorite spreads, and fillings. No need for specialty trips.
- Perfect for Meal Prep: These sandwiches freeze well and thaw quickly, great for packing lunches, snacks, or even a quick bite on the go.
- Crowd-Pleaser: Kids, adults, picky eaters—everyone loves the neat, crust-free presentation and customizable fillings.
- Unbelievably Delicious: The sealed edges trap in flavor and moisture, giving you a neat, pocket-like sandwich that’s soft yet satisfying.
What makes this recipe stand out is the simple sealing technique that mimics those store-bought Uncrustables but lets you control what goes inside. I prefer using creamy peanut butter combined with a smooth fruit jam, but I’ve also tried savory options with ham and cheese. Plus, swapping traditional white bread for whole grain or gluten-free varieties works like a charm.
Honestly, this isn’t just a sandwich—it feels like a little homemade treat that you can trust and rely on. Whether you’re prepping for school, work, or quick snacks after a hectic day, these easy homemade Uncrustable sandwiches have your back.
What Ingredients You Will Need
This recipe uses straightforward, pantry-friendly ingredients that come together to create a neat, sealed sandwich that’s easy to handle and packed with flavor. No fancy stuff, just real food that works.
- Soft sandwich bread: White or whole wheat, preferably fresh and slightly thick-sliced for sturdiness.
- Peanut butter (or any nut/seed butter): Creamy texture works best for easy spreading. I often use Jif for its smoothness.
- Fruit jam or jelly: Grape, strawberry, or raspberry—choose your favorite. Homemade or store-bought, just make sure it’s not too runny.
- Butter or margarine (optional): Thinly spread on the bread edges before sealing to help edges stick better.
- Flour: Just a dusting for your work surface to prevent sticking while sealing sandwiches.
Optional fillings and substitutes:
- Sunflower seed butter or almond butter: Great alternatives for nut-free or different flavor profiles.
- Honey or cream cheese: For a sweeter or creamy twist inside.
- Gluten-free sandwich bread: Works well if you need a gluten-free option; just handle carefully as it’s more delicate.
Keep in mind, the key is to use ingredients that aren’t too runny or watery, so the sandwich seals properly and doesn’t leak during freezing or transport.
Equipment Needed
- Round sandwich cutter or large cookie cutter (about 3–4 inches/7.5–10 cm): Essential for cutting the sandwiches into the classic Uncrustable shape. If you don’t have a cutter, a sturdy glass rim or small bowl works.
- Rolling pin (optional): For gently pressing the sandwich edges to seal securely.
- Baking sheet or tray: To place the sandwiches on for freezing or resting before storage.
- Parchment paper or silicone mat: Prevents sticking during prep and freezing.
- Knife or spatula: For spreading fillings evenly.
Personally, I find that a good-quality sandwich cutter makes the whole process faster and tidier. But I’ve also managed with a glass and careful hands when I was in a pinch. If you plan to make these regularly, investing in a dedicated cutter is worth it. Just make sure to wash and dry it well to avoid any sticky build-up.
Preparation Method

- Prepare your workspace: Lightly dust your countertop or cutting board with flour to prevent bread from sticking.
- Lay out the bread slices: Place two slices flat on your surface for each sandwich you plan to make.
- Spread fillings: Using a knife or spatula, evenly spread about 1 tablespoon (15 ml) of peanut butter on one slice. Add 1 tablespoon (15 ml) of your preferred jam on top of the peanut butter. Keep fillings away from edges to avoid leakage.
- Optional butter edge: Lightly spread softened butter or margarine around the edges of the other slice; this helps seal the sandwiches better.
- Assemble sandwiches: Place the second slice of bread (butter side down, if using) on top of the filled slice, aligning edges carefully.
- Cut and seal: Press your round sandwich cutter firmly down through the sandwich, twisting slightly to cut a clean circle and seal the edges. If you don’t have a cutter, use a sturdy glass rim, pressing evenly all around.
- Press edges: Use the rolling pin or your fingers to firmly press around the edges to ensure they’re sealed tight, preventing fillings from escaping.
- Freeze or store: Place the sandwiches on a parchment-lined baking sheet and freeze for at least 1 hour before transferring to a freezer bag. If eating fresh, store in an airtight container in the fridge for up to 2 days.
- Thaw and enjoy: When ready to eat, thaw sandwiches at room temperature or warm slightly in the microwave for 15-20 seconds for that fresh-made softness.
Quick tip: If your bread is too thick or fresh, it might be tricky to seal. A gentle press with a rolling pin before cutting helps compress the bread for a better seal. Also, be sure not to overfill; it’s better to add less filling than risk messy leaks later.
Cooking Tips & Techniques
Creating the perfect homemade Uncrustable sandwich is part art, part practical know-how. Here are some tips I’ve picked up along the way:
- Choose the right bread: Fresh but slightly firm bread holds up best. Too soft or stale bread can tear while sealing.
- Control your fillings: Use thick peanut butter or nut butter and jam that isn’t runny. If your jelly is watery, drain some liquid or gently heat it to thicken slightly.
- Sealing technique: Press firmly around edges with a rolling pin or the bottom of a glass to create a secure seal. This stops fillings from leaking during freezing or transport.
- Freeze before storing: Freezing sandwiches on a tray before bagging prevents them from sticking together and keeps their shape intact.
- Multi-tasking tip: While sandwiches freeze, prep other meal components like your creamy chicken pot pie or loaded baked potato soup for a cozy dinner later on.
- Storage caution: Don’t freeze sandwiches with fresh lettuce or watery veggies inside—they don’t hold up well and can make bread soggy.
Honestly, the first few times I made these, I was worried about the edges not sticking or the sandwiches leaking. But once I got the hang of the pressing technique and filling proportions, it became second nature.
Variations & Adaptations
One of the best things about homemade Uncrustable sandwiches is how versatile they are. You can tweak fillings and bread to suit different tastes or dietary needs:
- Sweet variations: Swap peanut butter for sunflower seed butter or almond butter. Try cream cheese and strawberry jam or Nutella with sliced bananas for a richer treat.
- Savory options: Use thinly sliced ham and Swiss cheese, or turkey and cheddar with a touch of mayo. Just make sure to pat excess moisture off deli meats to avoid sogginess.
- Gluten-free: Choose your favorite gluten-free sandwich bread. These sandwiches freeze well but handle gently when sealing.
- Seasonal twists: In summer, swap jam for freshly mashed berries or peach preserves. In fall, try apple butter with cinnamon-spiced cream cheese.
- Personal favorite: I once made a batch with peanut butter, honey, and thin apple slices—surprisingly delightful and perfect for a quick snack.
For quicker sealing, some folks like to brush water around edges instead of butter, but I find butter adds a subtle richness and seals better.
Serving & Storage Suggestions
These homemade Uncrustable sandwiches are best served at room temperature or slightly warmed. Here’s how I like to keep and enjoy them:
- Serving: Let frozen sandwiches thaw at room temperature for 10-15 minutes or microwave on low for 15-20 seconds until warm and soft.
- Presentation: Place sandwiches on a colorful plate or wrap individually in parchment or reusable sandwich wraps for lunches on the go.
- Storage: Store frozen sandwiches in airtight freezer bags for up to 2 months. Refrigerate fresh sandwiches in an airtight container and eat within 2 days.
- Reheating tip: I like to warm sandwiches wrapped in a damp paper towel to keep them soft and prevent drying out.
- Flavor note: The flavors meld nicely after freezing and thawing, especially if using peanut butter and jam—the classic combo stays creamy and delicious.
These sandwiches pair well with fresh fruit, crunchy veggie sticks, or a cup of homemade soup like the loaded baked potato soup for a comforting meal.
Nutritional Information & Benefits
Each homemade Uncrustable sandwich is roughly 250-300 calories, depending on bread and fillings. Here’s a quick breakdown:
- Protein: Peanut butter or nut butter provides a good plant-based protein boost.
- Healthy fats: Nut butters contribute heart-healthy fats that keep you satisfied.
- Carbohydrates: The bread and jam supply energy-giving carbs, ideal for busy days.
- Dietary tips: Easily adjustable for gluten-free or nut-free diets by swapping bread and spreads.
- Allergens: Contains nuts (unless substituted) and gluten (unless using gluten-free bread).
From a wellness perspective, making these sandwiches at home means you control sugar levels and ingredient quality. It’s a wholesome alternative to processed snacks, perfect for both kids and adults who need a quick, balanced bite.
Conclusion
Easy homemade Uncrustable sandwiches have become one of my go-to meal prep hacks for busy weeks. They’re simple, customizable, and just downright practical for anyone who values homemade food without the hassle. Whether you’re packing school lunches, quick snacks, or a light meal, these sandwiches fit right in.
Feel free to experiment with fillings and breads until you find your perfect combo—this recipe is forgiving and flexible, which I truly appreciate. I love how these little sandwiches bring a bit of calm and order to hectic days.
If you try them out, I’d love to hear what variations you come up with or how they helped your meal prep routine. Sharing those moments makes cooking feel even more rewarding.
Here’s to simple, satisfying, homemade meals that work hard for you!
Frequently Asked Questions
Can I use gluten-free bread for homemade Uncrustable sandwiches?
Yes! Gluten-free sandwich bread works well, just handle it gently when sealing since it can be more delicate than regular bread.
How long can I freeze these sandwiches?
They freeze best for up to 2 months. Make sure to store them in airtight freezer bags to prevent freezer burn.
What fillings work best inside homemade Uncrustables?
Classic peanut butter and jelly is a favorite, but you can also try nut butters, cream cheese with jam, or even savory options like ham and cheese.
Can I freeze sandwiches without sealing the edges?
Sealing helps keep fillings inside and prevents freezer burn. Unsealed sandwiches may leak or dry out, so it’s best to seal them well.
How do I prevent the bread from getting soggy?
Use thick spreads and avoid watery fillings. Also, freezing the sandwiches before storing helps maintain texture and prevent sogginess.
Pin This Recipe!
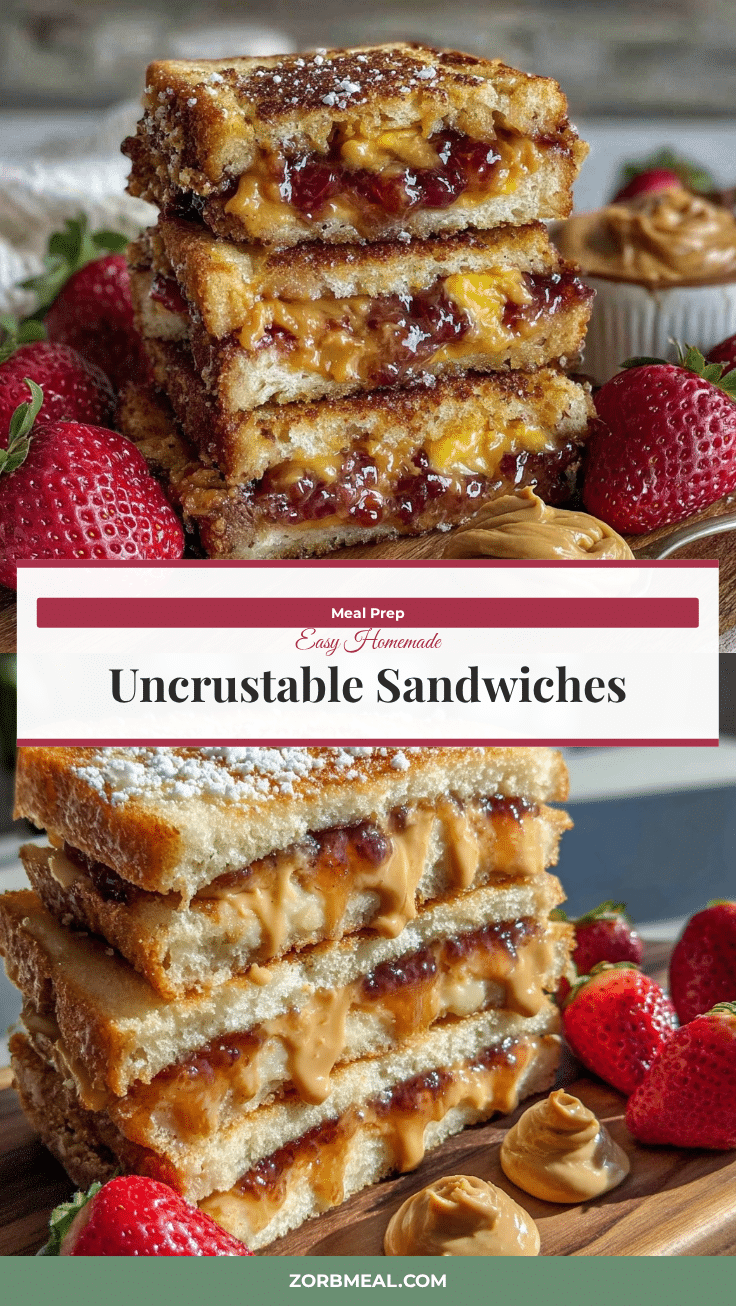
Easy Homemade Uncrustable Sandwiches for Quick Meal Prep Ideas

A quick and easy recipe for homemade Uncrustable sandwiches that are perfect for meal prep, lunchboxes, and snacks. These crust-free sandwiches are customizable, freezer-friendly, and made with simple ingredients.
- Prep Time: 10 minutes
- Cook Time: 0 minutes
- Total Time: 10 minutes plus freezing time
- Yield: 4 sandwiches
- Category: Snack
- Cuisine: American
Ingredients
- Soft sandwich bread (white or whole wheat, fresh and slightly thick-sliced)
- Peanut butter or any nut/seed butter (creamy texture preferred)
- Fruit jam or jelly (grape, strawberry, raspberry, or favorite flavor)
- Butter or margarine (optional, for spreading on bread edges to help seal)
- Flour (for dusting work surface to prevent sticking)
- Optional fillings and substitutes: sunflower seed butter, almond butter, honey, cream cheese, gluten-free sandwich bread
Instructions
- Lightly dust your countertop or cutting board with flour to prevent bread from sticking.
- Place two slices of bread flat on your surface for each sandwich you plan to make.
- Spread about 1 tablespoon of peanut butter on one slice of bread.
- Add 1 tablespoon of your preferred jam on top of the peanut butter, keeping fillings away from edges.
- Optionally, lightly spread softened butter or margarine around the edges of the other slice to help seal sandwiches better.
- Place the second slice of bread (butter side down, if using) on top of the filled slice, aligning edges carefully.
- Press a round sandwich cutter (3–4 inches diameter) firmly down through the sandwich, twisting slightly to cut a clean circle and seal the edges. If no cutter is available, use a sturdy glass rim or small bowl.
- Use a rolling pin or your fingers to firmly press around the edges to ensure a tight seal and prevent fillings from escaping.
- Place sandwiches on a parchment-lined baking sheet and freeze for at least 1 hour before transferring to a freezer bag. If eating fresh, store in an airtight container in the fridge for up to 2 days.
- When ready to eat, thaw sandwiches at room temperature for 10-15 minutes or warm slightly in the microwave for 15-20 seconds.
Notes
Use thick peanut butter and jam that is not runny to prevent leaks. Press edges firmly with a rolling pin or glass rim to seal well. Freeze sandwiches on a tray before bagging to prevent sticking. Avoid watery fillings like fresh lettuce or watery veggies to prevent sogginess. Gluten-free bread works but handle gently as it is more delicate.
Nutrition
- Serving Size: 1 sandwich
- Calories: 275
- Sugar: 10
- Sodium: 250
- Fat: 12
- Saturated Fat: 3
- Carbohydrates: 32
- Fiber: 2
- Protein: 8
Keywords: Uncrustable sandwiches, homemade sandwiches, meal prep, peanut butter and jelly, crust-free sandwich, freezer-friendly snack, quick lunch