Let me tell you, the moment I hear the sizzle of garlic hitting hot oil, I’m instantly hooked. The aroma alone—the golden, nutty scent of garlic crisps frying to perfection—is enough to make any kitchen feel like a cozy little haven. The first time I made these crispy fried garlic chips, I was knee-high to a grasshopper, helping my grandma in her bustling kitchen on a rainy weekend. I still remember that pause—the kind of moment where you take a deep breath, smile, and realize you’ve stumbled onto something truly special. The way those thin slices curled and bubbled in the pan, transforming into pure, crunchy magic, was almost hypnotizing.
Honestly, these garlic chips became an instant favorite in my family. My folks couldn’t stop sneaking them off the cooling rack (and I can’t really blame them). They’re dangerously easy to make, deliver pure, nostalgic comfort, and add that perfect punch of flavor and texture to just about anything. Whether you’re sprinkling them over a salad, jazzing up a bowl of noodles, or just munching straight from the jar, these garlic chips bring a little bit of joy to every bite.
You know what? These crispy fried garlic chips are perfect for potlucks, a sweet treat for your savory snack cravings, or even to brighten up your Pinterest snack boards. After testing this recipe more times than I can count—in the name of research, of course—they’ve become a staple for family gatherings and gifting. Trust me, you’re going to want to bookmark this one.
Why You’ll Love This Recipe
Let’s face it, not all garlic chips are created equal. What makes this crispy fried garlic chips recipe stand out? Well, here’s what I’ve learned from years of frying, tasting, and perfecting:
- Quick & Easy: Takes less than 15 minutes from start to finish—ideal for busy days or when you need a last-minute topping.
- Simple Ingredients: All you need is fresh garlic, oil, and a pinch of salt. No fancy trips to specialty stores.
- Perfect for All Occasions: Whether it’s brunch, dinner, or a snack attack, these chips add that irresistible crunch and flavor boost.
- Crowd-Pleaser: Kids, adults, garlic lovers, and skeptics alike can’t get enough of these crispy bites.
- Unbelievably Delicious: The texture is perfectly crunchy, and the flavor is deep, rich, and slightly sweet from caramelization—next-level comfort food.
What really sets this recipe apart is the technique: slicing the garlic paper-thin and frying at just the right temperature to avoid bitterness. Plus, a quick sprinkle of salt right after frying locks in the flavor. It’s not just another fried garlic chip recipe—it’s the one that makes you close your eyes after the first bite and savor every crunch. Honestly, it’s the kind of snack that feels like a warm hug and impresses guests without any stress.
What Ingredients You Will Need
This crispy fried garlic chips recipe uses simple, wholesome ingredients to deliver bold flavor and satisfying crunch without fuss. Most of these are pantry staples, and you might already have them on hand.
- Fresh Garlic Bulbs: Use firm, plump cloves—avoid any that feel soft or sprouted. I prefer organic garlic for its robust flavor.
- Neutral Cooking Oil: Such as vegetable oil, canola oil, or peanut oil. These oils have high smoke points, perfect for frying without burning the garlic.
- Sea Salt or Kosher Salt: A pinch to season right after frying—balances and enhances the natural garlic flavor.
Optional additions for flavor twists:
- Smoked Paprika or Chili Flakes: For a subtle smoky heat.
- Fresh Herbs: Like finely chopped parsley or thyme, tossed in after frying for a fresh pop.
- Black Pepper: Adds a mild bite without overpowering.
If you’re feeling adventurous, you can swap neutral oil with coconut oil for a slightly sweet undertone, but keep in mind it has a lower smoke point. For garlic selection, small-curd garlic cloves tend to crisp up better and taste sweeter.
Equipment Needed
- Sharp Mandoline or Knife: To slice garlic thinly and evenly. A mandoline with a fine setting works wonders for consistent slices, but a sharp chef’s knife can do the trick with some patience.
- Heavy-bottomed Skillet or Frying Pan: A cast iron or stainless steel pan helps maintain stable heat for even frying.
- Slotted Spoon or Spider Strainer: Essential for scooping out garlic chips without oil drips—makes you feel like a pro.
- Paper Towels or Wire Rack: For draining excess oil and keeping chips crispy.
- Heatproof Bowl: To toss the chips with salt and optional seasonings immediately after frying.
If you don’t have a mandoline, try using a vegetable peeler to shave thin slices, but be extra careful. For budget-friendly options, a basic stainless steel skillet works fine, but avoid nonstick pans as they don’t hold heat as well for frying.
Preparation Method

- Peel and Slice the Garlic: Start by peeling fresh garlic cloves, then slice them paper-thin—about 1-2 mm thick (roughly 1/16 inch). Consistency is key to even frying. This step usually takes about 10 minutes.
- Dry the Garlic: Lay the slices on a clean kitchen towel or paper towels and gently pat dry. Removing moisture helps prevent splattering and promotes crispiness.
- Heat the Oil: Pour about 1 to 1½ cups (240-360 ml) of neutral oil into your skillet. Heat over medium-low heat until it reaches around 275°F (135°C). Use a kitchen thermometer if you have one. If not, test by dropping one garlic slice in—it should bubble gently, not aggressively.
- Fry in Batches: Carefully add a small handful of garlic slices to the oil, spreading them out so they don’t stick together. Fry for 2-3 minutes, stirring gently with a slotted spoon. Watch closely—once they turn golden brown, scoop them out immediately to avoid burning.
- Drain and Season: Transfer the cooked garlic chips onto paper towels or a wire rack to drain. While still hot, sprinkle with sea salt and any optional seasonings you prefer.
- Cool Completely: Let the garlic chips cool fully before storing or serving. They’ll crisp up even more as they cool.
Pro tip: If some chips cook faster than others, remove those first to avoid bitterness. Also, keep the oil temperature steady—too hot and the garlic burns, too low and it gets soggy. This process takes about 15 minutes total once you get the hang of it.
Cooking Tips & Techniques
Here’s the thing about frying garlic chips: it’s all about timing and temperature. I’ve burned more than my fair share of garlic slices (smoke alarms included), so trust me when I say patience is your best friend here.
- Slice Evenly: Uneven slices lead to some chips burning while others stay pale. Use a mandoline or sharp knife for uniform slices.
- Keep Oil Temperature Low-to-Medium: Garlic cooks fast and can turn bitter if it burns. Aim for a gentle sizzle, not a furious fry.
- Don’t Crowd the Pan: Fry in small batches so the temperature stays stable and slices cook evenly.
- Drain Excess Oil Properly: Use paper towels or a wire rack to keep chips crisp and avoid sogginess.
- Store in an Airtight Container Once Cooled: This keeps the crunch intact for days.
Honestly, the first time I tried skipping the drying step, I ended up with a hot oil splatter disaster. Lesson learned! Also, multitasking helps—slice your garlic while heating the oil to save time without rushing.
Variations & Adaptations
One of the best things about crispy fried garlic chips is how versatile they are. Here are some ways to customize the recipe:
- Spicy Garlic Chips: Toss freshly fried chips with a pinch of chili powder or cayenne for a fiery kick.
- Herb-Infused: Add finely chopped rosemary or thyme right after frying for an herby twist.
- Low-Oil Version: Use an air fryer to crisp garlic slices with less oil. It won’t be quite the same, but it’s a great alternative for a lighter snack.
- Garlic and Shallot Mix: Combine thinly sliced shallots with garlic for a sweeter, layered flavor.
- Allergen-Friendly: Naturally gluten-free and vegan, just double-check your oil choice if allergies are a concern.
Personally, I once tried adding a sprinkle of smoked paprika and it was a game changer—perfect for topping roasted veggies or grilled meats. Feel free to experiment and find your favorite combo.
Serving & Storage Suggestions
Crispy fried garlic chips are best enjoyed fresh but store beautifully too. Serve them at room temperature as a topping or snack. They add incredible texture and flavor to:
- Salads and grain bowls
- Soups and stews
- Egg dishes like omelets and scrambled eggs
- Stir-fries and noodles
- Avocado toast or creamy dips
To store, place cooled garlic chips in an airtight container at room temperature. They keep their crunch for up to 1 week. Avoid refrigeration, which can introduce moisture and soften them. If you want to keep them longer, freeze in a sealed bag and re-crisp in a hot pan or oven before serving.
Reheating is simple: toss them in a dry skillet over medium heat for a minute or two until crunchy again. Over time, the flavor deepens, making them taste even nuttier and more aromatic.
Nutritional Information & Benefits
These crispy fried garlic chips are a low-calorie, flavorful snack option. A typical serving (about 1 tablespoon or 8-10 chips) contains roughly:
| Calories | Fat | Carbohydrates | Protein |
|---|---|---|---|
| 60 kcal | 5 g (mostly healthy fats) | 3 g | 0.5 g |
Garlic itself is known for potential heart-healthy benefits, containing antioxidants and compounds that may support immune health. Using a neutral oil with a good fat profile also adds to the recipe’s nutritional balance.
This recipe is naturally gluten-free and vegan, making it suitable for a variety of diets. The only allergen to watch out for is the oil type if you’re sensitive or allergic to nuts (like peanut oil).
Conclusion
So, why should you try this crispy fried garlic chips recipe? Because it’s a simple, satisfying way to add irresistible crunch and flavor to your meals and snacks. You can tailor it to your taste, whip it up in a flash, and trust me—the results will impress. I love it because it brings back warm memories, packs a punch of savory goodness, and is just downright fun to make.
Give it a go, tweak the seasonings, and let me know how you make it your own. If you try this recipe, don’t forget to share your thoughts or any cool variations you’ve come up with—I’d love to hear all about it. Here’s to many crunchy, garlicky moments ahead!
FAQs About Crispy Fried Garlic Chips
How thin should I slice the garlic for the chips?
Aim for about 1-2 mm thickness (roughly 1/16 inch). Thin slices crisp up best and fry evenly without burning.
Can I use pre-minced garlic instead of fresh cloves?
Pre-minced garlic isn’t suitable because it’s too moist and won’t crisp properly. Fresh cloves are the way to go.
What’s the best oil to fry garlic chips?
Neutral oils with high smoke points like vegetable, canola, or peanut oil work best. Avoid olive oil as it burns quickly at frying temperatures.
How do I store leftover garlic chips?
Keep them in an airtight container at room temperature for up to a week. Avoid refrigeration to maintain crispiness.
Can I make garlic chips in an air fryer?
Yes! Slice the garlic thinly, toss lightly with oil, and air fry at 300°F (150°C) for about 5-7 minutes, shaking halfway. Watch closely to prevent burning.
Pin This Recipe!
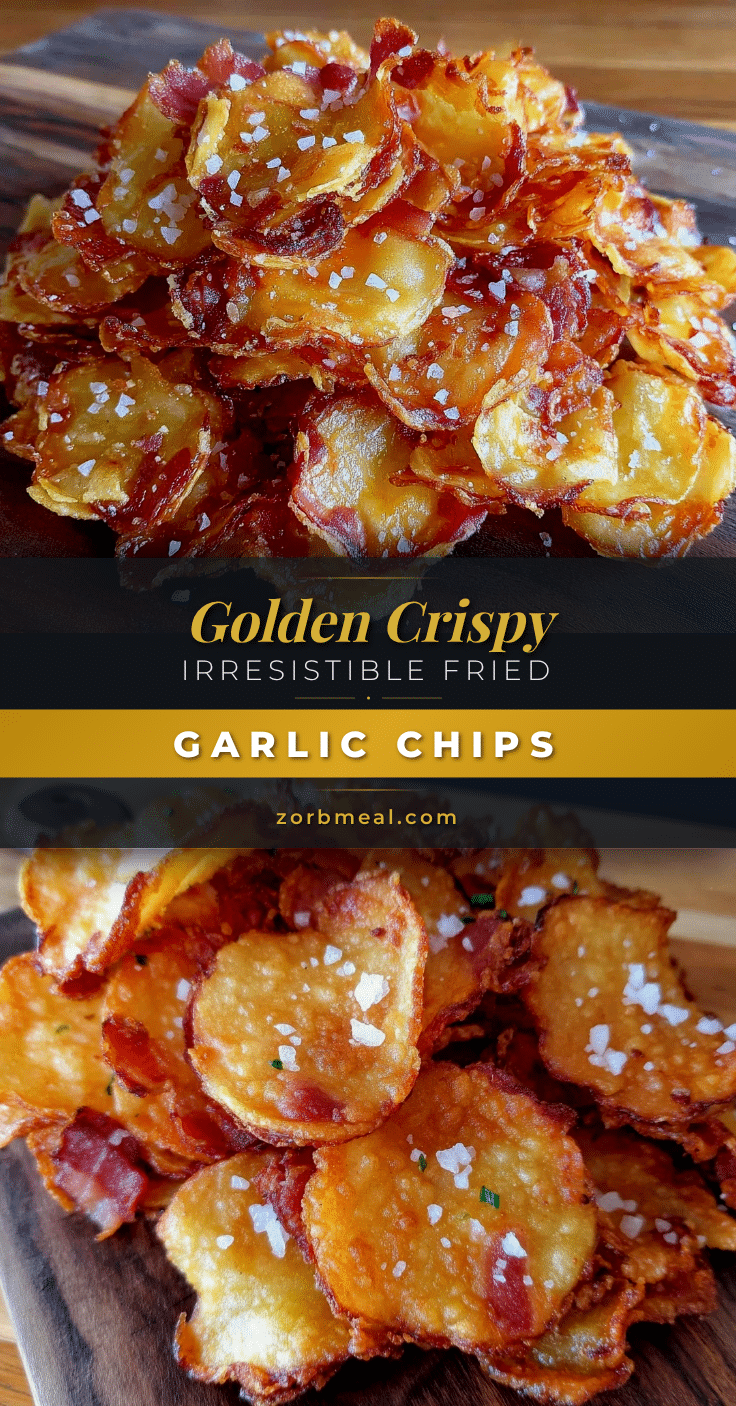
Crispy Fried Garlic Chips Recipe Easy Homemade Crunchy Snack
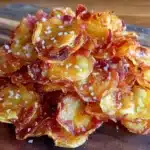
A quick and easy recipe for crispy fried garlic chips that deliver a crunchy, flavorful snack perfect for topping dishes or enjoying on their own.
- Prep Time: 10 minutes
- Cook Time: 15 minutes
- Total Time: 25 minutes
- Yield: About 8-10 chips per serving
- Category: Snack
- Cuisine: American
Ingredients
- Fresh garlic bulbs (firm, plump cloves)
- Neutral cooking oil (vegetable oil, canola oil, or peanut oil)
- Sea salt or kosher salt (a pinch)
- Optional: smoked paprika or chili flakes
- Optional: fresh herbs like parsley or thyme
- Optional: black pepper
Instructions
- Peel fresh garlic cloves and slice them paper-thin, about 1-2 mm thick (roughly 1/16 inch).
- Lay the slices on a clean kitchen towel or paper towels and gently pat dry to remove moisture.
- Pour about 1 to 1½ cups (8 to 12 fl oz) of neutral oil into a heavy-bottomed skillet and heat over medium-low heat until it reaches around 275°F (135°C).
- Carefully add a small handful of garlic slices to the oil, spreading them out so they don’t stick together.
- Fry for 2-3 minutes, stirring gently with a slotted spoon, until golden brown.
- Scoop out the garlic chips immediately to avoid burning and transfer onto paper towels or a wire rack to drain.
- While still hot, sprinkle with sea salt and any optional seasonings you prefer.
- Let the garlic chips cool completely before storing or serving.
Notes
Slice garlic evenly to avoid burning. Keep oil temperature steady around 275°F to prevent bitterness. Fry in small batches and drain excess oil properly. Store in an airtight container at room temperature for up to 1 week. Avoid refrigeration to maintain crispiness. Reheat in a dry skillet to re-crisp.
Nutrition
- Serving Size: About 1 tablespoon (
- Calories: 60
- Fat: 5
- Carbohydrates: 3
- Protein: 0.5
Keywords: garlic chips, crispy garlic, fried garlic, homemade snack, crunchy snack, garlic topping