There’s something magical about the aroma of warm chickpeas, garlic, and freshly squeezed lemon juice swirling together in the kitchen. The first time I whipped up a batch of my Healthy Homemade Hummus Trio, the scent was so inviting that my kids came running from the backyard, noses in the air, asking what smelled so good. I’ll never forget that moment—sunlight streaming in, the food processor humming away, and the anticipation of that first creamy, garlicky bite. It’s the kind of instant comfort that wraps you up, heart and soul, and makes you feel like you’ve stumbled onto a secret you want to share with everyone you love.
I first started making hummus years ago, back when store-bought tubs ruled my fridge (and honestly, they weren’t bad, but they never quite hit the spot). One rainy Saturday, determined to beat the blahs, I decided to make my own. I was instantly hooked. The texture was velvety, the flavors bright and punchy, and it took barely any time at all. My family couldn’t stop dipping, scooping, and sneaking tastes off the spoon. Even my “not so adventurous” aunt asked for seconds at our next family gathering. I should’ve started making homemade hummus years ago—it’s dangerously easy and delivers pure, nostalgic comfort every single time.
This Healthy Homemade Hummus Trio is now a staple for potlucks, after-school snacks, and last-minute get-togethers with friends. It’s the kind of recipe that feels like a warm hug—simple, customizable, and downright irresistible. Honestly, you’re going to want to bookmark this one (and maybe double it, just in case). After testing and tweaking these three flavors more times than I can count (all in the name of research, of course), I can promise you: this is one crowd-pleaser that will brighten up your Pinterest boards and your snack table.
Why You’ll Love This Healthy Homemade Hummus Trio Recipe
You know what? There’s a reason hummus has become a go-to snack for so many people, and this Healthy Homemade Hummus Trio takes things to the next level. I’ve tested, tasted, and tweaked these recipes in my own kitchen (with hungry snackers waiting impatiently), and here’s why you’re going to fall in love with them too:
- Quick & Easy: Each hummus flavor comes together in about 10 minutes (no cooking required!), making it perfect for busy weeknights, school lunches, or when surprise guests pop in.
- Simple Ingredients: No need for fancy ingredients or special trips to the store. You probably have everything you need already—just open your pantry and you’re halfway there.
- Perfect for Every Occasion: These dips shine at brunch, picnics, potlucks, or cozy nights in. They look stunning on a veggie platter and taste even better the next day.
- Crowd-Pleaser: I’ve served these to kids, teens, friends, and picky eaters, and they all come back for seconds (some even scrape the bowl—true story!).
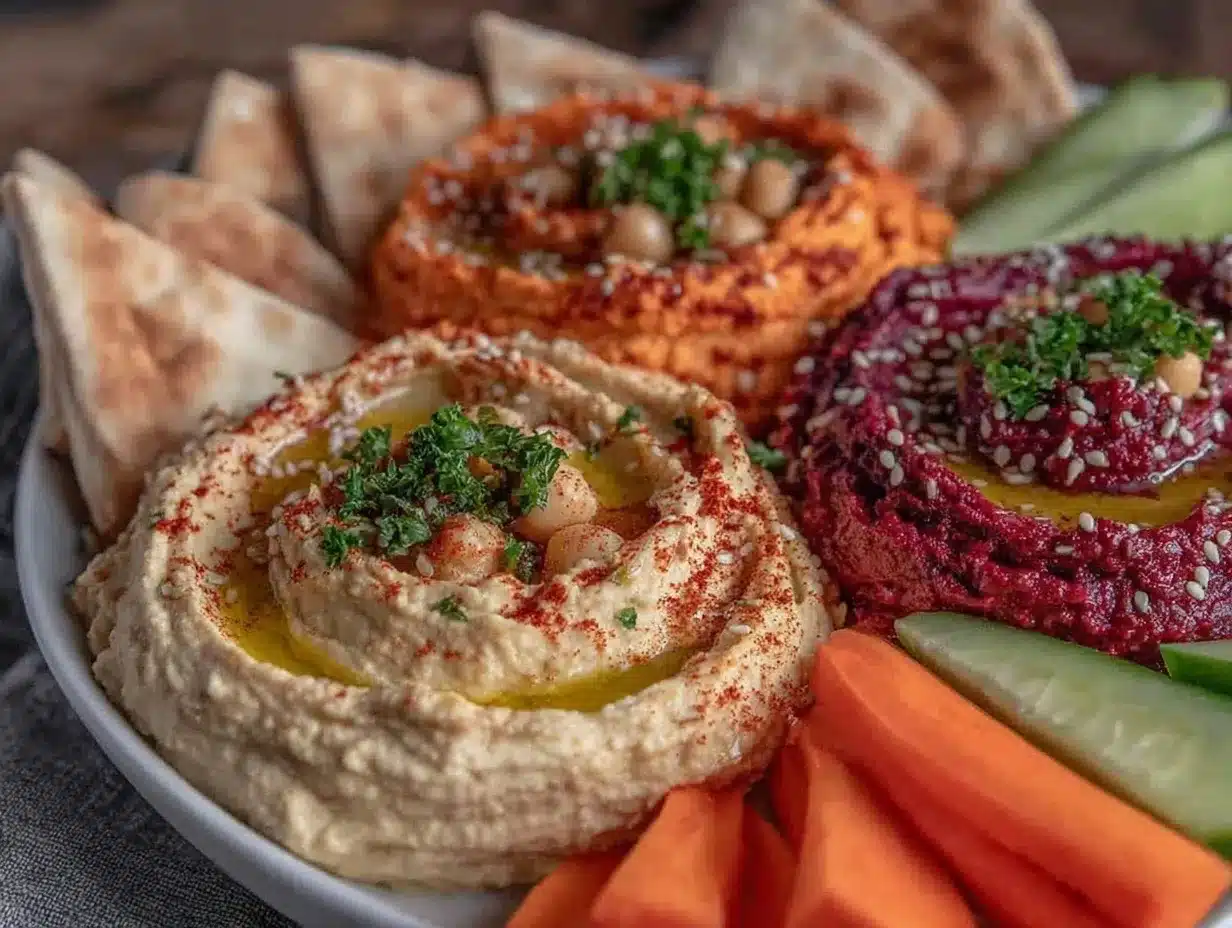
- Unbelievably Delicious: Each dip is creamy, rich, and bursting with fresh flavor. The classic hummus is silky and garlicky, the roasted red pepper version is sweet and smoky, and the herby green goddess is bright and zesty.
What really sets this Healthy Homemade Hummus Trio apart is the flexibility—you can blend up all three flavors without dirtying a bunch of dishes (just rinse between batches). I use a special trick: adding a splash of cold water at the end for that ultra-creamy texture you can’t get from store-bought. You know, it’s the little things that make homemade hummus taste so much better.
This recipe isn’t just another hummus—it’s the one you’ll crave. The kind that makes you close your eyes after the first bite and sigh in happiness. It’s comfort food with a healthy twist, simple enough for a weekday snack but impressive enough to wow at your next party. Whether you’re vegan, gluten-free, or just looking for something fresh, these dips are for you. Go ahead, make a batch (or three), and watch them disappear!
What Ingredients You Will Need for the Healthy Homemade Hummus Trio
This recipe uses simple, wholesome ingredients to deliver bold flavor and a creamy texture without any fuss. Most of these are pantry staples, and you can easily swap things in and out depending on what you have on hand.
For the Classic Hummus Base:
- 1 can (15 oz / 425 g) chickpeas, drained and rinsed (or 1.5 cups cooked chickpeas)
- 1/4 cup (60 mL) tahini (I like Soom or Seed + Mill for best flavor and smoothness)
- 2 tablespoons (30 mL) fresh lemon juice (about 1 large lemon)
- 1–2 cloves garlic, peeled (for a milder flavor, use roasted garlic—so good!)
- 1/2 teaspoon kosher salt, or to taste
- 2–3 tablespoons (30–45 mL) cold water (for extra creaminess)
- 2 tablespoons (30 mL) extra virgin olive oil (plus more for drizzling)
For Roasted Red Pepper Hummus:
- 1/3 of the classic hummus base (from above)
- 1/3 cup (60 g) roasted red peppers, drained and chopped (jarred or homemade)
- 1/4 teaspoon smoked paprika (adds a subtle smoky note)
For Herby Green Goddess Hummus:
- 1/3 of the classic hummus base (from above)
- 1/2 cup (15 g) fresh parsley and/or cilantro, chopped (I like a mix—use your favorite)
- 1 tablespoon (15 mL) fresh lemon juice
- 1 tablespoon (15 mL) chopped fresh chives or green onion
- 1/2 small jalapeño, seeded and chopped (optional, for a mild kick)
For Garnish (Optional but Highly Recommended!):
- Extra virgin olive oil (for drizzling)
- Smoked paprika or sumac (for dusting)
- Sesame seeds, chopped herbs, or pine nuts
- Fresh veggies, pita chips, or crackers for dipping
Ingredient Tips: If you want a super-smooth hummus, peel your chickpeas by gently pinching them (it’s a little tedious, but it makes a difference). For a garlic punch, use raw; for mellow flavor, roast it first. Using jarred roasted red peppers is a great shortcut, but homemade is even better if you have time. For a nutty spin, swap in cashew butter for tahini. Gluten-free? All flavors are naturally gluten-free—just double-check your dippers.
Equipment Needed
- Food Processor or High-Powered Blender: The gold standard for creamy hummus. I use a 7-cup food processor, but any size works if you blend in batches.
- Can Opener: For opening chickpea cans (unless you’re using cooked-from-scratch—go you!).
- Measuring Cups & Spoons: For getting the right balance of flavors. A digital scale is great if you’re aiming for true precision.
- Small Sharp Knife & Cutting Board: For prepping garlic, herbs, and add-ins.
- Rubber Spatula: Makes it easy to scrape down the sides and get every last bit of hummus out of the bowl.
- Serving Bowls & Spoons: For that Pinterest-worthy hummus spread.
Alternatives: If you don’t have a food processor, a blender works (just scrape often). A potato masher and some elbow grease will do in a pinch, though the result will be chunkier (hey, rustic is charming!).
My food processor is years old and still going strong—just keep those blades sharp and wash parts promptly so the garlic smell doesn’t linger. For budget-friendly options, check thrift stores or ask around—someone’s always upgrading and looking to rehome their trusty appliance!
Preparation Method: How to Make Healthy Homemade Hummus Trio
-
Prep the Chickpeas: Drain and rinse 1 can (15 oz / 425 g) chickpeas well. If you want ultra-creamy hummus, take a few extra minutes to peel the chickpeas by gently pinching each one to remove the skins. This step is tedious but totally worth it for silky-smooth results.
Note: If using home-cooked chickpeas, reserve a few tablespoons of the cooking liquid to use instead of water in the next steps. -
Blend the Base: In your food processor, combine all chickpeas, 1/4 cup (60 mL) tahini, 2 tablespoons (30 mL) lemon juice, 1–2 cloves garlic, 1/2 teaspoon kosher salt, and 2 tablespoons (30 mL) olive oil. Blend for 1–2 minutes, scraping down the sides as needed.
Tip: If the mixture looks too thick or dry, add cold water 1 tablespoon (15 mL) at a time until you reach a creamy consistency that’s easy to scoop but not runny. - Divide the Base: Scoop the blended hummus base into three equal portions (about 2/3 cup or 170 g each) into separate bowls. Rinse out your food processor between flavors so each dip tastes distinct.
-
Classic Hummus: Place one portion back into the processor. Blend again for 30 seconds, adding a little more lemon juice, olive oil, or salt to taste. Scrape into a serving bowl and swirl the top with the back of a spoon.
Sensory cue: The texture should be smooth and airy, with a mild garlicky aroma. -
Roasted Red Pepper Hummus: To a clean processor bowl, add one hummus portion, 1/3 cup (60 g) roasted red peppers, and 1/4 teaspoon smoked paprika. Blend until the peppers are fully incorporated and the hummus turns a rosy hue, about 30–45 seconds. Taste and adjust seasoning if needed.
Note: If using jarred peppers, blot them on paper towels to remove excess liquid. -
Herby Green Goddess Hummus: In the cleaned processor, combine the final hummus portion, 1/2 cup (15 g) fresh herbs, 1 tablespoon (15 mL) lemon juice, 1 tablespoon (15 mL) chopped chives, and optional jalapeño. Blend until the herbs are finely minced and the hummus is a vibrant green.
Tip: If the mix is too thick, add a splash of cold water. -
Finish and Garnish: Spoon each hummus into its own bowl. Swirl the tops with the back of a spoon, drizzle with olive oil, and add your favorite garnishes—smoked paprika on the red pepper, sesame seeds on the classic, chopped herbs on the green goddess.
Personal tip: Let the dips chill in the fridge for 30 minutes before serving. The flavors meld and deepen, trust me!
Troubleshooting: If your hummus tastes bland, add more lemon, salt, or tahini. Too thick? More water or olive oil. Too thin? Blend in extra chickpeas. If the garlic is too harsh, let the hummus rest in the fridge for an hour—the flavor mellows out beautifully.
Cooking Tips & Techniques for the Best Hummus
- Peel Those Chickpeas: I know, it sounds fussy, but peeling chickpeas makes the hummus almost buttery-smooth. When I skip this, it’s still tasty, just a bit chunkier.
- Blend While Warm: If you’re cooking chickpeas from scratch, blend them while they’re still warm. The heat softens them and helps everything whip up extra creamy.
- Adjust Seasonings Gradually: Always start with the lower end of garlic, lemon, and salt, then add more after tasting. Chickpeas can soak up flavor—sometimes you need an extra pinch or squeeze to really make it pop.
- Don’t Skip the Cold Water Trick: A tablespoon or two of cold water, added at the end, makes the hummus fluffy and light. I stumbled onto this tip after a batch turned out dense—one splash of icy water fixed it instantly.
- Multitasking: While the hummus blends, get your garnishes and dippers ready. This way, everything hits the table at the same time.
- Consistency is Key: If you want hummus perfect for spreading on sandwiches, make it thicker. For dipping, go creamier. It’s all about personal preference—don’t be afraid to play around.
- Don’t Be Afraid to Mess Up: I’ve made hummus with too much garlic (hello, dragon breath!) and once forgot the salt entirely. Just taste, adjust, and remember—it’s nearly impossible to ruin homemade hummus.
Honestly, every batch is a little different, and that’s half the fun. If you’re making a trio for a party, rinse and reuse your processor between flavors for clean, distinct tastes. And don’t stress if the hummus looks rustic—it’s homemade, after all!
Variations & Adaptations
- Spicy Sriracha Hummus: Add 1–2 teaspoons sriracha or your favorite hot sauce to the classic base for a fiery kick. Sprinkle with chili flakes for extra heat.
- Beet Hummus: Blend in 1/2 cup cooked, diced beets with the classic base for a gorgeous magenta color and earthy sweetness. This one’s a hit at brunch and looks amazing on Instagram.
- Sun-Dried Tomato & Basil: Toss in 1/4 cup oil-packed sun-dried tomatoes and a handful of fresh basil leaves for a Mediterranean-inspired twist.
- Different Cooking Methods: No food processor? Mash ingredients together with a fork or potato masher for a chunky, rustic dip. It’s not as creamy, but still delicious.
- Dietary Swaps: For oil-free hummus, skip the olive oil and add a splash more water or aquafaba (the liquid from canned chickpeas). For sesame allergies, use sunflower seed butter or cashew butter in place of tahini.
- Personal Favorite: I often toss in a handful of roasted carrots with the classic base for a slightly sweet, earthy flavor—my kids love it!
The beauty of this Healthy Homemade Hummus Trio recipe is its flexibility. Play with any herbs, spices, or add-ins you like. If you have a garden, swap in whatever’s fresh. And if you’re cooking for a crowd, double the recipe—there’s never too much hummus!
Serving & Storage Suggestions
Serve your Healthy Homemade Hummus Trio slightly chilled or at room temperature. For a showstopper platter, spoon each flavor into a shallow bowl, swirl the tops, drizzle with olive oil, and sprinkle with herbs, sesame seeds, or paprika. Surround with crisp veggies, pita chips, pretzels, or even toasted sourdough slices.
Pair these dips with fresh lemonade, iced tea, or a light, citrusy white wine. For a full meal, add grilled chicken skewers, roasted veggies, or a big salad on the side.
Store leftovers in airtight containers in the refrigerator for up to 5 days. The flavors intensify as they sit—if the hummus thickens, just stir in a splash of water before serving. You can freeze hummus for up to 2 months; thaw overnight in the fridge and stir well before eating. For best flavor, let it come close to room temperature before serving—cold hummus can taste a little muted.
Reheating isn’t usually necessary, but if you like it warm, zap it in the microwave for 10–15 seconds and stir. Trust me, this trio never lasts long enough in my house to worry about storage!
Nutritional Information & Benefits
Each serving (about 2 tablespoons/30 g) of this Healthy Homemade Hummus Trio clocks in at roughly 70 calories, with 2 g protein, 4 g fat (mostly heart-healthy), and 6 g carbs. These dips are naturally vegan, gluten-free, and full of plant-based goodness.
Chickpeas deliver fiber, protein, and key minerals like iron and magnesium. Tahini and olive oil add healthy fats that help keep you full. The trio of flavors means you’re getting bonus vitamins from herbs, peppers, and lemon juice. If you’re watching sodium, use low-salt beans and adjust salt to taste. Allergic to sesame? Try sunflower seed butter instead of tahini.
From a wellness perspective, hummus is one of those snacks that fuels you and satisfies cravings without the crash. I love how it’s both nourishing and genuinely tasty—a true win-win for any snack time!
Conclusion
This Healthy Homemade Hummus Trio recipe isn’t just a dip—it’s a whole experience. With simple ingredients, endless flavor possibilities, and a creamy texture that beats anything from a store, it’s the kind of recipe you’ll reach for again and again. Whether you stick with the classic, get adventurous with roasted red peppers, or try the herby green goddess spin, you’re in for a treat.
Don’t be afraid to customize these dips with your favorite add-ins or whatever’s in season. The magic of homemade hummus is that it’s forgiving, flexible, and always delicious. Personally, it’s brought so many smiles (and happy bellies) to my family table, and I hope it does the same for you.
If you try this recipe, I’d love to hear how you made it your own—drop a comment below, share your photo on Pinterest, or let me know your favorite hummus flavor. Here’s to sharing good food and good times—happy dipping!
FAQs About Healthy Homemade Hummus Trio
Can I make this hummus without tahini?
Absolutely! Try using sunflower seed butter, cashew butter, or even plain Greek yogurt for a different flavor profile. The texture will change a bit, but it’ll still be creamy and delicious.
How long does homemade hummus last in the fridge?
Stored in an airtight container, homemade hummus keeps well for up to 5 days. Just stir before serving if any separation occurs.
Can I freeze hummus?
Yes, you can freeze hummus for up to 2 months. Thaw overnight in the fridge and give it a good stir before eating. Add a splash of water or olive oil if it seems too thick.
What can I use instead of chickpeas?
White beans (like cannellini or great northern beans) work well as a substitute, and offer a slightly different flavor. You can also try black beans for a fun twist!
Is this recipe suitable for kids?
Definitely! Kids usually love the creamy texture and mild flavors. Start with less garlic and add more if your family likes a stronger taste. The bright colors are a bonus for picky eaters.
Pin This Recipe!
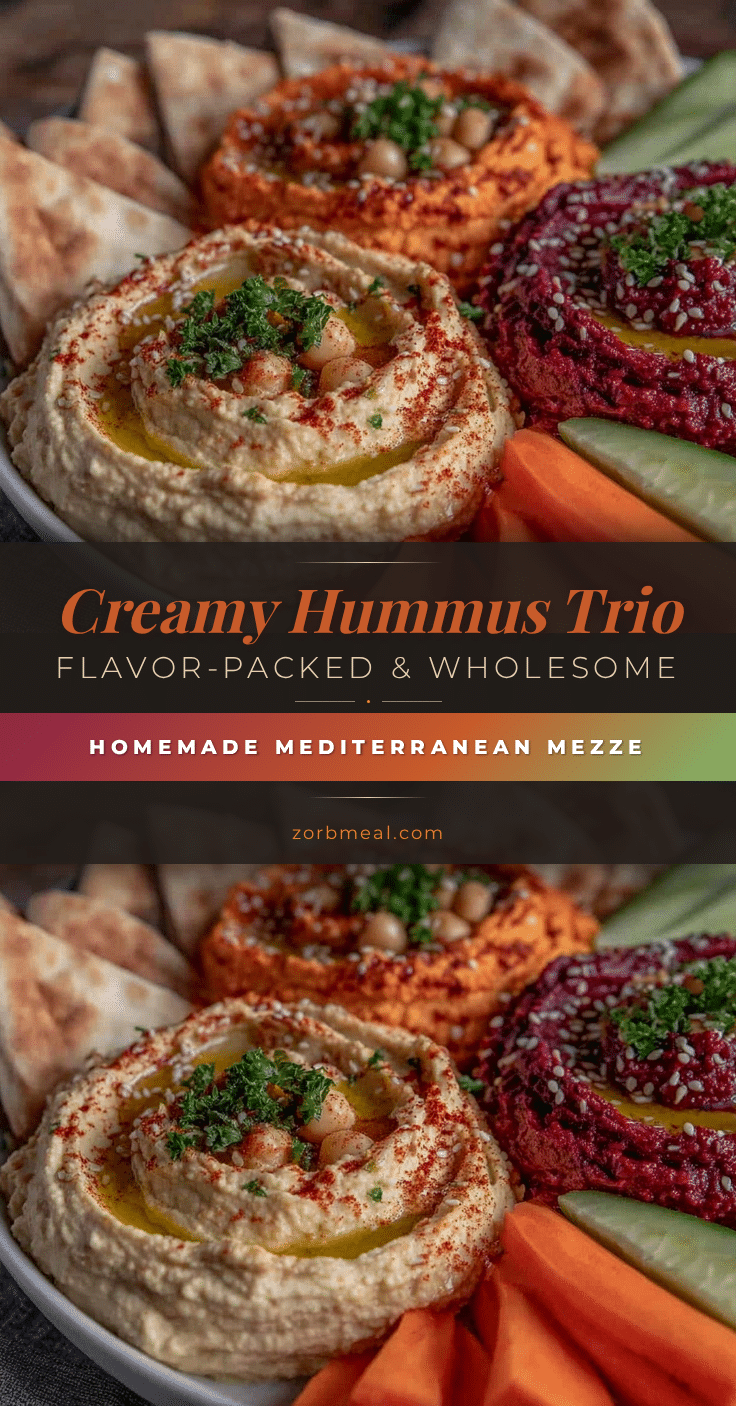
Healthy Homemade Hummus Trio Recipe – 3 Easy Flavors to Try

This Healthy Homemade Hummus Trio features three delicious flavors—classic, roasted red pepper, and herby green goddess. Each dip is creamy, customizable, and comes together in minutes for a crowd-pleasing snack or appetizer.
- Prep Time: 10 minutes
- Cook Time: 0 minutes
- Total Time: 10 minutes
- Yield: 2 cups (about 12 servings, 2 tablespoons each) 1x
- Category: Appetizer
- Cuisine: Middle Eastern, Mediterranean
Ingredients
- 1 can (15 oz) chickpeas, drained and rinsed (or 1.5 cups cooked chickpeas)
- 1/4 cup tahini
- 2 tablespoons fresh lemon juice (about 1 large lemon)
- 1–2 cloves garlic, peeled (use roasted garlic for milder flavor)
- 1/2 teaspoon kosher salt, or to taste
- 2–3 tablespoons cold water
- 2 tablespoons extra virgin olive oil (plus more for drizzling)
- 1/3 cup roasted red peppers, drained and chopped (jarred or homemade)
- 1/4 teaspoon smoked paprika
- 1/2 cup fresh parsley and/or cilantro, chopped
- 1 tablespoon fresh lemon juice
- 1 tablespoon chopped fresh chives or green onion
- 1/2 small jalapeño, seeded and chopped (optional)
- Extra virgin olive oil (for drizzling, optional garnish)
- Smoked paprika or sumac (for dusting, optional garnish)
- Sesame seeds, chopped herbs, or pine nuts (optional garnish)
- Fresh veggies, pita chips, or crackers for dipping
Instructions
- Drain and rinse chickpeas well. For ultra-creamy hummus, peel chickpeas by gently pinching each one to remove the skins.
- In a food processor, combine all chickpeas, tahini, 2 tablespoons lemon juice, garlic, salt, and olive oil. Blend for 1–2 minutes, scraping down the sides as needed.
- If the mixture is too thick, add cold water 1 tablespoon at a time until creamy and scoopable.
- Divide the hummus base into three equal portions in separate bowls. Rinse the food processor between flavors.
- For Classic Hummus: Place one portion back in the processor. Blend again for 30 seconds, adding more lemon juice, olive oil, or salt to taste. Scrape into a serving bowl and swirl the top.
- For Roasted Red Pepper Hummus: In a clean processor bowl, add one hummus portion, roasted red peppers, and smoked paprika. Blend until fully incorporated and rosy in color, about 30–45 seconds. Adjust seasoning if needed.
- For Herby Green Goddess Hummus: In the cleaned processor, combine the final hummus portion, fresh herbs, 1 tablespoon lemon juice, chives or green onion, and optional jalapeño. Blend until herbs are finely minced and hummus is vibrant green. Add a splash of cold water if too thick.
- Spoon each hummus into its own bowl. Swirl the tops, drizzle with olive oil, and add garnishes as desired.
- Let dips chill in the fridge for 30 minutes before serving for best flavor.
Notes
For extra creamy hummus, peel chickpeas before blending. Adjust garlic, lemon, and salt to taste. Add cold water at the end for fluffiness. Store leftovers in the fridge for up to 5 days or freeze for up to 2 months. All flavors are naturally gluten-free and vegan. For oil-free, omit olive oil and add more water or aquafaba.
Nutrition
- Serving Size: 2 tablespoons (about
- Calories: 70
- Sugar: 1
- Sodium: 120
- Fat: 4
- Saturated Fat: 0.5
- Carbohydrates: 6
- Fiber: 2
- Protein: 2
Keywords: hummus, healthy, vegan, gluten-free, trio, dip, snack, Mediterranean, chickpeas, easy, homemade