Picture this: the soft clink of coffee mugs, the sun streaming through your kitchen window, and the irresistible aroma of freshly toasted sourdough swirling in the air. There’s a gentle hum of laughter as your best friends—your Galentine’s crew—gather around, eyes lighting up at a table bursting with colorful spreads, vibrant fruits, and crunchy toppings. The first time I set up a Galentine’s Build-Your-Own Toast Bar, it felt like I’d stumbled onto a little slice of brunch heaven. We were all in our pinkest pajamas, giggling about the week, and honestly, the excitement over the toppings was only rivaled by our enthusiasm for swapping stories.
I remember running around the kitchen, my apron smeared with berry jam, thinking, “Why didn’t I do this years ago?” Maybe it’s the nostalgia of sleepovers or the pure joy of customizing every bite, but this toast bar quickly became a tradition. (My friends still talk about the pistachio butter and honey combo!) It’s the kind of moment where you pause, look around at everyone building their creations, and realize you’ve made something magical out of simple ingredients.
Let’s face it, when you want to impress without the stress, nothing beats a build-your-own approach. My friends couldn’t stop snapping pictures (or sneaking bites before I’d finished setting up). It’s festive, interactive, and, you know what, dangerously easy to pull off. Whether you’re planning a Galentine’s brunch, a birthday bash, or just want to brighten up your Sunday, this toast bar is your ticket to pure, nostalgic comfort. I’ve tested and tweaked my favorite combinations more times than I can count (in the name of research, of course). It’s now a staple for every brunch, and—trust me—you’re going to want to bookmark this one for your next gathering.
Why You’ll Love This Galentine’s Build-Your-Own Toast Bar
After years of hosting brunches (and, let’s be honest, learning the hard way that complicated recipes cut into gossip time), I can say this is the most crowd-pleasing, low-stress, and absolutely fun brunch setup I’ve ever hosted. Here’s why you’ll fall head over heels for this festive Galentine’s toast bar:
- Quick & Easy: Seriously, you’ll have the whole spread ready in under 30 minutes. Perfect for last-minute get-togethers or when you’d rather chat than cook.
- Simple Ingredients: Everything is made from everyday staples—bread, fruit, spreads, and a few fun extras. No fancy cheese shops or specialty stores required.
- Perfect for Brunch or Parties: This is a Galentine’s Day superstar, but it’s also ideal for baby showers, bridal brunches, or even lazy Sundays with your kids.
- Crowd-Pleaser: Everyone gets to make their own perfect toast, so even the pickiest eaters are happy. (Trust me, I’ve hosted for both avocado lovers and PB&J purists—everyone left smiling.)
- Unbelievably Delicious: The flavor and texture combos are endless—crunchy, creamy, sweet, savory. It’s comfort food, but make it stylish and Insta-worthy.
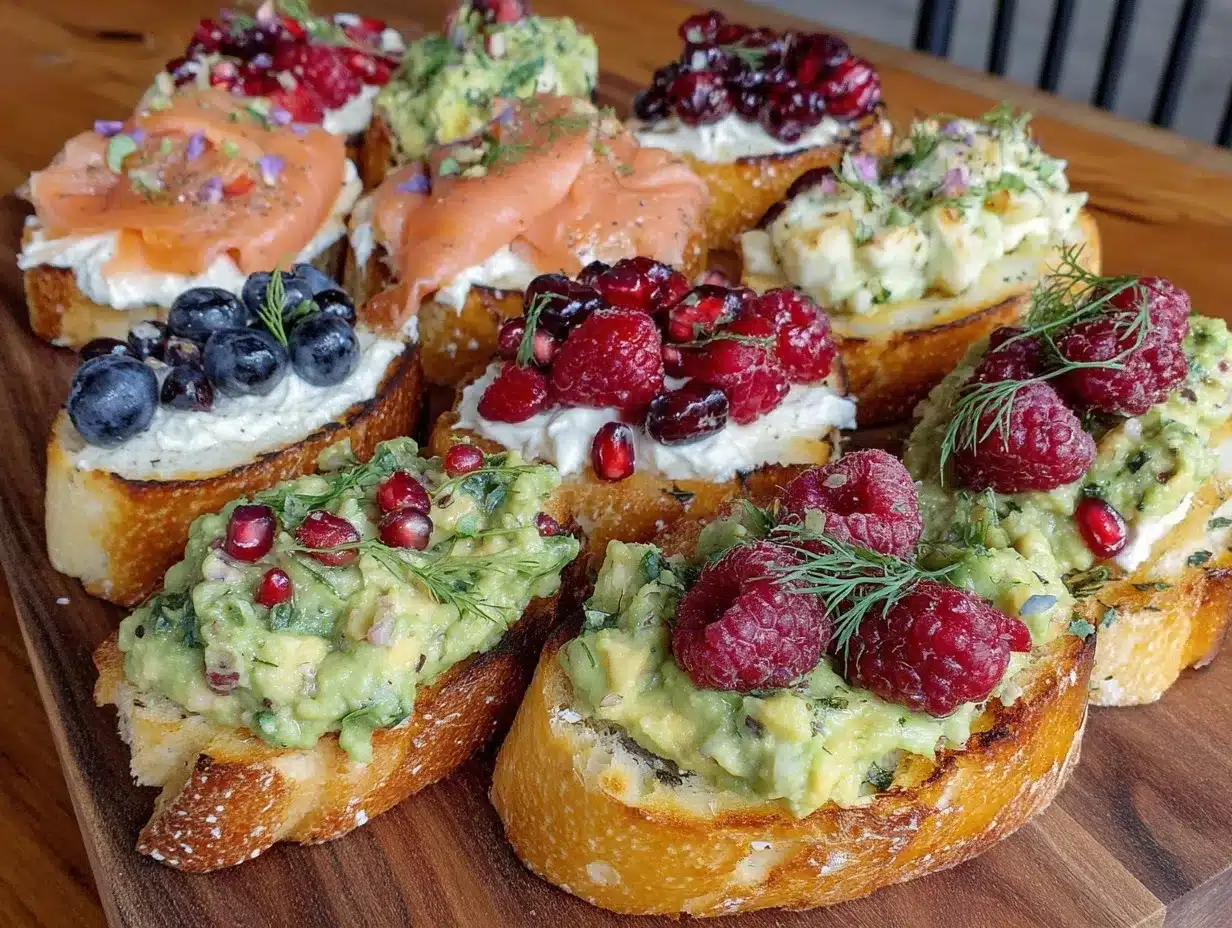
What sets this toast bar apart? First off, it’s not just bread and jam. I’ve tested everything from whipped feta to homemade nut butters, and learned that prepping a few unique spreads (like cinnamon-maple cream cheese) turns a regular brunch into a festive feast. Plus, the toppings are arranged to look like a Pinterest dream—think edible flowers, jewel-toned berries, and little bowls of crunchy seeds.
This isn’t just another “toast” recipe. It’s an experience—a way to connect and celebrate with your best friends. It’s the kind of brunch that makes people linger at the table, inventing wild toast combos, and laughing until the coffee runs cold. Whether you’re a seasoned host or just dipping your toes into entertaining, this Galentine’s Build-Your-Own Toast Bar is a guaranteed way to create memories (and a few new favorite flavor combos!).
What Ingredients You Will Need
This Galentine’s Build-Your-Own Toast Bar is all about options, fun, and bold flavor. Most of these ingredients are pantry staples, but you can easily swap in your favorites or whatever’s in season. Here’s what I recommend for a brunch spread that covers all your bases—sweet, savory, classic, and adventurous!
- Breads:
- Sourdough (thick-sliced for sturdiness)
- Multigrain or whole wheat (adds a nutty crunch)
- Brioche or challah (for those who love a sweeter base)
- Gluten-free bread (so everyone feels included)
- Bagels or English muffins (optional but fun for variety)
- Spreads & Bases:
- Butter (softened for easy spreading; I like Kerrygold for its creamy texture)
- Cream cheese (plain and a flavored variety, like strawberry or honey-whipped)
- Nut butters (peanut, almond, cashew; I recommend Justin’s or homemade if you have time)
- Ricotta cheese (adds a luscious, slightly tangy finish—try BelGioioso)
- Greek yogurt (thick and creamy, perfect for layering with fruit)
- Mascarpone (if you’re feeling fancy)
- Avocado (ripe and sliced or mashed with a bit of salt and lemon juice)
- Hummus (for a savory, vegan-friendly option)
- Fruits & Veggies:
- Fresh berries (strawberries, blueberries, raspberries, blackberries—whatever’s in season)
- Bananas (sliced, always a classic)
- Kiwi or mango (for a tropical touch)
- Cherry tomatoes (halved, for savory toasts)
- Cucumbers (thinly sliced, super refreshing)
- Roasted red peppers or sun-dried tomatoes (for a punch of flavor)
- Microgreens or arugula (peppery and pretty!)
- Proteins & Cheeses:
- Smoked salmon (classic with cream cheese and capers)
- Hard-boiled eggs (sliced, with a sprinkle of salt and pepper)
- Crumbled feta or goat cheese (for tang and creaminess)
- Shredded rotisserie chicken or turkey (for those who want a heartier bite)
- Toppings & Extras:
- Honey or maple syrup (for drizzling)
- Chia seeds, hemp hearts, or flax seeds (boost the nutrition and add crunch)
- Granola (adds a sweet, crispy topping—my crowd loves Purely Elizabeth)
- Edible flowers (make your spread feel extra special—Whole Foods usually carries them in the produce section)
- Capers, sliced olives, or pickled onions (for savory fans)
- Sea salt flakes, black pepper, red pepper flakes (for finishing touches)
- Fresh herbs (dill, basil, chives—snip right before serving)
- Jam or preserves (raspberry, apricot, fig—pick a couple for variety)
- Chocolate chips or cocoa nibs (for the sweet tooths!)
If you’re working with food allergies, swap nut butters for seed butters (like sunflower), or grab gluten-free bread for celiac-friendly options. For a dairy-free brunch, coconut yogurt and vegan butters work beautifully. You can totally customize based on what’s in your fridge or what you find at the farmer’s market—there’s no wrong way to toast!
Equipment Needed
The magic of a Galentine’s Build-Your-Own Toast Bar is that you don’t need a professional kitchen—just a few reliable tools and a dash of creativity. Here’s what works best for me:
- Toaster or Toaster Oven: A four-slot toaster speeds things up, but a toaster oven works great for batch toasting. If you’re toasting for a crowd, pre-toast some slices and keep them warm in a low oven.
- Bread Knife: For slicing loaves evenly (I love my serrated Victorinox—it stays sharp and doesn’t mash the bread).
- Cutting Boards: One for bread, one for fruits and veggies. If you only own one, just wash it in between to avoid mixing flavors.
- Serving Platters or Trays: Lay out the bread and toppings buffet-style so everyone can build their own masterpiece.
- Small Bowls or Ramekins: For jams, spreads, seeds, and toppings. Mason jars or cute mugs also work if you’re on a budget.
- Spreaders and Spoons: Enough for each type of spread (or at least a few so you’re not rinsing constantly).
- Tongs: For picking up bread or delicate toppings—keeps things tidy and germ-free.
- Small Plates and Napkins: For each guest. I use mismatched vintage plates for a playful, Pinterest-ready look!
If you don’t have a toaster, a grill pan or even the oven broiler will do the trick (watch closely so nothing burns). And if you’re short on serving dishes, go rustic—lined baking sheets or wooden cutting boards make a casual, inviting display. Just keep things simple, clean, and easy to reach.
Preparation Method
-
Prep All Your Ingredients (15-20 minutes):
- Wash and dry all fruits and veggies.
- Slice bread into thick, even pieces—about 1/2 inch (1.25 cm) thick for sturdiness.
- Slice or mash avocado, cut bananas, hull and halve strawberries, and arrange other toppings in small bowls.
- Set out butter, cream cheese, nut butters, and other spreads. If using homemade or flavored spreads, mix those up now (e.g., blend cream cheese with a drizzle of honey and a pinch of cinnamon for an extra special touch).
- Prepare proteins: slice hard-boiled eggs, flake smoked salmon, crumble feta, etc.
Tip: Keep any cut fruit covered in the fridge until just before serving, so it stays fresh and colorful.
-
Set Up Your Toast Bar (10 minutes):
- Arrange breads on a large cutting board or tray near the toaster.
- Place spreads and toppings in small bowls or ramekins, grouping sweet and savory items together for easy browsing.
- Scatter spoons, spreaders, and tongs within reach. Napkins and small plates go at the start of the bar.
- Add a few finishing touches—edible flowers, sprigs of fresh herbs, or cute Galentine’s decorations (confetti, heart-shaped picks, whatever makes you smile).
Note: If you have a big group, set up the bar on your kitchen island or a sideboard so there’s room for everyone to mingle.
-
Toast the Bread (as needed):
- Let each guest toast their slice to their preferred level of golden brown. For batch toasting, use a 350°F (175°C) oven—arrange slices on a baking sheet and bake for about 5-7 minutes, flipping halfway. Keep warm in a low oven (200°F/93°C) if needed.
If you’re using a broiler, watch closely—bread can go from golden to burned in a flash. I learned that lesson the hard way…
-
Build, Top, and Enjoy!
- Spread, stack, and sprinkle to your heart’s content. Encourage friends to try new combos—like ricotta with berries and honey, or hummus with cucumber and dill.
- Have fun with it! The best part is everyone’s toast looks a little different.
Pro tip: Snap a quick photo before everyone digs in—the colors and textures are almost too pretty to eat!
-
Troubleshooting:
- If bread is too soft, toast a little longer or switch to a sturdier loaf next time.
- If spreads are too cold to work with, microwave for 10-15 seconds or let sit at room temperature for 10 minutes.
- Keep a damp towel handy for quick wipe-ups—sticky jam and honey are part of the fun, but they can get everywhere!
Once everyone’s built their dream toast, sit back, sip your coffee, and soak in the chatter. There’s something about hands-on brunches that feels extra special—less fussy, more fun, and always memorable.
Cooking Tips & Techniques
I’ve hosted enough brunches to know that a little prep and a few tricks make all the difference. Here’s what I’ve learned from my own kitchen adventures (and a few mishaps):
- Batch Toasting: To avoid a traffic jam at the toaster, pre-toast a tray of bread slices in the oven at 350°F (175°C) for 5-7 minutes. Flip halfway for even browning. Hold the finished toast in a low oven (200°F/93°C) so everyone gets a warm slice.
- Spread Consistency: If your cream cheese or butter is straight from the fridge, it’s tough to spread and tears up the bread. Set them out 30 minutes ahead, or microwave for 10 seconds to soften (not melt!).
- Colorful Presentation: Arrange toppings in bright, contrasting groups—reds (berries, tomatoes), greens (microgreens, cucumber), whites (cheeses, yogurt). It makes the bar look vibrant and inviting, perfect for those inevitable Instagram snaps.
- Label Everything: Sticky notes or little flags help guests with allergies or preferences. I’ve forgotten this before—cue the awkward “which one’s the dairy-free butter?” moment.
- Timing is Everything: Prep all toppings the night before (except avocado and bananas), so you’re not rushing in the morning. Slice avocados just before serving to avoid browning—tossing them in lemon juice helps, too.
- Serving Size: Plan on 2-3 slices per person, depending on your group’s appetite and what else you’re serving.
- Keep It Clean: Have extra napkins and a few damp towels nearby. Toast bars are hands-on and can get a little messy, but that’s half the fun!
I’ve burnt my fair share of toast, forgotten the gluten-free bread, and run out of jam at the worst moments. The good news? Every “oops” is a chance to laugh, learn, and make the next brunch even better. The secret is to have fun and roll with it—after all, it’s about good company and great food, not perfection.
Variations & Adaptations
The best part about a Galentine’s Build-Your-Own Toast Bar is how easy it is to switch things up. Here are some favorite ways to make it your own:
- Dietary-Friendly Options:
- Gluten-free bread (like Canyon Bakehouse or Schär) for celiac-friendly toast.
- Dairy-free spreads: Use vegan butter, plant-based cream cheese, or coconut yogurt for the lactose-intolerant crowd.
- Nut-free: Swap nut butters for sunflower seed butter or tahini.
- Seasonal Twists:
- Spring: Add sliced radishes, pea shoots, and fresh strawberries.
- Summer: Load up with juicy peaches, blackberries, or grilled zucchini.
- Fall: Try roasted sweet potato slices, apple butter, and cinnamon-spiced cream cheese.
- Winter: Pomegranate seeds, persimmon, or cranberry-orange compote add festive cheer.
- Flavor Combos:
- Try a Mediterranean theme with hummus, olives, feta, and roasted peppers.
- Go sweet and decadent with chocolate hazelnut spread, sliced bananas, and a sprinkle of sea salt.
- My personal favorite: whipped ricotta, honey, pistachios, and a drizzle of orange zest. It’s a flavor explosion!
- Different Cooking Methods:
- Grill bread outdoors for smoky flavor in warm weather.
- For a cozy twist, use waffle irons for “toast waffles” (trust me, it’s a hit!).
The possibilities are endless—let your guests get creative, and you might discover a new favorite combo. I once tried a toast with goat cheese, fig jam, and crushed walnuts just to use up leftovers, and now it’s a regular part of my brunch spread!
Serving & Storage Suggestions
The Galentine’s Build-Your-Own Toast Bar shines brightest when everything is fresh, colorful, and inviting. Here’s how to serve and store your brunch spread for maximum enjoyment:
- Serving:
- Serve toast warm, straight from the toaster or oven. Arrange breads in a basket lined with a pretty napkin to keep them cozy.
- Set out all toppings buffet-style so everyone can build at their own pace. (Bonus points for a pink or heart-themed tablecloth!)
- Pair with fresh fruit salad, yogurt parfaits, or a simple frittata for a full brunch menu. Coffee, tea, or sparkling rosé are perfect Galentine’s drinks.
- Storage:
- Leftover bread can be stored in an airtight bag at room temperature for up to 2 days, or frozen for a month. Refresh in the toaster before serving again.
- Store spreads and toppings in covered containers in the fridge. Most will keep for 2-3 days—except avocado and bananas, which brown quickly. (Eat those up day-of!)
- If you prepped extra proteins, use them in salads or wraps for lunch the next day.
- Reheating:
- Re-toast bread slices to revive their crunch. Microwave spreads for 10 seconds if they firm up too much in the fridge.
- Flavor Notes:
- Many flavors (like jam, cheese, and roasted veggies) get even better after a night in the fridge, so don’t be afraid to prep ahead.
Keep things casual and let everyone build at their own pace—the fun is in the mix-and-match magic!
Nutritional Information & Benefits
One of the best things about a Galentine’s Build-Your-Own Toast Bar is that you control the nutrition. Here’s a general breakdown per serving (2 slices with toppings):
- Calories: 300-400 (varies by bread and toppings)
- Protein: 8-15g (add more with eggs, smoked salmon, or nut butters)
- Fiber: 4-8g (multigrain breads and fruit boost fiber)
- Healthy fats: From avocado, nuts, and seeds
- Vitamins & minerals: Fresh fruits, veggies, microgreens, and seeds all load up the nutrition
This brunch is easy to adapt—go gluten-free, dairy-free, vegetarian, or vegan as needed. Potential allergens include nuts, gluten, dairy, and eggs, so keep those labeled if you’re serving a crowd. Personally, I love that you can sneak in extra fiber, healthy fats, and antioxidants without sacrificing an ounce of flavor or fun.
Conclusion
There’s just something special about gathering your favorite people for a Galentine’s Build-Your-Own Toast Bar—it’s festive, flexible, and always delicious. Whether you go all-out with fancy toppings or stick to the basics, you’re guaranteed a brunch that feels like a celebration.
Don’t be afraid to put your own spin on things or try new combinations—half the fun is discovering a new favorite. For me, it’s become a way to slow down and savor good food and even better company. I hope this guide inspires you to start your own Galentine’s tradition (or just treat yourself to a cozy, creative brunch).
If you give this toast bar a try, I’d love to hear how it goes—share your combos, tag your photos, and let me know your favorite toppings in the comments below. Here’s to good friends, good food, and the perfect Galentine’s brunch!
Frequently Asked Questions
Can I make a Galentine’s toast bar ahead of time?
Absolutely! Prep all fruits, spreads, and toppings the night before. Store everything covered in the fridge. Toast bread right before serving so it stays fresh and crunchy.
What are the best breads for a toast bar?
Sourdough, multigrain, and brioche are my top picks—they hold up well to toppings. Include a gluten-free option if needed. Slice thick so they’re sturdy enough for all the goodies!
How do I keep the toast warm for a crowd?
Toast bread in batches and keep slices warm in a low oven (200°F/93°C) on a baking sheet. Cover loosely with foil if you’re worried about drying out.
What if my guests have allergies or dietary restrictions?
Offer gluten-free bread, dairy-free spreads, and nut-free butters. Label everything clearly, and keep allergen-free options separated from the rest to avoid cross-contamination.
Can I serve this for other occasions besides Galentine’s Day?
Oh, yes! This toast bar is perfect for birthdays, bridal showers, baby showers, or any brunch party. Change up the decorations and toppings to fit the season or your theme.
Pin This Recipe!
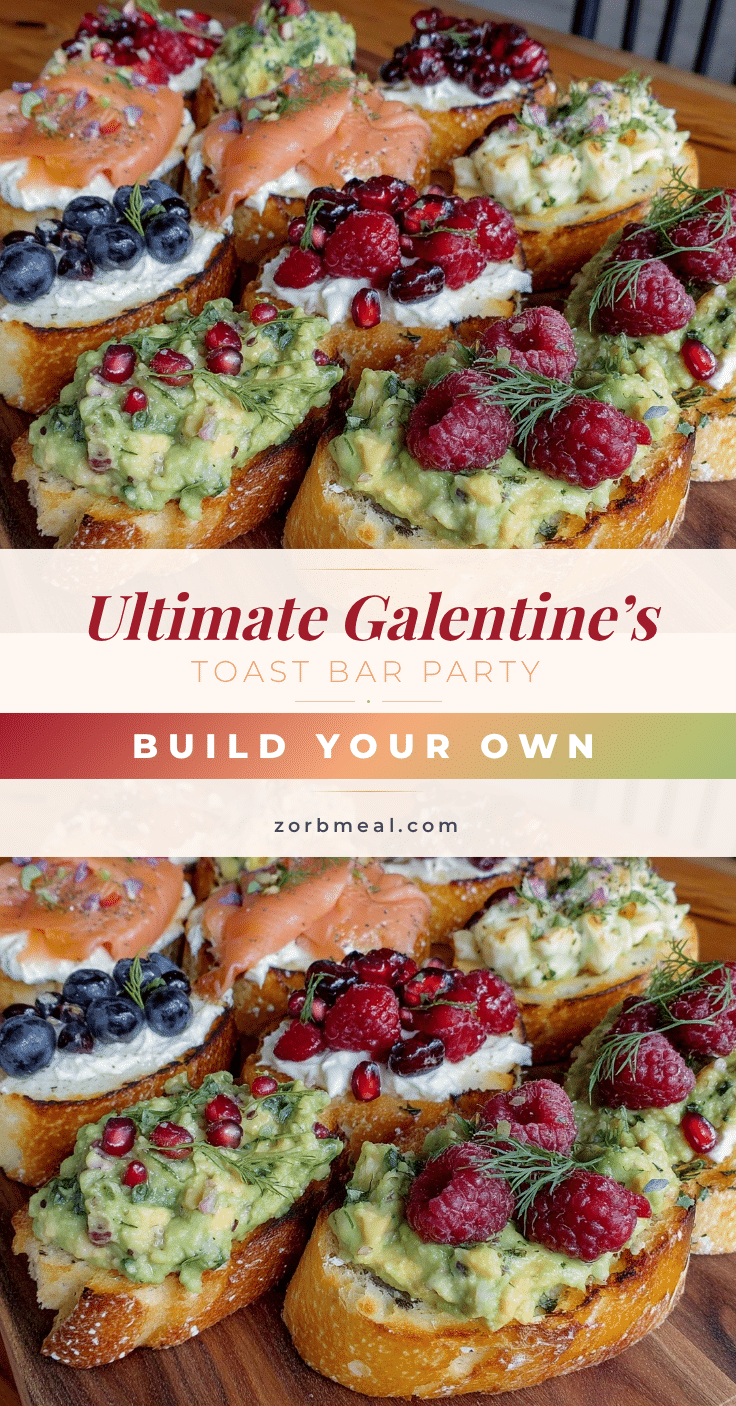
Perfect Galentine’s Build-Your-Own Toast Bar

A festive, crowd-pleasing brunch idea where everyone builds their own dream toast from a colorful spread of breads, spreads, fruits, proteins, and toppings. Perfect for Galentine’s Day, parties, or any brunch gathering—customizable for all diets and guaranteed to spark joy and creativity.
- Prep Time: 20 minutes
- Cook Time: 10 minutes
- Total Time: 30 minutes
- Yield: 8 servings
- Category: Brunch
- Cuisine: American
Ingredients
- Sourdough bread, thick-sliced
- Multigrain or whole wheat bread
- Brioche or challah bread
- Gluten-free bread
- Bagels or English muffins (optional)
- Butter, softened
- Cream cheese (plain and flavored, e.g., strawberry or honey-whipped)
- Nut butters (peanut, almond, cashew, or sunflower seed butter for nut-free)
- Ricotta cheese
- Greek yogurt
- Mascarpone cheese
- Avocado, sliced or mashed with salt and lemon juice
- Hummus
- Fresh berries (strawberries, blueberries, raspberries, blackberries)
- Bananas, sliced
- Kiwi or mango, sliced
- Cherry tomatoes, halved
- Cucumbers, thinly sliced
- Roasted red peppers or sun-dried tomatoes
- Microgreens or arugula
- Smoked salmon
- Hard-boiled eggs, sliced
- Crumbled feta or goat cheese
- Shredded rotisserie chicken or turkey
- Honey or maple syrup
- Chia seeds, hemp hearts, or flax seeds
- Granola
- Edible flowers
- Capers, sliced olives, or pickled onions
- Sea salt flakes, black pepper, red pepper flakes
- Fresh herbs (dill, basil, chives)
- Jam or preserves (raspberry, apricot, fig)
- Chocolate chips or cocoa nibs
Instructions
- Prep all your ingredients: Wash and dry fruits and veggies. Slice bread into thick, even pieces (about 1/2 inch thick). Slice or mash avocado, cut bananas, hull and halve strawberries, and arrange other toppings in small bowls. Set out butter, cream cheese, nut butters, and other spreads. Prepare proteins: slice hard-boiled eggs, flake smoked salmon, crumble feta, etc.
- Set up your toast bar: Arrange breads on a large cutting board or tray near the toaster. Place spreads and toppings in small bowls or ramekins, grouping sweet and savory items together. Scatter spoons, spreaders, and tongs within reach. Set napkins and small plates at the start of the bar. Add finishing touches like edible flowers, fresh herbs, or festive decorations.
- Toast the bread as needed: Let each guest toast their slice to their preferred level. For batch toasting, use a 350°F oven—arrange slices on a baking sheet and bake for about 5-7 minutes, flipping halfway. Keep warm in a low oven (200°F) if needed.
- Build, top, and enjoy: Encourage guests to spread, stack, and sprinkle their favorite combos. Try ricotta with berries and honey, or hummus with cucumber and dill. Snap a photo before digging in!
- Troubleshooting: If bread is too soft, toast longer or use a sturdier loaf. If spreads are too cold, microwave for 10-15 seconds or let sit at room temperature. Keep a damp towel handy for quick clean-ups.
Notes
Prep toppings the night before (except avocado and bananas). Label spreads for allergies. For a crowd, batch-toast bread in the oven and keep warm. Offer gluten-free, dairy-free, and nut-free options as needed. Encourage creativity with toppings and have extra napkins handy for messes.
Nutrition
- Serving Size: 2 slices with toppin
- Calories: 350
- Sugar: 10
- Sodium: 400
- Fat: 12
- Saturated Fat: 4
- Carbohydrates: 48
- Fiber: 6
- Protein: 10
Keywords: toast bar, brunch, Galentine’s Day, build-your-own, party, breakfast, customizable, vegetarian, gluten-free, dairy-free, easy entertaining