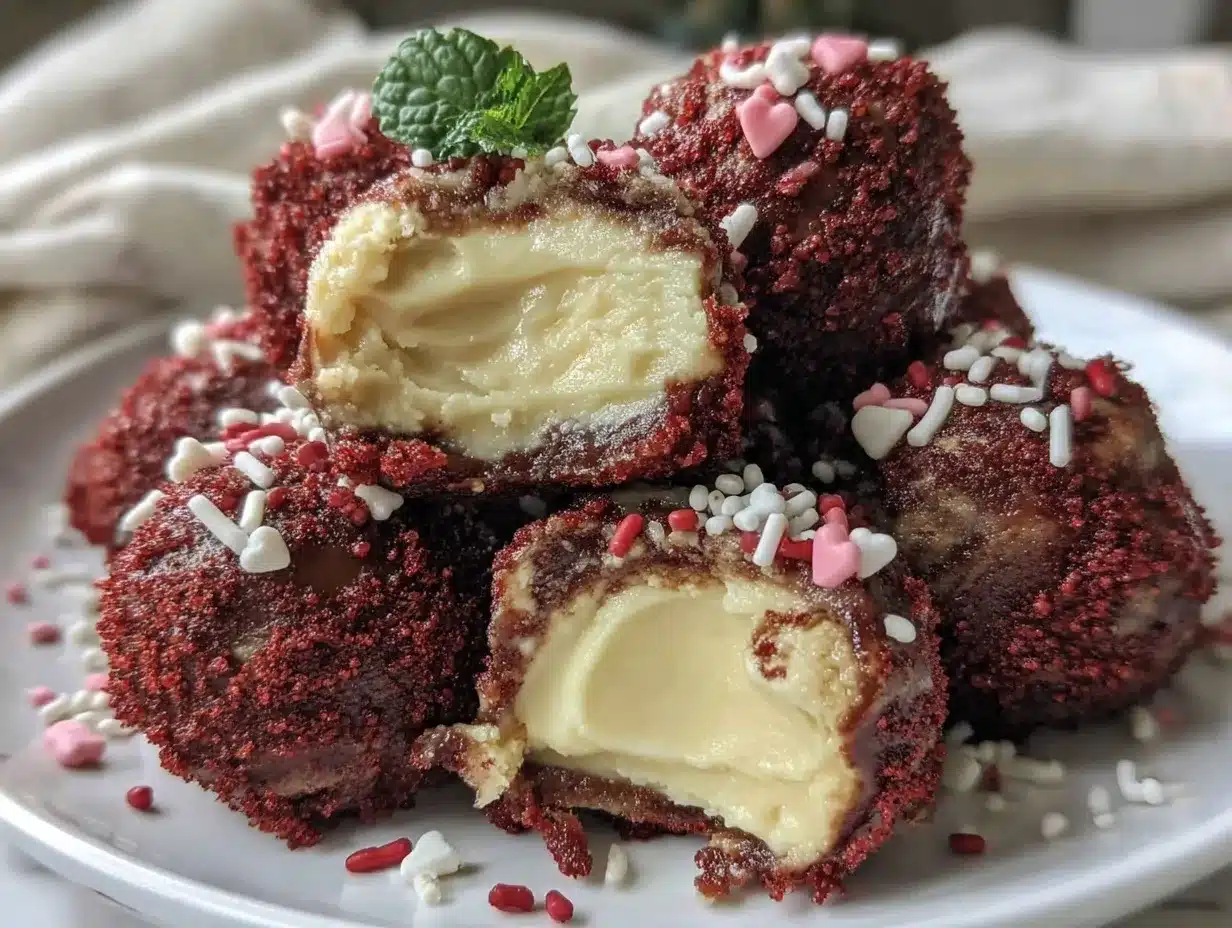
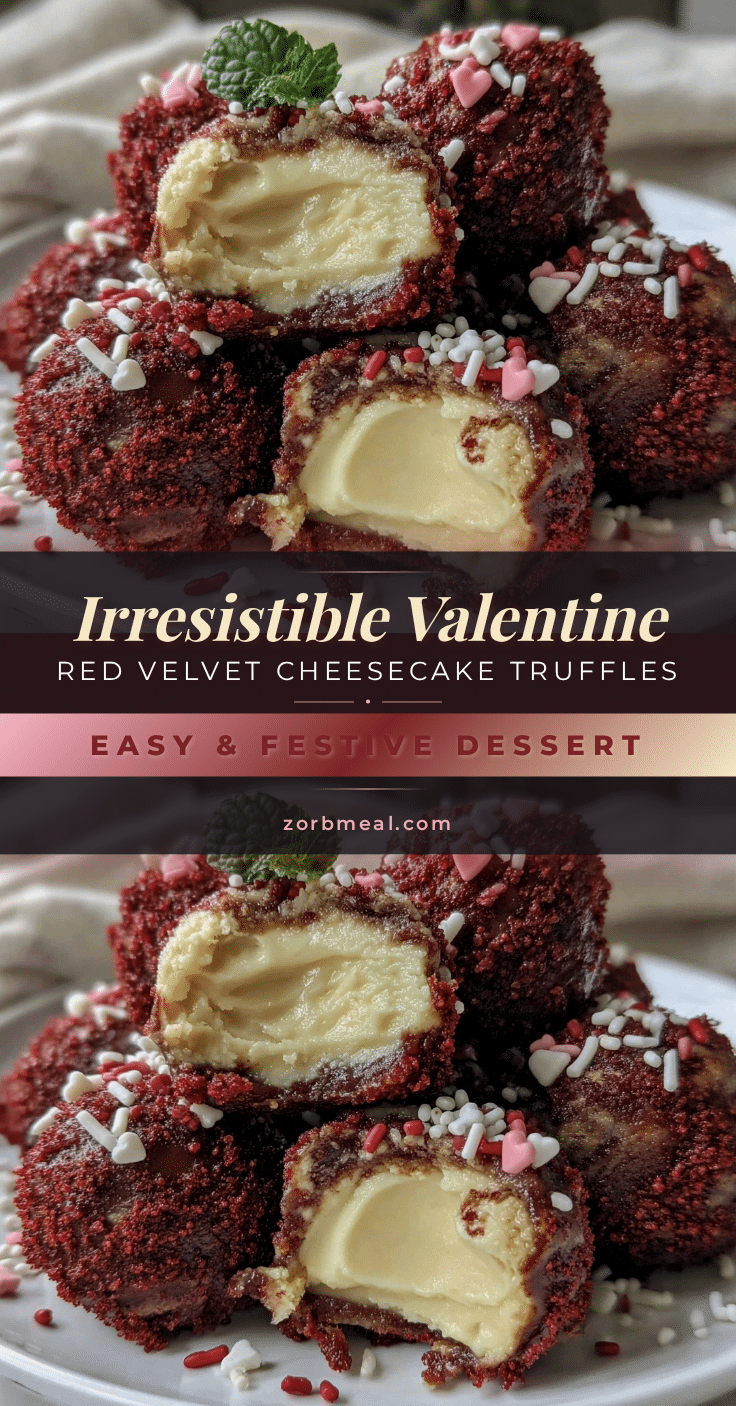
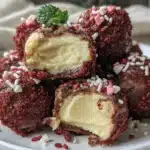
Picture this: The first time I rolled a batch of these Creamy Valentine’s Red Velvet Cheesecake Truffles, the kitchen was filled with the sweet scent of cocoa and vanilla—so thick in the air, it almost felt like you could taste it before even sneaking a bite. The glossy, ruby-red crumbs mixed with creamy cheesecake made my hands sticky, and honestly, I didn’t mind one bit. I remember pausing, dusted in cocoa powder, and thinking, “This is the kind of moment you want to bottle up and save for every February 14th.” These truffles are pure, nostalgic comfort, wrapped up in a bite-sized treat.
When I was knee-high to a grasshopper, my grandma used to bake a red velvet cake every Valentine’s Day. It was always the centerpiece—bright red, topped with clouds of cream cheese frosting. Years later, on a rainy weekend, I tried to recreate that magic but ended up with the idea for these truffles instead. I wish I’d stumbled on this recipe years ago. You know what? My family couldn’t stop sneaking them off the tray as they set, leaving a trail of red crumbs around the kitchen. And I can’t blame them—these are the kind of treats that just disappear when you’re not looking.
These Red Velvet Cheesecake Truffles are dangerously easy, which means they’re perfect for potlucks, a sweet surprise for your kids, or to brighten up your Pinterest dessert board. They’re a crowd-pleaser at Galentine’s parties or for cozy nights in. I’ve tested the recipe more times than I can count (all in the name of research, of course), and it’s now a staple for family gatherings and edible gifts. Each truffle feels like a warm hug, wrapped in chocolate and love. Bookmark this one—you’re going to want to make these every Valentine’s Day (or, if we’re being honest, any time you need a little pick-me-up).
Why You’ll Love This Recipe
After years of baking, I’ve learned that the best recipes are the ones you want to make again and again, and these Red Velvet Cheesecake Truffles fit the bill. Whether you’re a seasoned baker or just starting out, you’ll appreciate how simple, yet special, these treats are. I’ve made dozens of batches—some for fancy dessert tables, others just for myself (no shame). Here’s why you’ll be hooked:
- Quick & Easy: Comes together in under 45 minutes. Perfect for last-minute Valentine’s gifts or when cravings strike late at night.
- Simple Ingredients: Nothing fancy here—just pantry basics like red velvet cake mix, cream cheese, and chocolate. You probably have everything on hand already.
- Perfect for Celebrations: These truffles look stunning on a holiday dessert platter, at baby showers, or as a sweet surprise for your sweetheart.
- Crowd-Pleaser: Kids love them, adults sneak seconds, and they’ll be the first to vanish at any party.
- Unbelievably Delicious: The creamy, tangy cheesecake center hugs that rich red velvet flavor, all wrapped in a crackly chocolate shell—seriously next-level comfort food.
What sets this recipe apart? I blend the cake crumbs and cream cheese until velvety-smooth (no dry bits here), and chill the mixture just right for perfect rolling. Dipping in real chocolate makes all the difference—no fake chocolate coatings for me. I’ve played with ratios, chilling times, and even tried adding a touch of espresso powder for more depth. It’s the best version I’ve made, hands-down.
This isn’t just another red velvet dessert. It’s the kind that makes you close your eyes and sigh after the first bite. It’s comfort food, but somehow even more special. And the best part? You don’t need to stress—these truffles look impressive but are totally achievable. Whether you want to wow your friends or just treat yourself, these truffles turn everyday moments into something memorable.
What Ingredients You Will Need
These Creamy Valentine’s Red Velvet Cheesecake Truffles use simple, wholesome ingredients that pack a punch of flavor and create that classic, crave-worthy texture. Most of them are pantry staples, so you might not even need a special trip to the store.
- For the Red Velvet Cake Base:
- Red velvet cake mix (15.25 oz/432g) – Any favorite brand works, but I love Duncan Hines for that rich flavor and moist crumb.
- Large eggs (2, room temperature) – Helps bind the cake and keeps it soft.
- Vegetable oil (1/2 cup/120ml) – Keeps the cake moist without a heavy texture.
- Buttermilk (3/4 cup/180ml) – Adds tang and tenderness; if you don’t have any, mix regular milk with a splash of vinegar.
- Vanilla extract (1 teaspoon/5ml) – For that extra depth (I always go with pure vanilla extract, not imitation).
- For the Cheesecake Filling:
- Cream cheese (8 oz/226g, softened) – Full-fat works best for a creamy, rich filling. Philadelphia is my go-to.
- Powdered sugar (1/2 cup/60g) – Sweetens and thickens the filling.
- Butter (2 tablespoons/28g, softened) – Adds a bit of richness and helps with texture.
- Pinch of salt – Just enough to balance the sweetness.
- For the Chocolate Coating:
- Semi-sweet chocolate chips (10 oz/280g) – Ghirardelli or Guittard melt smoothly and taste amazing.
- Coconut oil (2 teaspoons/10ml) – Makes the chocolate shell shiny and easy to bite through.
- Optional: White chocolate chips (1/2 cup/85g) – For drizzling on top. Adds a festive flair!
- Festive sprinkles or freeze-dried raspberry bits – For that Valentine’s sparkle (totally optional, but fun).
A few quick tips: If you want gluten-free truffles, use a gluten-free red velvet cake mix (King Arthur makes a solid one). For dairy-free, swap the cream cheese and butter with plant-based versions (Miyoko’s is excellent). You can also use dark chocolate instead of semi-sweet for a richer shell. And if you’re feeling creative, swap in crushed freeze-dried strawberries for a fruity twist.
Equipment Needed
- Baking sheet or cake pan (9×13-inch/23x33cm): For baking the red velvet cake. A basic nonstick pan works perfectly.
- Electric mixer (hand or stand): Makes mixing the cake batter and cheesecake filling easy and lump-free. A whisk and strong arms work in a pinch, but trust me—use the mixer if you can.
- Mixing bowls (medium and large): You’ll need a few to keep cake, filling, and coating separate.
- Measuring cups and spoons: Precision is key for baking that perfect cake base.
- Baking parchment or wax paper: Prevents truffles from sticking as they chill and set.
- Small cookie scoop or melon baller: For even truffle sizes. A tablespoon works, too, but the scoop keeps your hands clean(er).
- Microwave-safe bowl or double boiler: For melting the chocolate coating. I usually use the microwave, but a double boiler is great for larger batches.
- Forks or dipping tools: For dipping truffles in chocolate (and rescuing them if they slip!).
If you don’t have a cookie scoop, just use a spoon and roll the balls by hand. For melting, the microwave is faster, but the double boiler gives you more control (just don’t get water in the chocolate!). My favorite tip? Place a silicone baking mat under your parchment for extra nonstick insurance and easy cleanup.
If you’re on a budget, dollar store mixing bowls and hand whisks work just fine. Just wash your tools well between steps to keep everything neat and easy.
Preparation Method
-
Bake the Red Velvet Cake:
Time: 30-35 minutes
Preheat your oven to 350°F (175°C). Grease a 9×13-inch (23x33cm) baking pan. In a large bowl, combine the red velvet cake mix, 2 eggs, 1/2 cup (120ml) vegetable oil, 3/4 cup (180ml) buttermilk, and 1 teaspoon (5ml) vanilla extract. Mix on medium speed until smooth and fluffy, about 2 minutes. Pour the batter into the prepared pan and bake for 30-35 minutes, or until a toothpick comes out clean. Let the cake cool completely—patience is key here, or you’ll end up with a gooey mess! -
Prepare the Cheesecake Filling:
Time: 5 minutes
In a medium bowl, beat 8 oz (226g) cream cheese, 1/2 cup (60g) powdered sugar, 2 tablespoons (28g) butter, and a pinch of salt until smooth and creamy. The mixture should be thick but spreadable. -
Crumble the Cake and Combine:
Time: 5 minutes
Once the cake has cooled, break it into fine crumbs using your hands or a food processor. Transfer the crumbs to a large bowl. Add the cheesecake filling and mix until evenly combined. The mixture should hold its shape when pressed—if it’s too sticky, chill for 10 minutes before rolling. -
Shape the Truffles:
Time: 10 minutes
Line a baking sheet with parchment paper. Using a small cookie scoop or tablespoon, portion out the mixture and roll into 1-inch (2.5cm) balls. Place on the prepared sheet. Pop the tray in the freezer for 20 minutes—this makes dipping much easier and keeps things tidy. -
Make the Chocolate Coating:
Time: 5 minutes
In a microwave-safe bowl, combine 10 oz (280g) semi-sweet chocolate chips and 2 teaspoons (10ml) coconut oil. Microwave in 20-second intervals, stirring well between each, until smooth and glossy. Don’t overheat, or the chocolate will seize. If using a double boiler, melt gently over simmering water. -
Dip and Decorate:
Time: 10-15 minutes
Using forks or dipping tools, dip each chilled truffle into the melted chocolate, letting excess drip off before returning to the parchment. If desired, drizzle with melted white chocolate and sprinkle with festive toppings. Let set at room temperature or chill for 10 minutes to firm up. -
Serve or Store:
Once set, transfer truffles to a serving plate or airtight container. Keep refrigerated for up to 5 days or freeze for up to a month. Let come to room temperature before serving for the smoothest texture.
Troubleshooting Tips: If the mixture feels too wet, chill longer or add more cake crumbs. If the chocolate starts to thicken, reheat in short bursts. Don’t rush the chilling steps—they really help keep the truffles neat and easy to handle. And if a truffle falls apart mid-dip, just patch it up and try again (nobody’s perfect, right?).
Cooking Tips & Techniques
I’ve made these Red Velvet Cheesecake Truffles more times than I can count, and I’ve picked up a few tricks along the way. Here are my best tips for truffle success:
- Chill, Chill, Chill: Cold truffles are much easier to dip. If you skip the freezing step, the centers can fall apart in the chocolate—ask me how I know!
- Use Quality Chocolate: Real chocolate chips give a better shell and flavor. Candy melts will work, but the taste isn’t quite the same. I like to add coconut oil for that glossy finish.
- Don’t Overmix: When combining the cake and cheesecake, mix just until you get a uniform dough. Overmixing can make the truffles dense and tough.
- Work in Batches: Keep half the truffles chilling while you dip the others. This keeps them firm and ready to coat.
- Use Two Forks: For dipping, set the truffle on one fork, dip, then tap gently to shake off excess chocolate. Use the second fork to nudge it onto the parchment.
- Troubleshooting Chocolate: If your chocolate gets thick, add a bit more coconut oil or microwave for a few seconds. If water gets in, it’ll seize—just trust me, keep the bowls dry.
- Decorate Fast: Sprinkles and toppings stick best when the chocolate is wet. Set up your decorating station before you start dipping.
- Practice Makes Perfect: My first batch was lumpy and a little misshapen, but they still tasted amazing. Each batch gets easier—don’t stress about imperfections!
If you’re multitasking, bake the cake a day ahead and freeze it. That way, you can assemble the truffles quickly when you have time. And if your kitchen is warm, keep the truffles in the fridge until ready to serve—they’re best enjoyed slightly chilled.
Variations & Adaptations
One of the best things about Red Velvet Cheesecake Truffles is how easy they are to customize. Whether you’re making them for special diets or just want to switch things up, here are a few ideas:
- Gluten-Free: Use a gluten-free red velvet cake mix—King Arthur and Betty Crocker both make great options. Everything else in the recipe is naturally gluten-free.
- Dairy-Free or Vegan: Swap the cream cheese and butter for vegan versions (Miyoko’s or Violife are reliable brands), and use dairy-free chocolate chips. Use a flax egg or egg replacer for the cake.
- Flavor Twists: Add 1/2 teaspoon espresso powder to the cake for depth, or mix in a handful of mini chocolate chips to the filling for crunch. Swap in lemon zest for a tangy surprise.
- Holiday Variations: For Christmas, drizzle with green and white chocolate; for birthdays, add rainbow sprinkles.
- Smaller/Larger Bites: Make mini-truffles for party platters or jumbo ones for gifting—just adjust chilling time as needed.
- Nut-Free: The base recipe is nut-free, but always check your cake mix and chocolate for possible contaminants. If you want a crunch, roll finished truffles in crushed cookies instead of nuts.
Personally, I love adding a dash of orange zest for a Valentine’s brunch or coating half the batch in dark chocolate for an extra-rich treat. There are no rules—just have fun and make them your own!
Serving & Storage Suggestions
These Red Velvet Cheesecake Truffles are best served slightly chilled—the creamy center holds its shape, and the chocolate shell has that perfect snap. Arrange them on a pretty platter, layer in mini cupcake liners, or pile into a heart-shaped box for gifting. They look especially cute with a sprinkle of pink or red sugar on top.
For a Valentine’s party, pair these with fresh strawberries, a bubbly rosé, or a mug of hot cocoa. They also make an adorable addition to any dessert board or picnic basket.
To store, keep truffles in an airtight container in the refrigerator for up to 5 days. If you’re making them ahead, freeze on a parchment-lined tray, then transfer to a zip-top bag—just let them thaw at room temperature for 10-15 minutes before serving. The flavors actually deepen after a day, so don’t be afraid to make them in advance.
If you need to reheat (say, for a gooey center), zap for 5-6 seconds in the microwave, but honestly, they’re best enjoyed cold or at room temp. If you’re gifting, pop a parchment square between layers so they don’t stick together.
Nutritional Information & Benefits
Each Red Velvet Cheesecake Truffle is about 110 calories, with 7g fat, 12g carbs, and 1g protein (totally worth it for a festive treat!). They’re rich but bite-sized, so you can enjoy a little sweetness without going overboard.
Key ingredients like cream cheese provide a bit of calcium, and if you use dark chocolate, you’ll get a tiny boost of antioxidants. For gluten-free or dairy-free adaptations, the nutrition stays pretty similar—just check your ingredient labels for specifics. These truffles are nut-free as written, but always double-check if allergies are a concern.
Personally, I love that these truffles are portion-controlled and easy to share—a little indulgence that fits into most celebrations and brings a smile to anyone’s face.
Conclusion
If you’re searching for a treat that’s festive, easy, and guaranteed to delight, these Creamy Valentine’s Red Velvet Cheesecake Truffles are a must-try. They’re simple enough for beginners but impressive enough to wow your loved ones—plus, you can tweak them to suit any occasion or craving.
I come back to this recipe every February (and, honestly, whenever I need a quick win in the kitchen). It’s nostalgic, a little luxurious, and always brings people together. If you make these, I’d love to hear how you customize them—maybe with a special topping, a fun drizzle, or your own family twist.
Go ahead, give these a try—and don’t forget to leave a comment, share your creations, or pin this recipe for later. Happy Valentine’s Day, and may all your truffles be creamy and chocolatey!
FAQs
How far in advance can I make Red Velvet Cheesecake Truffles?
You can make these up to 5 days ahead and store in the refrigerator. For longer storage, freeze for up to a month—just let them thaw before serving.
Can I use store-bought red velvet cake instead of baking from scratch?
Absolutely! If you’re short on time, crumble up a bakery cake or even use leftover cake. The key is making sure it’s moist enough to bind with the cheesecake mixture.
What if I don’t have coconut oil for the chocolate coating?
No worries—just use a teaspoon of vegetable oil or even skip the oil. The chocolate will be a little firmer, but still delicious.
Do these need to be refrigerated?
Yes, because of the cream cheese filling, truffles should be kept chilled. Set them out at room temperature for about 15 minutes before serving for the best texture.
Can I make these truffles gluten-free or vegan?
Definitely! Use a gluten-free cake mix and dairy-free cream cheese and butter to make the truffles suitable for gluten-free or vegan diets.
Pin This Recipe!
Red Velvet Cheesecake Truffles
These Red Velvet Cheesecake Truffles are creamy, chocolate-dipped bites of nostalgia—perfect for Valentine’s Day, parties, or edible gifts. They’re easy to make, crowd-pleasing, and can be adapted for gluten-free or vegan diets.
- Prep Time: 20 minutes
- Cook Time: 35 minutes
- Total Time: 55 minutes
- Yield: 30 truffles 1x
- Category: Dessert
- Cuisine: American
Ingredients
- 1 (15.25 oz) box red velvet cake mix
- 2 large eggs, room temperature
- 1/2 cup vegetable oil
- 3/4 cup buttermilk
- 1 teaspoon vanilla extract
- 8 oz cream cheese, softened
- 1/2 cup powdered sugar
- 2 tablespoons butter, softened
- Pinch of salt
- 10 oz semi-sweet chocolate chips
- 2 teaspoons coconut oil
- Optional: 1/2 cup white chocolate chips (for drizzling)
- Optional: Festive sprinkles or freeze-dried raspberry bits
Instructions
- Preheat oven to 350°F (175°C). Grease a 9×13-inch baking pan.
- In a large bowl, combine red velvet cake mix, eggs, vegetable oil, buttermilk, and vanilla extract. Mix on medium speed until smooth and fluffy, about 2 minutes.
- Pour batter into prepared pan and bake for 30-35 minutes, or until a toothpick comes out clean. Let cake cool completely.
- In a medium bowl, beat cream cheese, powdered sugar, butter, and a pinch of salt until smooth and creamy.
- Crumble cooled cake into fine crumbs. Add cheesecake filling and mix until evenly combined. If too sticky, chill for 10 minutes.
- Line a baking sheet with parchment paper. Scoop and roll mixture into 1-inch balls. Place on sheet and freeze for 20 minutes.
- In a microwave-safe bowl, melt semi-sweet chocolate chips and coconut oil in 20-second intervals, stirring until smooth.
- Dip each chilled truffle into melted chocolate, letting excess drip off. Place on parchment. Drizzle with white chocolate and decorate with sprinkles if desired.
- Let truffles set at room temperature or chill for 10 minutes to firm up.
- Serve or store in an airtight container in the refrigerator for up to 5 days, or freeze for up to a month.
Notes
Chill the truffles well before dipping for best results. Use quality chocolate for a better shell. For gluten-free or vegan, use appropriate cake mix and dairy substitutes. Decorate quickly before the chocolate sets. Store in the fridge for best texture.
Nutrition
- Serving Size: 1 truffle
- Calories: 110
- Sugar: 9
- Sodium: 80
- Fat: 7
- Saturated Fat: 4
- Carbohydrates: 12
- Protein: 1
Keywords: red velvet, cheesecake truffles, Valentine’s Day, easy dessert, chocolate, party treats, edible gifts, no nuts, crowd-pleaser