My sister had claimed to hate chocolate mint for fifteen years. Fifteen years! Every holiday season, she’d make this little face whenever the topic of peppermint bark or thin mints came up. “Too much like toothpaste,” she’d say, waving a hand dismissively. Then last December, I caught her standing alone in my kitchen, eating the very cookies I was supposed to be photographing for this blog post. She had crumbs on her sweater and a guilty look on her face. “These are different,” she mumbled through a mouthful of cookie. “These are actually good.”
That’s the thing about these Festive Chocolate Mint Cookies. They don’t taste like toothpaste or artificial mint. They taste like the perfect marriage of rich, fudgy chocolate and cool, creamy mint. It’s the kind of cookie that makes you close your eyes after the first bite, even if you swore you weren’t a mint person. Honestly, I wasn’t either, not really. But then I made these Andes copycat cookies on a whim one Tuesday afternoon when I was supposed to be testing a completely different recipe. The power went out halfway through my original plan, and I found myself staring at a bag of Andes mints I’d bought for hot chocolate garnishes. Sometimes the best recipes come from happy accidents, you know?
The thing that got me was the texture. Most chocolate mint cookies I’d tried were either too cakey or too crunchy. These? They have this perfect crackly top that gives way to a soft, almost brownie-like center. And that layer of melted Andes mint on top? It creates this thin, snappy shell that shatters when you bite into it. Maybe you’ve been there, searching for that one cookie recipe that actually delivers on both flavor and texture. Let me tell you, this is it. Three winters ago, I would have never believed I’d be writing a love letter to a chocolate mint cookie. But here we are. And honestly? I’m not sorry about it.
Why You’ll Love This Recipe
After testing this recipe seven times (yes, seven — my coworkers were very happy volunteers), I can confidently say these are the best Andes copycat cookies you’ll ever make. Here’s why they’ve earned a permanent spot in my holiday baking rotation:
- Quick & Easy: From start to finish, you’re looking at about 25 minutes. No chilling the dough, no complicated techniques. Just mix, scoop, bake, and top with mint.
- Simple Ingredients: You probably have most of these in your pantry right now. The only specialty item is the Andes mints, and you can find those at any grocery store near the checkout aisle.
- Perfect for the Holidays: These cookies are made for cookie exchanges, holiday parties, and gift boxes. They’re festive without being fussy, and everyone goes crazy for them.
- Crowd-Pleaser: Even the self-proclaimed mint haters (like my sister) will be reaching for seconds. I’ve served these at three different holiday gatherings, and they disappeared first every single time.
- Unbelievably Delicious: The combination of rich cocoa, soft cookie texture, and that signature Andes mint crunch is absolutely addictive. I’m not exaggerating when I say I’ve had to stop myself from eating six in one sitting.
What makes these cookies different from other chocolate mint recipes is the technique. Instead of just mixing crushed mints into the dough (which can make the cookies too sweet and mess with the texture), I press a whole Andes mint onto each cookie right when it comes out of the oven. This creates that beautiful crackled top and ensures every single bite has the perfect ratio of chocolate to mint. It’s a small detail, but it makes all the difference.
These cookies are the kind that make you close your eyes after the first bite. They’re comfort food reimagined — faster than a from-scratch brownie, but with the same soul-soothing satisfaction. Perfect for impressing guests without stress, or turning a simple Tuesday afternoon into something memorable.
What Ingredients You Will Need
This recipe uses simple, wholesome ingredients to deliver bold flavor and satisfying texture without the fuss. Most of these are pantry staples, which means you can whip up a batch whenever the craving hits.
- Unsalted butter, softened (1 cup / 226g) — I always use unsalted so I can control the salt level. Let it sit out for about 30 minutes before starting.
- Granulated sugar (1 cup / 200g) — Regular white sugar gives these cookies that perfect crackly top. Don’t substitute with brown sugar here; it changes the texture.
- Large eggs (2, room temperature) — Room temperature eggs incorporate better into the butter-sugar mixture. If you forgot to take them out, place them in a bowl of warm water for 5 minutes.
- Vanilla extract (1 teaspoon) — Pure vanilla extract really does make a difference, but imitation works fine in a pinch.
- Peppermint extract (½ teaspoon) — This is the secret to that cool mint flavor. I recommend Nielsen-Massey for the best quality, but any brand works. Don’t use mint extract; it tastes different.
- All-purpose flour (2 cups / 250g) — Spoon and level your flour for the most accurate measurement. Scooping directly from the bag can pack in too much flour and make dry cookies.
- Unsweetened cocoa powder (¾ cup / 75g) — I prefer Dutch-process cocoa for its richer, smoother chocolate flavor. Hershey’s Special Dark works beautifully if that’s what you have.
- Baking soda (1 teaspoon) — Make sure your baking soda is fresh. Test it by dropping a little into vinegar; it should bubble vigorously.
- Salt (½ teaspoon) — Don’t skip this! Salt balances the sweetness and enhances the chocolate flavor.
- Andes Creme de Menthe Thins (about 40-45 pieces) — You’ll need one mint per cookie. I buy the big holiday bag because I always eat a few while baking. (Don’t judge.)
Ingredient Selection Tips: For the best texture, look for butter with at least 80% fat content. European-style butter like Kerrygold adds extra richness, but regular store-brand butter works perfectly fine. For the cocoa powder, if you’re using natural cocoa instead of Dutch-process, your cookies will be slightly lighter in color and have a more intense, slightly acidic chocolate flavor. Both work, but I personally prefer the Dutch-process for these.
Substitution Guidance: If you need a dairy-free option, use vegan butter sticks (not spreadable margarine) and check that your Andes mints are dairy-free (the original ones contain milk). For a gluten-free version, substitute the all-purpose flour with a 1:1 gluten-free baking flour blend that contains xanthan gum. I’ve tested this with Bob’s Red Mill 1:1 Baking Flour, and the texture was surprisingly good — just a tiny bit more delicate.
Equipment Needed
You don’t need any fancy equipment for these cookies, which is part of what makes them so great. Here’s what you’ll need:
- Electric mixer (stand or hand-held) — You can cream the butter and sugar by hand, but your arm will get tired. I use my KitchenAid stand mixer, but a hand mixer works just as well.
- Large mixing bowl — For combining your dry ingredients.
- Medium mixing bowl — For creaming the butter and sugar.
- Cookie scoop (about 1.5 tablespoons) — This ensures all your cookies are the same size and bake evenly. I love my OXO Good Grips scoop; it’s never let me down.
- Baking sheets (2) — Light-colored aluminum sheets give the most consistent results. Dark sheets can cause the bottoms to brown too quickly.
- Parchment paper — Silicone baking mats work too, but I prefer parchment for these cookies because it gives slightly crisper bottoms.
- Cooling rack — Essential for letting the cookies cool properly before adding the mint topping.
- Small microwave-safe bowl — For melting the Andes mints if needed (though I prefer pressing them on whole).
Budget-Friendly Options: If you don’t have a cookie scoop, use two spoons to portion the dough. If you don’t have parchment paper, you can grease the baking sheet lightly, but the cookies might spread a bit more. And honestly, you can cool cookies on a clean kitchen towel in a pinch — I’ve done it more times than I’d like to admit.
Preparation Method

Let’s get baking! These cookies come together quickly, so preheat your oven first and get everything organized.
- Preheat your oven to 350°F (175°C). Line two baking sheets with parchment paper. This gives you time to prep the dough while the oven heats up.
- Cream the butter and sugar. In a large mixing bowl, beat the softened butter and granulated sugar together until light and fluffy, about 2-3 minutes. You’re looking for a pale, creamy texture that’s almost doubled in volume. Scrape down the sides of the bowl halfway through. (I always forget to do this and end up with butter chunks in my cookies — learn from my mistakes!)
- Add the wet ingredients. Beat in the eggs one at a time, making sure each is fully incorporated before adding the next. Add the vanilla extract and peppermint extract, and mix until combined. The mixture might look a little curdled at this point — that’s totally normal, especially if your eggs were cold. Don’t panic.
- Mix the dry ingredients. In a separate medium bowl, whisk together the all-purpose flour, cocoa powder, baking soda, and salt. Whisking ensures everything is evenly distributed and breaks up any cocoa clumps. (Pro tip: sift the cocoa powder if it’s particularly lumpy. I learned this the hard way when I bit into a pocket of bitter cocoa powder in my first test batch.)
- Combine wet and dry ingredients. Gradually add the dry ingredients to the wet mixture, mixing on low speed just until combined. Be careful not to overmix! Stop as soon as you don’t see any more streaks of flour. Overmixing develops gluten and makes your cookies tough instead of tender.
- Scoop the dough. Using your cookie scoop, portion the dough into 1.5-tablespoon balls and place them about 2 inches apart on the prepared baking sheets. The dough will be fairly thick and slightly sticky — that’s perfect. You should get about 36 cookies total.
- Bake the cookies. Bake one sheet at a time for 8-10 minutes. The cookies will look puffy and slightly cracked on top. They might look underdone in the center, but that’s what you want! They’ll continue baking on the hot sheet after you take them out. For softer, fudgier cookies, bake for 8 minutes. For slightly firmer cookies, go for 10.
- Add the Andes mint topping. This is the crucial step! As soon as the cookies come out of the oven, let them cool on the baking sheet for exactly 2 minutes. Then, gently press one Andes mint into the center of each cookie. The heat from the cookie will melt the mint. Let them sit for another 2-3 minutes, then use a toothpick or the back of a spoon to swirl the melted mint into a thin layer over the top of the cookie. Don’t skip this swirling step — it creates that beautiful, crackled finish.
- Transfer to a cooling rack. After the mint has melted and swirled, carefully move the cookies to a wire rack to cool completely. The mint will harden as they cool, creating that signature snappy shell.
Sensory Cues: When the cookies are done, they should be set around the edges but still soft in the center. The tops will have a delicate, crackled appearance. The smell is incredible — rich chocolate with a cool mint undertone that fills your whole kitchen. When you bite into a cooled cookie, you should hear a slight crack from the mint topping, followed by the soft, fudgy interior.
Cooking Tips & Techniques
After seven rounds of testing, I’ve collected a few hard-won lessons that will help you nail these cookies on the first try.
Don’t overbake! This is the number one mistake I made in my early tests. These cookies are meant to be soft and fudgy, almost like a brownie in cookie form. If you wait until they look fully set in the center, they’ll be dry and cakey by the time they cool. Pull them out when the edges are set but the centers still look slightly underdone. Trust the process.
Use room temperature ingredients. I know, I know — everyone says this. But it really matters here. Cold butter won’t cream properly with the sugar, which means your cookies won’t spread evenly or develop that beautiful crackly top. Cold eggs can cause the butter to seize up and create a lumpy dough. Set everything out 30 minutes before you start, and you’ll thank me later.
Press the mint gently. When you add the Andes mint to the hot cookie, press it down just enough to stick. If you press too hard, the mint will melt into a puddle and run off the edges of the cookie. A gentle press is all you need — the heat will do the rest of the work.
Work in batches. Only bake one sheet at a time in the center of the oven. If you try to bake two sheets at once, the heat distribution will be uneven, and you’ll end up with some overdone and some underdone cookies. I learned this lesson when I was rushing to make cookies for a party and ended up with a very inconsistent batch. Now I take the extra 10 minutes and do it right.
Let them cool completely. I know it’s hard to wait, but the mint topping needs time to harden. If you try to eat one while it’s still warm, the mint will be gooey and messy. Give them at least 20 minutes on the cooling rack. The payoff is worth it — that perfect snap when you bite through the mint layer is pure magic.
Variations & Adaptations
One of the best things about this recipe is how easily it adapts to different tastes and dietary needs. Here are a few variations I’ve tried and loved:
Dark Chocolate Mint Cookies: Swap the regular cocoa powder for dark Dutch-process cocoa, and use dark chocolate Andes mints instead of the original green ones. The result is a deeper, more sophisticated chocolate flavor that pairs beautifully with the mint. My friend Sarah, who claims to hate milk chocolate, devoured an entire batch of these.
Gluten-Free Version: As I mentioned earlier, substitute the all-purpose flour with a 1:1 gluten-free baking blend that contains xanthan gum. I’ve tested this with Bob’s Red Mill 1:1 Baking Flour, and the texture was surprisingly close to the original. Just be gentle when mixing — gluten-free doughs can be more delicate.
Peppermint Crunch Variation: Before baking, roll the dough balls in crushed candy canes or peppermint candies. This adds a lovely crunch and extra peppermint flavor. Just be aware that the candy canes will melt slightly during baking, creating little pockets of minty sweetness throughout the cookie. I made these for a Christmas party, and they were gone in 20 minutes.
Double Mint Delight: Add ½ cup of mini chocolate chips to the dough along with ¼ teaspoon of extra peppermint extract. The chocolate chips add extra fudgy pockets, and the extra mint gives these cookies a real punch. This is my personal favorite variation for when I want something extra indulgent.
Vegan Adaptation: Use vegan butter sticks, a flax egg (1 tablespoon ground flaxseed mixed with 3 tablespoons water, let sit for 5 minutes), and dairy-free chocolate chips instead of the Andes mints. The texture will be slightly different — a bit more cakey — but the flavor is still fantastic. I tested this for my vegan cousin’s holiday party, and no one even noticed the difference.
Serving & Storage Suggestions
These cookies are delicious at room temperature, but they’re also amazing slightly warm. If you’ve stored them, pop one in the microwave for about 8 seconds to soften the cookie and slightly warm the mint topping. It’s like eating a freshly baked cookie all over again.
Presentation Ideas: Arrange the cookies on a festive platter or tiered stand for holiday gatherings. They look beautiful dusted with a light sprinkle of powdered sugar (do this right before serving, as the sugar will dissolve on the mint topping over time). For gift-giving, layer them in a decorative tin with parchment paper between each layer. I like to add a little tag that says “Homemade with love — and Andes mints.”
Perfect Pairings: These cookies are wonderful with a cold glass of milk, a hot cup of coffee, or a mug of peppermint hot chocolate. For an adult pairing, try them with a glass of red wine or a peppermint martini. The mint and chocolate combination is surprisingly versatile.
Storage Instructions: Store the cookies in an airtight container at room temperature for up to 5 days. Layer them with parchment paper to prevent sticking. Do not refrigerate them — the cold will make the mint topping sweat and become sticky. If you need to store them longer, freeze them.
Freezing Tips: These cookies freeze beautifully for up to 3 months. Place the cooled cookies in a single layer on a baking sheet and freeze for 1 hour, then transfer to a freezer-safe bag or container. To thaw, let them sit at room temperature for about 30 minutes. The mint topping will be just as snappy as the day you baked them. I always keep a stash in my freezer for unexpected guests or late-night cravings.
Flavor Development: Interestingly, these cookies actually taste better the day after baking. The mint flavor mellows slightly and melds with the chocolate, creating a more balanced, harmonious taste. So don’t worry if you’re making them a day ahead for a party — they’ll be even better.
Nutritional Information & Benefits
Let’s be real — these are cookies, not health food. But here’s the estimated nutritional information for one cookie (based on 36 cookies):
| Nutrient | Amount per Cookie |
|---|---|
| Calories | 145 |
| Total Fat | 8g |
| Saturated Fat | 5g |
| Cholesterol | 25mg |
| Sodium | 85mg |
| Total Carbohydrates | 18g |
| Dietary Fiber | 1g |
| Sugars | 12g |
| Protein | 2g |
Health Benefits of Key Ingredients: On the bright side, cocoa powder is rich in antioxidants called flavonoids, which can help reduce inflammation and improve heart health. Peppermint has been shown to aid digestion and soothe headaches. So while these cookies are definitely a treat, they’re not completely without redeeming qualities!
Dietary Considerations: This recipe contains gluten, dairy, and eggs. For gluten-free and vegan adaptations, see the variations section above. These cookies are not low-carb or keto-friendly due to the sugar content. If you’re watching your sugar intake, I’d recommend enjoying these as an occasional treat rather than a daily indulgence.
Conclusion
These Festive Chocolate Mint Cookies are the real deal. They’re quick enough for a last-minute holiday craving, impressive enough for cookie exchanges, and delicious enough to convert even the most stubborn mint skeptics (I’m looking at you, sis). The combination of fudgy chocolate cookie and cool, snappy mint topping is honestly unbeatable.
What I love most about this recipe is how forgiving it is. Whether you’re a seasoned baker or someone who’s just starting out, these cookies come together easily and deliver consistent, crowd-pleasing results. And the best part? You can customize them to your heart’s content — different chocolate, extra mint, gluten-free, vegan. This recipe is a canvas, and you’re the artist.
So go ahead — preheat that oven, unwrap those Andes mints, and make some magic. I’d love to hear how yours turn out! Drop a comment below and let me know if you tried any variations, or tag me in your photos on social media. Happy baking, friends!
Frequently Asked Questions
Can I use mint extract instead of peppermint extract?
Technically yes, but I wouldn’t recommend it. Peppermint extract has a cleaner, more authentic mint flavor. Mint extract often has a slightly artificial taste that can make these cookies taste like toothpaste. Stick with peppermint extract for the best results.
Why did my cookies spread too much?
This usually happens for one of three reasons: your butter was too soft or melted, you used too much sugar, or your baking sheet was too hot. Make sure your butter is softened but not melted, measure your ingredients accurately, and always start with a cool baking sheet. If you’re reusing a sheet, let it cool completely before adding more dough.
Can I use regular chocolate chips instead of Andes mints?
You can, but the texture and flavor will be different. Andes mints have a unique creamy texture and a specific mint flavor that creates that signature crackly top. If you use chocolate chips, I’d recommend melting them with a little coconut oil and drizzling them over the cookies instead.
How do I prevent the mint topping from becoming too hard?
The mint topping is supposed to harden slightly — that’s what gives these cookies their signature snap. But if you find it too hard, try pressing the mint onto the cookie when it’s slightly cooler (wait 3 minutes instead of 2). The mint will melt more slowly and create a thinner, more delicate layer.
Can I make the dough ahead of time?
Absolutely! You can prepare the dough, scoop it into balls, and refrigerate them on a baking sheet for up to 24 hours. When you’re ready to bake, just add 1-2 minutes to the baking time since the dough is cold. You can also freeze the dough balls for up to 3 months — bake directly from frozen, adding 2-3 minutes to the baking time.
Pin This Recipe!
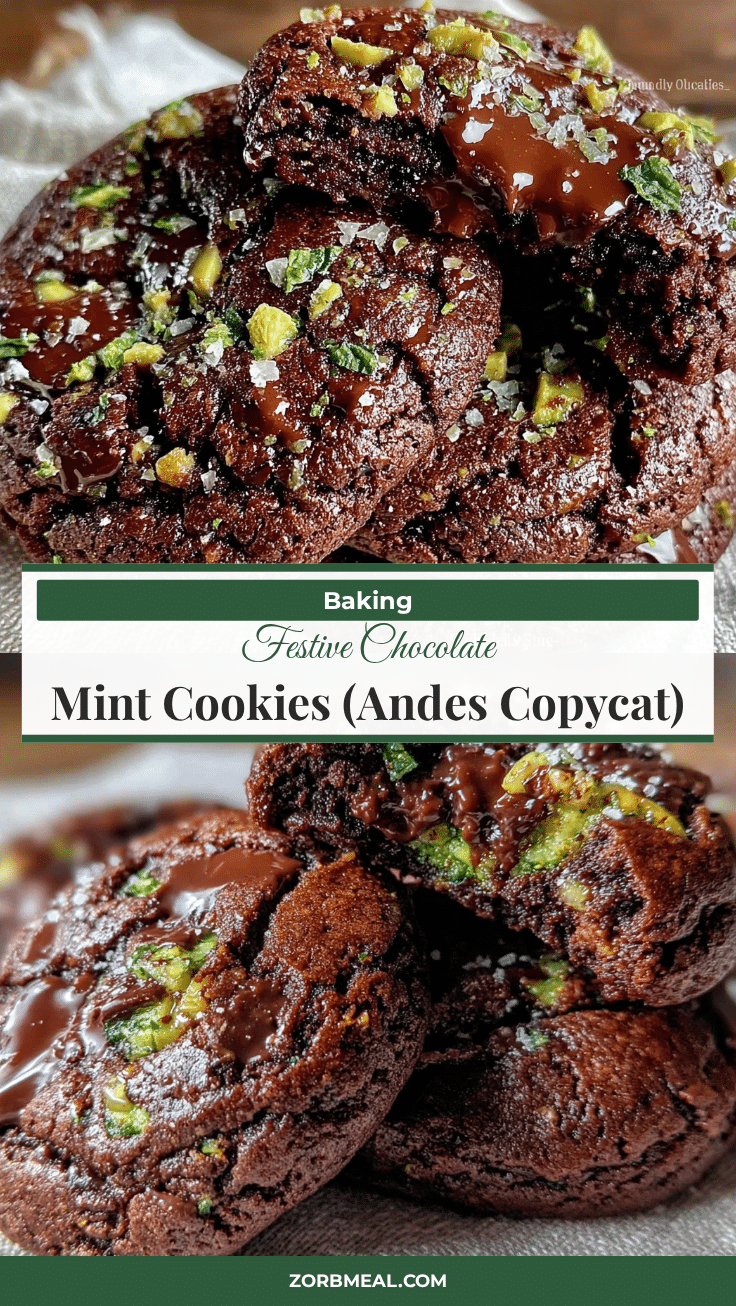
Festive Chocolate Mint Cookies: Best Andes Copycat Recipe

These Festive Chocolate Mint Cookies are the perfect marriage of rich, fudgy chocolate and cool, creamy mint. With a crackly top and a snappy Andes mint shell, they’re quick, easy, and guaranteed to convert even the most stubborn mint skeptics.
- Prep Time: 15 minutes
- Cook Time: 10 minutes
- Total Time: 25 minutes
- Yield: 36 cookies 1x
- Category: Dessert
- Cuisine: American
Ingredients
- 1 cup (226g) unsalted butter, softened
- 1 cup (200g) granulated sugar
- 2 large eggs, room temperature
- 1 teaspoon vanilla extract
- ½ teaspoon peppermint extract
- 2 cups (250g) all-purpose flour
- ¾ cup (75g) unsweetened cocoa powder (preferably Dutch-process)
- 1 teaspoon baking soda
- ½ teaspoon salt
- 40–45 Andes Creme de Menthe Thins
Instructions
- Preheat your oven to 350°F (175°C). Line two baking sheets with parchment paper.
- In a large mixing bowl, beat the softened butter and granulated sugar together until light and fluffy, about 2-3 minutes. Scrape down the sides halfway through.
- Beat in the eggs one at a time, ensuring each is fully incorporated. Add the vanilla extract and peppermint extract, and mix until combined.
- In a separate medium bowl, whisk together the all-purpose flour, cocoa powder, baking soda, and salt.
- Gradually add the dry ingredients to the wet mixture, mixing on low speed just until combined. Do not overmix.
- Using a cookie scoop (about 1.5 tablespoons), portion the dough into balls and place them about 2 inches apart on the prepared baking sheets. You should get about 36 cookies.
- Bake one sheet at a time for 8-10 minutes. The cookies will look puffy and slightly cracked on top, with set edges and soft centers.
- Let the cookies cool on the baking sheet for exactly 2 minutes. Gently press one Andes mint into the center of each cookie. Let sit for another 2-3 minutes, then use a toothpick or the back of a spoon to swirl the melted mint into a thin layer over the top.
- Transfer the cookies to a wire rack to cool completely. The mint will harden as they cool.
Notes
Don’t overbake! Pull cookies when edges are set but centers still look slightly underdone. Use room temperature ingredients for best results. Press the mint gently onto the hot cookie. Work in batches, baking one sheet at a time. Let cookies cool completely before eating to allow the mint topping to harden. Cookies taste even better the day after baking.
Nutrition
- Serving Size: 1 cookie
- Calories: 145
- Sugar: 12
- Sodium: 85
- Fat: 8
- Saturated Fat: 5
- Carbohydrates: 18
- Fiber: 1
- Protein: 2
Keywords: chocolate mint cookies, Andes copycat, holiday cookies, easy cookie recipe, fudgy cookies, peppermint cookies