It was 11:47 PM on a Tuesday, and I had a very specific, almost aggressive craving for apple pie. The kind of craving that makes you stand in front of the open fridge, hoping a solution will just materialize. But here’s the thing—I live alone, and the thought of wrestling with a full pie crust, peeling a mountain of apples, and then staring at an entire 9-inch pie for the next week felt… exhausting. I didn’t have the energy for the “real” version. But I had a single Honeycrisp apple rolling around in the fruit bowl, a lonely stick of butter, and the faint memory of a bar cookie recipe I’d seen years ago. And then the idea arrived: what if I just… didn’t make a pie? What if I made pie bars, but for just two people? Honestly, it felt like a cheat code. I grabbed my small baking dish, a little unhinged from the late hour, and started throwing things together. The quiet of the kitchen at that hour, the rhythmic thump of the knife—it was oddly meditative. Maybe you’ve been there, standing in your own kitchen at a ridiculous hour, convinced that a homemade dessert is the only thing that will fix the day. This recipe is that fix. It’s the reason I keep making these bars, even when the sun is still up.
Why You’ll Love This Recipe
Let’s face it, not every dessert needs to feed a crowd. Sometimes you just want a little something sweet without the commitment of a whole cake or pie. These small-batch apple pie bars are exactly that—a perfectly portioned treat for two that delivers all the cozy, spiced flavor of a classic apple pie with a fraction of the work.
- Perfectly Portioned: This recipe is designed for two people, so no leftovers lingering for days (unless you want to share, which is your call).
- Simple Ingredients: You probably have most of these in your pantry right now. No fancy grocery store trips required.
- Quick & Easy: From start to finish, you’re looking at about 45 minutes. That’s faster than ordering delivery.
- No Pie Crust Stress: The buttery, press-in crust is foolproof. No rolling, no chilling, no tears.
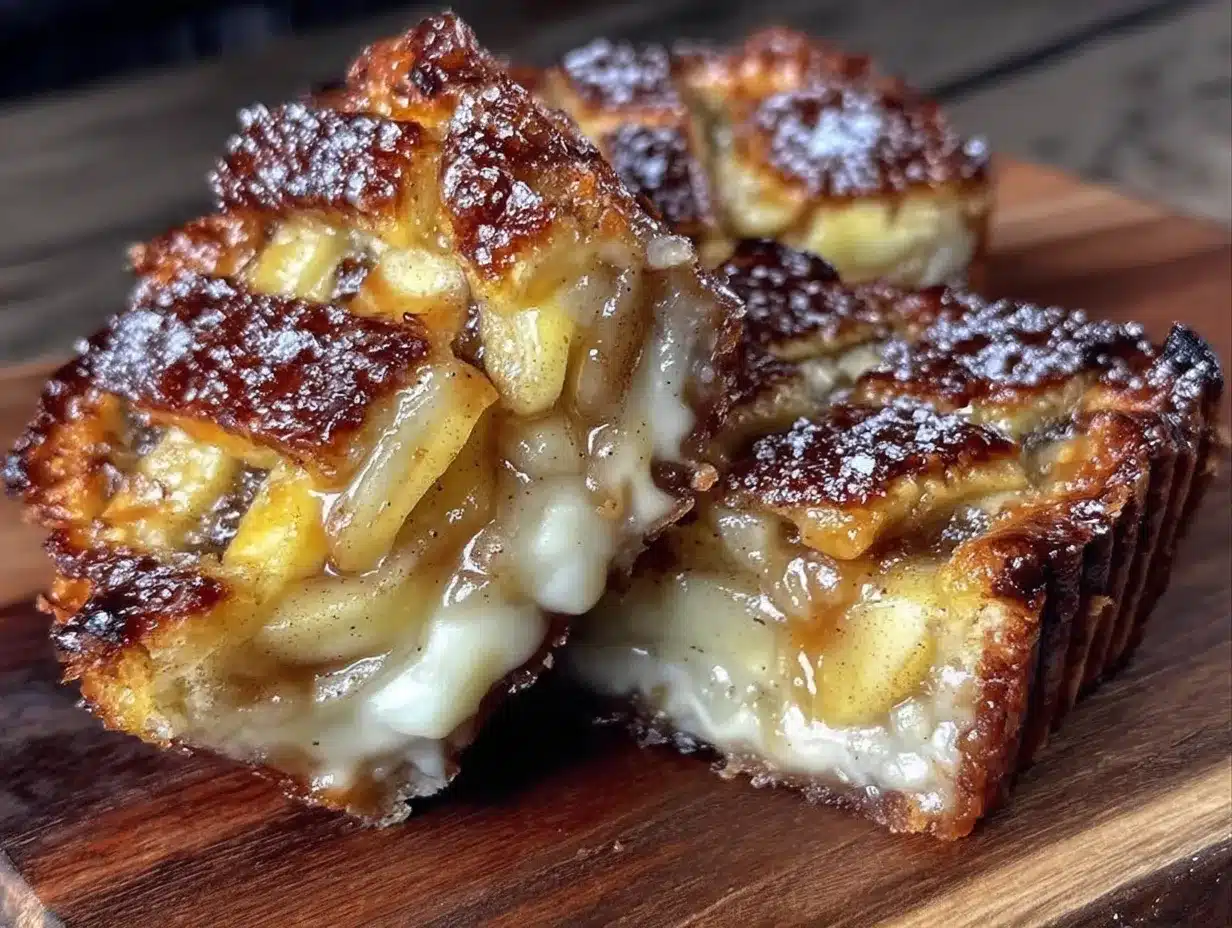
- Unbelievably Delicious: The combination of a tender, buttery shortbread crust, a soft, cinnamon-spiced apple filling, and a crunchy oat streusel topping is pure comfort.
What makes these bars different from other apple desserts is the texture. The crust stays firm, the apples get perfectly tender without turning into mush, and the streusel adds that essential crunch. I’ve tested this with different apple varieties, and let me tell you, the balance of sweet and tart is everything. This isn’t just another apple dessert—it’s the one that makes you close your eyes after the first bite. It’s comfort food, reimagined for a quiet evening in.
What Ingredients You Will Need
This recipe uses simple, wholesome ingredients to deliver bold flavor and a satisfying texture without any fuss. Most of these are pantry staples, so you’re probably already halfway there.
For the Crust
- 1/2 cup (60g) all-purpose flour (I prefer King Arthur for consistent results)
- 2 tablespoons granulated sugar
- 1/4 cup (56g) cold unsalted butter, cut into small cubes (cold butter is key for a flaky texture)
- 1/8 teaspoon salt
- 1-2 tablespoons ice water (only if needed to bring the dough together)
For the Apple Filling
- 1 large apple (about 200g), peeled, cored, and diced (I recommend Honeycrisp or Granny Smith for the best balance of sweet and tart)
- 2 tablespoons granulated sugar
- 1 tablespoon all-purpose flour
- 1/2 teaspoon ground cinnamon
- 1/8 teaspoon ground nutmeg (freshly grated if you have it—it makes a difference)
- 1 teaspoon lemon juice (this keeps the apples from browning and adds a little brightness)
For the Streusel Topping
- 1/4 cup (30g) all-purpose flour
- 2 tablespoons rolled oats (old-fashioned, not quick-cooking)
- 2 tablespoons brown sugar, packed
- 1/4 teaspoon ground cinnamon
- 2 tablespoons (28g) cold unsalted butter, cut into small cubes
A quick note on the apple: don’t use Red Delicious. They turn into mush. Stick with a firm apple that holds its shape during baking. If you want to swap the butter for a plant-based version, it works fine—just make sure it’s cold.
Equipment Needed
You don’t need a fancy kitchen to make these bars. Here’s what you’ll need:
- One 6×6-inch or 8×4-inch baking dish (a small loaf pan also works in a pinch)
- Mixing bowls (one medium, one small)
- Paring knife and cutting board (for prepping the apple)
- Pastry cutter or two forks (for cutting butter into the flour)
- Measuring cups and spoons
- Parchment paper (for easy removal—trust me on this)
If you don’t have a pastry cutter, just use your fingertips. The warmth of your hands will melt the butter a little, which is actually fine for the streusel. I’ve also used a food processor for the crust in a pinch, but be careful not to overmix.
Preparation Method
Alright, let’s get to it. This is where the magic happens. Preheat your oven to 375°F (190°C).
- Make the crust: In a medium bowl, whisk together the flour, sugar, and salt. Add the cold butter cubes. Using a pastry cutter or your fingertips, work the butter into the flour until the mixture looks like coarse sand with a few pea-sized butter pieces remaining. Add the ice water, one tablespoon at a time, and mix until the dough just comes together. Don’t overwork it—you want it to be shaggy, not smooth.
- Press the crust: Line your baking dish with parchment paper, leaving some overhang for easy lifting. Press the dough evenly into the bottom of the dish. Use the bottom of a measuring cup to get it flat and even. Bake for 12-15 minutes, until the edges are just starting to turn golden. Set aside to cool slightly while you make the filling.
- Prepare the apple filling: In the same bowl (less dishes, you’re welcome), toss the diced apple with the sugar, flour, cinnamon, nutmeg, and lemon juice. Make sure every piece is coated. Let it sit for 5 minutes—this helps the apples release some of their juices, which will thicken into a lovely syrup as they bake.
- Make the streusel: In a small bowl, combine the flour, oats, brown sugar, and cinnamon. Add the cold butter cubes and use your fingers or a pastry cutter to mix until the mixture forms clumps. Some larger clumps are good—they’ll get extra crunchy.
- Assemble the bars: Spread the apple filling evenly over the pre-baked crust. Don’t worry if it looks a little piled up—it will settle as it bakes. Sprinkle the streusel topping over the apples, covering them completely.
- Bake: Place the dish in the oven and bake for 25-30 minutes, until the streusel is golden brown and the apple filling is bubbly around the edges. Your kitchen will smell like a fall candle, but better.
- Cool: Let the bars cool in the dish on a wire rack for at least 15 minutes. This is the hardest part, I know. The filling needs time to set, or you’ll end up with a delicious but messy puddle.
- Slice and serve: Use the parchment paper to lift the bars out of the dish. Slice into two or four pieces—no judgment here. Serve warm, maybe with a scoop of vanilla ice cream if you’re feeling fancy.
A note on timing: the crust can be made a day ahead and kept in the fridge. Just press it into the dish and cover with plastic wrap. This is a great timesaver if you’re planning a cozy night in.
Cooking Tips & Techniques
I’ve made these bars more times than I can count, and I’ve definitely learned a few things along the way. Here are my best tips:
- Don’t skip the lemon juice. I once did, thinking it was optional. The apple filling turned a sad, brownish color and the sweetness was one-dimensional. The lemon juice brightens everything up.
- Use cold butter. I cannot stress this enough. Warm butter will make the crust tough and the streusel greasy. If your kitchen is warm, pop the butter in the freezer for 10 minutes before you start.
- Let the bars cool completely before slicing. I know, I know—you want to eat them immediately. But the filling needs time to set. I learned this the hard way when my first batch turned into apple pie soup. Still delicious, but not very photogenic.
- Toast the oats first. If you have an extra 5 minutes, toast the rolled oats in a dry skillet over medium heat until they’re fragrant. It adds a nutty depth to the streusel that is absolutely worth it.
- Multitask wisely. While the crust is baking, prep the apple filling and streusel. This keeps the process moving and prevents that frantic “oh no, the crust is done and I’m not ready” moment.
One of my biggest failures? I once used a soft, mealy apple because it was all I had. The bars were a soggy, sad mess. Stick with firm apples—it makes all the difference.
Variations & Adaptations
This recipe is a great starting point, but don’t be afraid to make it your own. Here are a few ways to switch it up:
- Gluten-Free: Swap the all-purpose flour with a 1:1 gluten-free baking flour blend. The texture will be slightly more crumbly, but still delicious. Use certified gluten-free oats for the streusel.
- Vegan: Use cold vegan butter in both the crust and streusel. I’ve tried it with Miyoko’s and it works beautifully. Just make sure it’s solid, not spreadable.
- Spice it up: Add 1/8 teaspoon of ground ginger or cardamom to the apple filling for a more complex flavor profile. I did this once on a whim and it was fantastic.
- Nutty Streusel: Replace the oats with finely chopped pecans or walnuts. The crunch is incredible, and it adds a lovely richness.
- Caramel Drizzle: After the bars have cooled, drizzle them with a little store-bought or homemade caramel sauce. It’s a small touch that feels extra special.
I personally love the version with a pinch of cardamom—it reminds me of a Swedish apple cake I had years ago. Feel free to experiment based on what you have in your pantry.
Serving & Storage Suggestions
These bars are best served warm, straight from the oven. The contrast between the warm, soft apple filling and the crunchy streusel is pure magic. A scoop of vanilla ice cream or a dollop of whipped cream takes it over the top. If you’re feeling extra cozy, serve them with a mug of hot cider or a cup of spiced chai.
For storage, let the bars cool completely, then cover the dish tightly with plastic wrap or transfer them to an airtight container. They’ll keep in the refrigerator for up to 3 days. The texture will soften a bit, but the flavor actually gets better as the spices meld together.
To reheat, pop a bar in the microwave for 15-20 seconds, or warm it in a 350°F (175°C) oven for 5-7 minutes. If you’re reheating from frozen, add a few extra minutes. I don’t recommend freezing the fully assembled bars—the texture of the apples can become watery. However, you can freeze the unbaked streusel topping in a zip-top bag for up to 3 months.
Nutritional Information & Benefits
Here’s an approximate nutritional breakdown for one bar (based on cutting the recipe into 2 servings):
- Calories: ~380
- Fat: 18g
- Carbohydrates: 54g
- Fiber: 4g
- Sugar: 30g
- Protein: 4g
Apples are a great source of dietary fiber and vitamin C, and the oats in the streusel provide a little extra fiber and iron. While this is definitely a treat, it’s made with whole ingredients and no artificial anything. If you’re watching your sugar intake, you can reduce the sugar in the filling by a tablespoon—the natural sweetness of the apple will still shine through. This recipe is naturally vegetarian and can be adapted to be gluten-free or vegan as noted above.
Conclusion
These cozy small-batch apple pie bars are proof that you don’t need a special occasion or a full kitchen to make something truly wonderful. They’re simple, honest, and deeply satisfying—exactly what a dessert for two should be. Whether you’re making them for a quiet night in, a date night dessert, or just because Tuesday was long, these bars deliver every single time.
I love this recipe because it feels like a warm hug in food form. It’s forgiving, it’s flexible, and it always makes me smile. I’d love to hear how yours turn out—did you add a twist? Use a different apple? Share your experience in the comments below, or tag me in your photos. Happy baking, friends!
Frequently Asked Questions
Can I use a different type of apple?
Absolutely. Firm, tart apples like Granny Smith or Braeburn work best because they hold their shape during baking. Softer apples like McIntosh or Red Delicious can turn mushy, so I’d avoid those.
Can I double this recipe?
Yes! To double it, use an 8×8-inch baking dish and increase the baking time by 5-10 minutes. Keep an eye on the streusel—if it’s browning too quickly, tent the dish with foil.
Can I make these bars ahead of time?
You can prepare the crust and streusel a day ahead and store them separately in the fridge. Assemble and bake when you’re ready. The fully baked bars are best eaten within 2 days.
Why did my crust turn out soggy?
This usually happens if the crust wasn’t pre-baked long enough, or if the apples released too much liquid. Make sure to pre-bake the crust until it’s lightly golden, and don’t skip the flour in the apple filling—it helps absorb excess moisture.
Can I use a different fruit instead of apples?
Sure! Pears work beautifully, as do peaches or nectarines in the summer. Just adjust the sugar based on the sweetness of the fruit, and you’re good to go.
Pin This Recipe!
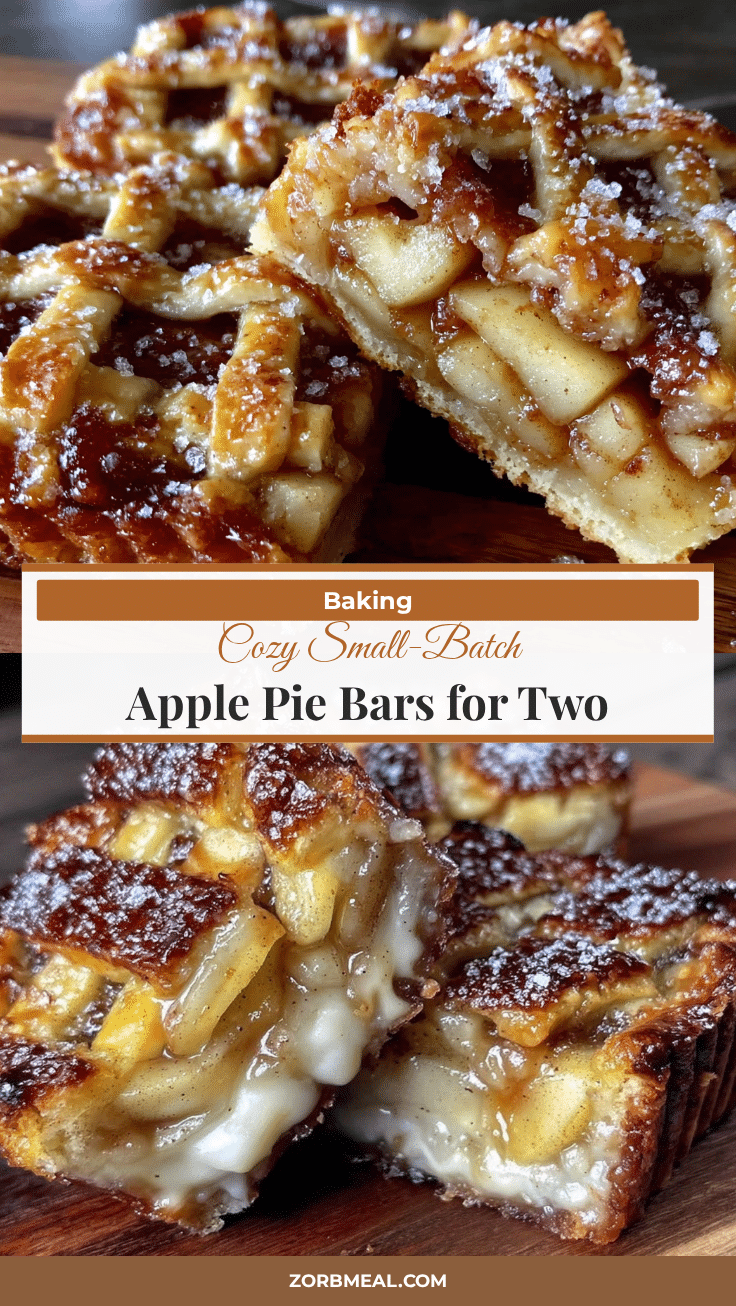
Cozy Small-Batch Apple Pie Bars for Two – Easy Fall Dessert
These small-batch apple pie bars are a perfectly portioned treat for two, delivering all the cozy, spiced flavor of a classic apple pie with a fraction of the work. A buttery shortbread crust, soft cinnamon-spiced apple filling, and crunchy oat streusel topping make this the ultimate comfort dessert for a quiet evening in.
- Prep Time: 15 minutes
- Cook Time: 30 minutes
- Total Time: 45 minutes
- Yield: 2 servings 1x
- Category: Dessert
- Cuisine: American
Ingredients
- 1/2 cup (60g) all-purpose flour
- 2 tablespoons granulated sugar
- 1/4 cup (56g) cold unsalted butter, cut into small cubes
- 1/8 teaspoon salt
- 1–2 tablespoons ice water (only if needed)
- 1 large apple (about 200g), peeled, cored, and diced (Honeycrisp or Granny Smith recommended)
- 2 tablespoons granulated sugar
- 1 tablespoon all-purpose flour
- 1/2 teaspoon ground cinnamon
- 1/8 teaspoon ground nutmeg
- 1 teaspoon lemon juice
- 1/4 cup (30g) all-purpose flour
- 2 tablespoons rolled oats (old-fashioned)
- 2 tablespoons brown sugar, packed
- 1/4 teaspoon ground cinnamon
- 2 tablespoons (28g) cold unsalted butter, cut into small cubes
Instructions
- Preheat oven to 375°F (190°C).
- Make the crust: In a medium bowl, whisk together 1/2 cup flour, 2 tablespoons granulated sugar, and 1/8 teaspoon salt. Add 1/4 cup cold butter cubes. Using a pastry cutter or fingertips, work the butter into the flour until the mixture looks like coarse sand with a few pea-sized butter pieces remaining. Add ice water, one tablespoon at a time, and mix until the dough just comes together. Do not overwork.
- Press the crust: Line a 6×6-inch or 8×4-inch baking dish with parchment paper, leaving overhang. Press dough evenly into the bottom. Use the bottom of a measuring cup to flatten. Bake for 12-15 minutes until edges are just golden. Set aside to cool slightly.
- Prepare the apple filling: In the same bowl, toss diced apple with 2 tablespoons granulated sugar, 1 tablespoon flour, 1/2 teaspoon cinnamon, 1/8 teaspoon nutmeg, and 1 teaspoon lemon juice. Coat evenly. Let sit for 5 minutes.
- Make the streusel: In a small bowl, combine 1/4 cup flour, 2 tablespoons oats, 2 tablespoons brown sugar, and 1/4 teaspoon cinnamon. Add 2 tablespoons cold butter cubes. Use fingers or a pastry cutter to mix until clumps form.
- Assemble the bars: Spread apple filling evenly over pre-baked crust. Sprinkle streusel topping over apples, covering completely.
- Bake for 25-30 minutes until streusel is golden brown and apple filling is bubbly around edges.
- Cool in the dish on a wire rack for at least 15 minutes to allow filling to set.
- Use parchment paper to lift bars out of dish. Slice into 2 or 4 pieces. Serve warm.
Notes
Use cold butter for best texture. Let bars cool completely before slicing to allow filling to set. For extra flavor, toast oats before adding to streusel. Can be made gluten-free with 1:1 gluten-free flour blend and certified gluten-free oats. Vegan option: use cold vegan butter. Store in refrigerator for up to 3 days; reheat in microwave for 15-20 seconds or in 350°F oven for 5-7 minutes.
Nutrition
- Serving Size: 1 bar (recipe makes
- Calories: 380
- Sugar: 30
- Fat: 18
- Carbohydrates: 54
- Fiber: 4
- Protein: 4
Keywords: apple pie bars, small batch dessert, dessert for two, apple bars, fall dessert, easy apple dessert, streusel bars


