I was standing in the frozen foods aisle last Tuesday, staring at a bag of microwaveable Brussels sprouts—and I actually laughed out loud. A woman next to me gave me that look, you know the one, like maybe I’d lost it. But she didn’t understand. She didn’t know that ten years ago, I would have rather eaten a shoe than a Brussels sprout. The smell alone—that sulfurous, boiled-to-death stench from my childhood cafeteria—was enough to make me walk the other way.
Honestly, I don’t even remember the first time I had them done right. But I remember the moment I knew I had to figure them out myself. It was at a tiny dinner party at my friend Carla’s apartment. She pulled a sheet pan out of the oven, and these little green orbs were all caramelized and shrunken, with dark, crispy edges. They smelled like roasted nuts and something sweet—balsamic, she said, offhand. I took one, just to be polite. And then I took four more. I literally hid the last few on my side of the plate so no one else would grab them.
That night, I went home and made three batches in a row. The first one was burnt. The second was soggy. The third… the third was close. I’ve been chasing that perfect crispy-yet-tender bite ever since, and I think I’ve finally cracked it. These Crispy Balsamic Brussels Sprouts Bites are the result of all those trials—and a few happy accidents involving a hot oven and a very sticky measuring spoon. Let me tell you, once you get that balsamic glaze to caramelize just right, there’s no going back.
Why You’ll Love This Recipe
Look, I’m not going to tell you these Brussels sprouts will change your life. But I will tell you they might change your mind about Brussels sprouts. If you’re someone who thinks they don’t like them, this is the recipe that proves you wrong. I’ve seen it happen at three separate dinner parties—skeptics becoming converts in a single bite.
- Quick & Easy: From fridge to table in 20 minutes flat. No marinating, no complicated steps. Just chop, toss, and roast.
- Simple Ingredients: You need exactly six things—Brussels sprouts, olive oil, balsamic vinegar, honey (or maple syrup), salt, and pepper. That’s it. You probably have most of them right now.
- Perfect for Weeknights or Holidays: These work for a Tuesday night side dish and a Thanksgiving table. They’re fancy enough to impress but simple enough to make on a whim.
- Crowd-Pleaser: I’ve served these to kids, picky eaters, and full-on vegetable haters. They always disappear first. Always.
- Unbelievably Delicious: The magic is in the contrast—crispy, charred edges with a tender center, all coated in a tangy-sweet glaze that caramelizes into something almost candy-like. It’s next-level comfort food that happens to be good for you.
What makes this recipe different from the dozens of others out there? It’s the technique. Most recipes tell you to roast at 400°F, but I’ve found that 425°F is the sweet spot for getting that deep, nutty char without burning the balsamic. Plus, I add the glaze halfway through, not at the beginning, so it reduces into a sticky coating instead of just steaming off. It’s a small tweak, but it makes all the difference.
This isn’t just a side dish—it’s the kind of recipe that makes you close your eyes after the first bite. It’s comfort food reimagined: healthier, faster, but with the same soul-soothing satisfaction. Perfect for impressing guests without stress, or turning a simple weeknight meal into something memorable.
What Ingredients You Will Need
This recipe uses simple, wholesome ingredients to deliver bold flavor and satisfying texture without the fuss. Most of these are probably already in your pantry, which is exactly how I like to cook.
- Brussels sprouts – 1 pound, trimmed and halved (look for firm, bright green sprouts with tight leaves; smaller ones tend to be sweeter and less bitter)
- Olive oil – 2 tablespoons, extra virgin (I prefer California Olive Ranch for its clean, mild flavor that doesn’t overpower the sprouts)
- Balsamic vinegar – 3 tablespoons, good quality (the aged stuff from Modena is worth the splurge here—it’s thicker and sweeter, which means better glaze)
- Honey – 1 tablespoon (or maple syrup for a vegan option; both work beautifully, though honey gives a slightly richer caramelization)
- Garlic powder – ½ teaspoon (not fresh garlic—it burns at high heat and turns bitter; trust me on this one)
- Salt – ½ teaspoon, fine sea salt (I use Diamond Crystal; if you’re using Morton’s, reduce to ¼ teaspoon because it’s saltier by volume)
- Black pepper – ¼ teaspoon, freshly cracked (pre-ground works in a pinch, but fresh makes a noticeable difference here)
- Optional: Red pepper flakes – ¼ teaspoon, for heat (I add these about half the time, depending on my mood)
- Optional: Parmesan cheese – 2 tablespoons, freshly grated (adds a salty, nutty finish that’s absolutely divine)
Ingredient Selection Tips: When buying Brussels sprouts, avoid any that have yellowing leaves or feel spongy. They should be dense and heavy for their size. If you’re shopping at a farmers’ market in the fall, look for sprouts still attached to the stalk—they’re often fresher and sweeter. In a pinch, frozen Brussels sprouts work, but you’ll need to thaw and pat them very dry, and they won’t get quite as crispy.
Substitution Guidance: For a gluten-free option, this recipe is naturally gluten-free as written. For a low-carb version, skip the honey and use a sugar-free balsamic glaze (I like the one from Trader Joe’s). For a nut-free option, you’re already good—just watch the Parmesan if you’re dairy-free, too.
Equipment Needed
You don’t need much for this recipe, which is part of its beauty. Here’s what I use:
- Baking sheet – A half-sheet pan (18×13 inches) is ideal. I’ve had my Nordic Ware for years, and it’s never warped. If you don’t have one, any rimmed baking sheet will work—just avoid dark nonstick pans, which can burn the bottoms.
- Parchment paper – Lining the pan makes cleanup effortless. I’ve tried foil, and it works, but the sprouts stick more. Parchment is worth the extra 10 seconds.
- Chef’s knife – A sharp 8-inch knife makes trimming and halving the sprouts a breeze. I learned the hard way that a dull knife just squishes them.
- Cutting board – Any sturdy board will do. I prefer wood because it’s gentler on my knife, but plastic is fine.
- Mixing bowl – A medium bowl for tossing the sprouts with oil and seasonings. Glass or stainless steel works best—plastic can absorb odors.
- Measuring spoons – For accuracy. I’ve eyeballed the balsamic before and ended up with a pool of vinegar. Don’t be like me.
- Spatula – For flipping the sprouts halfway through. A thin metal spatula works best for getting under the crispy edges.
Budget-Friendly Options: Don’t have a half-sheet pan? Use a 9×13 baking dish—just spread the sprouts in a single layer, and they’ll still get crispy, though you might need an extra minute or two of roasting time.
Preparation Method
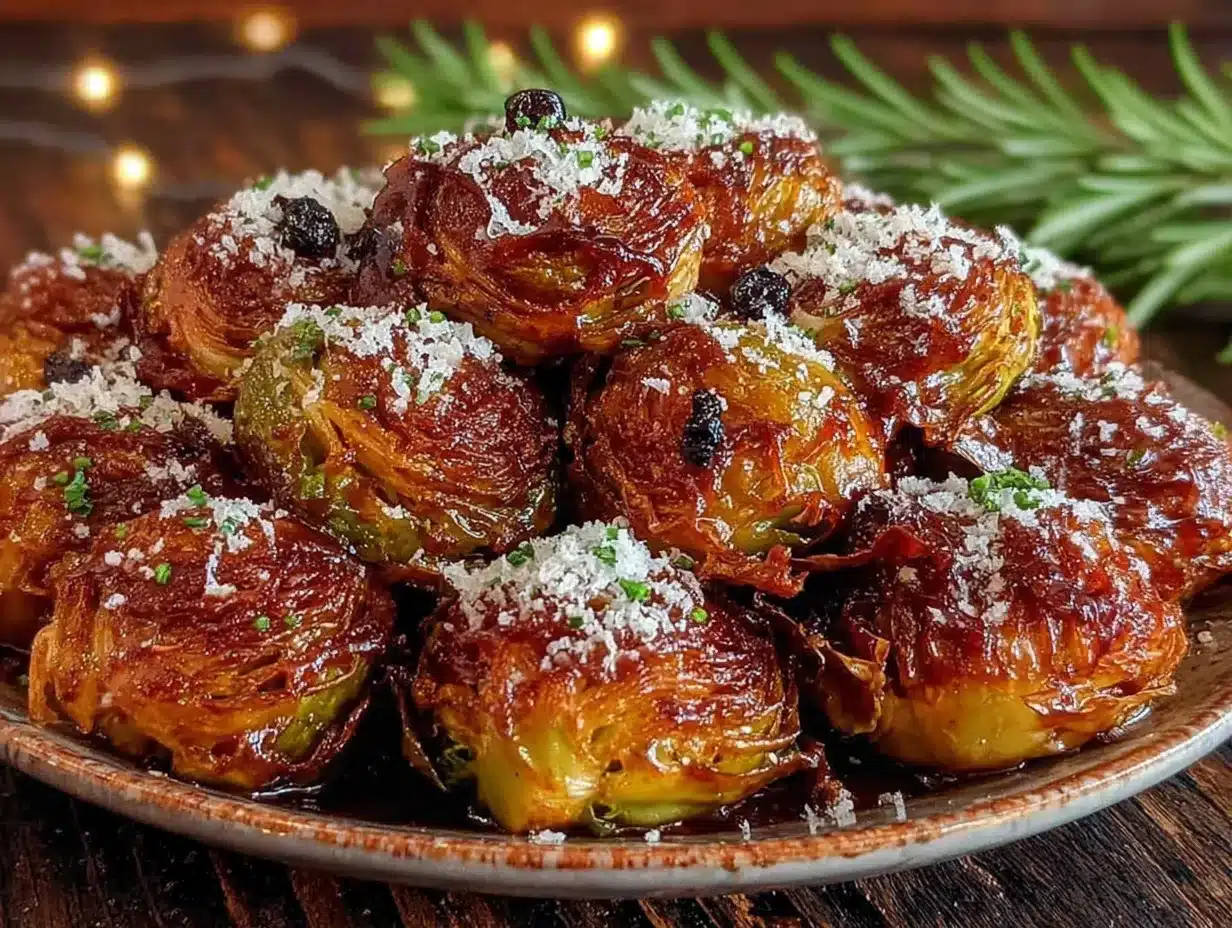
Let’s get cooking. This recipe comes together in about 20 minutes, and most of that is hands-off oven time. Here’s how I do it:
- Preheat your oven to 425°F (218°C). This is non-negotiable. I’ve tried 400°F, and the sprouts take longer to crisp up. I’ve tried 450°F, and the balsamic burns. 425°F is the Goldilocks temperature.
- Prep the Brussels sprouts. Rinse 1 pound of sprouts under cold water and pat them very dry with a clean towel. Any moisture left on them will steam instead of roast, and nobody wants soggy sprouts. Trim off the tough, woody ends—about ¼ inch—and remove any yellow or damaged outer leaves. Then cut each sprout in half lengthwise through the stem. If you have any really large ones, quarter them so they’re all roughly the same size. This is key for even cooking.
- Toss with oil and seasonings. In a medium bowl, combine the halved sprouts with 2 tablespoons olive oil, ½ teaspoon salt, ¼ teaspoon black pepper, and ½ teaspoon garlic powder. Use your hands to toss everything together—yes, get in there. It’s the best way to make sure every cut side gets coated. The sprouts should look glossy but not greasy.
- Arrange on the baking sheet. Line your baking sheet with parchment paper. Spread the sprouts in a single layer, cut-side down. This is important—the cut surface needs to be flat against the pan to get that deep, golden char. Don’t overcrowd the pan; if the sprouts are touching too much, they’ll steam instead of roast. Use two pans if you need to.
- Roast for 10 minutes. Slide the pan into the oven and let them do their thing. Don’t open the door—you’ll let out all the heat. Set a timer and walk away.
- Make the balsamic glaze. While the sprouts roast, whisk together 3 tablespoons balsamic vinegar and 1 tablespoon honey in a small bowl. If your honey is thick and stubborn, microwave it for 10 seconds to loosen it up. Set the glaze aside.
- Flip and glaze. After 10 minutes, pull the pan out. The cut sides should be deeply browned and the outer leaves starting to crisp. Use a spatula to flip each sprout over. Drizzle the balsamic-honey mixture evenly over the sprouts. Give the pan a gentle shake to distribute.
- Roast for another 8-10 minutes. Return the pan to the oven. The glaze will bubble and reduce, coating the sprouts in a sticky, caramelized layer. Watch them closely in the last 2 minutes—balsamic can go from perfect to burnt very quickly. You’re looking for the edges to be dark and crispy, and the glaze to be thick and syrupy.
- Finish and serve. Remove from the oven. If using, sprinkle with red pepper flakes and freshly grated Parmesan. Let them rest on the pan for 1-2 minutes—this helps the glaze set. Transfer to a serving dish and enjoy immediately while they’re still hot and crispy.
Sensory Cues: At step 5, you should smell a nutty, almost popcorn-like aroma coming from the oven. At step 7, the cut sides should be a deep mahogany brown—not black, but close. At step 8, the glaze should be bubbling and the kitchen should smell sweet and tangy, like a balsamic reduction at a fancy restaurant.
Troubleshooting: If your sprouts are burning on the outside but still hard in the center, they’re too large. Next time, cut them smaller. If they’re soggy, your oven might not be hot enough—check the temperature with an oven thermometer. If the glaze is pooling instead of coating, you added it too early; next time, wait until the last 8 minutes.
Cooking Tips & Techniques
I’ve made this recipe probably fifty times, and I’ve learned a few things the hard way. Here’s what I wish someone had told me:
Dry your sprouts thoroughly. This is the single most important tip. Water is the enemy of crispiness. After washing, I lay the sprouts out on a kitchen towel and pat them dry, then let them air-dry for a few minutes while I preheat the oven. It sounds fussy, but it makes a huge difference.
Don’t skimp on the oil. I know we’re all trying to be healthy, but the sprouts need enough oil to conduct heat and create that crispy exterior. If you use too little, they’ll dry out and burn. Two tablespoons is the sweet spot for one pound of sprouts.
Hot pan, cold sprouts. For extra crispy results, place your baking sheet in the oven while it preheats. When you add the oiled sprouts to the hot pan, they’ll start sizzling immediately. I do this when I’m feeling fancy, and it gives the best char I’ve ever gotten at home.
Use a timer, not your instincts. I once got distracted by a phone call and left the sprouts in for 22 minutes. The glaze had turned into a black, sticky mess that took me an hour to scrub off the pan. Set a timer for every step. Your future self will thank you.
Multitasking strategy: While the sprouts roast, prep any other parts of your meal. I often make a simple lemon-herb quinoa or roast chicken thighs alongside. The sprouts take exactly 20 minutes, so I time everything to finish together.
Variations & Adaptations
This recipe is endlessly adaptable. Here are some of my favorite twists:
- Spicy Maple Bacon: Cook 4 slices of bacon until crispy, then crumble. Toss the roasted sprouts with the bacon bits and substitute maple syrup for the honey. The salty-smoky-sweet combo is out of this world. I made this for a Super Bowl party, and people were fighting over the last pieces.
- Lemon Garlic: Skip the balsamic and honey. Instead, toss the roasted sprouts with 2 tablespoons fresh lemon juice, 1 teaspoon lemon zest, and 2 minced garlic cloves (add after roasting so the garlic doesn’t burn). Finish with a handful of toasted pine nuts. This version is brighter and lighter—perfect for spring.
- Asian-Inspired: Swap the balsamic for 2 tablespoons soy sauce (or tamari for gluten-free) and 1 tablespoon sesame oil. Add 1 teaspoon sriracha for heat. Toss the roasted sprouts with sesame seeds and sliced green onions. I serve this with salmon and jasmine rice for a quick weeknight dinner.
- Cheesy Herb: After roasting, toss the sprouts with ¼ cup grated Pecorino Romano and 2 tablespoons chopped fresh herbs—parsley, thyme, and chives work beautifully. The cheese melts slightly and clings to the crispy edges. This is my go-to for holiday dinners.
Dietary Adaptations: For a vegan version, use maple syrup instead of honey and skip the Parmesan. For a keto-friendly version, use a sugar-free balsamic glaze and omit the honey entirely—the sprouts will still caramelize beautifully from the natural sugars. For a nut-free version, skip any nut-based toppings and you’re good to go.
Serving & Storage Suggestions
These sprouts are best served hot, straight from the oven. The crispy edges start to soften after about 10 minutes, so I always try to time them for right when I’m ready to eat. That said, they’re still delicious at room temperature—I’ve been known to pick at the leftovers straight from the pan.
What to serve with them: These sprouts are incredibly versatile. They pair beautifully with roasted chicken, grilled steak, pan-seared salmon, or even a simple pasta. For a vegetarian meal, serve them over creamy polenta or alongside a hearty grain bowl. I love them with a dollop of garlic aioli for dipping—the creamy sauce contrasts perfectly with the crispy edges.
Storage: Store leftovers in an airtight container in the refrigerator for up to 4 days. They’ll lose their crispiness, but the flavor will still be great. I often make a double batch just to have leftovers for salads and grain bowls throughout the week.
Reheating: The best way to re-crisp them is in the oven or air fryer. Spread them on a baking sheet and reheat at 400°F for 5-7 minutes. The microwave will make them soggy, so avoid it if you can. If you’re in a rush, a hot skillet with a tiny bit of oil works in a pinch—just toss them over medium-high heat for 2-3 minutes.
How flavors develop: Interestingly, the balsamic flavor mellows and deepens overnight. I actually enjoy cold leftovers straight from the fridge—they taste almost pickled, in a good way. They’re fantastic chopped up and tossed into a lunch salad with some goat cheese and toasted walnuts.
Nutritional Information & Benefits
These sprouts are as good for you as they are delicious. Here’s the breakdown for one serving (about ¾ cup, based on 4 servings):
| Nutrient | Amount per Serving |
|---|---|
| Calories | 145 |
| Total Fat | 8g |
| Saturated Fat | 1g |
| Carbohydrates | 17g |
| Fiber | 5g |
| Sugar | 9g |
| Protein | 5g |
| Vitamin C | 130% DV |
| Vitamin K | 220% DV |
Health Benefits: Brussels sprouts are a nutritional powerhouse. They’re packed with vitamin C for immune support, vitamin K for bone health, and fiber for digestive health. The balsamic vinegar adds antioxidants, and olive oil provides healthy monounsaturated fats. This recipe is naturally gluten-free, low-carb, and can easily be made vegan. The only potential allergen is the optional Parmesan cheese, which contains dairy.
My wellness perspective: I love that this recipe lets me eat a vegetable that feels indulgent. The honey and balsamic add a touch of sweetness, but it’s balanced by the bitterness of the sprouts and the savory olive oil. It’s the kind of dish that makes eating healthy feel effortless—because honestly, when food tastes this good, you don’t even think about whether it’s good for you.
Conclusion
If you’ve ever been skeptical about Brussels sprouts, I get it. I was there once, standing in that frozen foods aisle, judging a vegetable I barely knew. But these Crispy Balsamic Brussels Sprouts Bites are the recipe that changed everything for me. They’re quick enough for a Tuesday night, fancy enough for a dinner party, and delicious enough to convert even the most stubborn vegetable hater.
What I love most about this recipe is how forgiving it is. You can tweak the glaze, swap the seasonings, or add your favorite toppings, and it still works. It’s a blueprint, not a rigid formula—and that’s exactly how I think cooking should be.
I’d love to hear how these turn out for you. Did you add bacon? Skip the honey? Double the garlic? Drop a comment below and let me know—I read every single one, and I’m always looking for new variations to try. And if you loved them, share this recipe with a friend who thinks they don’t like Brussels sprouts. Trust me, you’ll be doing them a favor.
Now go preheat that oven. Your new favorite side dish is waiting.
Frequently Asked Questions
Can I use frozen Brussels sprouts for this recipe?
Yes, but you’ll need to thaw them completely and pat them very dry with paper towels. They won’t get quite as crispy as fresh sprouts, but they’ll still be delicious. Add 2-3 minutes to the roasting time to account for the extra moisture.
Why did my balsamic glaze burn?
Balsamic vinegar has natural sugars that can burn at high temperatures. Make sure you’re adding the glaze halfway through roasting (not at the beginning) and keep a close eye on the sprouts in the last 2-3 minutes. If your oven runs hot, reduce the temperature to 400°F.
Can I make this recipe in an air fryer?
Absolutely! Preheat your air fryer to 375°F. Toss the sprouts with oil and seasonings, then air fry for 12-15 minutes, shaking the basket halfway through. Add the balsamic glaze in the last 5 minutes. You might need to work in batches to avoid overcrowding.
How do I get my sprouts extra crispy?
Three things: dry them thoroughly, preheat your baking sheet in the oven, and make sure the cut sides are flat against the pan. Also, don’t overcrowd—the sprouts need space for the hot air to circulate and crisp up the edges.
Can I prep these ahead of time?
You can trim and halve the sprouts up to 24 hours in advance and store them in a sealed container in the fridge. The glaze can also be mixed ahead. But don’t toss the sprouts with oil until just before roasting, or they’ll get soggy. The actual roasting should happen right before serving for the best texture.
Pin This Recipe!
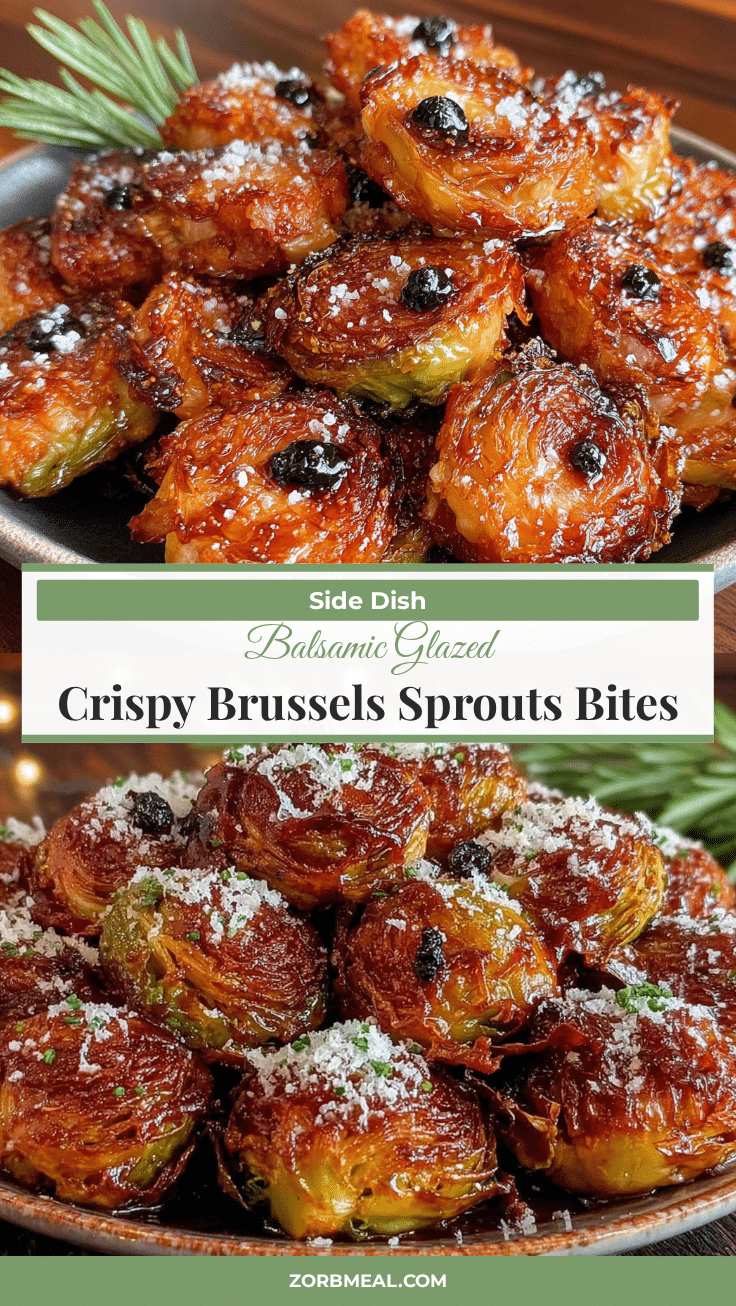
Crispy Balsamic Brussels Sprouts Bites: Easy 20-Min Recipe

These crispy balsamic Brussels sprouts bites are a quick and easy side dish that transforms a humble vegetable into a caramelized, tangy-sweet delight. Ready in just 20 minutes, they’re perfect for weeknights or holiday feasts.
- Prep Time: 5 minutes
- Cook Time: 18-20 minutes
- Total Time: 23-25 minutes
- Yield: 4 servings 1x
- Category: Side Dish
- Cuisine: American
Ingredients
- 1 pound Brussels sprouts, trimmed and halved
- 2 tablespoons extra virgin olive oil
- 3 tablespoons balsamic vinegar
- 1 tablespoon honey (or maple syrup for vegan)
- ½ teaspoon garlic powder
- ½ teaspoon fine sea salt (or ¼ teaspoon Morton’s salt)
- ¼ teaspoon freshly cracked black pepper
- ¼ teaspoon red pepper flakes (optional)
- 2 tablespoons freshly grated Parmesan cheese (optional)
Instructions
- Preheat your oven to 425°F (218°C).
- Rinse 1 pound of Brussels sprouts under cold water and pat them very dry. Trim off the tough, woody ends (about ¼ inch) and remove any yellow or damaged outer leaves. Cut each sprout in half lengthwise through the stem; quarter any large ones so they’re roughly the same size.
- In a medium bowl, combine the halved sprouts with 2 tablespoons olive oil, ½ teaspoon salt, ¼ teaspoon black pepper, and ½ teaspoon garlic powder. Use your hands to toss until every cut side is coated.
- Line a baking sheet with parchment paper. Spread the sprouts in a single layer, cut-side down. Do not overcrowd.
- Roast for 10 minutes. Do not open the oven door.
- While the sprouts roast, whisk together 3 tablespoons balsamic vinegar and 1 tablespoon honey in a small bowl. If honey is thick, microwave for 10 seconds.
- After 10 minutes, remove the pan from the oven. Flip each sprout over using a spatula. Drizzle the balsamic-honey mixture evenly over the sprouts and gently shake the pan to distribute.
- Return the pan to the oven and roast for another 8-10 minutes, until the glaze is bubbling and the edges are dark and crispy. Watch closely in the last 2 minutes to prevent burning.
- Remove from the oven. If using, sprinkle with red pepper flakes and freshly grated Parmesan. Let rest on the pan for 1-2 minutes. Transfer to a serving dish and serve immediately.
Notes
Dry sprouts thoroughly for maximum crispiness. For extra crispy results, preheat the baking sheet in the oven while it preheats. Add the glaze halfway through roasting to prevent burning. Store leftovers in an airtight container in the refrigerator for up to 4 days. Reheat in the oven or air fryer at 400°F for 5-7 minutes to restore crispiness.
Nutrition
- Serving Size: ¾ cup
- Calories: 145
- Sugar: 9
- Sodium: 300
- Fat: 8
- Saturated Fat: 1
- Carbohydrates: 17
- Fiber: 5
- Protein: 5
Keywords: Brussels sprouts, balsamic, crispy, easy, quick, side dish, roasted, vegetarian, gluten-free


