There used to be a tiny bakery tucked between a dry cleaner and a used bookstore in my old neighborhood that made the most ridiculous blondies. They weren’t fancy—no drizzled caramel or sea salt flakes. But every October, they’d line the display case with these three-layer bars that looked exactly like candy corn. When the bakery closed two years ago (the owner retired, which I try to be happy about), I honestly felt a little lost. I mean, those blondies were my whole fall mood.
After eleven tries—eleven, let me tell you—I finally cracked it. The first batch came out too cakey. The second batch burned the bottom layer. Batch number seven tasted great but looked nothing like candy corn. But batch twelve? That was the one. And the best part? This version comes together in about thirty minutes flat. You don’t need a stand mixer or any fancy equipment. Just a bowl, a spatula, and a serious craving for something sweet and nostalgic.
Maybe you’ve been there—chasing a flavor from a place that no longer exists. It’s a weird kind of grief, honestly. But there’s something satisfying about recreating it in your own kitchen, especially when it turns out even better than you remembered. These easy candy corn blondies have that same buttery, brown sugar depth with a colorful twist that makes people smile. And they’re quick enough for a Tuesday night sugar fix, which is really what weeknight baking is all about.
Why You’ll Love This Recipe
Let’s be real for a second. Weeknight baking can feel like a chore when you’re already tired from the day. But these candy corn blondies are different. They’re designed for real life—the kind where you want something homemade without spending your whole evening in the kitchen.
- Quick & Easy: From start to finish, these are ready in about 30 minutes. No chilling dough, no complicated steps. Just mix, layer, and bake.
- Simple Ingredients: You probably already have butter, brown sugar, eggs, and flour in your pantry. The only special addition is candy corn, which shows up everywhere in the fall.
- Perfect for Fall Gatherings: These are great for Halloween parties, tailgates, or just a cozy night in. They look impressive but take almost no effort.
- Crowd-Pleaser: Kids love the candy corn topping, and adults appreciate the buttery blondie base. I’ve never brought these anywhere without someone asking for the recipe.
- Unbelievably Delicious: The combination of chewy blondie, sweet candy corn, and that slightly crisp edge is pure comfort food magic.
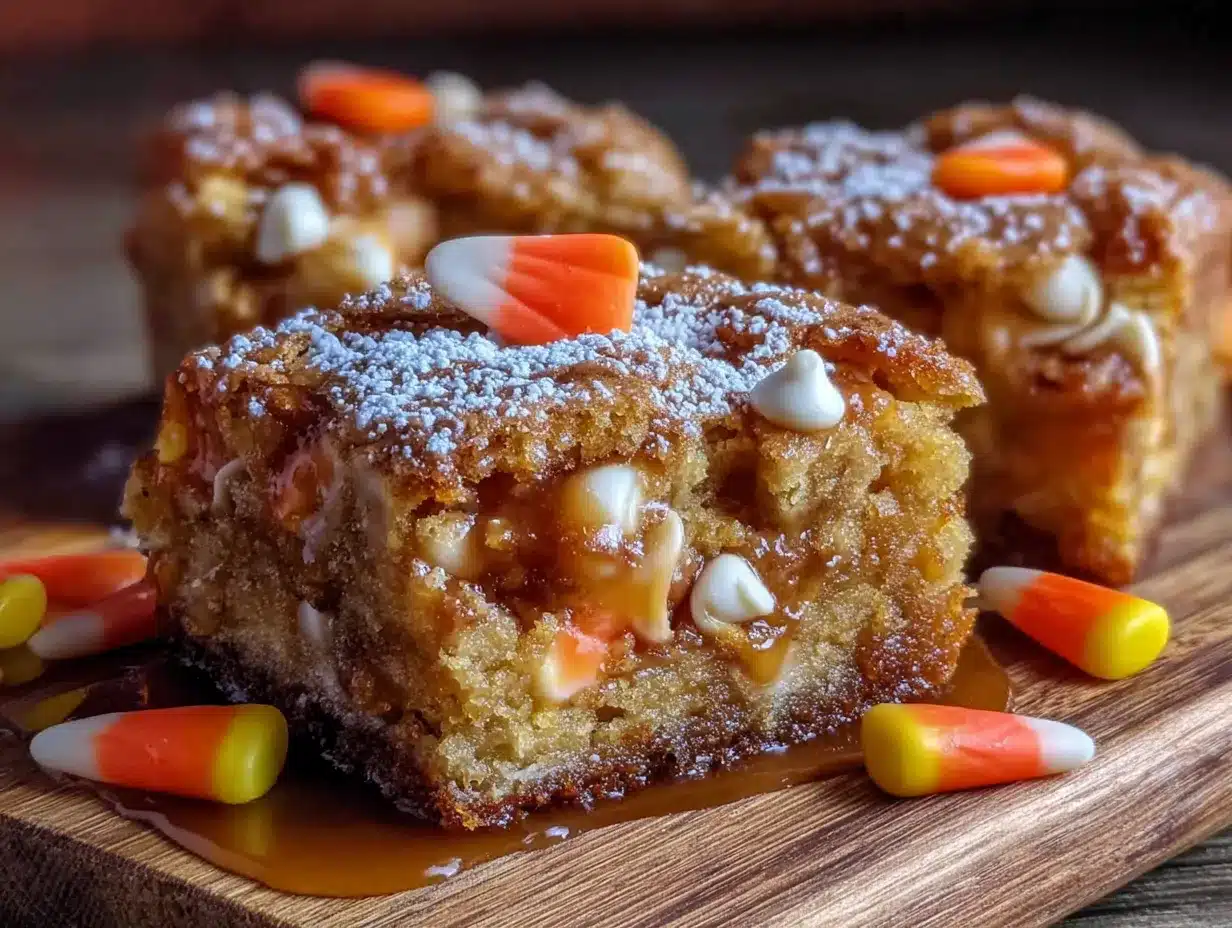
What makes these different from every other blondie recipe out there? It’s the layering technique. Instead of mixing everything together, you create three distinct color bands that mimic candy corn. The result is both visually stunning and perfectly balanced—you get a little bit of each layer in every bite. Plus, I’ve tested this with both homemade and store-bought candy corn, and honestly, the store-bought stuff works perfectly. No need to overcomplicate things.
This is the kind of recipe that makes you close your eyes after the first bite. It’s nostalgic without being fussy, sweet without being cloying, and fast without sacrificing flavor. Perfect for impressing your kids on a school night or bringing a little joy to an otherwise ordinary Wednesday.
What Ingredients You Will Need
This recipe uses simple, wholesome ingredients to create something special. Most of these are pantry staples, which means you can whip up a batch whenever the craving hits without a special trip to the store.
For the Blondie Base
- Unsalted butter, melted (1/2 cup or 1 stick) — I use Land O’Lakes for consistent results. Melting the butter instead of creaming it makes this recipe faster and gives the blondies a chewier texture.
- Light brown sugar, packed (1 cup, about 200g) — This is where the deep, caramel-like flavor comes from. Dark brown sugar works too, but it’ll make the base slightly more molasses-forward.
- Granulated sugar (1/4 cup, about 50g) — Adds a touch of sweetness and helps with that crackly top. You can skip this if you want less sweetness, but the texture won’t be quite the same.
- Large egg (1, room temperature) — Room temperature eggs incorporate more evenly into melted butter. If you forgot to take it out ahead of time, place it in a bowl of warm water for five minutes.
- Vanilla extract (1 teaspoon) — Pure vanilla makes a difference here. I prefer Nielsen-Massey, but any brand works. Avoid imitation vanilla if you can—it has a harsh aftertaste.
- All-purpose flour (1 cup, about 120g) — Spoon and level your flour for the best results. Scooping directly from the bag can pack in too much flour and make the blondies dry.
- Baking powder (1/2 teaspoon) — Just enough lift to keep these from being dense hockey pucks.
- Salt (1/4 teaspoon) — Balances the sweetness. I use fine sea salt for even distribution.
For the Color Layering
- Yellow food coloring (a few drops) — Gel food coloring works best because it doesn’t thin out the batter. I use Wilton brand.
- Orange food coloring (a few drops) — Same here—gel is your friend. You can mix red and yellow if you don’t have orange on hand.
For the Topping
- Candy corn (about 1/2 cup, roughly chopped) — I use Brach’s candy corn for that classic flavor. If you’re feeling fancy, you can use the autumn mix with the little pumpkins and leaves. Just chop everything to similar sizes so they distribute evenly.
Substitution Notes: For a gluten-free version, swap the all-purpose flour with a 1:1 gluten-free baking blend. I’ve had good luck with Bob’s Red Mill. For dairy-free, use vegan butter sticks—just make sure they’re the kind meant for baking, not the spreadable tub variety. And if you’re not a fan of candy corn (I know, controversial), try using chopped white chocolate and dried cranberries for a similar festive look.
Equipment Needed
You don’t need a fully stocked bakery kitchen for these candy corn blondies. Here’s what you’ll actually use:
- 8×8-inch baking pan — This is the sweet spot for thick, chewy blondies. A 9×9 pan works too, but they’ll be slightly thinner and bake a few minutes faster. Line it with parchment paper for easy removal—trust me, you’ll thank yourself later.
- Mixing bowls — One medium bowl for the wet ingredients and one small bowl for the dry. Nothing fancy needed.
- Whisk and spatula — A whisk for combining the wet ingredients and a rubber spatula for folding everything together. I use a silicone spatula because it doesn’t scratch my bowls.
- Measuring cups and spoons — For accuracy. I know some people eyeball it, but baking is a science, even for simple recipes like this.
- Small bowls for coloring — You’ll need two small bowls to divide and color the batter. Ramekins work great.
- Toothpick or skewer — For testing doneness. A clean toothpick means perfectly baked blondies.
- Chef’s knife and cutting board — For chopping the candy corn. A sharp knife makes clean cuts without crushing the candy.
If you don’t have an 8×8 pan, you can use a loaf pan and adjust the baking time. I’ve done it before when my square pan was in use, and it worked fine—just expect them to be a bit thicker and need about 5 extra minutes in the oven.
Preparation Method
Let’s get these candy corn blondies into your oven. The whole process takes about 10 minutes of active work and 20 minutes of baking. Set a timer and you’ll have warm, gooey blondies before you know it.
- Preheat your oven to 350°F (175°C). Line your 8×8 pan with parchment paper, leaving some overhang on two sides. This creates handles for lifting the blondies out later. Lightly grease the parchment with non-stick spray or butter.
- Melt the butter in a microwave-safe bowl or in a small saucepan over low heat. Let it cool for a minute or two—you don’t want it hot enough to cook the egg when you add it.
- Combine the wet ingredients. In a medium bowl, whisk together the melted butter, brown sugar, and granulated sugar until smooth. The mixture should look like wet sand. Add the egg and vanilla extract, then whisk vigorously until everything is well combined and slightly thickened, about 30 seconds.
- Add the dry ingredients. In a small bowl, whisk together the flour, baking powder, and salt. Pour this into the wet mixture and fold gently with your spatula until just combined. Stop mixing as soon as you don’t see any more flour streaks—overmixing makes blondies tough.
- Divide the batter. Scoop out about one-third of the batter into a small bowl. Scoop another third into a second small bowl. Leave the remaining third in the original bowl. You should have three roughly equal portions.
- Color the layers. Add a few drops of yellow food coloring to one small bowl and stir until the color is even. Add orange food coloring to the other small bowl and mix well. Leave the third portion plain (this will be your white layer at the bottom). The colors should be vibrant but not neon—remember, they’ll bake up slightly lighter.
- Layer the batter. Start by spreading the plain (white) batter evenly in the bottom of your prepared pan. Use a small offset spatula or the back of a spoon to smooth it out. Next, carefully spoon the orange batter over the white layer and spread it gently to the edges. Finally, drop spoonfuls of the yellow batter on top and spread it carefully. Don’t press too hard or you’ll mix the colors together.
- Top with candy corn. Sprinkle the chopped candy corn evenly over the top of the yellow layer. Press them in very gently—just enough so they stick, not so much that they sink into the batter.
- Bake for 18-22 minutes. Start checking at 18 minutes. The edges should be golden brown and pulling away from the sides of the pan. The center will look slightly underdone and might jiggle just a tiny bit—that’s perfect. A toothpick inserted in the center should come out with a few moist crumbs attached, not wet batter.
- Cool completely before cutting. This is the hardest part, I know. Let the blondies cool in the pan on a wire rack for at least 30 minutes. If you cut them while they’re warm, they’ll fall apart. Use the parchment handles to lift the whole block out, then slice into squares with a sharp knife. Wipe the knife clean between cuts for the neatest edges.
Pro tip: If your layers start to blur together while spreading, don’t panic. A little blending at the edges actually looks pretty and homemade. The distinct colors will still show through once they’re baked and cut.
Cooking Tips & Techniques
After eleven batches of these candy corn blondies, I learned a few things the hard way. Here’s what I wish I’d known from the start:
Don’t overmix the batter. I know I said this already, but it bears repeating. Overmixing develops the gluten in the flour, which makes blondies dense and tough. You want chewy, not tough. Mix until the flour just disappears, then stop. A few tiny flour streaks are better than a rubbery blondie.
Use room temperature ingredients. Cold eggs seize up when they hit melted butter, creating a lumpy batter. If you forgot to set out your egg, place it in a cup of warm water for 5 minutes. Same goes for any dairy you might be using.
Watch the baking time closely. Every oven runs differently. My old oven baked these in exactly 19 minutes. My current one takes 21. Start checking at 18 minutes and trust your senses more than the timer. The edges should be golden, and the center should look just slightly underdone. Remember, they continue baking from residual heat after you pull them out.
Chop the candy corn consistently. Big chunks sink to the bottom. Tiny pieces almost disappear. Aim for pieces about the size of a pea. I stack several candy corns together and cut them all at once—it’s faster and more uniform.
Let them cool completely. I cannot stress this enough. The first time I made these, I cut into them after 10 minutes because I couldn’t wait. The layers smeared together, the candy corn pulled out, and I ended up with a delicious mess. They tasted great but looked terrible. Patience pays off here.
Line your pan properly. Don’t skip the parchment paper overhang. It makes removing the blondies so much easier. I learned this lesson when I had to dig a batch out of the pan with a spatula, scratching my favorite baking dish in the process.
Variations & Adaptations
One of the best things about this easy candy corn blondies recipe is how flexible it is. Here are some ways to make it your own:
Halloween Candy Swap: Not a candy corn fan? No problem. Swap in chopped Reese’s Pieces, M&M’s in autumn colors, or even crushed Oreos. The layering technique works with any topping you choose. I made a batch with chopped Snickers bars last year, and they disappeared in record time.
White Chocolate Drizzle: After the blondies cool, melt about 1/4 cup of white chocolate chips with a teaspoon of coconut oil and drizzle it over the top. It adds a professional-looking finish and extra sweetness. Plus, the white against the orange and yellow layers looks gorgeous.
Spiced Version: Add 1/2 teaspoon of pumpkin pie spice or cinnamon to the flour mixture. It gives the blondies a warm, fall flavor that pairs beautifully with the candy corn. I tried this on a whim and now it’s my go-to variation for Thanksgiving.
Gluten-Free Adaptation: Use a 1:1 gluten-free baking flour blend. I’ve tested this with Bob’s Red Mill and King Arthur brands, and both worked well. The texture is slightly more crumbly, but the flavor is spot on. Add an extra tablespoon of melted butter to help with moisture.
Dairy-Free Option: Replace the butter with vegan butter sticks (not tub margarine) and use a flax egg instead of a regular egg. For the flax egg, mix 1 tablespoon of ground flaxseed with 3 tablespoons of water and let it sit for 5 minutes until gel-like. The texture will be a bit more cakey, but still delicious.
Mini Blondie Bites: Press the layered batter into a mini muffin tin (greased well) and bake for 10-12 minutes. These are perfect for parties or lunchbox treats. Just reduce the candy corn topping to about 1/4 cup since you’ll use less per bite.
Serving & Storage Suggestions
These candy corn blondies are best served at room temperature, but they’re also amazing warm with a scoop of vanilla ice cream. The contrast between the warm, chewy blondie and the cold, creamy ice cream is pure heaven. For a real treat, microwave a blondie for about 10 seconds before adding the ice cream—it softens the candy corn just enough to make it extra gooey.
They pair beautifully with a cup of coffee or a glass of cold milk. If you’re serving them at a Halloween party, arrange them on a platter with some extra candy corn scattered around for a festive touch. I like to cut them into small squares (about 2 inches) for parties—they’re rich enough that a little piece goes a long way.
Storage: Store leftover blondies in an airtight container at room temperature for up to 5 days. Place a piece of parchment paper between layers to prevent sticking. They actually get better on day two—the flavors meld together and the texture becomes even more chewy.
Freezer Instructions: These freeze beautifully. Wrap individual blondies tightly in plastic wrap, then place them in a freezer-safe bag. They’ll keep for up to 3 months. To thaw, just leave them at room temperature for about 30 minutes, or microwave for 15-20 seconds if you want them warm. I usually keep a stash in the freezer for unexpected visitors or late-night cravings.
Reheating Tip: If you prefer your blondies warm, pop them in a 300°F oven for 5 minutes or microwave for 10-15 seconds. Just be careful not to overheat them, or the candy corn will melt into a sticky puddle.
Nutritional Information & Benefits
Let’s be honest—these are a treat, not a health food. But here’s what you’re looking at per blondie (based on 16 servings):
| Nutrient | Amount per Blondie |
|---|---|
| Calories | 185 |
| Total Fat | 8g |
| Saturated Fat | 5g |
| Carbohydrates | 28g |
| Sugar | 20g |
| Protein | 2g |
| Sodium | 95mg |
On the bright side, these blondies are made with simple ingredients you can pronounce. No preservatives or artificial flavors (except the food coloring, which you can skip if you want). The brown sugar provides a small amount of molasses, which contains some minerals like calcium and iron. And hey, the eggs add a bit of protein.
If you’re watching your sugar intake, you can reduce the granulated sugar to 2 tablespoons without affecting the texture too much. The candy corn will still provide plenty of sweetness. For a lower-fat version, substitute half the butter with unsweetened applesauce—the blondies will be more cake-like but still tasty.
These are not suitable for anyone with gluten intolerance unless you use the gluten-free adaptation. They also contain dairy and eggs, so keep that in mind for guests with allergies.
Conclusion
These easy candy corn blondies are everything I loved about that little bakery’s version, but better. They’re faster, simpler, and honestly, just as delicious. The three-color layering makes them look like you spent hours in the kitchen, but between us, it takes about ten minutes of actual work. That’s my favorite kind of recipe—impressive results with minimal effort.
I hope you give these a try, whether you’re chasing a memory like I was or just looking for a fun fall treat. Don’t be afraid to experiment with the colors or toppings—make them your own. And if you come up with a variation I haven’t tried, please share it in the comments. I’m always looking for new ways to play with this recipe.
Go ahead, preheat that oven. Your kitchen is about to smell amazing, and your family is about to be very, very happy. Happy baking, friend!
Frequently Asked Questions
Can I use salted butter instead of unsalted?
Yes, you can. Just reduce the added salt in the recipe to a pinch or skip it entirely. Salted butter has varying amounts of salt between brands, so it’s harder to control the final flavor. But in a pinch, it works fine.
Why did my blondies turn out cakey instead of chewy?
This usually happens from overmixing the batter or using too much flour. Make sure you’re spooning and leveling your flour rather than scooping directly from the bag. Also, mix just until the flour disappears—overmixing develops gluten and creates a cake-like texture.
Can I use liquid food coloring instead of gel?
You can, but liquid coloring will thin out your batter slightly. Add it drop by drop and be prepared for slightly less vibrant colors. Gel coloring gives you more intense color without changing the batter consistency, which is why I prefer it.
How do I get cleaner layers when spreading the batter?
The key is to spread each layer gently and evenly. Use a small offset spatula or the back of a spoon, and work from the center outward. Don’t press down hard—you want to nudge the batter into place, not squish it into the layer below. Chilling the pan between layers for 5 minutes can also help.
Can I make these ahead for a party?
Absolutely. These blondies actually taste better the next day. Bake them up to two days in advance, store them in an airtight container at room temperature, and cut them just before serving. They also freeze beautifully for up to three months.
Pin This Recipe!
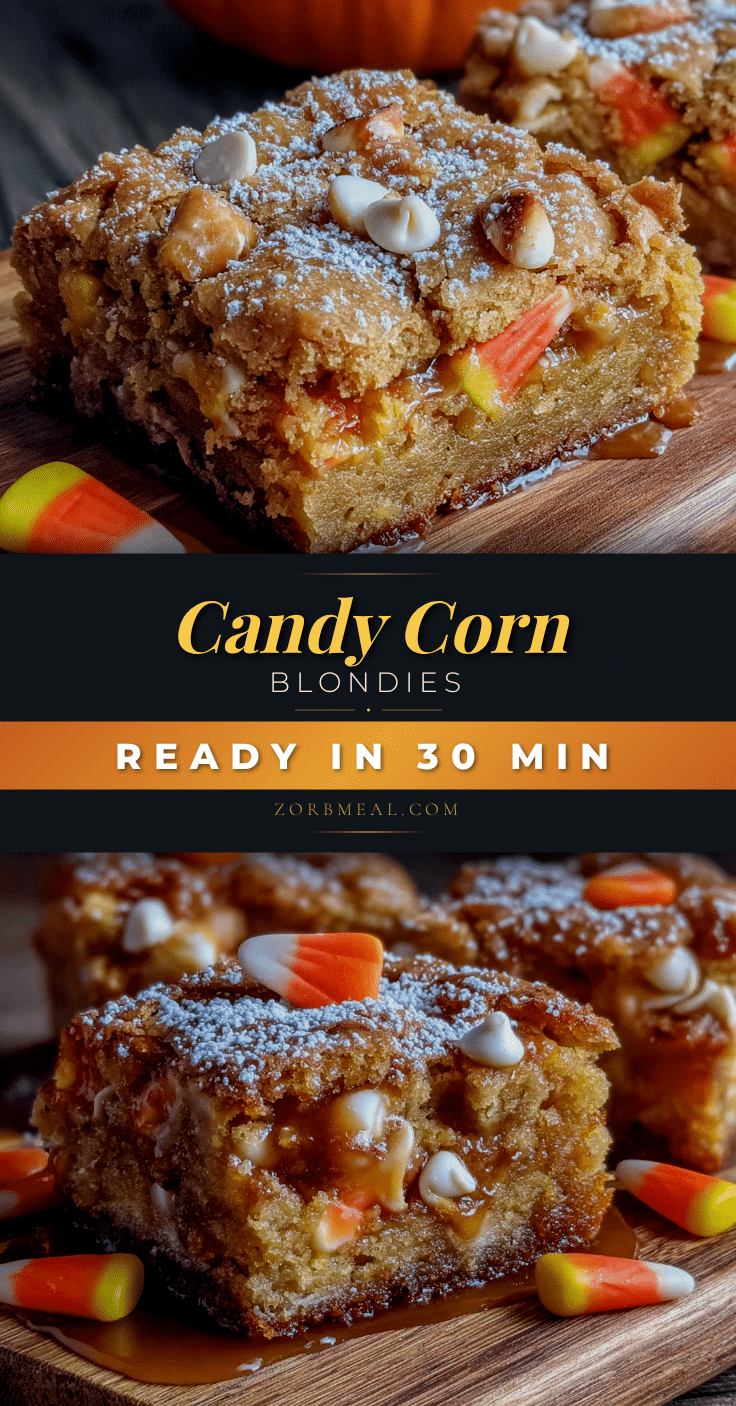
Easy Candy Corn Blondies Ready in 30 Minutes
These easy candy corn blondies are a quick and nostalgic fall treat, featuring a buttery brown sugar base with three colorful layers that mimic candy corn. Ready in about 30 minutes, they’re perfect for weeknight baking, Halloween parties, or any autumn gathering.
- Prep Time: 10 minutes
- Cook Time: 20 minutes
- Total Time: 30 minutes
- Yield: 16 servings 1x
- Category: Dessert
- Cuisine: American
Ingredients
- 1/2 cup (1 stick) unsalted butter, melted
- 1 cup (200g) light brown sugar, packed
- 1/4 cup (50g) granulated sugar
- 1 large egg, room temperature
- 1 teaspoon vanilla extract
- 1 cup (120g) all-purpose flour
- 1/2 teaspoon baking powder
- 1/4 teaspoon fine sea salt
- A few drops yellow food coloring (gel preferred)
- A few drops orange food coloring (gel preferred)
- 1/2 cup candy corn, roughly chopped
Instructions
- Preheat your oven to 350°F (175°C). Line an 8×8-inch baking pan with parchment paper, leaving overhang on two sides. Lightly grease the parchment.
- Melt the butter in a microwave-safe bowl or small saucepan. Let cool for 1-2 minutes.
- In a medium bowl, whisk together melted butter, brown sugar, and granulated sugar until smooth. Add egg and vanilla extract, whisk vigorously until well combined and slightly thickened, about 30 seconds.
- In a small bowl, whisk together flour, baking powder, and salt. Pour into wet mixture and fold gently with a spatula until just combined. Do not overmix.
- Divide the batter into three roughly equal portions: one-third in a small bowl, another third in a second small bowl, and leave the remaining third in the original bowl.
- Add a few drops of yellow food coloring to one small bowl and stir until even. Add orange food coloring to the other small bowl and mix well. Leave the third portion plain (white).
- Layer the batter: Spread the plain (white) batter evenly in the bottom of the prepared pan. Carefully spoon the orange batter over the white layer and spread gently. Then spoon the yellow batter on top and spread carefully.
- Sprinkle the chopped candy corn evenly over the top. Press in very gently.
- Bake for 18-22 minutes, until edges are golden brown and center looks slightly underdone. A toothpick inserted in the center should come out with a few moist crumbs.
- Cool completely in the pan on a wire rack for at least 30 minutes. Use parchment handles to lift out, then slice into squares with a sharp knife.
Notes
For cleaner layers, chill the pan between layers for 5 minutes. Use gel food coloring for vibrant colors without thinning the batter. Let blondies cool completely before cutting to prevent layers from smearing. Store in an airtight container at room temperature for up to 5 days, or freeze for up to 3 months.
Nutrition
- Serving Size: 1 blondie
- Calories: 185
- Sugar: 20
- Sodium: 95
- Fat: 8
- Saturated Fat: 5
- Carbohydrates: 28
- Protein: 2
Keywords: candy corn blondies, easy blondies, fall dessert, Halloween treats, quick dessert, 30-minute recipe


