My niece asked why I couldn’t just use a cookie cutter to shape the apples. I started to explain why that wouldn’t work — then stopped. Honestly, I had no good reason. I’d been slicing apples the same way for years, carefully carving each one by hand, convinced that was the only proper method. But she was eight, and she looked at me like I was the one who didn’t get it. So I handed her the cookie cutter. A ghost-shaped one, because it was October. And you know what? It worked perfectly.
That moment changed how I think about Halloween treats. I’d spent weeks planning elaborate caramel apple bars with perfectly uniform slices, stressing over every detail. Meanwhile, a kid with a plastic cutter showed me the whole thing could be fun instead of fussy. I mean, isn’t that the whole point of Halloween? It’s supposed to be a little spooky, a little silly, and a whole lot of delicious.
That’s how this Light & Spooky Caramel Apple Slices Bar was born. It’s the kind of recipe that makes you feel like you’re getting away with something — because it’s actually pretty good for you, but it looks like a candy shop exploded on a platter. The apples are fresh and crisp, the caramel is rich without being heavy, and the toppings are where you get to go wild. Maybe you’ve been there — staring at a Pinterest board full of complicated Halloween desserts, wondering if there’s a way to get the wow factor without spending all day in the kitchen. There is. And it starts with a cookie cutter and a really good caramel sauce.
Why You’ll Love This Recipe
Let me tell you why this recipe has become my go-to for every Halloween gathering. I’ve tested it at three different parties now, and each time, the platter comes back empty. That’s not an exaggeration — people literally fight over the last ghost-shaped apple slice.
- Quick & Easy: This comes together in about 20 minutes of active prep. The apples themselves take maybe 5 minutes to slice and stamp, and the caramel sauce simmers while you set up your toppings bar. Perfect for those last-minute Halloween party invites or when you realize tomorrow is the school party and you promised to bring something.
- Simple Ingredients: You probably have most of this in your kitchen right now. Apples, butter, brown sugar, cream — these are pantry staples. The spooky shapes come from cookie cutters, not specialty stores. I found my ghost and bat cutters at the dollar store, and they work like a charm.
- Perfect for Halloween: This isn’t just another dessert — it’s an activity. Kids love stamping out the shapes and choosing their toppings. Adults love that it’s not a sugar bomb. It’s the kind of thing that makes everyone feel included, whether they’re five or fifty-five.
- Crowd-Pleaser: I’ve served this alongside full-sugar caramel apples and cupcakes, and the Light & Spooky version gets just as much attention. The fresh apple crunch against the silky caramel is a combination that works for everyone.
- Unbelievably Delicious: The secret is in the caramel. By using a lighter hand with the sugar and adding a pinch of sea salt, you get that deep, buttery flavor without the cloying sweetness. It’s the kind of caramel that makes you close your eyes after the first bite.
What makes this different from every other caramel apple recipe out there? It’s the approach. Most recipes treat caramel apples as a sticky, messy affair that requires patience and a lot of napkins. This version is designed to be shared — a bar where everyone builds their own. Plus, by using apple slices instead of whole apples, you get more surface area for caramel and toppings. More crunch, more flavor, more fun. It’s comfort food reimagined — lighter, faster, but with the same soul-soothing satisfaction of a classic fall treat.
What Ingredients You Will Need
This recipe uses simple, wholesome ingredients to deliver that perfect balance of fresh apple crunch and silky caramel richness. Most of these are pantry staples, which means you can whip this up without a special trip to the store.
For the Caramel Sauce
- Unsalted butter — 4 tablespoons (½ stick), cut into pieces (adds richness and helps create that smooth texture)
- Light brown sugar — ½ cup, packed (I prefer Domino brand for consistent results)
- Heavy cream — ¼ cup (use full-fat for best texture; half-and-half works in a pinch)
- Vanilla extract — 1 teaspoon (pure, not imitation, for deeper flavor)
- Sea salt — ¼ teaspoon (I use Maldon flaky salt for that perfect finishing touch)
- Water — 2 tablespoons (helps dissolve the sugar evenly)
For the Apple Slices
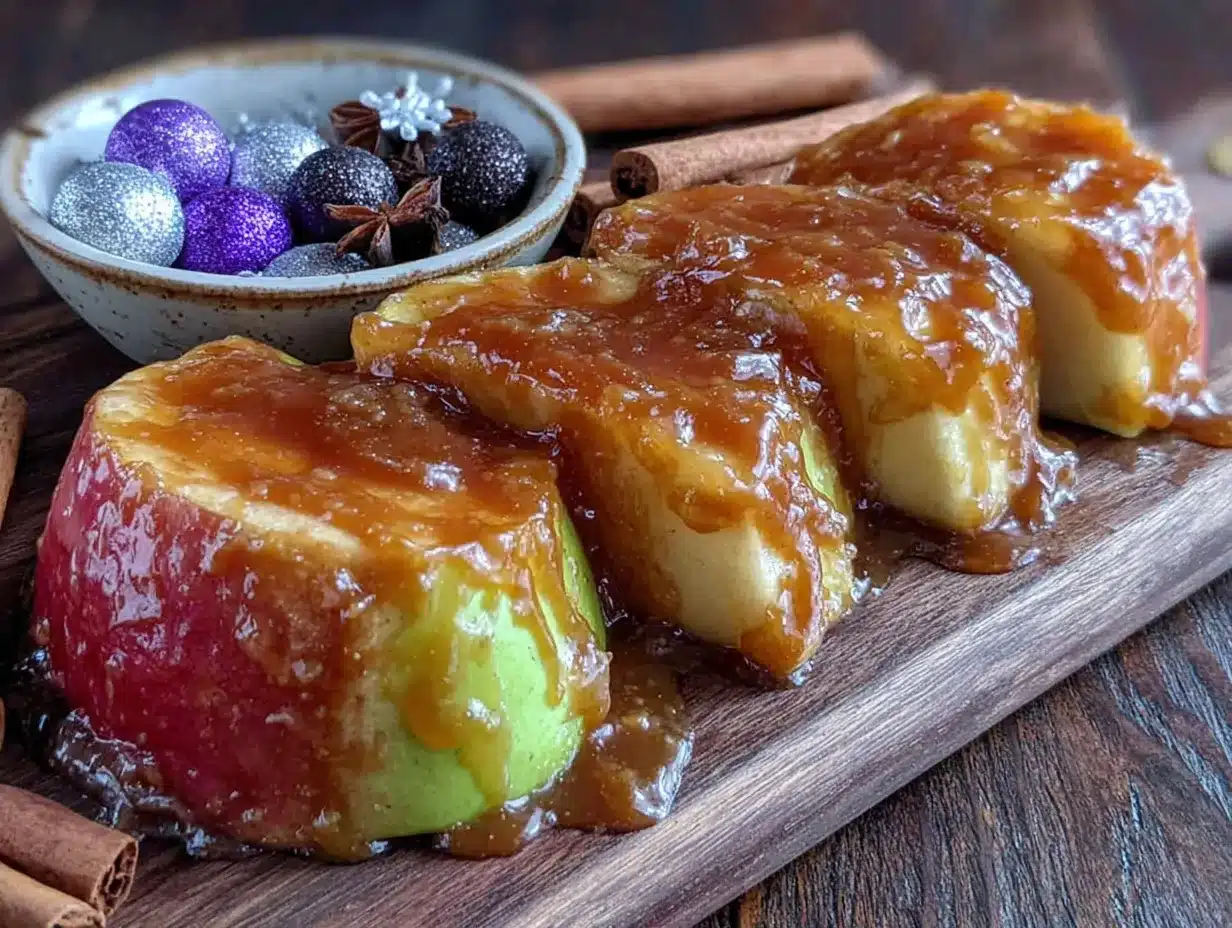
- Large apples — 4 to 5 (I recommend Honeycrisp or Fuji for sweetness and crunch; Granny Smith works if you prefer tart)
- Fresh lemon juice — 2 tablespoons (prevents browning and adds a bright note)
- Water — 2 cups (for the lemon water bath)
For the Toppings Bar
- Mini chocolate chips — ¼ cup (semi-sweet or dark)
- Chopped peanuts — ¼ cup (toasted lightly for extra crunch)
- Shredded coconut — ¼ cup (unsweetened, toasted if you have time)
- Crushed graham crackers — ¼ cup (adds that s’mores vibe)
- Mini M&Ms — ¼ cup (orange and brown ones for Halloween)
- White chocolate drizzle — optional, for spooky webs
Ingredient Tips
When selecting apples, look for firm ones without bruises. I’ve learned the hard way that soft apples don’t hold their shape after stamping. For the caramel, use a heavy-bottomed saucepan — thin pans can scorch the sugar before it melts evenly. If you’re dairy-free, coconut cream works surprisingly well in the caramel, though the texture will be slightly thinner. And here’s a trick I picked up from a pastry chef: add a tiny pinch of baking soda to the caramel at the end. It makes it extra smooth and prevents crystallization. Just be careful — it will bubble up!
Equipment Needed
You don’t need a fancy kitchen to pull this off. Here’s what you’ll need:
- Small saucepan — 2-quart size works best for the caramel (I use a stainless steel one from Cuisinart)
- Wooden spoon or silicone spatula — for stirring the caramel (avoid metal, which can scratch your pan)
- Sharp knife — for slicing the apples (a chef’s knife or paring knife works fine)
- Cutting board — preferably a large one for apple prep
- Cookie cutters — Halloween shapes like ghosts, bats, pumpkins (I found a set of 6 on Amazon for $8)
- Medium bowl — for the lemon water bath
- Paper towels — for drying apple slices
- Serving platter — a large white platter shows off the colors best
- Small bowls — for arranging the toppings bar
- Pastry brush — optional, for applying lemon water
If you don’t have cookie cutters, don’t worry. You can slice the apples into rounds or wedges and still make a beautiful bar. I’ve done it both ways, and honestly, the round slices look like little moons — very Halloween-appropriate. For the caramel, a candy thermometer is helpful but not essential. You can test the consistency by dropping a tiny bit into cold water; it should form a soft ball. My grandmother taught me that trick, and it’s never failed me.
Preparation Method
Let’s walk through this step by step. I’ve made this recipe about a dozen times now, so I’ve got all the little tricks figured out.
- Make the lemon water bath. In a medium bowl, whisk together 2 cups of cold water and 2 tablespoons of fresh lemon juice. Set aside. This is your secret weapon against brown apples — and trust me, you’ll thank yourself later when your spooky shapes still look fresh hours later.
- Prepare the apples. Wash and dry your apples thoroughly. Cut each apple in half from stem to bottom, then cut each half into ¼-inch thick slices. You’re aiming for slices that are sturdy enough to hold their shape but thin enough to bite through easily. Aim for about 4-5 slices per apple half.
- Stamp out the shapes. Press your cookie cutter firmly into each apple slice. Wiggle it slightly to release the shape. If the cutter sticks, dip it in the lemon water between stamps. Place the shaped slices into the lemon water bath immediately. I learned this the hard way — the first time I made these, I cut all the shapes first and then tried to dip them. They’d already started browning. Don’t be me.
- Dry the apple shapes. Remove the shaped apples from the lemon water and pat them completely dry with paper towels. This step is crucial — wet apples won’t hold caramel. Let them air dry for 5 minutes on a clean kitchen towel if you have time.
- Start the caramel. In your small saucepan, combine the brown sugar, water, and a pinch of salt. Stir gently over medium heat until the sugar dissolves completely. This takes about 2-3 minutes. Don’t rush it — if you see sugar crystals on the sides of the pan, brush them down with a wet pastry brush.
- Add the butter. Once the sugar is dissolved, add the butter pieces. Stir constantly until the butter is fully melted and incorporated. The mixture will look slightly separated at first — that’s normal. Keep stirring.
- Add the cream. Slowly pour in the heavy cream while stirring. The mixture will bubble up dramatically — this is where having a larger saucepan pays off. Reduce the heat to low and simmer for 5-7 minutes, stirring occasionally. You’re looking for a golden amber color and a consistency that coats the back of a spoon.
- Finish the caramel. Remove from heat and stir in the vanilla extract and sea salt. Let it cool for 5 minutes. It will thicken as it cools. If it gets too thick, stir in a teaspoon of warm water.
- Arrange the toppings bar. While the caramel cools, set out your small bowls with all the toppings. I like to arrange them in a rainbow — chocolate on one end, coconut on the other. It makes the platter look intentional and beautiful.
- Assemble the bar. Arrange the dried apple shapes on your serving platter. Pour the warm caramel into a small bowl or ramekin for dipping. If you’re feeling fancy, you can drizzle some caramel directly over the apples — just use a spoon and a light hand.
- Serve immediately. This is best enjoyed within an hour of assembly. The apples stay crisp, the caramel stays silky, and everyone gets to build their perfect bite.
Cooking Tips & Techniques
I’ve made every mistake possible with this recipe, so let me save you the trouble. Here are the things I wish someone had told me:
Don’t skip the lemon water. I know it seems like an extra step, but without it, your apple shapes will turn brown within 20 minutes. And nobody wants a gray ghost on their Halloween platter. If you’re serving these at a party, you can prep the apples up to 4 hours ahead and keep them in the lemon water in the fridge. Just pat them dry right before serving.
Watch your caramel temperature. The difference between perfect caramel and burnt sugar is about 30 seconds. Cook it on medium-low heat and stir constantly once you add the cream. If you see dark specks forming, you’ve gone too far. Start over — it’s not worth serving bitter caramel. I ruined three batches before I learned to pull it off the heat just when it starts to deepen in color.
Use room temperature cream. Cold cream will seize the caramel and create lumps. If you forgot to take it out of the fridge, microwave it for 15 seconds. The same goes for the butter — softened butter incorporates more smoothly.
Multitask strategically. While the caramel simmers, you can set up your toppings bar and arrange the apple shapes. This recipe is all about timing — the caramel needs to be warm when you serve it, so everything else should be ready to go before you start cooking.
Test your cookie cutters first. Not all cutters work well on apples. I have a set of tiny bat cutters that are too small — the apples just crumble. Look for cutters that are at least 1.5 inches in diameter. Ghost shapes work best because they’re simple and sturdy.
Variations & Adaptations
One of the best things about this recipe is how flexible it is. Here are some ways to make it your own:
Dietary Variations
- Vegan version: Use coconut cream instead of heavy cream and vegan butter. The caramel will be slightly thinner but still delicious. I tested this with a friend who’s vegan, and she said it was the best caramel she’d had in years.
- Gluten-free: This recipe is naturally gluten-free as written. Just be careful with your toppings — some crushed cookies contain wheat. Use certified gluten-free graham crackers or skip them.
- Lower sugar: Swap the brown sugar for coconut sugar. The caramel will be darker and have a slight molasses flavor, but it works beautifully. Reduce the cream to 3 tablespoons since coconut sugar absorbs more liquid.
Seasonal Twists
- Fall harvest: Add a sprinkle of pumpkin pie spice to the caramel. It gives the whole thing a cozy, Thanksgiving vibe.
- Winter wonderland: Use star-shaped cookie cutters and add crushed candy canes to the toppings bar. The peppermint-caramel combo is incredible.
- Spring celebration: Flower-shaped cutters and pastel M&Ms make this perfect for Easter or spring brunches.
Flavor Experiments
- Salted caramel: Double the sea salt in the caramel and add a sprinkle of flaky salt on top before serving. This is my personal favorite — the salt cuts through the sweetness perfectly.
- Chocolate caramel: Stir in 2 tablespoons of cocoa powder with the cream. It makes a dark, rich caramel that tastes like a candy bar.
- Spiced apple: Add ½ teaspoon of cinnamon and ¼ teaspoon of nutmeg to the caramel. It’s like apple pie in bite-sized form.
Serving & Storage Suggestions
This recipe is best served fresh, but there are ways to make it work for different situations.
Serving temperature: Serve the apple slices at room temperature with warm caramel. The contrast between the cool, crisp apples and the warm, silky caramel is what makes this special. If the caramel cools and thickens too much, just pop it in the microwave for 10 seconds and stir.
Presentation tips: Arrange the apple shapes in a spiral pattern on a large white platter. Place the caramel bowl in the center and surround it with the toppings bowls. I like to scatter a few extra candy pieces around the platter for color. For a spooky touch, use a spiderweb-shaped serving tray or add plastic spiders to the arrangement.
What to serve alongside: These pair beautifully with warm apple cider or a pumpkin spice latte. For a full Halloween spread, serve them alongside popcorn balls, pumpkin muffins, or a charcuterie board with cheese and nuts.
Storage: If you have leftovers (which rarely happens), store the apple slices and caramel separately. The apples will keep in the fridge for up to 24 hours if stored in the lemon water. The caramel keeps in an airtight container in the fridge for up to a week. Reheat it gently in the microwave or on the stovetop with a splash of cream.
Reheating: Warm the caramel in 10-second intervals in the microwave, stirring between each. Don’t overheat it or it will separate. If it separates, whisk in a tablespoon of warm water until it comes back together.
Flavor development: The caramel actually gets better after a day in the fridge. The flavors meld together and become deeper. So if you’re planning ahead, make the caramel a day early and reheat it when you’re ready to serve.
Nutritional Information & Benefits
This recipe is a lighter take on traditional caramel apples, but it doesn’t skimp on satisfaction. Here’s what you’re working with per serving (about 4 apple slices with 2 tablespoons of caramel and a sprinkle of toppings):
- Calories: Approximately 180-200
- Fat: 8g (mostly from butter and cream)
- Carbohydrates: 28g
- Fiber: 3g (from the apples)
- Sugar: 20g (about half from the apples)
- Protein: 2g
Health benefits: Apples are packed with fiber and vitamin C, and the skin contains quercetin, an antioxidant that supports immune health. By using a lighter caramel and letting the apples shine, you’re getting a treat that satisfies your sweet tooth while still offering nutritional value. The nuts add healthy fats and protein, making this more balanced than your average Halloween candy.
Dietary considerations: This recipe is vegetarian and gluten-free as written. For dairy-free, use the vegan substitutions mentioned above. It’s also naturally nut-free if you skip the peanuts and use seed-based toppings instead.
My perspective: I believe in balance. Halloween should be fun, and food should be joyful. This recipe lets you have both — a treat that feels indulgent but doesn’t leave you with a sugar crash. It’s the kind of dessert you can feel good about serving to your family, and that’s worth celebrating.
Conclusion
This Light & Spooky Caramel Apple Slices Bar has become a Halloween tradition in my house, and I hope it becomes one in yours too. It’s the recipe that reminded me that cooking doesn’t have to be complicated to be special. Sometimes the best ideas come from an eight-year-old with a cookie cutter and a stubborn streak.
I love this recipe because it brings people together. There’s something about building your own caramel apple slice that makes everyone feel like a kid again. The laughter, the sticky fingers, the friendly competition over who can pile on the most toppings — that’s what Halloween is really about.
So go ahead and give it a try. Use whatever cookie cutters you have, raid your pantry for toppings, and don’t stress about perfection. The slightly crooked ghosts and lopsided bats are what make them charming. And when someone takes that first bite and their eyes light up, you’ll know it was worth every minute.
I’d love to hear how yours turn out! Drop a comment below and tell me what toppings you used, or share a photo of your spooky creation. And if you have a favorite Halloween recipe that’s become a tradition in your family, I’m always looking for new ideas. Happy Halloween, and happy eating!
Frequently Asked Questions
Can I make the caramel sauce ahead of time?
Absolutely! The caramel keeps beautifully in an airtight container in the refrigerator for up to a week. Just reheat it gently before serving. I actually prefer making it a day ahead because the flavors have time to meld together.
What’s the best apple variety for this recipe?
Honeycrisp and Fuji are my top picks because they’re sweet, firm, and hold their shape well. Granny Smith works if you prefer a tart contrast to the caramel. Avoid Red Delicious — they tend to be mealy and won’t hold up to stamping.
How do I keep the apples from turning brown?
The lemon water bath is your best friend here. The citric acid prevents oxidation. You can also use a commercial product like Fruit-Fresh, but I prefer lemon juice because it adds a nice brightness. Just make sure to pat the apples completely dry before serving.
Can I use store-bought caramel instead of making my own?
You can, but the homemade version is genuinely worth the extra 10 minutes. Store-bought caramel is often too sweet and has a thicker, stickier texture. Homemade caramel has a silkier consistency and a more complex flavor. If you’re short on time, look for a high-quality jarred caramel sauce in the baking aisle.
How do I make this recipe nut-free?
Simply skip the peanuts and any nut-based toppings. Use seeds like pumpkin seeds or sunflower seeds instead, or stick with chocolate chips, coconut, and crushed cookies. The recipe is naturally nut-free otherwise, so it’s an easy swap.
Pin This Recipe!

Light & Spooky Caramel Apple Slices Bar: Easy Halloween Treat

A fun and easy Halloween treat featuring fresh apple slices stamped into spooky shapes, dipped in a light homemade caramel sauce, and topped with a variety of festive toppings. Perfect for parties and kid-friendly activities.
- Prep Time: 20 minutes
- Cook Time: 10 minutes
- Total Time: 30 minutes
- Yield: 4 servings 1x
- Category: Dessert
- Cuisine: American
Ingredients
- 4 tablespoons unsalted butter, cut into pieces
- ½ cup light brown sugar, packed
- ¼ cup heavy cream
- 1 teaspoon vanilla extract
- ¼ teaspoon sea salt
- 2 tablespoons water
- 4 to 5 large apples (Honeycrisp or Fuji recommended)
- 2 tablespoons fresh lemon juice
- 2 cups water (for lemon water bath)
- ¼ cup mini chocolate chips
- ¼ cup chopped peanuts
- ¼ cup shredded coconut (unsweetened)
- ¼ cup crushed graham crackers
- ¼ cup mini M&Ms (orange and brown)
- White chocolate drizzle (optional)
Instructions
- In a medium bowl, whisk together 2 cups cold water and 2 tablespoons fresh lemon juice. Set aside.
- Wash and dry apples. Cut each apple in half from stem to bottom, then cut each half into ¼-inch thick slices.
- Press cookie cutter firmly into each apple slice to stamp out shapes. Dip cutter in lemon water between stamps if it sticks. Place shaped slices immediately into lemon water bath.
- Remove apple shapes from lemon water and pat completely dry with paper towels. Let air dry for 5 minutes on a clean kitchen towel if time allows.
- In a small saucepan, combine brown sugar, 2 tablespoons water, and a pinch of salt. Stir gently over medium heat until sugar dissolves completely (2-3 minutes).
- Add butter pieces and stir constantly until fully melted and incorporated.
- Slowly pour in heavy cream while stirring. Reduce heat to low and simmer for 5-7 minutes, stirring occasionally, until golden amber and coats the back of a spoon.
- Remove from heat and stir in vanilla extract and sea salt. Let cool for 5 minutes (it will thicken as it cools).
- While caramel cools, arrange toppings in small bowls.
- Arrange dried apple shapes on a serving platter. Pour warm caramel into a small bowl for dipping, or drizzle over apples.
- Serve immediately. Best enjoyed within an hour of assembly.
Notes
Don’t skip the lemon water bath to prevent browning. Use room temperature cream to avoid lumps. Test cookie cutters first; shapes should be at least 1.5 inches in diameter. Caramel can be made a day ahead and reheated.
Nutrition
- Serving Size: 4 apple slices with
- Calories: 180200
- Sugar: 20
- Sodium: 100
- Fat: 8
- Saturated Fat: 4
- Carbohydrates: 28
- Fiber: 3
- Protein: 2
Keywords: Halloween, caramel apples, apple slices, spooky, easy, party treat, kid-friendly


