My neighbor Kate wasn’t trying to impress anyone that Tuesday afternoon. I’d stopped by to return her measuring cups—the ones I’d borrowed three weeks prior and honestly kept forgetting to give back—and the smell hit me before I even got through her screen door. Cinnamon, ginger, nutmeg, and something deeper, almost caramel-like. It was October, sure, but it wasn’t Thanksgiving. It wasn’t even a special occasion. She was just… making a pumpkin pie.
I found her in the kitchen, flour dusted across her jeans, rolling pin in hand, and a slightly lopsided crust draped over a glass pie dish. “Oh, that’s just my mom’s old recipe,” she said when I asked, waving her hand like it was no big deal. But the way she pressed the dough into the corners—firm but gentle, like she’d done it a thousand times—told a different story. She wasn’t showing off. She was just making something good because Tuesday felt like a good day for it.
I sat on her counter stool and watched her work. She didn’t use a food processor. She didn’t chill her butter for hours. She just… did it. By hand. With a fork and her fingers and this quiet confidence that comes from knowing a recipe so well it’s muscle memory. “You want a piece?” she asked, not waiting for my answer before sliding the pie into the oven. Maybe you’ve been there—that moment when someone makes something extraordinary look so easy it almost feels unfair. That’s what this recipe is. It’s the kind of pie that makes people close their eyes after the first bite, but the person who made it just shrugs and says, “It’s nothing.”
I asked for the recipe three times before she finally wrote it down for me, scribbled on a napkin with butter stains in the corner. I’ve tweaked it a little over the years—added a pinch more salt, swapped in cold vodka for some of the water in the crust—but the soul of it is still hers. This is that pie. The one that fills your whole house with the smell of fall and makes everyone wander into the kitchen asking, “What time is dessert?”
Why You’ll Love This Recipe
Let me be real with you. I’ve tested a lot of pumpkin pie recipes over the years. Like, a lot. Some were too eggy. Some had a crust that crumbled into sad little pieces the second you looked at it. Others were just… boring. This one? This one hits different.
- Foolproof Flaky Crust: No food processor. No fancy gadgets. Just cold butter, a little vodka (trust me on this), and your hands. It comes together in minutes and bakes up impossibly tender and flaky every single time.
- Perfectly Spiced Filling: Not too sweet, not too spicy. It’s that Goldilocks balance of warm fall spices that tastes like comfort in a slice. The secret? Freshly grated nutmeg. I know, I know—it’s one extra step. But it makes a difference you can actually taste.
- No Cracks, No Drama: We’ve all been there—pulling a pumpkin pie out of the oven only to find a giant crack running through the middle like a canyon. This method uses a low-and-slow approach with a water bath trick that keeps the filling silky smooth and crack-free.
- Make-Ahead Friendly: This is a host’s best friend. You can make the crust three days ahead. You can blind bake it a day ahead. You can even freeze the whole baked pie for up to a month. When you’ve got guests coming over, that kind of flexibility is a lifesaver.
- Crowd-Pleaser Status: I’ve brought this pie to Friendsgiving dinners, potlucks, and holiday parties. It disappears fast. People ask for seconds. Someone always asks for the recipe. It’s just one of those dishes that makes everyone happy.
Honestly, what makes this recipe different from all the others is the crust. Most pumpkin pie recipes treat the crust like an afterthought—something to hold the filling. But here, the crust is just as important. It’s buttery, flaky, and sturdy enough to hold up to the filling without getting soggy. And that filling? It’s silky, spiced just right, and has that perfect custard texture that makes you close your eyes after the first bite.
This is the pie you bring to impress. The one that makes people think you spent all day in the kitchen when really, you had it mostly done the night before. It’s comfort food at its finest—simple ingredients, honest technique, and a result that feels special.
What Ingredients You Will Need
This recipe uses simple, honest ingredients that come together to create something truly special. Most of these are pantry staples, especially if you’re a fall baking enthusiast. Let me walk you through each one and share a few tips I’ve picked up along the way.
For the Flaky Crust
- All-purpose flour (2 ½ cups / 312g) — I use King Arthur Flour for consistent results. Spoon and level your flour; don’t scoop straight from the bag or you’ll end up with a dry, tough crust.
- Unsalted butter (1 cup / 226g, cold and cubed) — This is non-negotiable. The butter needs to be ice-cold. I pop my cubed butter in the freezer for 15 minutes before I start. It creates those beautiful steam pockets that make the crust flaky.
- Salt (1 teaspoon) — Don’t skimp. Salt is what makes the crust taste buttery instead of just greasy.
- Sugar (1 tablespoon) — Just a touch to balance the savory notes.
- Ice water (4-6 tablespoons) — Start with less and add more as needed. The dough should just hold together when squeezed.
- Vodka (2 tablespoons, ice cold) — This is my secret weapon. Vodka adds moisture without developing gluten, which means a tender, flaky crust. It bakes off completely, so there’s zero alcohol taste. You can substitute with more ice water if you prefer, but the texture won’t be quite as tender.
For the Pumpkin Filling
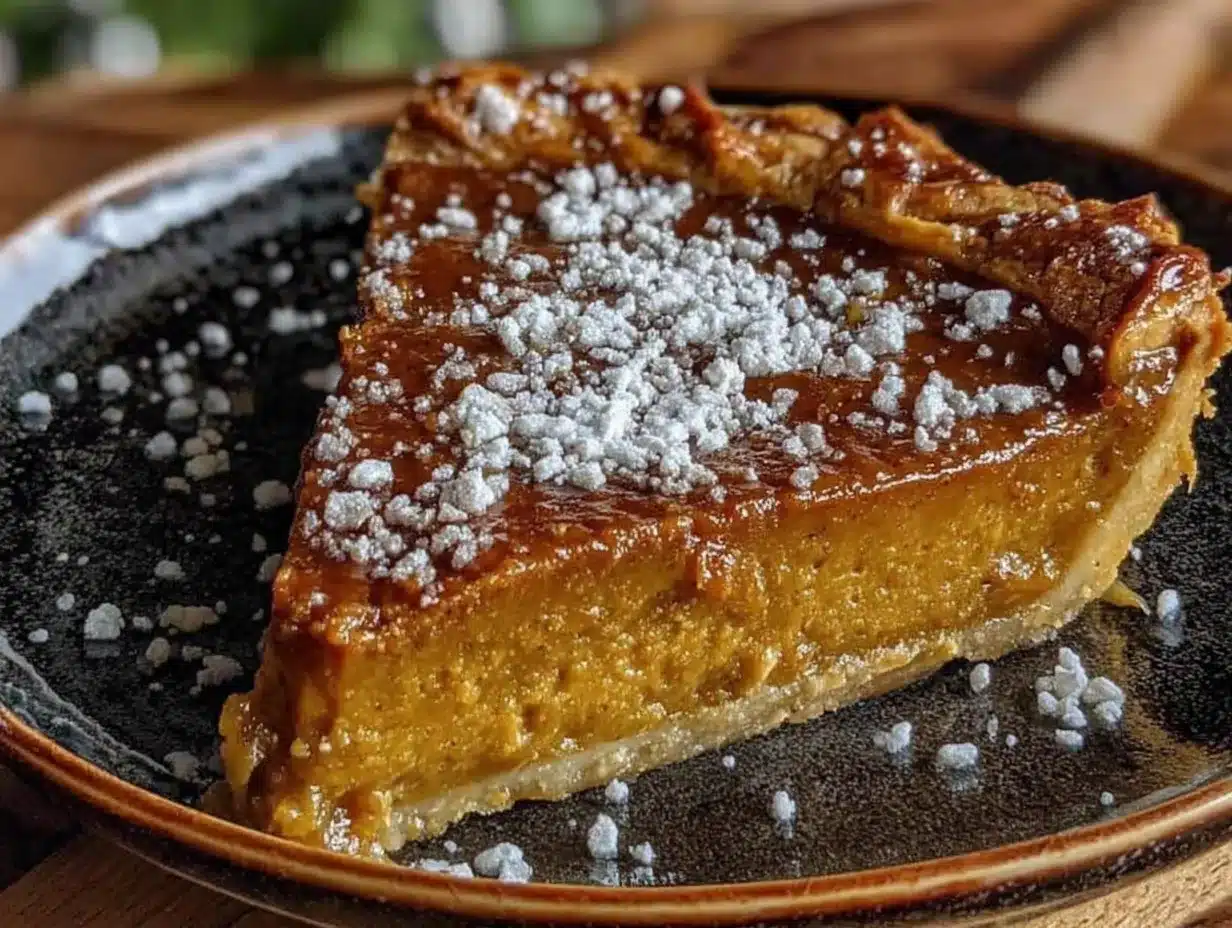
- Pumpkin puree (1 can / 15 oz / 425g) — Use pure pumpkin puree, not pumpkin pie filling. I prefer Libby’s for its consistent texture and flavor. If you’re feeling ambitious, you can roast and puree your own sugar pumpkin, but honestly? The canned stuff works beautifully here.
- Heavy cream (1 cup / 240ml) — This gives the filling that luscious, silky texture. Half-and-half works in a pinch, but the pie won’t be quite as rich.
- Large eggs (3) — Room temperature is important here. Cold eggs can seize the filling and create a less smooth texture. Set them out 30 minutes before you start.
- Light brown sugar (¾ cup / 150g, packed) — Brown sugar adds moisture and a deeper, molasses-like sweetness that pairs perfectly with pumpkin. Dark brown sugar works too, for an even richer flavor.
- Granulated sugar (¼ cup / 50g) — Balances the brown sugar and helps with structure.
- Vanilla extract (1 teaspoon) — Pure vanilla, not imitation. It rounds out the spices beautifully.
- Ground cinnamon (1 ½ teaspoons) — The backbone of the spice blend.
- Ground ginger (½ teaspoon) — Adds warmth and a little zing.
- Freshly grated nutmeg (½ teaspoon) — This is where it’s at. Pre-ground nutmeg is fine, but freshly grated? It’s a whole different ballgame. The flavor is brighter, more aromatic, and somehow deeper. I use a Microplane and grate it right over the bowl.
- Ground cloves (¼ teaspoon) — A little goes a long way. It adds that classic pumpkin pie warmth without being overpowering.
- Salt (½ teaspoon) — Brings everything into focus.
Ingredient Substitutions
If you’re dairy-free, you can substitute the heavy cream with full-fat coconut cream (the solid part from a can of full-fat coconut milk). The texture will be slightly different—a little less rich, but still delicious. For a gluten-free crust, use a 1:1 gluten-free flour blend that contains xanthan gum. I’ve had good results with Bob’s Red Mill 1:1 Baking Flour. Just know that the crust will be more delicate and harder to roll out—press it into the dish instead.
Equipment Needed
You don’t need a fancy kitchen to make this pie. Here’s what you’ll actually use:
- 9-inch pie dish — Glass or ceramic works best. I use a Pyrex glass dish because I can see how the bottom crust is browning. Metal works too, but it conducts heat differently so keep an eye on it.
- Rolling pin — A standard wooden one is fine. No rolling pin? A wine bottle works in a pinch. Just chill it first.
- Large mixing bowls — One for the crust, one for the filling.
- Pastry cutter or two forks — For cutting the butter into the flour. You can also use your fingertips, but work quickly so the butter doesn’t warm up.
- Plastic wrap — For chilling the dough.
- Parchment paper — For blind baking the crust. Aluminum foil works too.
- Pie weights or dried beans — To weigh down the crust during blind baking. I keep a bag of dried pinto beans in my pantry just for this purpose. They work perfectly and can be reused indefinitely.
- Whisk — For the filling. Nothing fancy needed.
- Microplane or fine grater — For that fresh nutmeg. This is honestly one of my favorite kitchen tools. It costs like ten bucks and makes everything better.
- Cooling rack — Essential for even cooling. Don’t skip this or your bottom crust will get soggy.
I’ll be honest—I bought a fancy marble rolling pin once thinking it would change my pie game. It didn’t. My old wooden one works just as well. Save your money for good butter.
Preparation Method
Alright, let’s make some pie. I’m going to walk you through every step, including the little things I’ve learned from making this dozens of times. Take your time—good pie isn’t rushed.
Step 1: Make the Crust Dough
In a large bowl, whisk together the flour, salt, and sugar. Add the cold, cubed butter. Using a pastry cutter or two forks, cut the butter into the flour until the mixture looks like coarse meal with some pea-sized butter pieces remaining. You want visible chunks of butter—that’s what creates flakiness. Drizzle the ice water and vodka over the mixture, one tablespoon at a time, tossing with a fork after each addition. The dough should look shaggy and hold together when you squeeze a handful. Turn it out onto a lightly floured surface and bring it together into a disk. Don’t knead it—just press it together. Wrap in plastic wrap and refrigerate for at least 1 hour, or up to 3 days.
Pro tip: If your kitchen is warm, pop the bowl of flour and butter into the fridge for 10 minutes halfway through cutting. Cold butter is happy butter.
Step 2: Roll Out the Dough
On a lightly floured surface, roll the chilled dough into a 12-inch circle, about ⅛-inch thick. Rotate the dough a quarter turn after each roll to keep it even. If the dough starts sticking, add a little more flour underneath. Carefully transfer the dough to your 9-inch pie dish by rolling it loosely around your rolling pin and unrolling it over the dish. Gently press the dough into the bottom and up the sides. Don’t stretch it—stretched dough will shrink during baking. Trim the overhang to about ½ inch, then fold it under and crimp the edges however you like. I do a simple scalloped edge with my fingers, but a fork press works great too. Place the crust in the fridge for 30 minutes while you preheat the oven.
Step 3: Blind Bake the Crust
Preheat your oven to 375°F (190°C). Line the chilled crust with parchment paper, leaving some overhang, and fill with pie weights or dried beans. Bake for 15 minutes. Remove the parchment and weights, then prick the bottom of the crust all over with a fork (this prevents bubbles). Return to the oven and bake for another 10-12 minutes, until the bottom looks dry and lightly golden. Set aside to cool slightly. Leave the oven on.
Real talk: The first time I blind baked a crust, I forgot the pie weights. The crust puffed up into a giant bubble. I pressed it down with a spoon and it cracked everywhere. It was ugly. But you know what? It still tasted good. Don’t stress the small stuff.
Step 4: Make the Filling
In a large bowl, whisk together the pumpkin puree, heavy cream, eggs, brown sugar, granulated sugar, and vanilla extract until smooth. In a small bowl, combine the cinnamon, ginger, nutmeg, cloves, and salt. Add the spice mixture to the pumpkin mixture and whisk until fully incorporated. The filling should be smooth, glossy, and a beautiful deep orange color. Give it a taste—I always do. Adjust the spices if you want, but this blend is pretty perfect as-is.
Step 5: Bake the Pie
Place the blind-baked crust on a baking sheet (this catches any drips and makes it easier to handle). Pour the filling into the warm crust. Carefully transfer to the oven and bake at 375°F (190°C) for 15 minutes. Then, without opening the oven, reduce the temperature to 325°F (163°C) and continue baking for 40-50 minutes. The pie is done when the edges are set but the center still jiggles slightly when you gently shake the pan. It will continue to set as it cools.
Sensory cue: The kitchen will smell like heaven at this point. The filling will puff up slightly around the edges and develop a matte finish. If you see any cracks forming, you’ve overbaked it—pull it out immediately.
Step 6: Cool and Serve
Place the pie on a cooling rack and let it cool completely at room temperature, about 2-3 hours. Do not refrigerate it while it’s still warm—the condensation will make the crust soggy. Once completely cool, you can serve it immediately or refrigerate it for up to 2 days. I actually think it’s better the next day—the flavors meld and deepen overnight.
Cooking Tips & Techniques
I’ve made this pie enough times to have a few hard-won lessons under my belt. Here are the things I wish someone had told me when I started:
Keep everything cold. I cannot stress this enough. Cold butter, cold water, cold vodka, cold hands. If at any point your dough feels warm or sticky, pop it back in the fridge for 15 minutes. Warm butter melts into the flour instead of creating those flaky layers. I once made a crust in a hot kitchen without air conditioning and ended up with something that tasted more like shortbread than pie crust. It was still edible, but not what I was going for.
Don’t overwork the dough. Mix until it just comes together. Overmixing develops gluten, and gluten makes tough crust. You want tender, not tough. I learned this the hard way after making a crust that could have doubled as a frisbee.
Blind bake is not optional. I know it’s an extra step, but it’s the difference between a crisp, flaky bottom crust and a soggy, sad one. Pumpkin pie filling is wet—it needs a head start on the crust. Trust me on this. I’ve skipped it exactly once and regretted every bite.
Low and slow for the filling. That initial blast of high heat sets the crust, then the lower temperature gently cooks the custard without curdling it. If you bake the whole thing at 375°F, you’ll get a cracked, rubbery filling. Patience, my friend.
Use a baking sheet. This catches any drips (especially if you overfill) and makes it easier to get the pie in and out of the oven without sloshing. I use a rimmed baking sheet lined with parchment for easy cleanup.
Let it cool completely. I know it’s tempting to cut into a warm pie, but warm pumpkin pie is loose and runny. It needs time to set. I once served a slightly warm pie to guests and watched it ooze across the plate like pumpkin soup. Not my finest moment.
Variations & Adaptations
One of the best things about this recipe is how adaptable it is. Here are some variations I’ve tried and loved:
Maple Pumpkin Pie: Substitute the granulated sugar with ¼ cup of pure maple syrup and reduce the heavy cream by 2 tablespoons. The maple flavor pairs beautifully with the pumpkin and spices. I made this for a Canadian friend’s birthday and she nearly cried.
Ginger Snap Crust: Swap the traditional pie crust for a crust made from crushed ginger snaps and melted butter. Use 2 cups of crushed cookies and 6 tablespoons of melted butter, pressed into the dish. No blind baking needed—just bake at 350°F for 10 minutes. The spicy-sweet crunch is incredible against the silky filling.
Dairy-Free Version: Use full-fat coconut cream instead of heavy cream, and substitute the butter in the crust with cold, cubed coconut oil or vegan butter. The texture is slightly different—a little less rich—but still delicious. I’ve served this to dairy-free friends and they couldn’t tell the difference.
Spice It Up: Add ¼ teaspoon of white pepper or a pinch of cayenne to the spice blend for a subtle warmth that catches people off guard in the best way. I did this on a whim one year and now it’s my secret weapon.
Mini Pies: Use a muffin tin and cut the crust into circles. Fill each mini crust with filling and bake at 350°F for 20-25 minutes. Perfect for parties when you want individual servings. Plus, everyone loves a personal pie.
Serving & Storage Suggestions
This pie is best served at room temperature or slightly warm. If you’ve refrigerated it, let it sit on the counter for about 30 minutes before serving. The flavors are more pronounced when it’s not straight-from-the-fridge cold.
For the full experience, serve each slice with a generous dollop of lightly sweetened whipped cream. I make mine with 1 cup of heavy cream, 2 tablespoons of powdered sugar, and a splash of vanilla—whipped to soft peaks. A sprinkle of cinnamon on top makes it look extra pretty. If you’re feeling fancy, a drizzle of caramel sauce takes it over the top.
This pie pairs beautifully with a cup of hot coffee, spiced chai, or a glass of apple cider. For a full fall spread, serve it alongside a roasted butternut squash soup and a apple cider braised pork shoulder for a dinner that screams autumn.
Storage: Cover the cooled pie loosely with plastic wrap or foil and refrigerate for up to 4 days. The crust will soften slightly over time, but it’ll still be delicious. For longer storage, wrap the completely cooled pie tightly in plastic wrap, then foil, and freeze for up to 1 month. Thaw overnight in the refrigerator before serving. I always make an extra pie in October and stash it in the freezer for a rainy November day. Future me is always grateful.
Reheating: If you want to serve it warm, place individual slices on a baking sheet and warm in a 300°F (150°C) oven for 10-15 minutes. The microwave works in a pinch, but the crust won’t be as crisp.
Nutritional Information & Benefits
Let’s be honest—pumpkin pie is a treat, not a health food. But it does have some redeeming qualities. Here’s the estimated nutritional breakdown per slice (based on 8 servings):
- Calories: 380
- Fat: 22g
- Carbohydrates: 42g
- Protein: 6g
- Fiber: 3g
- Sugar: 24g
Pumpkin itself is packed with vitamin A (over 200% of your daily needs per cup), fiber, and antioxidants like beta-carotene. It’s also lower in calories than many other dessert bases. The eggs add protein, and the spices—cinnamon, ginger, nutmeg—have anti-inflammatory properties. So while this isn’t a salad, it’s not the worst thing you could eat for dessert either.
For dietary considerations: This recipe contains gluten, dairy, and eggs. For gluten-free, use a 1:1 gluten-free flour blend. For dairy-free, use the substitutions mentioned above. For egg-free, I haven’t found a version I love yet—eggs are crucial for the custard texture.
Conclusion
This pumpkin pie is the one I keep coming back to, year after year. It’s the one I make for Thanksgiving, for Friendsgiving, for random Tuesdays in October when the air turns crisp and I need something warm and familiar. It’s the pie that made my neighbor Kate shrug and say “it’s nothing” while I stood there, utterly ruined for any other pumpkin pie.
The flaky crust, the silky spiced filling, the way the whole house smells while it bakes—it’s comfort in its purest form. And the best part? It’s not complicated. It doesn’t require fancy equipment or hard-to-find ingredients. It just asks for a little patience, a little attention, and a willingness to get your hands a little floury.
I’d love to hear how it turns out for you. Did you add your own twist? Did someone ask for the recipe? Drop a comment below and let me know—I read every single one. And if you’re looking for more fall baking inspiration, check out my classic apple crisp or spiced pear gingerbread cake. Happy baking, friends. You’ve got this.
Frequently Asked Questions
Can I use pumpkin pie filling instead of pumpkin puree?
I wouldn’t recommend it. Pumpkin pie filling is already sweetened and spiced, so using it would throw off the balance of the recipe. Stick with 100% pure pumpkin puree for the best results. Your taste buds will thank you.
Why did my pie crust shrink during baking?
This usually happens when the dough is stretched too much during rolling or when it’s placed in the dish. Handle the dough gently and let it relax in the fridge for at least 30 minutes before baking. Also, make sure you’re not using too much water—a wet dough shrinks more.
Can I make this pie ahead of time?
Absolutely. You can make the crust dough up to 3 days ahead and keep it refrigerated. You can blind bake the crust a day ahead. And the fully baked pie keeps in the fridge for up to 4 days. I actually think the flavor improves after a day in the fridge—the spices have time to meld and deepen.
How do I know when the pie is done baking?
The edges should be set and slightly puffed, but the center should still jiggle a little when you gently shake the pan. It will continue to set as it cools. If the center is completely firm, you’ve overbaked it. A knife inserted near the center should come out clean, but don’t rely on that test alone—custards can be tricky.
Can I freeze pumpkin pie?
Yes! Let the pie cool completely, then wrap it tightly in plastic wrap, followed by a layer of aluminum foil. Freeze for up to 1 month. Thaw overnight in the refrigerator before serving. The crust will be slightly softer after freezing, but the flavor will still be wonderful. I’ve done this many times and it’s always a hit.
Pin This Recipe!
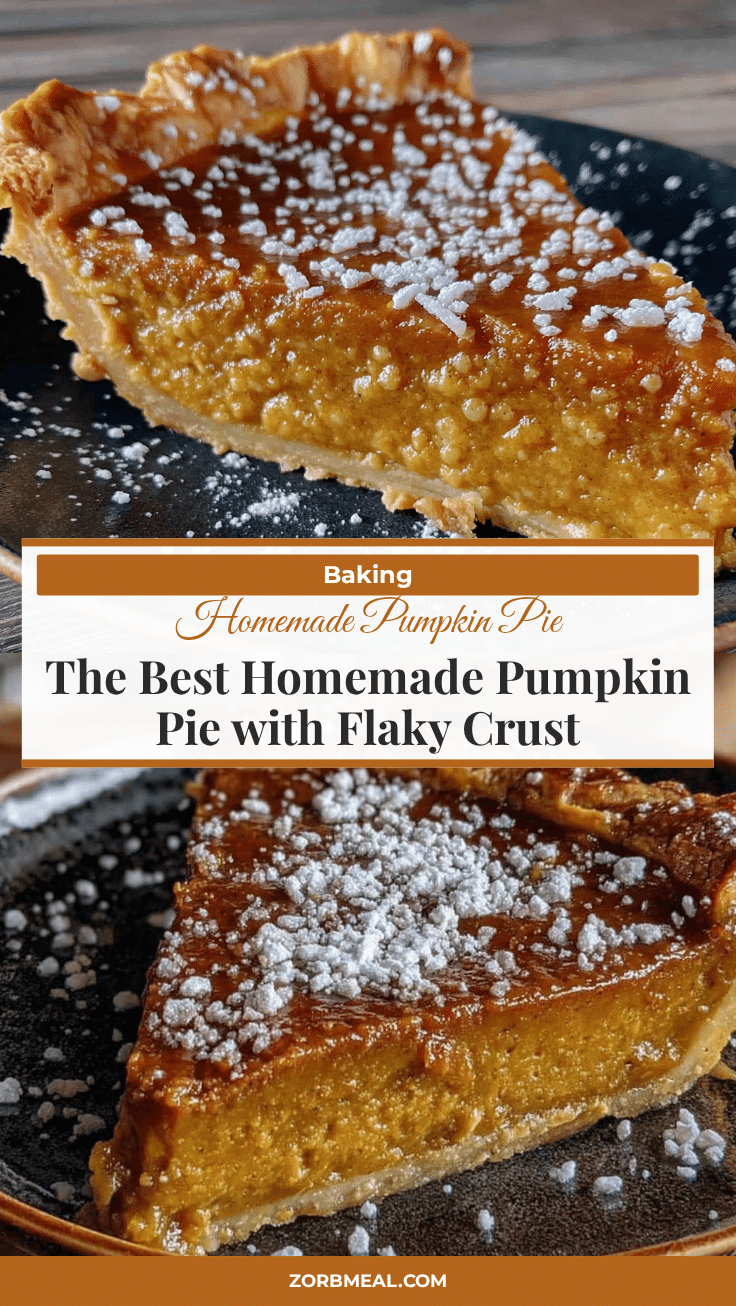
The Best Homemade Pumpkin Pie with Flaky Crust
This pumpkin pie features a foolproof flaky crust made with a secret ingredient—vodka—and a perfectly spiced, silky smooth filling. It’s a crowd-pleasing dessert that’s make-ahead friendly and guaranteed to impress.
- Prep Time: 30 minutes
- Cook Time: 1 hour 5 minutes
- Total Time: 4 hours 35 minutes (includes chilling and cooling)
- Yield: 8 servings 1x
- Category: Dessert
- Cuisine: American
Ingredients
- 2 ½ cups (312g) all-purpose flour
- 1 cup (226g) unsalted butter, cold and cubed
- 1 teaspoon salt
- 1 tablespoon sugar
- 4–6 tablespoons ice water
- 2 tablespoons vodka, ice cold
- 1 can (15 oz / 425g) pumpkin puree
- 1 cup (240ml) heavy cream
- 3 large eggs, room temperature
- ¾ cup (150g) packed light brown sugar
- ¼ cup (50g) granulated sugar
- 1 teaspoon vanilla extract
- 1 ½ teaspoons ground cinnamon
- ½ teaspoon ground ginger
- ½ teaspoon freshly grated nutmeg
- ¼ teaspoon ground cloves
- ½ teaspoon salt
Instructions
- Make the crust dough: In a large bowl, whisk together flour, salt, and sugar. Add cold cubed butter. Using a pastry cutter or two forks, cut the butter into the flour until the mixture looks like coarse meal with some pea-sized butter pieces remaining. Drizzle ice water and vodka over the mixture, one tablespoon at a time, tossing with a fork after each addition. The dough should look shaggy and hold together when squeezed. Turn out onto a lightly floured surface and bring together into a disk. …
- Roll out the dough: On a lightly floured surface, roll the chilled dough into a 12-inch circle, about ⅛-inch thick. Rotate the dough a quarter turn after each roll. Transfer to a 9-inch pie dish by rolling around the rolling pin and unrolling over the dish. Gently press into the bottom and up the sides without stretching. Trim overhang to ½ inch, fold under, and crimp edges. Refrigerate for 30 minutes while preheating oven.
- Blind bake the crust: Preheat oven to 375°F (190°C). Line chilled crust with parchment paper and fill with pie weights or dried beans. Bake for 15 minutes. Remove parchment and weights, prick bottom with a fork, and bake for another 10-12 minutes until dry and lightly golden. Set aside to cool slightly. Leave oven on.
- Make the filling: In a large bowl, whisk together pumpkin puree, heavy cream, eggs, brown sugar, granulated sugar, and vanilla until smooth. In a small bowl, combine cinnamon, ginger, nutmeg, cloves, and salt. Add spice mixture to pumpkin mixture and whisk until fully incorporated.
- Bake the pie: Place blind-baked crust on a baking sheet. Pour filling into warm crust. Bake at 375°F (190°C) for 15 minutes. Without opening oven, reduce temperature to 325°F (163°C) and continue baking for 40-50 minutes, until edges are set but center still jiggles slightly.
- Cool and serve: Place pie on a cooling rack and cool completely at room temperature, about 2-3 hours. Do not refrigerate while warm. Serve at room temperature or slightly warm with whipped cream.
Notes
Keep all ingredients cold for the flakiest crust. Do not overwork the dough. Blind baking is essential to prevent a soggy bottom. The pie is done when the edges are set but the center still jiggles slightly. Cool completely before serving to allow the filling to set. The pie can be made ahead and stored in the refrigerator for up to 4 days or frozen for up to 1 month.
Nutrition
- Serving Size: 1 slice
- Calories: 380
- Sugar: 24
- Sodium: 380
- Fat: 22
- Saturated Fat: 13
- Carbohydrates: 42
- Fiber: 3
- Protein: 6
Keywords: pumpkin pie, homemade pumpkin pie, flaky crust, Thanksgiving dessert, fall baking, pumpkin dessert, pie recipe


