The church chili cook-off was in four hours and I’d completely forgotten. I mean, completely. My kids had been home sick all week, the grocery list was a sad little scrap of paper covered in old coffee rings, and the only meat in my freezer was a three-pound package of ground beef I’d bought on sale. Everyone else would be bringing their secret-ingredient, slow-simmered-all-day masterpieces. Mrs. Patterson from two pews over was known for a recipe that involved three different chiles she grew herself. I was going to show up with a pot of desperation.
Let me tell you, I almost just grabbed a jar of store-bought and called it a day. But then I remembered my kids. They hate beans. Hate them. And every single chili at that cook-off was going to be loaded with them. So I figured, fine. I’ll make a chili that’s basically just meat and spices. No beans. No fancy vegetables they’d pick out. Just pure, unadulterated, kid-approved comfort. I threw the beef in the pot, added what I had—onions, garlic, canned tomatoes, and a mountain of chili powder—and prayed.
Honestly? It won. Not the official prize (that went to Mrs. Patterson and her three-chile masterpiece, as expected). But the real prize. The one that matters. My kids ate seconds. Then thirds. And a few other parents came over asking for the recipe, shocked it was so simple. I just smiled and said, “No beans. That’s the secret.” Maybe you’ve been there too—needing a dinner that’s fast, cheap, and actually gets eaten without complaint. This is that recipe. It’s the one that stayed in my rotation long after the cook-off was over, because sometimes the best things come from a little bit of panic and a whole lot of necessity.
Why You’ll Love This Recipe
This isn’t just another chili recipe. It’s the one you’ll actually want to make on a Tuesday night when you’re tired and the kids are hungry. Let me break down why this no-bean Texas chili is about to become your new best friend in the kitchen.
- Budget-Friendly: We’re talking ground beef, canned tomatoes, and pantry spices. That’s it. No expensive cuts of meat, no specialty ingredients you’ll use once and forget about. This chili stretches a pound of beef into a hearty meal for the whole family.
- Kid-Approved: The texture is smooth and meaty—no weird bean surprises or chunky vegetables hiding in there. My own kids, who can spot a sliver of onion from across the table, gobble this up without a single complaint.
- Quick & Easy: From start to finish, you’re looking at about 45 minutes. Most of that is just simmering time, which means you can throw it together while helping with homework or unloading the dishwasher.
- Picky Eater Solution: If you’ve got a kid who turns their nose up at anything “soupy” or “mixed together,” this chili is a game-changer. The thick, meaty consistency is more like a hearty meat sauce than a traditional chili. Serve it over rice or with a side of cornbread, and suddenly dinner is a win.
- Leftovers That Rock: This chili gets even better the next day. The flavors meld together overnight, making it perfect for meal prep or a quick lunch. Plus, it freezes beautifully—just portion it out and you’ve got emergency dinners ready to go.
What makes this recipe different from all the other chili recipes out there? It’s the focus on simplicity and flavor without the fuss. No soaking beans overnight. No browning multiple cuts of meat. No long list of spices you’ll never use again. This is Texas chili the way it was meant to be—all about the beef and the bold, smoky chili flavor. It’s comfort food that doesn’t cost a fortune or take all day, and honestly, that’s the kind of cooking we all need more of.
What Ingredients You Will Need
This recipe uses simple, wholesome ingredients that you probably already have in your kitchen. The magic is in how they come together to create a rich, deeply flavorful chili that tastes like it simmered all day.
For the Chili Base
- 2 tablespoons olive oil (or any neutral oil you have on hand)
- 1 large yellow onion, diced (adds a sweet, savory foundation)
- 4 cloves garlic, minced (fresh is best, but jarred minced garlic works in a pinch)
- 2 pounds ground beef (80/20 is ideal—the fat adds flavor and keeps the chili moist. I usually buy whatever’s on sale and it works great)
- 1 teaspoon salt (plus more to taste)
- 1/2 teaspoon black pepper
For the Chili Seasoning
- 3 tablespoons chili powder (this is the star of the show. I prefer a mild chili powder for the kids, but feel free to use a hotter blend if your family likes spice)
- 1 tablespoon ground cumin (adds that warm, earthy depth that makes chili taste like chili)
- 1 teaspoon smoked paprika (optional, but it adds a lovely smoky note that mimics the flavor of a long-simmered chili)
- 1/2 teaspoon dried oregano (a little goes a long way)
- 1/4 teaspoon cayenne pepper (optional—leave this out if your kids are sensitive to heat)
For the Liquid & Tomatoes
- 1 can (15 ounces) tomato sauce (creates a smooth, thick base)
- 1 can (14.5 ounces) diced tomatoes, undrained (I like to use fire-roasted for extra flavor, but regular works just fine)
- 1 cup beef broth (or water, if that’s all you have. The broth adds more depth, though)
- 1 tablespoon tomato paste (this is my secret ingredient—it thickens the chili and adds a concentrated tomato flavor)
Optional Toppings (for serving)
- Shredded cheddar cheese
- Sour cream or plain Greek yogurt
- Chopped green onions
- Fritos or tortilla chips (my kids love this)
Ingredient Notes: I usually buy my chili powder from the bulk section at the grocery store—it’s fresher and more affordable. For the ground beef, I’ve used everything from the generic store brand to a grass-fed blend, and honestly, they all work. The key is not to drain all the fat after browning; you want a little bit left in the pot for flavor. If you’re watching your fat intake, you can use lean ground beef and add an extra tablespoon of oil to compensate.
Equipment Needed
You don’t need a fancy kitchen to make this chili. Here’s what you’ll need:
- Large Dutch oven or heavy-bottomed pot (a 5-quart or larger is ideal. I use my trusty enameled cast iron pot, but any large pot with a thick bottom will work)
- Wooden spoon or spatula (for breaking up the ground beef and stirring)
- Chef’s knife and cutting board (for dicing the onion and mincing the garlic)
- Measuring spoons (for the spices)
- Can opener
- Ladle (for serving)
If you don’t have a Dutch oven, no worries. A large skillet or a regular stockpot will do the job. Just make sure it’s big enough to hold all the ingredients without spilling. I once made this in a nonstick skillet because my good pot was in the dishwasher, and it turned out perfectly fine. The only difference is you might need to stir a little more often to prevent sticking.
One tip: if you’re using a stainless steel pot, you might get some browning on the bottom when you cook the beef. That’s actually a good thing—it’s called fond, and it adds flavor. Just deglaze the pan with a splash of beef broth before adding the tomatoes, and you’ll scrape up all that deliciousness.
Preparation Method
Alright, let’s get cooking. This recipe comes together in about 45 minutes, and most of that is hands-off simmering time. Here’s how to do it:
- Heat the oil: Place your large pot over medium-high heat and add the olive oil. Let it heat up for about 30 seconds until it shimmers.
- Cook the aromatics: Add the diced onion and cook for 4-5 minutes, stirring occasionally, until the onion is soft and translucent. You’ll know it’s ready when it smells sweet and fragrant. Add the minced garlic and cook for another 30 seconds—just until you can smell it. Don’t let the garlic burn, or it’ll turn bitter.
- Brown the beef: Add the ground beef to the pot. Break it up with your wooden spoon into crumbles. Let it cook undisturbed for 2-3 minutes to get a nice sear on the bottom, then stir and continue cooking until the beef is fully browned, about 5-7 minutes total. Don’t drain all the fat—leave about a tablespoon in the pot for flavor.
- Add the spices: Sprinkle the chili powder, cumin, smoked paprika (if using), oregano, cayenne (if using), salt, and pepper over the beef. Stir well to coat the meat evenly. Let it cook for 1 minute, stirring constantly. This toasts the spices and wakes up their flavors. Your kitchen is going to smell amazing right about now.
- Add the tomatoes and broth: Pour in the tomato sauce, diced tomatoes (with their juices), beef broth, and tomato paste. Stir everything together until the tomato paste is fully incorporated. The mixture should look thick and chunky at this point.
- Bring to a simmer: Increase the heat to high and bring the chili to a gentle boil. Once it’s bubbling, reduce the heat to low, cover the pot with the lid slightly ajar (to let a little steam escape), and let it simmer for 25-30 minutes. Stir occasionally to prevent sticking.
- Adjust the seasoning: Taste the chili after it’s simmered. Does it need more salt? A pinch more chili powder? This is where you can customize it to your family’s taste. If it’s too thick, add a splash more broth or water. If it’s too thin, let it simmer uncovered for an extra 5-10 minutes to thicken up.
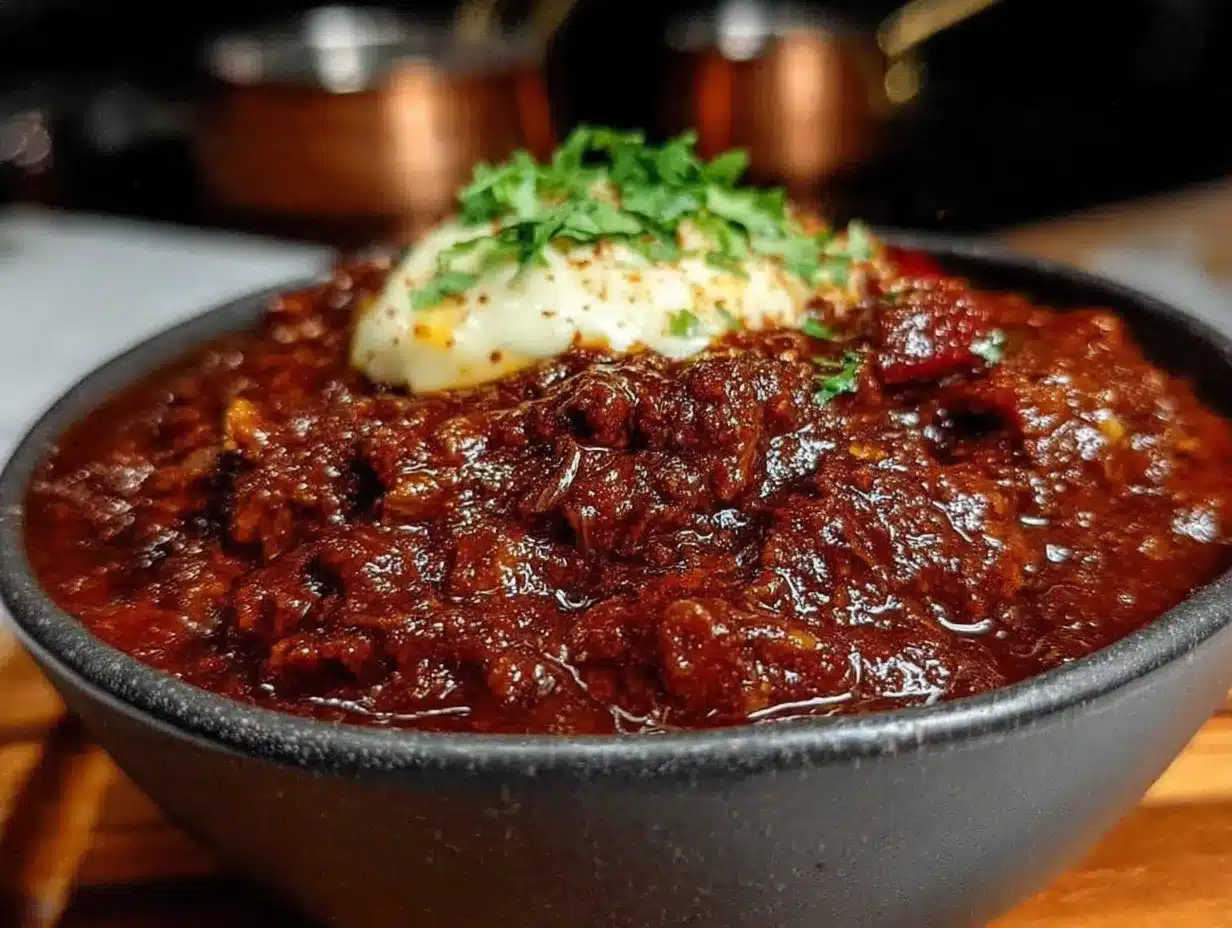
- Serve: Ladle the chili into bowls and let everyone add their own toppings. My kids love a pile of shredded cheese and a dollop of sour cream. I like mine with a few shakes of hot sauce and some crushed Fritos on top.
Pro tip: If you’re short on time, you can skip the simmering step and serve it right after the beef is browned and the liquids are added. It won’t be quite as developed in flavor, but it’ll still be delicious. The simmering is really where the magic happens, though—those 25-30 minutes allow the flavors to meld and deepen.
Cooking Tips & Techniques
Over the years, I’ve made this chili more times than I can count, and I’ve learned a few things along the way. Here are my best tips for getting it perfect every time:
Don’t over-stir the beef. I know it’s tempting to break it up into tiny pieces right away, but letting it sit for a minute or two before stirring gives you better browning. Those little browned bits are where the flavor lives. Think of it like making a burger—you want a crust, not a gray blob.
Toast your spices. This is a game-changer. When you add the spices to the browned beef and cook them for a minute, it releases their essential oils and makes them way more aromatic. I learned this the hard way after years of bland chili. Now I never skip this step.
Watch the salt. Canned tomatoes and broth already have salt in them, so go easy on the salt until the end. You can always add more, but you can’t take it out. I usually add just a teaspoon at the beginning and then adjust at the end.
Make it a double batch. This chili freezes beautifully, so I always make a double batch when I have the time. I freeze it in quart-sized freezer bags laid flat (they stack easily that way) and pull one out whenever I need a quick dinner. Just thaw in the fridge overnight and reheat on the stove.
One mistake I made: I once tried to speed things up by using pre-minced garlic from a jar. It worked, but the flavor wasn’t as bright. Fresh garlic really does make a difference here. Also, I forgot to add the tomato paste once and the chili was way too thin. Don’t skip it—it’s the secret to that perfect, hearty texture.
Multitasking tip: While the chili is simmering, you can prep your toppings, make a quick side salad, or whip up some boxed cornbread. That way, everything’s ready at the same time and dinner feels like a real meal without a ton of effort.
Variations & Adaptations
This recipe is super flexible, so feel free to make it your own. Here are some of my favorite variations:
Spicy Version: Add 1-2 diced jalapeños (seeds removed if you want less heat) along with the onions. You can also use hot chili powder instead of mild, or add a dash of chipotle powder for a smoky kick. My husband loves this version, but I keep it separate so the kids don’t accidentally get a mouthful of fire.
Loaded Chili: After the chili has simmered, stir in 1 cup of frozen corn kernels and 1 diced bell pepper (any color). Let it cook for another 5 minutes until the corn is heated through and the pepper is tender. This adds a little sweetness and crunch that even picky eaters tend to like.
Slow Cooker Method: Brown the beef and onions in a skillet first, then transfer everything to a slow cooker. Cook on low for 6-8 hours or on high for 3-4 hours. This is perfect for busy days when you want dinner ready when you walk in the door. Just make sure to add a little less broth since the slow cooker doesn’t evaporate liquid as much.
Dairy-Free Topping Option: Skip the cheese and sour cream and top with sliced avocado, fresh cilantro, and a squeeze of lime juice. It’s surprisingly refreshing and adds a whole new flavor profile. My sister-in-law, who’s dairy-free, introduced me to this combo and now I actually prefer it sometimes.
Meat Swap: Ground turkey or chicken works well in place of beef. Just be aware that leaner meats can dry out, so you might need to add an extra tablespoon of oil when browning. I’ve also used ground pork in a pinch, and it was delicious—just a little richer.
Serving & Storage Suggestions
This chili is incredibly versatile when it comes to serving. Here are some ideas:
Serving Temperature: Serve it piping hot straight from the pot. The toppings should be cold and fresh to create a nice contrast. I like to set up a little “topping bar” on the table so everyone can customize their bowl.
What to Serve With It: Cornbread is the classic pairing, and it’s perfect for soaking up every last drop of chili. A simple green salad with a tangy vinaigrette also works well to balance the richness. For a low-carb option, serve it over cauliflower rice or with a side of roasted vegetables.
Storage: Leftover chili can be stored in an airtight container in the refrigerator for up to 5 days. The flavors actually get better as they sit, so don’t be surprised if it tastes even more amazing the next day. Just reheat it on the stovetop over medium-low heat, stirring occasionally, or in the microwave in 30-second bursts.
Freezing: This chili freezes like a dream. Let it cool completely, then transfer it to freezer-safe containers or bags. I like to portion it into individual servings so I can grab just what I need. It will keep for up to 3 months in the freezer. To thaw, place it in the refrigerator overnight or run the sealed bag under cold water for a quick thaw.
Reheating from Frozen: If you’re in a hurry, you can reheat frozen chili directly in a pot over low heat. Just add a splash of water or broth to loosen it up, and stir frequently until it’s heated through. It usually takes about 10-15 minutes.
Flavor Development: One thing I love about this chili is how the flavors deepen over time. The spices meld together, the meat absorbs all the tomato goodness, and it becomes this incredibly cohesive, comforting dish. I honestly think it’s at its best on day two.
Nutritional Information & Benefits
While this chili is definitely comfort food, it also has some solid nutritional benefits. Here’s a rough estimate per serving (based on 6 servings, without toppings):
- Calories: Approximately 380
- Protein: 28 grams (hello, muscle-building beef!)
- Fat: 24 grams (mostly from the beef, which provides essential fatty acids)
- Carbohydrates: 12 grams (from the tomatoes and onions)
- Fiber: 3 grams
- Iron: 25% of the daily value (beef is a great source of heme iron, which is easily absorbed by the body)
Health Highlights: This chili is naturally gluten-free and low-carb, making it a great option for families with dietary restrictions. The tomatoes provide a good dose of vitamin C and lycopene, a powerful antioxidant. The garlic and onions are known for their immune-boosting properties. And the protein from the beef will keep everyone full and satisfied for hours.
Dietary Considerations: As written, this recipe is gluten-free, dairy-free (if you skip the cheese and sour cream toppings), and nut-free. It’s also low in sugar. If you’re watching your sodium, use low-sodium broth and no-salt-added canned tomatoes, and go easy on the added salt.
My personal perspective: I love that this chili feels indulgent but is actually pretty balanced. It’s not a health food, but it’s real food made from real ingredients. And honestly, that’s what matters most to me. A meal that brings my family together, fills their bellies, and doesn’t require a thousand exotic ingredients? That’s a win in my book.
Conclusion
This kid-friendly no-bean Texas chili is proof that you don’t need fancy ingredients or hours in the kitchen to make something truly delicious. It started as a panic-driven experiment for a church cook-off, but it’s become a staple in my home because it’s simple, affordable, and—most importantly—my kids actually eat it without complaint.
I hope you’ll give it a try, and I hope you’ll make it your own. Maybe you’ll add a little extra cumin, or top it with avocado, or serve it over rice. That’s the beauty of a recipe like this—it’s a starting point, not a rulebook. The best chili is the one that makes your family happy, and this one is designed to do exactly that.
So go ahead. Grab that pound of ground beef, open a can of tomatoes, and make some chili tonight. Your family will thank you, and you’ll feel like a hero for pulling off a delicious dinner with almost no effort. And if you come up with a fun variation, I’d love to hear about it. Drop a comment below and share your creation!
Frequently Asked Questions
Can I use ground turkey instead of beef?
Absolutely! Ground turkey or chicken works great. Just add a little extra oil when browning since leaner meats can dry out. The flavor will be slightly milder, but it’ll still be delicious.
How can I make this chili spicier for adults but keep it mild for kids?
Make the chili as written (mild), then stir in a diced jalapeño or a dash of cayenne pepper to individual bowls for the adults. That way, everyone gets the level of heat they like without compromising the kid-friendly base.
Can I make this in a slow cooker?
Yes! Brown the beef and onions on the stovetop first, then transfer everything to a slow cooker. Cook on low for 6-8 hours or on high for 3-4 hours. You might need to reduce the broth slightly since the slow cooker doesn’t evaporate liquid as much.
How do I thicken the chili if it’s too thin?
Let it simmer uncovered for an extra 10-15 minutes. The liquid will evaporate and the chili will naturally thicken. You can also mash a few of the diced tomatoes against the side of the pot with your spoon to release their pulp.
Can I freeze this chili?
Definitely! Let the chili cool completely, then transfer it to freezer-safe containers or bags. It will keep for up to 3 months. Thaw in the refrigerator overnight and reheat on the stovetop or in the microwave.
Pin This Recipe!

The Best Kid-Friendly No-Bean Texas Chili – Easy Budget Dinner

A quick, budget-friendly, and kid-approved no-bean Texas chili made with ground beef, simple spices, and canned tomatoes. Perfect for busy weeknights, this hearty chili comes together in about 45 minutes and is sure to please even the pickiest eaters.
- Prep Time: 10 minutes
- Cook Time: 35 minutes
- Total Time: 45 minutes
- Yield: 6 servings 1x
- Category: Main Course
- Cuisine: American
Ingredients
- 2 tablespoons olive oil
- 1 large yellow onion, diced
- 4 cloves garlic, minced
- 2 pounds ground beef (80/20)
- 1 teaspoon salt
- 1/2 teaspoon black pepper
- 3 tablespoons chili powder
- 1 tablespoon ground cumin
- 1 teaspoon smoked paprika (optional)
- 1/2 teaspoon dried oregano
- 1/4 teaspoon cayenne pepper (optional)
- 1 can (15 ounces) tomato sauce
- 1 can (14.5 ounces) diced tomatoes, undrained
- 1 cup beef broth
- 1 tablespoon tomato paste
- Shredded cheddar cheese (for serving, optional)
- Sour cream or plain Greek yogurt (for serving, optional)
- Chopped green onions (for serving, optional)
- Fritos or tortilla chips (for serving, optional)
Instructions
- Heat the oil: Place your large pot over medium-high heat and add the olive oil. Let it heat up for about 30 seconds until it shimmers.
- Cook the aromatics: Add the diced onion and cook for 4-5 minutes, stirring occasionally, until the onion is soft and translucent. Add the minced garlic and cook for another 30 seconds—just until you can smell it. Don’t let the garlic burn.
- Brown the beef: Add the ground beef to the pot. Break it up with your wooden spoon into crumbles. Let it cook undisturbed for 2-3 minutes to get a nice sear on the bottom, then stir and continue cooking until the beef is fully browned, about 5-7 minutes total. Leave about a tablespoon of fat in the pot for flavor.
- Add the spices: Sprinkle the chili powder, cumin, smoked paprika (if using), oregano, cayenne (if using), salt, and pepper over the beef. Stir well to coat the meat evenly. Let it cook for 1 minute, stirring constantly.
- Add the tomatoes and broth: Pour in the tomato sauce, diced tomatoes (with their juices), beef broth, and tomato paste. Stir everything together until the tomato paste is fully incorporated.
- Bring to a simmer: Increase the heat to high and bring the chili to a gentle boil. Once it’s bubbling, reduce the heat to low, cover the pot with the lid slightly ajar, and let it simmer for 25-30 minutes. Stir occasionally to prevent sticking.
- Adjust the seasoning: Taste the chili after it’s simmered. Add more salt or chili powder if needed. If it’s too thick, add a splash more broth or water. If it’s too thin, let it simmer uncovered for an extra 5-10 minutes to thicken up.
- Serve: Ladle the chili into bowls and let everyone add their own toppings.
Notes
For best flavor, toast the spices after adding them to the beef. Don’t over-stir the beef to get better browning. Adjust salt at the end since canned tomatoes and broth already contain salt. This chili freezes well for up to 3 months. For a thicker chili, simmer uncovered longer. For a spicier version, add diced jalapeños or use hot chili powder.
Nutrition
- Serving Size: 1 bowl (about 1.5 cu
- Calories: 380
- Sugar: 6
- Sodium: 800
- Fat: 24
- Saturated Fat: 8
- Carbohydrates: 12
- Fiber: 3
- Protein: 28
Keywords: no-bean chili, Texas chili, kid-friendly chili, easy chili, budget dinner, ground beef chili, quick chili, family dinner


