It was 10:47 PM on a random Tuesday, and I was staring into the fridge like it owed me money. The craving hit me hard—something warm, creamy, and just a little bit spicy. I didn’t have the energy for a full grocery run, and honestly, I didn’t have the ingredients for the traditional white chicken chili I usually make in my slow cooker on weekends. But I had a rotisserie chicken from two days ago, a can of white beans rolling around in the pantry, and a bottle of green enchilada sauce that I’d bought on a whim. That’s when the idea arrived—what if I just… used the enchilada sauce as the base? I mean, it’s already got tomatillos and green chiles in it, right? It felt like a weird shortcut, the kind of thing you’d never admit to a food snob. But at nearly 11 PM, I didn’t care. I just wanted dinner on the table in twenty minutes.
I grabbed my biggest pot, dumped in the enchilada sauce, and started adding things without measuring. A little cumin, some garlic powder, the shredded chicken. I opened the beans and threw them in, liquid and all, because who has time to rinse beans at that hour? The whole thing came together in a blur of tired efficiency. When I finally sat down with a bowl, I honestly expected it to taste like a compromise. But the first spoonful was… incredible. The green enchilada sauce gave it this tangy, smoky depth that regular chili just doesn’t have. It was creamy without any cream, thanks to the beans breaking down a little. And it was fast—so fast I almost felt guilty about how good it was.
I’ve made this Quick White Chicken Chili with Green Enchilada Sauce at least a dozen times since that late-night experiment. It’s become my go-to for those nights when I’m running on empty but still want something that feels like a real meal. Maybe you’ve been there—tired, hungry, and convinced you don’t have enough in the kitchen to make anything decent. Trust me, you do. And this recipe is proof.
Why You’ll Love This Recipe
Let me be real with you—I’ve tested this Quick White Chicken Chili with Green Enchilada Sauce more times than I can count. I’ve made it with rotisserie chicken, leftover grilled chicken, and even canned chicken in a pinch. Every single time, it delivers. Here’s why this one’s different from every other white chicken chili recipe out there:
- Ready in Under 30 Minutes: This isn’t a “set it and forget it” situation. It’s a “chop, dump, simmer, eat” situation. From fridge to table in about 25 minutes flat.
- Pantry-Friendly Ingredients: You probably have most of this stuff already. Canned beans, enchilada sauce, chicken stock—these are the heroes of a busy weeknight.
- One-Pot Wonder: Minimal cleanup means you’re not standing at the sink for fifteen minutes after dinner. That’s a win in my book.
- Crowd-Pleaser Approved: My picky eater friend asked for the recipe after her first bowl. My spice-averse neighbor asked for seconds. It’s got that perfect level of warmth without being overwhelming.
- Unbelievably Creamy Without Heavy Cream: The secret is blending a little of the beans and broth together. It gives you that luscious texture without the dairy guilt.
What really sets this recipe apart is the green enchilada sauce. Most white chicken chili recipes use a plain broth base, which can taste a little flat. The enchilada sauce brings this bright, tangy, slightly smoky flavor that makes the chili feel like it’s been simmering for hours. It’s a shortcut that actually makes the dish better—not just faster. And honestly, that’s the kind of cooking I can get behind.
This isn’t just good for a quick weeknight meal. It’s the kind of chili that makes you close your eyes after the first bite. It’s comfort food reimagined—faster, easier, but with the same soul-soothing satisfaction. Perfect for impressing your family on a Tuesday or just treating yourself to something warm and delicious without the stress.
What Ingredients You Will Need
This recipe uses simple, wholesome ingredients that work together to create something truly special. I’ve kept it streamlined on purpose—no fancy trips to specialty stores required. Here’s what you’ll need:
For the Chili Base
- 2 tablespoons olive oil (or avocado oil—whatever you have on hand)
- 1 medium yellow onion, diced (about 1 cup—this builds the flavor foundation)
- 3 cloves garlic, minced (fresh is best, but jarred minced garlic works in a pinch)
- 1 (19-ounce) can white beans, drained and rinsed (cannellini or great northern beans work great—I prefer Progresso brand for consistent texture)
- 1 (4-ounce) can diced green chiles (mild or medium, depending on your heat preference)
- 1 (10-ounce) can green enchilada sauce (I like Old El Paso or Las Palmas for that authentic flavor)
- 3 cups low-sodium chicken broth (homemade is lovely, but boxed broth is totally fine—just watch the salt)
- 3 cups cooked shredded chicken (rotisserie chicken is my go-to for speed; about half a large bird)
- 1 teaspoon ground cumin (this is non-negotiable—it gives the chili its warm, earthy backbone)
- ½ teaspoon dried oregano (Mexican oregano if you have it, but regular works too)
- ½ teaspoon salt, plus more to taste (start with less—you can always add more)
- ¼ teaspoon black pepper
For the Creamy Finish
- ½ cup sour cream or Greek yogurt (full-fat gives the best texture, but low-fat works—just don’t use nonfat)
- Juice of 1 lime (about 2 tablespoons—this brightens everything up)
For Garnish (Optional but Highly Recommended)
- Fresh cilantro, chopped (about ¼ cup)
- 1 avocado, diced (adds creaminess and healthy fats)
- Tortilla chips or strips (for crunch)
- Shredded Monterey Jack or pepper jack cheese (about ½ cup)
One thing I’ve learned from making this so many times—the quality of your green enchilada sauce matters. I’ve tried a few different brands, and the ones with tomatillos listed as the first ingredient tend to have the best flavor. Also, if you’re using a rotisserie chicken (which I almost always do), save the bones and skin to make a quick stock later. It’s a small habit that pays off.
For substitutions, here’s what I’ve tested: You can swap the white beans for chickpeas or even black beans if that’s what you have. The texture will be a little different, but the flavor still works. For a dairy-free version, use coconut cream instead of sour cream—it adds a subtle sweetness that plays nicely with the green chiles.
Equipment Needed
The beauty of this recipe is that it doesn’t require any fancy equipment. Here’s what you’ll need:
- Large Dutch oven or heavy-bottomed pot (at least 5-quart capacity—I use my trusty Le Creuset, but any heavy pot works)
- Wooden spoon or silicone spatula (for stirring without scratching your pot)
- Chef’s knife and cutting board (for dicing the onion and mincing garlic)
- Can opener (obvious, but easy to forget when you’re in a hurry)
- Measuring spoons (for the spices—eyeballing cumin is risky business)
- Ladle (for serving)
- Immersion blender or regular blender (optional, but this is how you get that ultra-creamy texture without adding cream—I use my immersion blender right in the pot)
If you don’t have an immersion blender, don’t sweat it. You can use a regular blender—just let the chili cool slightly first, blend about a cup of the beans and broth, then stir it back in. Or skip the blending altogether and just mash some of the beans against the side of the pot with your spoon. It’s not as smooth, but it still works. I’ve done it that way plenty of times when I didn’t feel like washing the blender.
Preparation Method
Alright, let’s get cooking. I’ve broken this down into clear steps so you can follow along without any guesswork. Trust me, even on your most exhausted Tuesday, you can handle this.
- Sauté the aromatics (5 minutes): Heat the olive oil in your large pot over medium heat. Add the diced onion and cook for about 3-4 minutes, stirring occasionally, until it’s soft and translucent. You’re not looking for color here—just some gentle sweat. Add the minced garlic and cook for another 30 seconds until it’s fragrant. Don’t let the garlic burn, or it’ll turn bitter. (I learned this the hard way—ruined a whole batch once because I got distracted by my phone.)
- Bloom the spices (1 minute): Add the ground cumin, dried oregano, salt, and pepper to the pot. Stir constantly for about 30-60 seconds. This might seem like a small step, but blooming the spices in the hot oil wakes up their flavors in a way that just adding them to liquid doesn’t. Your kitchen should start smelling amazing right about now.
- Add the liquids and beans (2 minutes): Pour in the green enchilada sauce and chicken broth. Add the drained white beans and diced green chiles. Give everything a good stir to combine. Scrape the bottom of the pot to make sure nothing’s sticking.
- Simmer the chili (10 minutes): Bring the chili to a gentle boil, then reduce the heat to medium-low. Let it simmer uncovered for about 10 minutes. This gives the flavors time to meld together. The chili will look a little thin at this point, but don’t worry—we’re going to thicken it up in the next step.
- Add the chicken (2 minutes): Stir in the shredded chicken. Let it cook for another 2-3 minutes, just until the chicken is heated through. Since you’re using pre-cooked chicken, you’re not really cooking it—just warming it up. Overcooking at this stage can make the chicken dry, so keep an eye on it.
- Create the creamy texture (5 minutes): This is the secret step. Remove about 1 cup of the chili (mostly beans and a little liquid) and transfer it to a blender or a heat-safe bowl. If you’re using an immersion blender, you can do this right in the pot—just blend about a third of the chili until smooth. If you’re using a regular blender, let the chili cool for a minute, then blend until smooth and stir it back into the pot. This gives you that luscious, creamy texture without any heavy cream. Stir in the sour cream or Greek yogurt and lime juice. Taste and adjust seasoning—you might want a little more salt or another squeeze of lime.
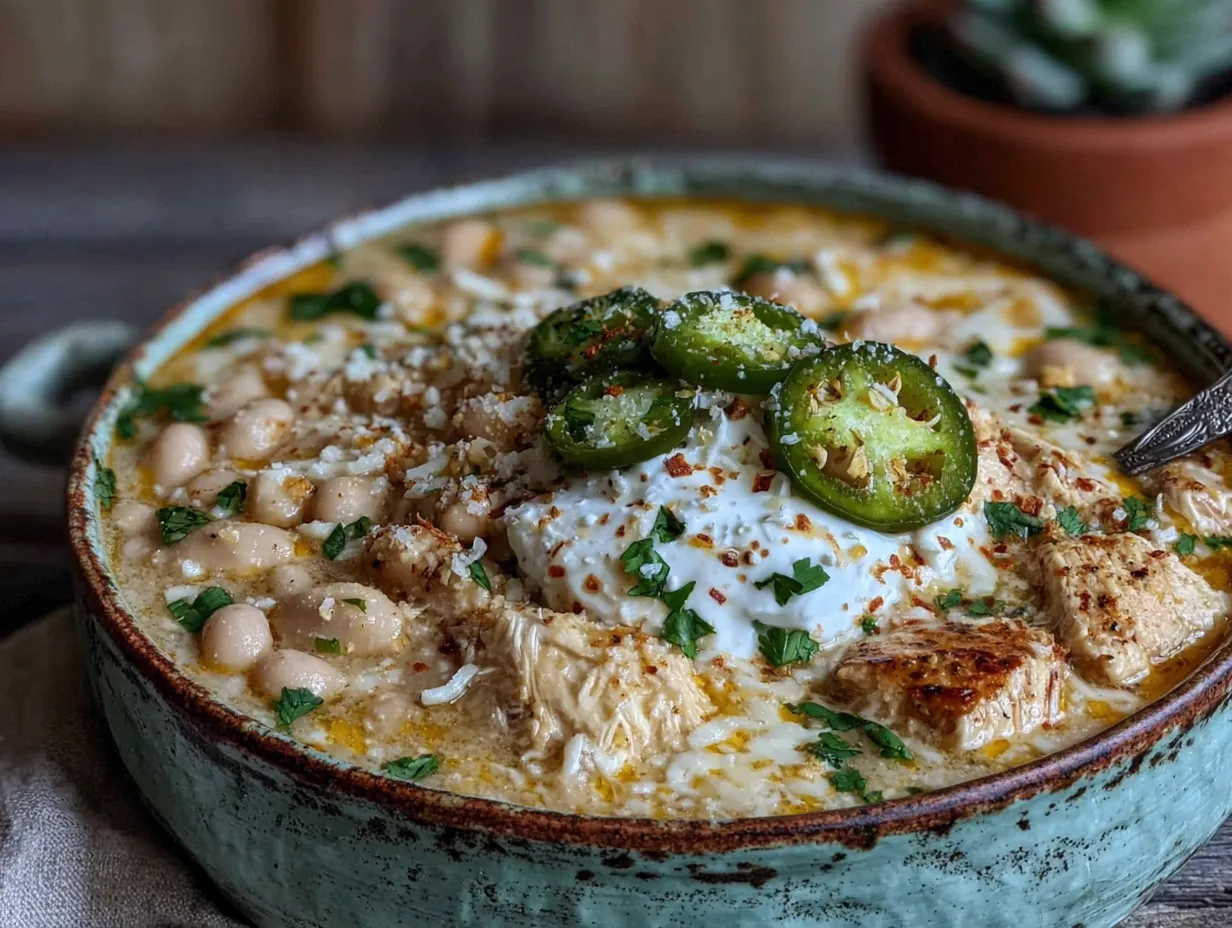
- Serve immediately (1 minute): Ladle the chili into bowls and top with your favorite garnishes. I always go for fresh cilantro, diced avocado, and a handful of tortilla chips for crunch. If you’re feeling indulgent, a sprinkle of shredded cheese melts beautifully into the warm chili.
One thing I want to emphasize—the chili will thicken as it sits. If you’re making it ahead of time or reheating leftovers, you might need to add a splash of broth or water to loosen it up. That’s totally normal.
Cooking Tips & Techniques
Over the years, I’ve made plenty of mistakes with this Quick White Chicken Chili with Green Enchilada Sauce. Here are the lessons I’ve learned so you don’t have to repeat them:
Don’t skip blooming the spices. I used to just dump cumin and oregano into the broth, and the flavor was always a little flat. Taking that extra 30 seconds to toast them in the oil makes a world of difference. It’s the difference between “this is fine” and “what did you put in this?”
Watch your salt levels. Canned enchilada sauce, chicken broth, and beans all contain sodium. I learned this the hard way after making a batch that was so salty I could barely eat it. Always use low-sodium broth and beans, and taste before adding any extra salt. You can always add more, but you can’t take it out.
Shred your chicken while it’s warm. If you’re using a rotisserie chicken, shred it as soon as you bring it home. Cold chicken is harder to shred and tends to clump together. I usually shred the whole bird at once and store it in the fridge, so it’s ready to go when I need it.
Multitask like a pro. While the chili is simmering, prep your garnishes. Dice the avocado, chop the cilantro, shred the cheese. This way, everything’s ready when the chili is done, and you’re not scrambling at the end. It’s a small habit that makes the whole process feel smoother.
Don’t boil after adding sour cream. If you add the sour cream or yogurt and then let the chili boil, it can curdle and separate. Keep the heat low after stirring it in, and you’ll get that silky, smooth texture every time. I learned this one after a particularly sad batch that looked like cottage cheese floating in soup.
Variations & Adaptations
One of the best things about this recipe is how flexible it is. Here are some variations I’ve tried and loved:
Spicy Version: Add a diced jalapeño along with the onion, or stir in ½ teaspoon of chipotle powder with the spices. For extra heat, use pepper jack cheese as a garnish instead of Monterey Jack. My spice-loving friend adds a splash of hot sauce at the table, and she swears by it.
Creamy Avocado Version: Instead of stirring in sour cream, blend half an avocado with a little of the broth and stir it in at the end. It gives the chili an extra-creamy texture and a beautiful pale green color. Plus, you get all those healthy fats from the avocado.
Slow Cooker Adaptation: If you want to set it and forget it, sauté the onion and garlic first, then transfer everything except the sour cream and lime juice to a slow cooker. Cook on low for 4-6 hours or high for 2-3 hours. Stir in the sour cream and lime juice just before serving. The flavors meld beautifully over time.
Vegetarian Version: Skip the chicken and add an extra can of beans—try black beans or pinto beans for variety. You can also add a cup of frozen corn for sweetness and texture. The rest of the recipe stays exactly the same, and it’s just as satisfying.
Dairy-Free Version: Use full-fat coconut cream instead of sour cream. It adds a subtle sweetness that actually complements the green enchilada sauce really well. I was skeptical the first time I tried it, but honestly, it works.
I once made a version with leftover Thanksgiving turkey instead of chicken, and it was fantastic. So if you’ve got leftover poultry of any kind, this recipe is a great way to use it up.
Serving & Storage Suggestions
This chili is best served hot, right after you make it. The texture is at its peak—creamy, thick, and perfectly seasoned. Here’s how I like to serve it:
Ladle the chili into deep bowls and top with a generous handful of fresh cilantro, diced avocado, and a sprinkle of shredded cheese. A few tortilla chips on the side add that necessary crunch. If you’re feeling fancy, a dollop of extra sour cream and a wedge of lime on the side finish it off beautifully.
For drinks, I love pairing this with a cold Mexican beer like Modelo or a crisp limeade. If you’re going non-alcoholic, a sparkling water with a splash of lime works perfectly to cut through the richness.
Storage: Leftover chili keeps well in an airtight container in the fridge for up to 4 days. The flavors actually deepen overnight, so it might taste even better the next day. Just be aware that the chili will thicken as it sits—that’s normal.
Reheating: Reheat gently on the stovetop over medium-low heat, adding a splash of broth or water to loosen it up. You can also microwave individual portions in 30-second bursts, stirring between each. Avoid boiling, as it can make the texture grainy.
Freezing: This chili freezes beautifully for up to 3 months. Let it cool completely, then transfer to freezer-safe containers or zip-top bags. Leave a little room for expansion. When you’re ready to eat, thaw overnight in the fridge and reheat gently. I like to freeze individual portions for easy lunches—just grab and go.
Nutritional Information & Benefits
Here’s an approximate nutritional breakdown per serving (based on 6 servings, without garnishes):
| Nutrient | Amount per Serving |
|---|---|
| Calories | 320 |
| Protein | 28g |
| Fat | 12g |
| Carbohydrates | 28g |
| Fiber | 8g |
| Sodium | 580mg |
This chili is packed with protein from the chicken and beans, which keeps you full and satisfied. The white beans are a great source of fiber and iron, while the green enchilada sauce provides a dose of vitamin C from the tomatillos. If you use Greek yogurt instead of sour cream, you’ll also get a probiotic boost. It’s a well-rounded meal that doesn’t leave you feeling heavy or sluggish—perfect for a busy weeknight when you need something nourishing but not complicated.
One note on allergens: This recipe contains dairy (sour cream) and is gluten-free as written. If you need it to be completely dairy-free, use the coconut cream substitution I mentioned earlier.
Conclusion
If you take one thing away from this post, let it be this: you don’t need hours in the kitchen or a pantry full of exotic ingredients to make something truly delicious. This Quick White Chicken Chili with Green Enchilada Sauce is proof that a little creativity and a few smart shortcuts can turn a random Tuesday night into something worth remembering. It’s become my go-to for those evenings when I’m running on fumes but still want a meal that feels like a hug in a bowl.
I love this recipe because it’s forgiving. You can tweak the spices, swap the beans, add more heat or less—it always works. It’s the kind of recipe you can make your own, and I hope you do. Whether you’re cooking for a crowd or just for yourself, this chili delivers comfort without the stress.
I’d love to hear how it turns out for you. Did you try a variation? Add something unexpected? Drop a comment below and let me know—I read every single one. And if you snap a photo, tag me on social media so I can see your creation. Happy cooking, friend. You’ve got this.
Frequently Asked Questions
Can I use canned chicken for this recipe?
Yes, you absolutely can. I’ve done it when I was in a real pinch, and it works fine. Just drain the canned chicken well and shred it with a fork before adding it to the chili. The texture is a little softer than rotisserie chicken, but the flavor is still great.
How can I make this chili thicker?
If you prefer a thicker chili, mash some of the beans against the side of the pot with a wooden spoon before adding the sour cream. You can also let the chili simmer uncovered for an extra 5-10 minutes to reduce the liquid. Just keep an eye on it so it doesn’t scorch on the bottom.
Can I make this in an Instant Pot?
Yes, and it’s super easy. Use the sauté function to cook the onion and garlic, then add the remaining ingredients except the sour cream and lime juice. Pressure cook on high for 5 minutes, then quick release. Stir in the sour cream and lime juice, and you’re done. It’s even faster than the stovetop version.
Is this recipe gluten-free?
Yes, as written, this recipe is gluten-free. Just make sure your chicken broth and green enchilada sauce are certified gluten-free, as some brands may contain additives with gluten. Most major brands are safe, but it’s always worth checking the label if you have celiac disease or a severe sensitivity.
Can I double this recipe for a crowd?
Absolutely. This recipe doubles beautifully. Just use a larger pot (at least 8 quarts) and increase the simmering time by about 5 minutes to account for the extra volume. You might also need to adjust the salt slightly, since you’re using more canned ingredients. Taste and adjust as you go.
Pin This Recipe!

Quick White Chicken Chili with Green Enchilada Sauce

A quick and creamy white chicken chili made with green enchilada sauce, rotisserie chicken, and white beans. Ready in under 30 minutes, this one-pot wonder is perfect for busy weeknights.
- Prep Time: 10 minutes
- Cook Time: 15 minutes
- Total Time: 25 minutes
- Yield: 6 servings 1x
- Category: Main Course
- Cuisine: Mexican
Ingredients
- 2 tablespoons olive oil
- 1 medium yellow onion, diced
- 3 cloves garlic, minced
- 1 (19-ounce) can white beans, drained and rinsed
- 1 (4-ounce) can diced green chiles
- 1 (10-ounce) can green enchilada sauce
- 3 cups low-sodium chicken broth
- 3 cups cooked shredded chicken
- 1 teaspoon ground cumin
- 1/2 teaspoon dried oregano
- 1/2 teaspoon salt, plus more to taste
- 1/4 teaspoon black pepper
- 1/2 cup sour cream or Greek yogurt
- Juice of 1 lime
- Fresh cilantro, chopped (for garnish)
- 1 avocado, diced (for garnish)
- Tortilla chips or strips (for garnish)
- Shredded Monterey Jack or pepper jack cheese (for garnish)
Instructions
- Heat olive oil in a large pot over medium heat. Add diced onion and cook for 3-4 minutes until soft and translucent. Add minced garlic and cook for 30 seconds until fragrant.
- Add ground cumin, dried oregano, salt, and pepper. Stir constantly for 30-60 seconds to bloom the spices.
- Pour in green enchilada sauce and chicken broth. Add drained white beans and diced green chiles. Stir to combine.
- Bring to a gentle boil, then reduce heat to medium-low. Simmer uncovered for 10 minutes.
- Stir in shredded chicken and cook for 2-3 minutes until heated through.
- Remove about 1 cup of chili (mostly beans and liquid) and blend until smooth using an immersion blender or regular blender. Stir back into the pot. Add sour cream or Greek yogurt and lime juice. Taste and adjust seasoning.
- Ladle into bowls and garnish with cilantro, avocado, tortilla chips, and cheese as desired.
Notes
The chili will thicken as it sits. If reheating, add a splash of broth or water to loosen it up. For a dairy-free version, use coconut cream instead of sour cream. For a thicker chili, mash some beans against the pot before adding sour cream.
Nutrition
- Serving Size: 1 bowl (about 1.5 cu
- Calories: 320
- Sugar: 4
- Sodium: 580
- Fat: 12
- Saturated Fat: 3
- Carbohydrates: 28
- Fiber: 8
- Protein: 28
Keywords: white chicken chili, green enchilada sauce, quick chili, weeknight dinner, one-pot meal


