The kindergarten Halloween party was in twelve hours and I’d completely forgotten. The sign-up sheet had been taped to the fridge for three weeks, staring at me every morning while I poured my coffee, and somehow it had become invisible. By the time I remembered, it was 10 PM, the grocery store was closed, and every other parent was probably already assembling elaborate mummy hot dogs or pumpkin-shaped cookies that looked like they belonged on a magazine cover. I stood in my kitchen, staring into the pantry like it might magically produce a solution. Honestly, I was ready to text the room mom and claim we’d come down with a sudden case of the sniffles.
But then I spotted the bag of pretzels. And the box of cereal. And the bag of chocolate chips my husband had hidden from me last month. Let me tell you, the panic turned into something else real quick—a sort of frantic, desperate creativity. I grabbed a bowl and started tossing things in, not really measuring, just hoping for the best. My son wandered in, pajama-clad and sleepy, and asked if he could help. I handed him a bag of candy corn and told him to pour. He dumped half on the floor. Classic. We swept it up, laughed about it, and kept going. The whole thing took maybe fifteen minutes, and I went to bed fully expecting to be the parent who brought the sad, last-minute snack.
The next day, I walked into that party carrying a big ziplock bag of what looked like chaos. The other tables had elaborate displays—witch-hat cupcakes, spiderweb cookies, the works. I plopped my bag down next to a tray of fruit skewers and braced myself. You know that feeling when you’re the underdog and you just know it? Well, the kids swarmed. Not the fruit skewers. Not the fancy cookies. My sad little snack mix disappeared in under ten minutes. A little boy named Leo actually asked his mom if she could get the recipe. I mean, I was as surprised as anyone. That night, my son asked if we could make it again for his class. And again for the neighborhood costume parade. And honestly? I’ve been making it every Halloween since. It’s the recipe that proved to me that simple, scrappy, and made-in-a-pinch can sometimes be the very best thing.
Why You’ll Love This Recipe
This isn’t just another Halloween snack mix. It’s the one that actually works for real families on a real budget. Here’s why you’ll keep coming back to it:
- Quick & Easy: Comes together in under 15 minutes with zero baking required. Perfect for the night before a party or even the morning of.
- Simple Ingredients: No fancy grocery trips needed. You likely have most of these things in your pantry right now, which is honestly the whole point.
- Perfect for Parties: Great for classroom celebrations, neighborhood costume parades, trunk-or-treat events, or just a fun movie night at home.
- Crowd-Pleaser: Always gets rave reviews from kids and adults alike. I’ve never seen a bowl of this last more than twenty minutes at any gathering.
- Unbelievably Delicious: The sweet and salty combo is next-level comfort food. The chocolate melts just enough to coat everything, and the crunch is absolutely perfect.
What makes this recipe different from all the other Halloween snack mixes out there? It’s the ratio. Most recipes go way too heavy on the candy corn or way too light on the pretzels. I’ve tested this balance over and over, and this is the version that gets devoured every single time. Plus, it’s endlessly adaptable—you can swap in whatever your family actually likes without ruining the whole thing.
This recipe is the kind that makes you close your eyes after the first bite. It’s comfort food reimagined—faster, cheaper, but with the same soul-soothing satisfaction. Perfect for impressing other parents without stressing yourself out, or turning a simple snack into something memorable.
What Ingredients You Will Need
This recipe uses simple, budget-friendly ingredients to deliver that perfect sweet-and-salty crunch. Most of these are pantry staples, which is exactly what you want when you’re feeding a family on a sensible budget.
For the Snack Mix Base
- 3 cups pretzel twists (broken into bite-sized pieces if they’re large; I prefer Snyder’s for their sturdy crunch)
- 3 cups popped popcorn (plain or lightly salted; air-popped works great, but microwave is fine too)
- 2 cups square cheese crackers (like Cheez-Its or a store brand; the sharper flavor balances the sweet elements)
- 1 cup dry roasted peanuts (optional for nut-free classrooms; substitute with sunflower seeds or omit entirely)
For the Sweet Elements
- 1 cup candy corn (the classic Halloween staple; look for fresh bags for the best texture)
- 1 cup candy pumpkins (also called “mellowcreme pumpkins”; adds that extra festive touch)
- 1/2 cup chocolate chips (milk chocolate is my go-to, but semi-sweet works beautifully too)
- 1/2 cup white chocolate chips (adds a nice visual contrast and creaminess)
For the Coating (Optional but Recommended)
- 2 tablespoons melted butter (salted or unsalted; I use salted for extra flavor contrast)
- 1/2 teaspoon vanilla extract (pure vanilla if you have it, imitation works fine)
- 1/4 cup powdered sugar (for a light dusting that mimics a “spooky” look)
Substitution guidance: For a nut-free version, simply omit the peanuts and add an extra cup of popcorn or cheese crackers. For a gluten-free option, use gluten-free pretzels and check your cheese crackers—many brands now offer gluten-free versions. For a dairy-free coating, use coconut oil instead of butter. I’ve tested all of these swaps and they work beautifully.
Equipment Needed
You don’t need much for this recipe, which is honestly one of the best things about it. Here’s what you’ll want to have on hand:
- Large mixing bowl: A big bowl is essential for getting everything evenly distributed. I use my grandmother’s old ceramic mixing bowl, but any large bowl works.
- Measuring cups: For getting the ratios right, though honestly, after the first time, you’ll probably just eyeball it like I do.
- Spatula or large spoon: For mixing everything together without crushing the pretzels.
- Baking sheet: Only needed if you’re doing the optional coating step. A rimmed baking sheet works best.
- Parchment paper: For easy cleanup if you’re baking the mix. Not strictly necessary, but makes life easier.
- Ziplock bags or airtight containers: For storing the finished mix. I like using gallon-sized bags for classroom parties.
If you don’t have a large mixing bowl, a clean paper grocery bag works surprisingly well—just toss everything in and shake. My grandmother taught me that trick, and it’s perfect for when you’re making a big batch.
Preparation Method
This comes together fast, so have all your ingredients measured and ready to go. Trust me, you don’t want to be hunting for the candy corn while your chocolate chips are melting.
- Prep your base ingredients (5 minutes): Start by breaking any large pretzel twists into bite-sized pieces. You want everything to be roughly the same size so every handful has a little bit of everything. Pop your popcorn if you haven’t already—about 3 cups worth. If you’re using microwave popcorn, let it cool completely so it stays crunchy.
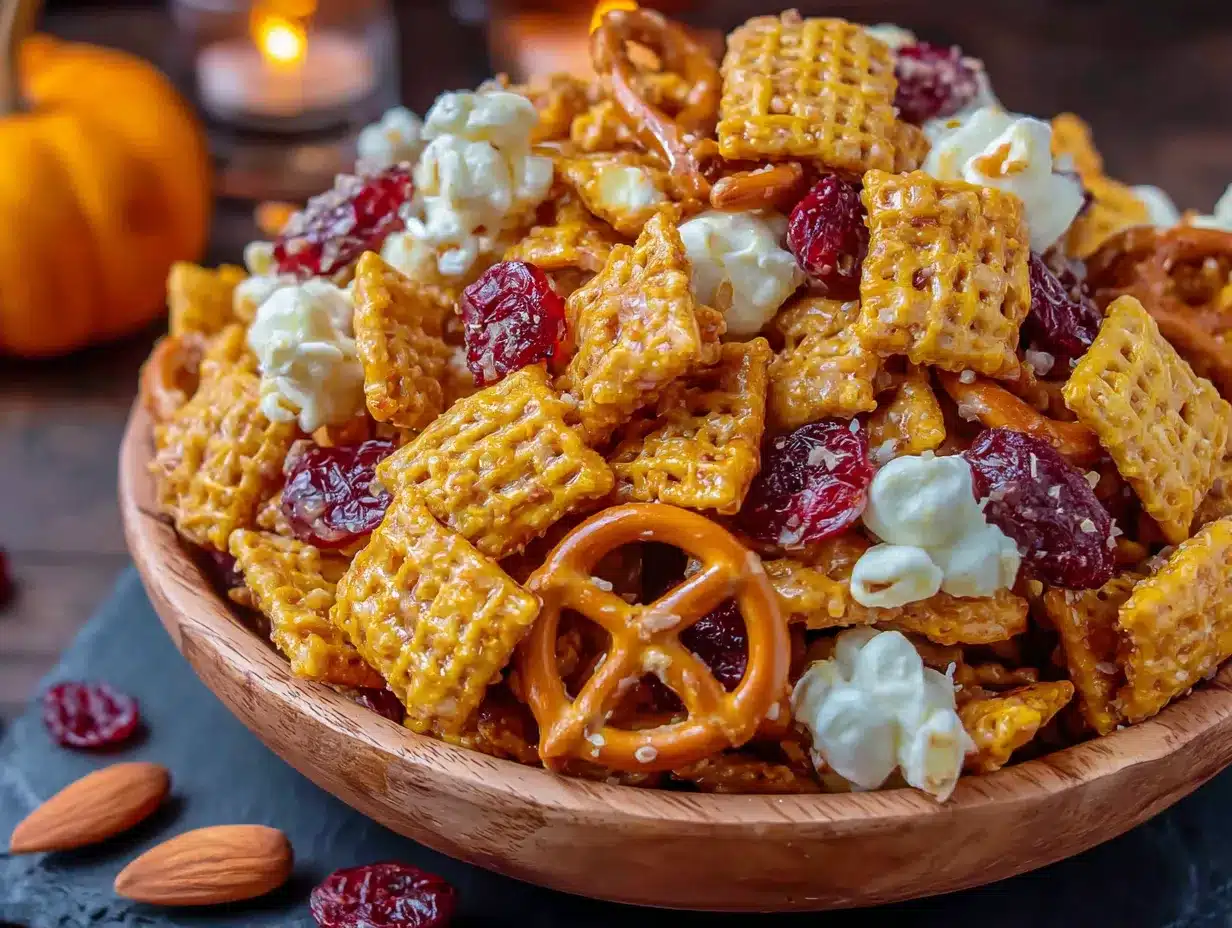
- Combine the dry ingredients (3 minutes): In your large mixing bowl, combine the broken pretzels, popcorn, cheese crackers, and peanuts (if using). Give it a gentle toss with your hands or a spatula to distribute everything evenly. You’ll notice the colors already look festive—orange cheese crackers, golden pretzels, white popcorn. It’s starting to look like Halloween already.
- Add the sweet elements (2 minutes): Pour in the candy corn, candy pumpkins, and both types of chocolate chips. Toss gently again. The key here is to not crush the candy corn—it gets sticky and messy if you’re too aggressive. I use a folding motion, like I’m folding egg whites into a batter. Go slow and be gentle.
- Optional coating step (10 minutes): If you want that extra-special touch, preheat your oven to 250°F (120°C). Spread the mix on a rimmed baking sheet lined with parchment paper. Melt the butter and vanilla together, then drizzle over the mix. Toss gently to coat. Bake for 8-10 minutes, stirring once halfway through. The chocolate chips will soften slightly and get all melty and wonderful. Let it cool completely on the baking sheet—the chocolate will set as it cools, creating little clusters of goodness.
- Add the finishing touch (2 minutes): If you used the coating step, sprinkle the powdered sugar over the cooled mix and toss one final time. This gives it that “spooky” dusted look that kids absolutely love. If you skipped the coating step, you can still add a light dusting of powdered sugar for visual effect—it’s totally optional but very cute.
- Package and serve: Transfer to serving bowls, ziplock bags, or airtight containers. The mix will keep for up to a week at room temperature, though I promise it won’t last that long.
Cooking Tips & Techniques
I’ve made this snack mix more times than I can count, and I’ve learned a few things the hard way. Let me save you some trouble.
Don’t overmix. I know it’s tempting to really work everything together, but aggressive mixing will crush your pretzels and break your candy corn. Use a gentle folding motion and stop as soon as everything looks evenly distributed. The first time I made this, I stirred like I was making cookie dough, and I ended up with a bowl of crumbs and candy dust. Still tasted good, but the texture was all wrong.
Watch your oven temperature. If you’re doing the coating step, 250°F is your sweet spot. Anything higher and the chocolate chips will melt into a puddle instead of getting soft and slightly gooey. I learned this the hard way when I accidentally set the oven to 350°F and ended up with chocolate soup. The kids still ate it, but it wasn’t pretty.
Let it cool completely. This is the hardest part, especially if you’re making it with kids who want to dig in immediately. But trust me, letting the mix cool fully allows the chocolate to set and the flavors to meld together. If you eat it warm, the candy corn gets weirdly soft and the chocolate just slides off everything. Patience pays off here.
Double the batch. Seriously. Every time I’ve made a single batch, I’ve wished I’d made more. This stuff disappears fast, and it’s just as good the next day. If you’re bringing it to a party, make at least a double batch. You’ll thank me later.
Variations & Adaptations
One of the best things about this recipe is how flexible it is. Here are some variations I’ve tried and loved:
Monster Mash Mix
Swap the candy corn and pumpkins for candy eyeballs and gummy worms. The eyeballs add a fun creepy factor, and the gummy worms give it a chewy texture that kids go crazy for. I made this version for my son’s Halloween class party and the teacher asked for the recipe.
Witch’s Brew Version
Add 1 cup of dried cranberries and 1/2 cup of shredded coconut. The cranberries add a tart pop that balances the sweetness, and the coconut gives it a slightly tropical vibe. This version is great for fall festivals where you want something a little different.
Gluten-Free Friendly Mix
Use gluten-free pretzels (I like the Glutino brand) and gluten-free cheese crackers. Most popcorn is naturally gluten-free, so you’re good there. The rest of the ingredients are naturally gluten-free as well. I’ve tested this version for friends with celiac disease and they loved it.
Nut-Free Classroom Version
Omit the peanuts entirely and add an extra cup of popcorn or cheese crackers. You can also add 1/2 cup of sunflower seeds for a similar crunch without the allergens. This version is safe for most nut-free classrooms, but always check with the teacher first.
Spicy Adult Version
Add 1/2 teaspoon of cayenne pepper and 1/4 teaspoon of smoked paprika to the melted butter before drizzling. The heat contrasts beautifully with the sweet candy corn. I made this for a Halloween party for grown-ups and it was gone before the punch bowl.
Serving & Storage Suggestions
This snack mix is incredibly versatile when it comes to serving. Here’s how to make it shine:
Serving temperature: Room temperature is perfect. If you did the coating step, let it cool completely before serving. The chocolate should be set but still soft enough to be pleasant. I like to serve it in a big bowl with a scoop, but individual cups or ziplock bags work great for parties.
Presentation ideas: For Halloween parties, I love serving this in a hollowed-out pumpkin or a black cauldron bowl. You can also portion it into small cellophane bags tied with orange ribbon for party favors. For a spooky touch, add a plastic spider ring or a glow stick to each bag—the kids go wild for that.
Storage instructions: Store in an airtight container at room temperature for up to one week. Do not refrigerate—the moisture will make the popcorn and pretzels soft. If you live in a humid climate, add a silica gel packet to the container to keep everything crunchy.
Freezer instructions: You can freeze this mix for up to three months. Place it in a freezer-safe ziplock bag, squeeze out as much air as possible, and freeze. Thaw at room temperature for about an hour before serving. The texture will be slightly less crunchy, but it’s still delicious.
Flavor development: If you have the patience, this mix actually tastes better the next day. The flavors meld together overnight, and the chocolate distributes more evenly. I often make it a day ahead for parties, and it’s always a hit.
Nutritional Information & Benefits
Let’s be real—this is a treat, not a health food. But it’s not as bad as you might think, especially compared to store-bought Halloween mixes loaded with preservatives and artificial colors.
Per 1/2 cup serving (approximate): Calories: 180, Fat: 8g, Carbohydrates: 26g, Fiber: 1g, Sugar: 14g, Protein: 3g, Sodium: 220mg. These numbers will vary based on your specific ingredients and ratios.
Health highlights: The popcorn provides whole grains and fiber. The peanuts offer protein and healthy fats. The dark chocolate option adds antioxidants. And honestly, the fact that you’re making it yourself means you control what goes in—no high-fructose corn syrup or artificial flavors unless you choose them.
Dietary considerations: This recipe can be made gluten-free, nut-free, and dairy-free with simple substitutions. Always check labels for allergens, especially if you’re bringing this to a classroom or party with known allergies.
My perspective: I’m a firm believer that treats have a place in a balanced diet. Halloween comes once a year, and making memories with your kids is more important than counting calories. This mix is a fun, affordable way to celebrate without breaking the bank or your sanity.
Conclusion
This Kid-Approved Easy Halloween Snack Mix is proof that you don’t need fancy ingredients or hours in the kitchen to create something truly special. It’s the recipe that saved me from party panic, the one that made my son proud instead of embarrassed, and the one that’s become a non-negotiable Halloween tradition in our house. Every year, when October rolls around, my kids start asking when we’re making “the mix.” And every year, I smile and grab the same bowl, the same bag of pretzels, the same slightly-hiding bag of chocolate chips.
I’d love for you to try this and make it your own. Maybe you’ll add different candies, or skip the coating step, or double the batch like I always wish I had. Whatever you do, I hope it brings a little joy to your Halloween table. If you make it, drop a comment below and tell me how it turned out—I genuinely love hearing about your kitchen victories. And if your kids ask for it again, well, you know you’ve found a winner.
Happy Halloween, friends. May your candy bowls stay full and your kitchen stay messy.
Frequently Asked Questions
Can I make this snack mix ahead of time?
Absolutely! In fact, it tastes even better the next day. Make it up to 3 days in advance and store in an airtight container at room temperature. Just give it a gentle stir before serving to redistribute everything.
How do I keep the popcorn from getting soggy?
The key is making sure your popcorn is completely cool before adding it to the mix. Warm popcorn releases steam, which makes everything soft. Also, store the mix in an airtight container at room temperature—never in the fridge, as moisture will ruin the crunch.
Can I use microwave popcorn for this recipe?
Yes, absolutely! Just make sure it’s cooled completely and break up any large clumps. Plain or lightly salted works best. Avoid butter-flavored varieties, as the extra oil can make the mix greasy.
What’s the best way to package this for classroom parties?
Individual ziplock bags or small paper treat bags work perfectly. Portion about 1/2 cup per bag. For an extra fun touch, add a Halloween-themed sticker or a glow stick to each bag. This also makes it easy for teachers to distribute without mess.
Can I add other candies to this mix?
Definitely! This recipe is super flexible. Try adding candy eyeballs, gummy worms, chocolate-covered raisins, or even mini marshmallows. Just keep the total amount of add-ins to about 2 cups so the ratios stay balanced.
Pin This Recipe!
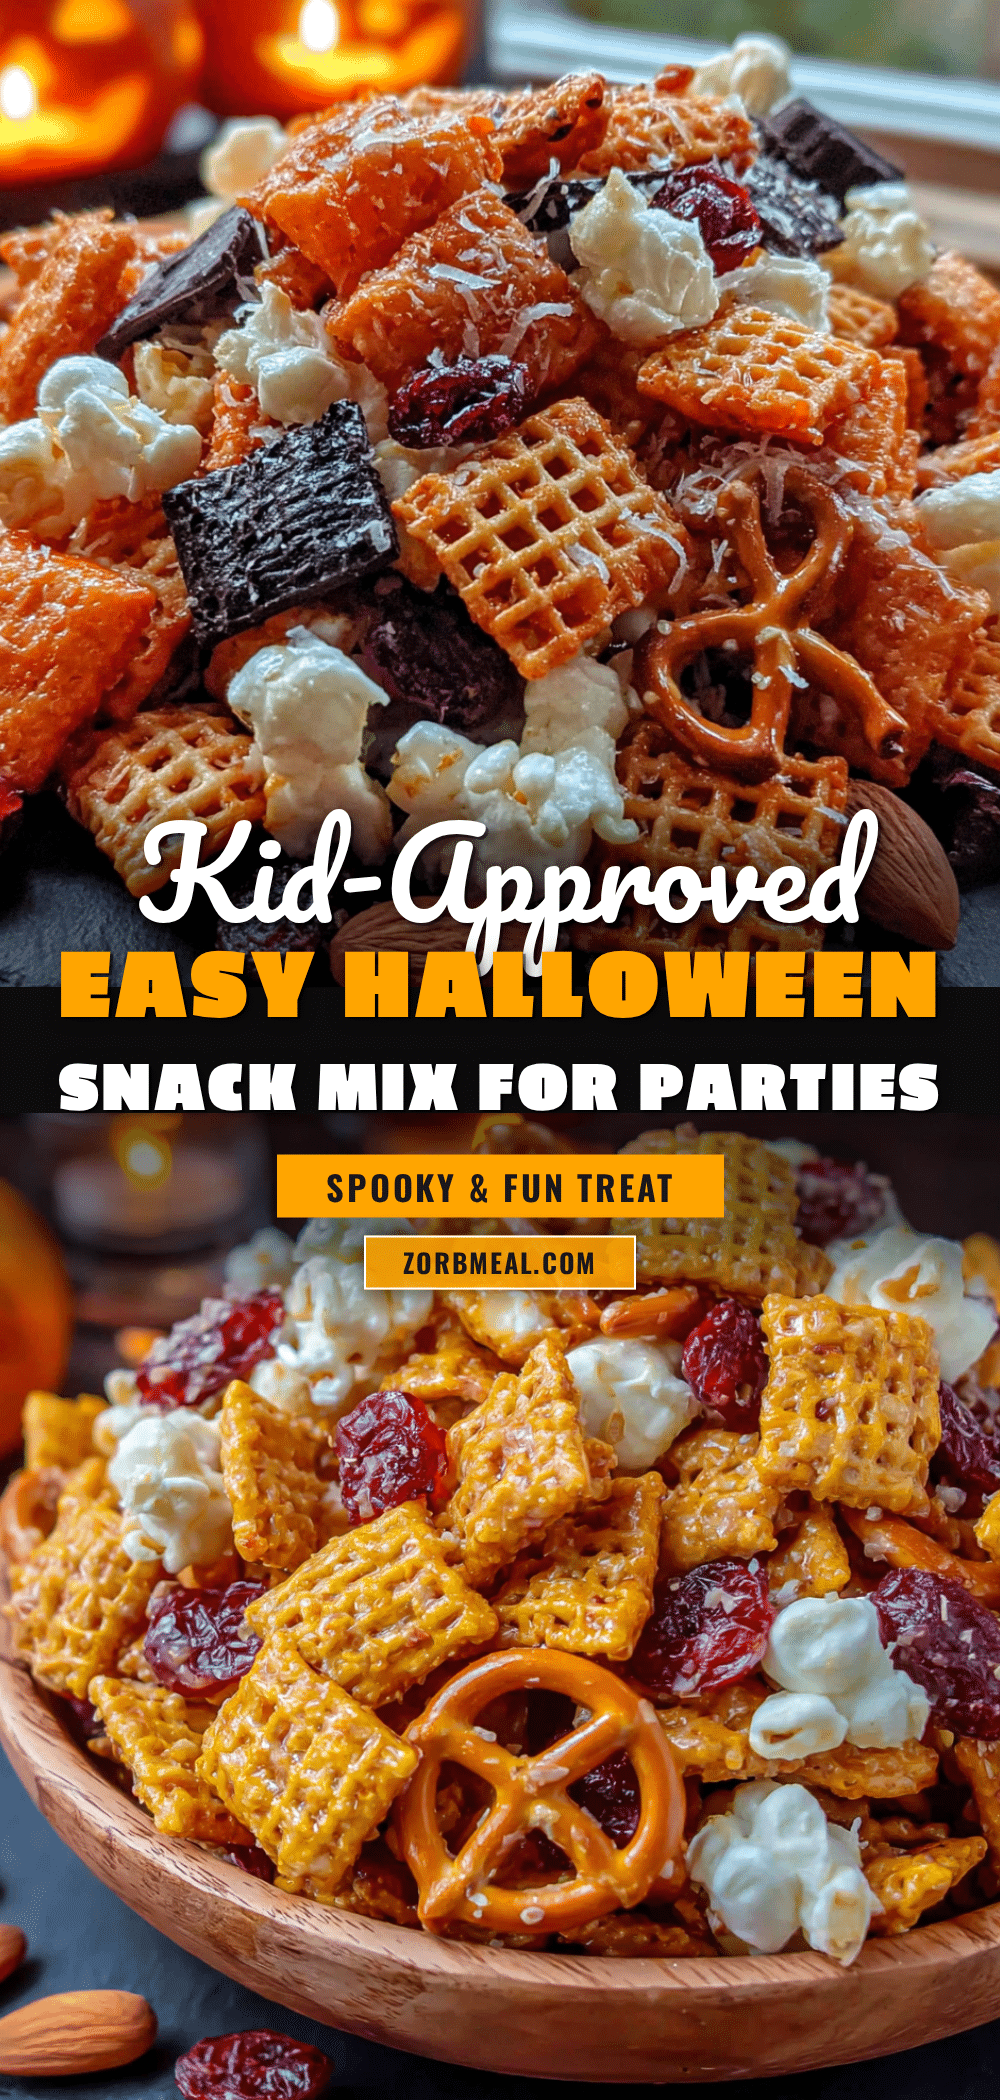
Kid-Approved Easy Halloween Snack Mix for Parties
A quick and easy Halloween snack mix that comes together in under 15 minutes with simple pantry ingredients. Perfect for classroom parties, costume parades, or a fun movie night at home.
- Prep Time: 10 minutes
- Cook Time: 10 minutes
- Total Time: 20 minutes
- Yield: 8 servings 1x
- Category: Snack
- Cuisine: American
Ingredients
- 3 cups pretzel twists, broken into bite-sized pieces
- 3 cups popped popcorn (plain or lightly salted)
- 2 cups square cheese crackers (like Cheez-Its)
- 1 cup dry roasted peanuts (optional; substitute with sunflower seeds or omit for nut-free)
- 1 cup candy corn
- 1 cup candy pumpkins (mellowcreme pumpkins)
- 1/2 cup milk chocolate chips
- 1/2 cup white chocolate chips
- 2 tablespoons melted butter (salted or unsalted)
- 1/2 teaspoon vanilla extract
- 1/4 cup powdered sugar
Instructions
- Prep your base ingredients: Break large pretzel twists into bite-sized pieces. Pop popcorn if needed and let cool completely.
- Combine the dry ingredients: In a large mixing bowl, combine broken pretzels, popcorn, cheese crackers, and peanuts (if using). Toss gently to distribute.
- Add the sweet elements: Pour in candy corn, candy pumpkins, and both types of chocolate chips. Toss gently using a folding motion to avoid crushing the candy corn.
- Optional coating step: Preheat oven to 250°F (120°C). Spread mix on a rimmed baking sheet lined with parchment paper. Melt butter and vanilla together, drizzle over mix, and toss gently. Bake for 8-10 minutes, stirring once halfway through. Let cool completely on the baking sheet.
- Add the finishing touch: If using the coating step, sprinkle powdered sugar over the cooled mix and toss one final time. If skipping the coating step, you can still add a light dusting of powdered sugar for visual effect.
- Package and serve: Transfer to serving bowls, ziplock bags, or airtight containers. Store at room temperature for up to one week.
Notes
Don’t overmix to avoid crushing pretzels and candy corn. If baking, watch oven temperature—250°F is ideal. Let mix cool completely before serving for best texture. Double the batch for parties. Store in an airtight container at room temperature; do not refrigerate. Flavor improves the next day.
Nutrition
- Serving Size: 1/2 cup
- Calories: 180
- Sugar: 14
- Sodium: 220
- Fat: 8
- Saturated Fat: 3
- Carbohydrates: 26
- Fiber: 1
- Protein: 3
Keywords: Halloween snack mix, easy snack mix, kid-friendly snack, party snack, sweet and salty mix, Halloween party food


