My niece Clara asked why I couldn’t just bake the cupcakes in a ghost-shaped pan instead of cutting them out after. I started to explain why that wouldn’t work — then stopped. Honestly, I had no good reason. I’d been making Halloween cupcakes for years, always baking them in standard tins and then carving each one with a cookie cutter. It was messy, wasteful, and half the time the ghosts ended up looking more like lopsided snowmen.
But Clara, all of seven years old, looked at me with that patient expression kids get when adults are being ridiculous. “But why don’t you just buy the pan?” she asked again. I mean, she had a point. I’d been making things harder than they needed to be, probably because I thought that’s how it was supposed to be done. So I ordered a ghost-shaped cupcake pan that very night, feeling a little silly that a second-grader had outsmarted me in the kitchen.
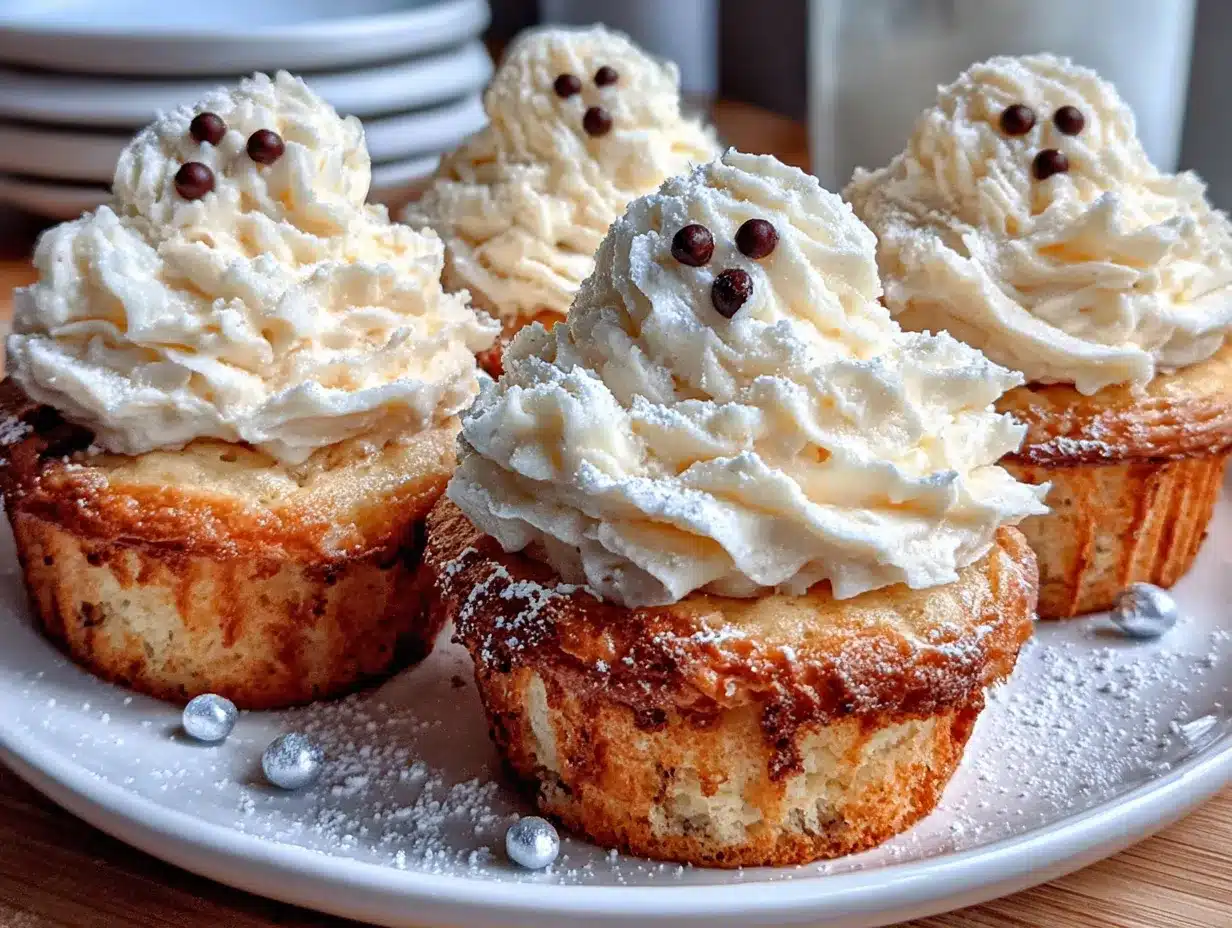
The next weekend, we made these Cozy Ghost-Shaped Vanilla Cupcakes together. And let me tell you — she was right. The batter baked up perfectly in those little ghost molds, each one coming out with a distinct shape that didn’t need any post-bake surgery. The kitchen smelled like vanilla and butter, and Clara carefully placed mini chocolate chips for eyes on each one. I’d never seen her so proud of something she’d helped create.
Now this recipe has become our Halloween tradition. There’s something about pulling a tray of ghost-shaped cupcakes out of the oven that just feels like the season. Maybe you’ve been there — overcomplicating something simple when the answer was right in front of you. These cupcakes are proof that sometimes the easiest path really is the best one. And honestly, I keep making them because they remind me that good things happen when you stop and listen to the people around you — even the ones who barely reach the counter.
Why You’ll Love This Recipe
These Cozy Ghost-Shaped Vanilla Cupcakes are everything you want in a Halloween treat without the stress. They’re cute, they’re delicious, and they come together faster than you’d think. Here’s why they’ve become my go-to for October:
- No Carving Required : The ghost-shaped pan does all the work for you. No more wasting cake scraps or fighting with cookie cutters. Just bake, cool, and decorate.
- Simple Pantry Ingredients : You probably already have everything in your kitchen right now. Butter, sugar, eggs, flour, vanilla — nothing fancy needed.
- Perfect for Halloween Parties : These little ghosts are the star of any Halloween gathering. Kids love them, adults can’t resist them, and they look adorable on any dessert table.
- Kid-Friendly Activity : This is the kind of recipe you can make with little helpers. They can help mix the batter, place the chocolate chip eyes, and dust on the powdered sugar.
- Cozy and Comforting : The vanilla flavor is classic and familiar — the kind of cupcake that feels like a warm hug on a chilly October evening.
What makes these different from other Halloween cupcakes? It’s the shape, honestly. When you bite into one of these ghosts, you get the perfect ratio of tender vanilla cake to creamy frosting. No awkward corners or dry edges. And the texture — let me tell you — it’s soft, moist, and absolutely melts in your mouth. I’ve tested this recipe half a dozen times to get it just right, and I’m confident this is the best version.
This recipe isn’t just good — it’s the kind that makes you smile after the first bite. It’s Halloween fun without the fuss, and it’s become a tradition I genuinely look forward to every year.
What Ingredients You Will Need
This recipe uses simple, wholesome ingredients to create tender, flavorful ghost-shaped cupcakes. Most of these are pantry staples you probably already have on hand.
For the Cupcakes
- 1 ½ cups (190g) all-purpose flour — spoon and level it for the best texture. I prefer Gold Medal for consistent results.
- 1 cup (200g) granulated sugar — adds sweetness and helps create a tender crumb.
- ½ cup (113g) unsalted butter , softened — use good quality butter like Kerrygold for richer flavor.
- 2 large eggs , room temperature — cold eggs can make the batter lumpy, so let them sit out for 30 minutes.
- ½ cup (120ml) whole milk , room temperature — adds moisture and helps the cupcakes rise evenly. You can use 2% if that’s what you have.
- 2 teaspoons vanilla extract — use pure vanilla extract, not imitation. It makes a real difference in flavor.
- 1 ½ teaspoons baking powder — helps the cupcakes rise and gives them a light texture.
- ¼ teaspoon salt — balances the sweetness and enhances the vanilla flavor.
For the Vanilla Buttercream Frosting
- 1 cup (226g) unsalted butter , softened — again, room temperature is key for smooth frosting.
- 3 ½ cups (420g) powdered sugar , sifted — sifting prevents lumps and gives you silky frosting.
- 2 tablespoons whole milk — add more if needed for desired consistency.
- 1 ½ teaspoons vanilla extract — keeps the vanilla theme going strong.
- Pinch of salt — trust me on this. It makes the frosting taste less sweet and more balanced.
For Decoration
- Mini chocolate chips — for the ghost eyes. About 2 per cupcake.
- Powdered sugar — for dusting. It gives the ghosts that spooky, ethereal look.
Ingredient Tips: For the best results, make sure your butter and eggs are truly at room temperature. If you forgot to take them out ahead of time, place the eggs in a bowl of warm water for 5 minutes and microwave the butter in 5-second bursts until it’s soft but not melted. I’ve made this mistake before — cold ingredients can make the batter curdle and the cupcakes turn out dense.
If you’re dairy-free, you can substitute the butter with a good quality vegan butter (I like Miyoko’s) and use oat milk instead of whole milk. The texture will be slightly different but still delicious.
Equipment Needed
You don’t need a fancy kitchen to make these ghosts. Here’s what you’ll need:
- Ghost-shaped cupcake pan — this is the star of the show. I use the Wilton ghost-shaped pan and it works beautifully. You can find them online or at kitchen supply stores.
- Standard 12-cup muffin tin — if you don’t have a ghost pan, you can still make these as regular cupcakes and cut them into ghost shapes. But honestly, the ghost pan is worth the investment.
- Mixing bowls — one large and one medium.
- Electric hand mixer or stand mixer — you can mix by hand, but a mixer makes the job much easier.
- Rubber spatula — for scraping down the bowl and folding in ingredients.
- Cooling rack — essential for letting the cupcakes cool completely before frosting.
- Piping bag with a round tip — or a zip-top bag with the corner snipped off for the frosting.
- Small offset spatula — helpful for smoothing frosting, but a butter knife works too.
Budget-Friendly Alternative: If you don’t want to buy a ghost-shaped pan, you can use a standard muffin tin and cut the cooled cupcakes with a ghost-shaped cookie cutter. You’ll have some scraps, but they make great snacks for the baker!
Preparation Method
Let’s get baking! Here’s how to make these adorable Cozy Ghost-Shaped Vanilla Cupcakes step by step.
Step 1: Preheat and Prep
Preheat your oven to 350°F (175°C). Grease your ghost-shaped cupcake pan thoroughly with butter or non-stick spray. I like to use a pastry brush to make sure every nook and cranny of the ghost shape is coated — nothing worse than a ghost that won’t come out of the pan.
Step 2: Mix the Dry Ingredients
In a medium bowl, whisk together the flour, baking powder, and salt. Set this aside for now. Whisking aerates the flour and ensures the baking powder is evenly distributed, which helps your cupcakes rise evenly.
Step 3: Cream the Butter and Sugar
In a large bowl, beat the softened butter and granulated sugar together with an electric mixer on medium speed until light and fluffy. This takes about 3 to 4 minutes. You’ll know it’s ready when the mixture looks pale and has increased in volume. Don’t rush this step — proper creaming is what gives your cupcakes that tender, melt-in-your-mouth texture.
Step 4: Add the Eggs and Vanilla
Add the eggs one at a time, beating well after each addition. Scrape down the sides of the bowl with your spatula as needed. Then add the vanilla extract and beat until combined. The mixture might look a little curdled at this point — that’s totally normal, especially if your eggs were slightly cooler than the butter.
Step 5: Alternate Adding Dry Ingredients and Milk
With the mixer on low speed, add about one-third of the flour mixture, then half of the milk. Mix until just combined. Repeat with another third of flour, the remaining milk, and then the final third of flour. Mix until just combined — overmixing will make your cupcakes tough. Use your spatula to give the batter a final fold from the bottom to make sure everything is incorporated.
Step 6: Fill the Ghost Pan
Using a cookie scoop or a spoon, fill each ghost-shaped cavity about two-thirds full. Don’t overfill — these ghosts need room to rise. A standard ghost pan makes about 8 to 10 cupcakes, depending on the size. If you have extra batter, you can bake a few regular cupcakes in a muffin tin.
Step 7: Bake
Bake for 14 to 17 minutes, or until a toothpick inserted into the center comes out clean. The ghosts should be lightly golden on top. Let them cool in the pan for 5 minutes, then carefully transfer them to a cooling rack to cool completely. This is important — if you try to frost them while they’re still warm, the frosting will melt into a sad puddle.
Step 8: Make the Frosting
While the cupcakes cool, make the buttercream. Beat the softened butter on medium speed until smooth and creamy, about 2 minutes. Gradually add the sifted powdered sugar, one cup at a time, beating on low speed until incorporated. Add the vanilla extract, milk, and salt, then increase the speed to medium-high and beat for 3 to 4 minutes until light and fluffy. If the frosting is too thick, add a little more milk. If it’s too thin, add a bit more powdered sugar.
Step 9: Decorate the Ghosts
Once the cupcakes are completely cool, it’s time to decorate. Fit your piping bag with a round tip and fill it with frosting. Pipe a generous swirl onto each ghost cupcake, covering the top completely. While the frosting is still soft, press two mini chocolate chips into each ghost for eyes. Finally, dust the cupcakes lightly with powdered sugar using a fine-mesh sieve — this gives them that spooky, ghostly appearance.
Cooking Tips & Techniques
I’ve made these Cozy Ghost-Shaped Vanilla Cupcakes more times than I can count, and I’ve learned a few things along the way. Here are my best tips for success:
Room Temperature Ingredients Matter. I cannot stress this enough. When your butter, eggs, and milk are all at room temperature, they emulsify properly, creating a smooth batter that bakes into tender cupcakes. Cold ingredients can cause the batter to separate and the cupcakes to turn out dense. Set everything out on the counter at least 30 minutes before you start.
Don’t Overmix the Batter. I learned this one the hard way. The first time I made these, I was so excited that I kept mixing until the batter was perfectly smooth. The cupcakes came out tough and a little rubbery. Mix just until the flour disappears into the batter — a few small lumps are totally fine.
Grease the Pan Well. Ghost-shaped pans have lots of nooks and crannies, and batter loves to hide in them. Use a pastry brush to get butter into every corner. I also like to dust the greased pan with a little flour — it creates an extra layer of non-stick insurance.
Let Them Cool Completely. I know it’s tempting to frost them while they’re still warm, but resist the urge. Warm cupcakes will melt your buttercream into a goopy mess. Give them a full 30 minutes on the cooling rack. If you’re in a hurry, you can pop them in the fridge for 15 minutes.
Pipe with Confidence. When you’re piping the frosting, start from the outside edge and work your way in, creating a spiral that builds up into a peak. This gives you that classic ghost shape. If you mess up, just scrape off the frosting and start again — no one will ever know.
Timing Strategy: I like to bake the cupcakes the day before and store them in an airtight container at room temperature. Then on the day of the party, I just make the frosting and decorate. It takes the pressure off and makes the whole process feel much more relaxed.
Variations & Adaptations
One of the best things about this recipe is how easy it is to customize. Here are some variations I’ve tried and loved:
Chocolate Ghosts
Swap out ¼ cup of the flour for ¼ cup of unsweetened cocoa powder. The chocolate version is rich and decadent, and the dark color makes the powdered sugar dusting really pop. My nephew declared these “the best ghosts ever.”
Gluten-Free Version
Use a 1:1 gluten-free flour blend like Bob’s Red Mill. The texture will be slightly more crumbly, but the flavor is still fantastic. Make sure your baking powder is also gluten-free. I’ve made these for a gluten-sensitive friend and she couldn’t tell the difference.
Vegan Ghosts
Substitute the butter with vegan butter, use flax eggs (1 tablespoon ground flaxseed mixed with 3 tablespoons water per egg), and use oat milk. The cupcakes will be a little denser, but they’re still delicious. For the frosting, use vegan butter and check that your powdered sugar is vegan-friendly.
Spooky Spider Webs
Instead of just chocolate chip eyes, pipe a small spider web on each ghost using melted dark chocolate. Use a piping bag with a tiny tip and start from the center, spiraling outward. Then drag a toothpick from the center to the edges to create the web effect. It’s extra work, but the result is stunning.
Pumpkin Spice Ghosts
Add 1 teaspoon of pumpkin pie spice to the dry ingredients and substitute ¼ cup of the milk with pumpkin puree. These are perfect for a cozy fall evening, and the warm spices pair beautifully with the vanilla frosting.
Serving & Storage Suggestions
These Cozy Ghost-Shaped Vanilla Cupcakes are best served at room temperature. The frosting is soft and creamy, and the cake is tender and moist. Arrange them on a white platter or a cake stand for maximum ghostly effect.
For a Halloween Party: Place the ghosts on a platter lined with black or orange tissue paper. You can add some fake spider webs around the edges for a spooky touch. They’re also adorable on a dessert table alongside pumpkin-shaped cookies or caramel apples.
Pairing Suggestions: These cupcakes go beautifully with a warm cup of apple cider or a pumpkin spice latte. For the kids, serve them with a glass of cold milk or hot chocolate. The vanilla flavor is classic enough to pair with almost anything.
Storage: Store leftover cupcakes in an airtight container at room temperature for up to 3 days. If you stack them, place a sheet of wax paper between layers to protect the frosting. Do not refrigerate them — the fridge will dry out the cake and make the frosting hard.
Freezing: You can freeze the unfrosted cupcakes for up to 2 months. Wrap each one tightly in plastic wrap, then place them in a freezer bag. When you’re ready to serve, thaw them at room temperature for about an hour, then frost and decorate. The frosting itself doesn’t freeze well, so always make it fresh.
Flavor Development: Honestly, these cupcakes taste even better the next day. The flavors have time to meld together, and the texture becomes even more tender. If you can resist eating them all on day one, you’ll be rewarded on day two.
Nutritional Information & Benefits
Here’s the approximate nutritional breakdown for one ghost-shaped cupcake with frosting (based on a recipe that makes 10 cupcakes):
- Calories: 380
- Fat: 20g
- Carbohydrates: 48g
- Protein: 3g
- Sugar: 36g
These are definitely a treat, not an everyday snack. But let’s be honest — Halloween is about having fun, and these cupcakes are worth every bite. The vanilla extract in the recipe contains small amounts of antioxidants, and the butter provides vitamin A. The eggs add protein and healthy fats.
Dietary Considerations: This recipe contains dairy, eggs, and gluten. For allergen-friendly options, check out the variations section above. If you’re watching your sugar intake, you can reduce the sugar in the frosting by using a sugar-free powdered sugar substitute, though the texture will be slightly different.
My personal philosophy? Enjoy the treat, share it with people you love, and don’t stress about the numbers. These ghosts are made for cozy Halloween moments, and that’s what matters most.
Conclusion
These Cozy Ghost-Shaped Vanilla Cupcakes have become a staple in my Halloween rotation, and I think they’ll become one in yours too. They’re simple enough for a weeknight baking session, cute enough for a party, and delicious enough that you’ll find yourself making them long after October is over.
What I love most about this recipe is how it brings people together. Whether you’re baking with a curious seven-year-old who has better ideas than you do, or just spending a quiet evening in the kitchen making something fun, these ghosts have a way of making the season feel special. They’re not perfect — some of mine come out lopsided or with chocolate chip eyes that are slightly crooked — but that’s part of their charm.
I’d love to hear how your ghost cupcakes turn out! Leave a comment below and let me know if you tried any of the variations, or if you came up with your own twist. Share a photo on Pinterest and tag me so I can see your spooky creations. And if you’re looking for more Halloween baking ideas, be sure to check out my Halloween dessert recipes collection for more seasonal inspiration.
Until next time, happy baking — and don’t forget to listen to the little voices in your kitchen. They might just have the best ideas of all.
Frequently Asked Questions
Can I use a regular muffin pan instead of a ghost-shaped pan?
Absolutely! If you don’t have a ghost-shaped pan, bake the batter in a standard 12-cup muffin tin. Once the cupcakes are completely cool, use a ghost-shaped cookie cutter to cut out the ghost shapes. You’ll have some cake scraps, but they make a tasty snack for the baker.
How do I keep the chocolate chip eyes from falling off?
Press the chocolate chips into the frosting while it’s still soft and slightly tacky. If the frosting has already set, dab a tiny bit of fresh frosting on the back of each chip before pressing it into place. This acts like glue and keeps the eyes secure.
Can I make these cupcakes ahead of time?
Yes! Bake the cupcakes up to 2 days in advance and store them in an airtight container at room temperature. Make the frosting and decorate them on the day you plan to serve them. The unfrosted cupcakes also freeze well for up to 2 months.
Why did my cupcakes turn out dense and heavy?
This usually happens when the batter is overmixed or the ingredients were too cold. Mix the batter just until the flour disappears, and make sure your butter, eggs, and milk are at room temperature before you start. Overmixing develops the gluten too much, which makes the cupcakes tough.
Can I use a different frosting flavor?
Of course! Cream cheese frosting is delicious with these vanilla cupcakes. You can also try chocolate buttercream or a simple glaze made with powdered sugar and milk. For a fun twist, add a drop of orange food coloring to the frosting for a Halloween-themed look.
Pin This Recipe!
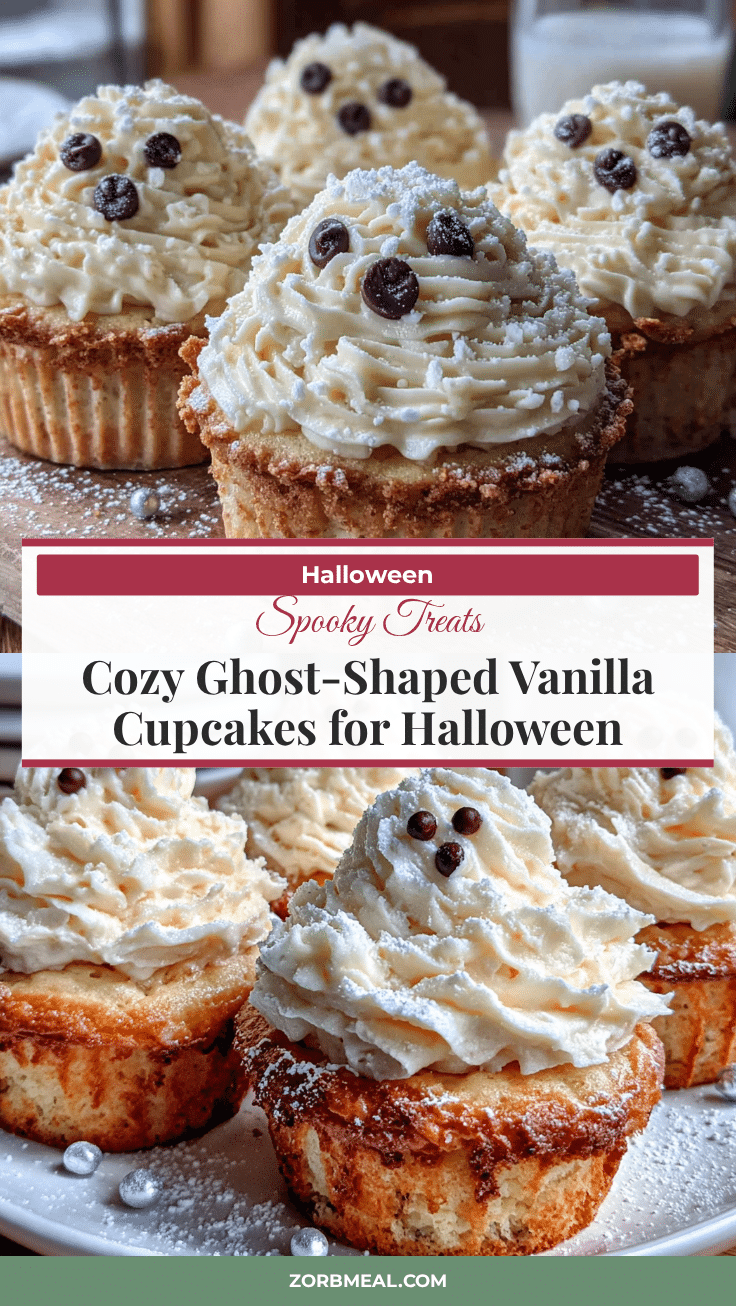
Cozy Ghost-Shaped Vanilla Cupcakes: Easy Halloween Treat
These adorable ghost-shaped vanilla cupcakes are a fun and easy Halloween treat. Made with simple pantry ingredients and a special ghost-shaped pan, they require no carving and are perfect for parties or baking with kids.
- Prep Time: 20 minutes
- Cook Time: 17 minutes
- Total Time: 37 minutes
- Yield: 10 servings 1x
- Category: Dessert
- Cuisine: American
Ingredients
- 1 ½ cups (190g) all-purpose flour
- 1 cup (200g) granulated sugar
- ½ cup (113g) unsalted butter, softened
- 2 large eggs, room temperature
- ½ cup (120ml) whole milk, room temperature
- 2 teaspoons vanilla extract
- 1 ½ teaspoons baking powder
- ¼ teaspoon salt
- 1 cup (226g) unsalted butter, softened (for frosting)
- 3 ½ cups (420g) powdered sugar, sifted (for frosting)
- 2 tablespoons whole milk (for frosting)
- 1 ½ teaspoons vanilla extract (for frosting)
- Pinch of salt (for frosting)
- Mini chocolate chips (for decoration)
- Powdered sugar (for dusting)
Instructions
- Preheat your oven to 350°F (175°C). Grease your ghost-shaped cupcake pan thoroughly with butter or non-stick spray.
- In a medium bowl, whisk together the flour, baking powder, and salt. Set aside.
- In a large bowl, beat the softened butter and granulated sugar together with an electric mixer on medium speed until light and fluffy, about 3 to 4 minutes.
- Add the eggs one at a time, beating well after each addition. Scrape down the sides of the bowl as needed. Add the vanilla extract and beat until combined.
- With the mixer on low speed, add about one-third of the flour mixture, then half of the milk. Mix until just combined. Repeat with another third of flour, the remaining milk, and then the final third of flour. Mix until just combined. Use a spatula to give the batter a final fold from the bottom.
- Using a cookie scoop or spoon, fill each ghost-shaped cavity about two-thirds full.
- Bake for 14 to 17 minutes, or until a toothpick inserted into the center comes out clean. Let them cool in the pan for 5 minutes, then carefully transfer them to a cooling rack to cool completely.
- While the cupcakes cool, make the buttercream. Beat the softened butter on medium speed until smooth and creamy, about 2 minutes. Gradually add the sifted powdered sugar, one cup at a time, beating on low speed until incorporated. Add the vanilla extract, milk, and salt, then increase the speed to medium-high and beat for 3 to 4 minutes until light and fluffy.
- Once the cupcakes are completely cool, fit a piping bag with a round tip and fill it with frosting. Pipe a generous swirl onto each ghost cupcake, covering the top completely. While the frosting is still soft, press two mini chocolate chips into each ghost for eyes. Dust the cupcakes lightly with powdered sugar using a fine-mesh sieve.
Notes
For best results, ensure butter, eggs, and milk are at room temperature. Do not overmix the batter. Grease the ghost-shaped pan thoroughly to prevent sticking. Let cupcakes cool completely before frosting. Store in an airtight container at room temperature for up to 3 days. Unfrosted cupcakes can be frozen for up to 2 months.
Nutrition
- Serving Size: 1 ghost-shaped cupca
- Calories: 380
- Sugar: 36
- Fat: 20
- Carbohydrates: 48
- Protein: 3
Keywords: Halloween cupcakes, ghost cupcakes, vanilla cupcakes, easy Halloween treat, kid-friendly baking, ghost-shaped cupcakes


