My seven-year-old nephew asked why I couldn’t just mash the bananas right in the flour bowl instead of dirtying a separate dish. I started to explain why that wouldn’t work—something about over-mixing and gluten development. Then I stopped. Honestly, I had no good reason other than “that’s how I’ve always done it.” So I let him dump the flour right on top of the bananas. We stirred it all together in one bowl, and that loaf of easy one-bowl banana bread turned out lighter and more tender than any batch I’d made before. I mean, really—I’d been washing an extra bowl for nothing for over a decade. The kid was right. The whole thing came together in about ten minutes of active work, and the smell drifting through the kitchen had my sister wandering in asking if she could “test a slice.” Maybe you’ve been there, stubbornly sticking to a method just because it’s what you learned first. This recipe is my apology to every dirty dish I created unnecessarily.
This easy one-bowl banana bread has become our go-to for using up those spotty bananas sitting on the counter. It’s the kind of recipe that makes you feel like a hero when you’re short on time and patience. The best part? It costs next to nothing to make, and kids actually devour it without complaint. I’ve made it at least thirty times now, tweaking the sugar and oil amounts until it landed exactly right. This version is forgiving, flexible, and somehow always turns out perfect even when you’re distracted by a toddler or a phone call. Let me tell you, that’s the kind of recipe every home cook needs in their back pocket.
Why You’ll Love This Recipe
After testing this recipe across multiple batches with different ovens and banana ripeness levels, I can confidently say it delivers consistent results every single time. Here’s what makes it stand out from the dozens of banana bread recipes floating around the internet:
- Quick & Easy: From start to oven in under 15 minutes. The one-bowl method means less cleanup and more time enjoying your morning coffee.
- Simple Ingredients: You probably have everything in your pantry right now. No weird extracts, no specialty flours, no trips to three different stores.
- Perfect for Busy Families: Great for breakfast on the go, after-school snacks, or a budget-friendly dessert that feels like a treat.
- Crowd-Pleaser: My nephew’s entire class requested the recipe after he brought slices for a classroom celebration. Even picky eaters ask for seconds.
- Unbelievably Moist: The combination of oil and mashed bananas creates a texture that stays soft for days—if it lasts that long.
What makes this version different from every other banana bread recipe? It’s the technique of mashing the bananas directly in the mixing bowl and adding the dry ingredients right on top. This method minimizes gluten development, resulting in a tender crumb that doesn’t get tough or rubbery. Plus, you save yourself a dish to wash. That’s a win-win in my book.
This isn’t just another banana bread recipe. It’s the one you’ll turn to when the bananas are turning brown and you need something fast. It’s the one that makes your kitchen smell like comfort and home. And it’s the one that proves sometimes the simplest approach really is the best.
What Ingredients You Will Need
This recipe uses simple, everyday ingredients to deliver a moist, flavorful loaf without any fuss. Most of these are pantry staples you likely already have on hand.
- Overripe bananas, mashed (about 3 medium or 2 large) – The darker and spottier, the better. They should be soft and almost liquidy inside. If your bananas aren’t ripe enough, you can speed things up by baking them at 180°C (350°F) for 10 minutes until the skins turn black. Let them cool before mashing.
- Granulated sugar (150g or ¾ cup) – Standard white sugar works beautifully. You can reduce to 100g (½ cup) if your bananas are very sweet, but I wouldn’t go lower than that.
- Vegetable oil (80ml or ⅓ cup) – I use canola or sunflower oil. Melted coconut oil or melted butter also work, but butter will give a slightly denser texture. Avoid olive oil—the flavor is too strong here.
- Large eggs (2, room temperature) – If you forget to take them out of the fridge, place them in a bowl of warm water for 5 minutes. Room temperature eggs incorporate more evenly into the batter.
- Vanilla extract (1 teaspoon) – Pure vanilla is lovely, but imitation works perfectly fine for this recipe. Don’t skip it—it rounds out the banana flavor beautifully.
- All-purpose flour (240g or 2 cups) – Spoon and level your flour rather than scooping directly from the bag. Scooping packs the flour down and can make your bread dry. If you need a gluten-free version, use a 1:1 gluten-free baking flour blend.
- Baking soda (1 teaspoon) – This is the main leavening agent. Make sure it’s fresh—test by dropping a little into vinegar; if it bubbles vigorously, it’s good to go.
- Salt (½ teaspoon) – Fine sea salt or table salt. Don’t skip this—it balances the sweetness and enhances the banana flavor.
- Optional add-ins: 100g (½ cup) chocolate chips, 60g (½ cup) chopped walnuts, or 80g (½ cup) dried cranberries. I usually add chocolate chips because my nephew insists on them.
For the best texture, I recommend using Gold Medal or King Arthur Flour if you’re in the US. In the UK, Allinson or Waitrose own-brand work well. The key is to weigh your flour if possible—it makes a noticeable difference in moisture.
Equipment Needed
You genuinely don’t need much for this recipe. Here’s what you’ll need:
- One large mixing bowl – Any size from 2 to 3 litres works. I use a sturdy ceramic bowl because it doesn’t slide around the counter.
- A fork or potato masher – For mashing the bananas. A fork works perfectly, but a masher is faster if you make this often.
- A whisk or wooden spoon – For combining the batter. A silicone spatula also works well for scraping the sides.
- A 9×5-inch loaf pan (23x13cm) – A standard loaf pan is ideal. If you only have an 8×4-inch pan, increase the baking time by 5-10 minutes and check for doneness with a toothpick.
- Parchment paper or non-stick spray – For lining the pan. Parchment paper with overhanging edges makes lifting the loaf out effortless.
- Cooling rack – A wire rack allows air to circulate around the loaf, preventing a soggy bottom.
- Measuring cups and spoons – Or a kitchen scale for more accurate measurements.
If you don’t have a loaf pan, you can bake the batter in a 9-inch round cake pan or even as muffins (bake muffins at 180°C/350°F for 18-22 minutes). I’ve done both in a pinch, and they work great.
Preparation Method
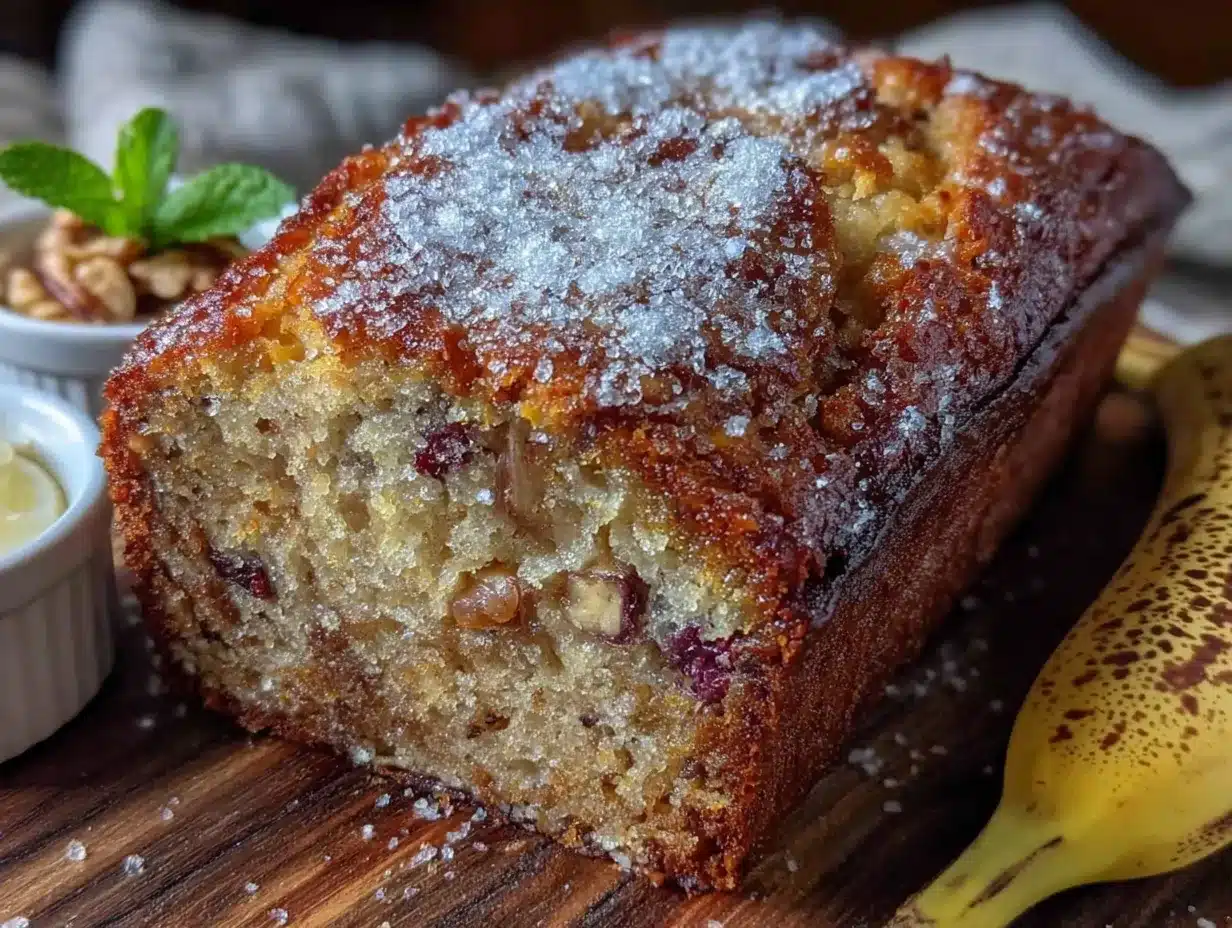
Preheat your oven to 180°C (350°F). Grease your loaf pan or line it with parchment paper, leaving some overhang on the long sides. This makes lifting the finished bread out so much easier.
- Mash the bananas directly in the mixing bowl. Peel the bananas and drop them into your large bowl. Use a fork or potato masher to mash them until they’re mostly smooth with a few small lumps remaining. You want some texture—completely smooth banana paste can make the bread dense. This should take about 30 seconds.
- Add the wet ingredients. To the mashed bananas, add the sugar, oil, eggs, and vanilla extract. Whisk everything together until well combined. The mixture will look slightly thin and glossy—that’s exactly right. If you’re using chocolate chips or nuts, don’t add them yet.
- Add the dry ingredients directly on top. Sprinkle the flour, baking soda, and salt over the wet mixture. Don’t stir yet—just let it sit on top. This helps prevent the baking soda from activating too early. If you’re adding chocolate chips or nuts, scatter them over the flour now.
- Stir until just combined. Use a wooden spoon or silicone spatula to fold the flour into the wet ingredients. Stir only until you no longer see streaks of flour. A few small lumps are fine—over-mixing develops gluten and makes the bread tough. The batter should be thick but scoopable, like a very thick muffin batter.
- Pour the batter into the prepared pan. Use your spatula to scrape every bit of batter into the loaf pan. Smooth the top gently—it will even out as it bakes. Tap the pan on the counter once or twice to release any air bubbles.
- Bake for 50-60 minutes. Place the pan in the center of the preheated oven. Bake until a toothpick inserted into the center comes out clean or with a few moist crumbs attached. The top should be golden brown and cracked in a few places—that’s the signature look of a good banana bread. If the top is browning too quickly after 40 minutes, tent loosely with aluminum foil.
- Cool in the pan for 10 minutes. Remove the loaf from the oven and let it rest in the pan on a cooling rack. This allows the structure to set before you try to remove it. After 10 minutes, lift the loaf out using the parchment paper overhang and transfer it to the cooling rack to cool completely.
- Slice and serve. Wait until the loaf is completely cool before slicing—warm banana bread tends to crumble. Use a serrated knife for clean slices. If you can’t wait, I completely understand. Just be prepared for some crumbs.
Cooking Tips & Techniques
After making this recipe more times than I can count, here are the things I wish someone had told me from the start:
Don’t over-mix the batter. This is the most common mistake I see. Stir until the flour disappears, then stop. Over-mixing develops gluten, which gives you a tough, rubbery loaf instead of a tender, soft one. I learned this the hard way when I made a batch that could have doubled as a doorstop. The batter should look slightly lumpy—that’s a good sign.
Use really ripe bananas. The bananas should be almost black with brown spots covering most of the peel. They should feel soft when you squeeze them. Green or yellow bananas don’t have enough natural sugar or moisture, and your bread will be bland and dry. If you only have slightly ripe bananas, you can add an extra tablespoon of sugar and a tablespoon of milk or yogurt to compensate.
Check for doneness with a toothpick. Insert a toothpick or cake tester into the center of the loaf. If it comes out clean or with just a few moist crumbs, it’s done. If it comes out with wet batter, give it another 5 minutes. Oven temperatures vary, so start checking at 50 minutes. My oven runs hot, so mine is usually done at 52 minutes.
Let it cool completely before slicing. I know it’s tempting to cut into a warm loaf, but the crumb needs time to set. Cutting too early can result in a gummy texture and slices that fall apart. Patience pays off here—I promise.
Measure your flour correctly. Spoon the flour into your measuring cup and level it off with a straight edge. Scooping directly from the bag can add up to 25% more flour, which dries out your bread. If you have a kitchen scale, weigh the flour for the most consistent results.
Variations & Adaptations
This recipe is incredibly flexible. Here are some variations I’ve tried and loved:
Chocolate Chip Banana Bread: Add 100g (½ cup) of semi-sweet or milk chocolate chips to the batter along with the flour. This is my nephew’s favorite version, and honestly, it’s hard to resist. You can also swirl in a tablespoon of cocoa powder for a double-chocolate version.
Nutty Banana Bread: Fold in 60g (½ cup) of chopped walnuts or pecans. Toast them lightly in a dry pan first for extra flavor. My sister-in-law swears by this version with a sprinkle of cinnamon sugar on top before baking.
Vegan Banana Bread: Replace the eggs with two “flax eggs” (2 tablespoons ground flaxseed mixed with 6 tablespoons water, left to sit for 5 minutes). Use a plant-based oil and ensure your sugar is vegan-friendly. The texture is slightly denser but still delicious.
Gluten-Free Banana Bread: Substitute the all-purpose flour with a 1:1 gluten-free baking blend that contains xanthan gum. I’ve had good results with Bob’s Red Mill and King Arthur brands. Add an extra tablespoon of oil to compensate for the drier texture of gluten-free flours.
Spiced Banana Bread: Add 1 teaspoon of cinnamon, ½ teaspoon of nutmeg, and ¼ teaspoon of ground ginger to the flour mixture. This version is especially cozy in autumn and pairs beautifully with a cup of chai tea.
Serving & Storage Suggestions
This banana bread is best served at room temperature, but a warm slice with a pat of butter melting into it is something special. Toast slices lightly in a toaster or under the broiler for a crisp exterior and soft, warm center. It’s wonderful for breakfast with a cup of coffee, as an afternoon snack with a glass of milk, or even as a simple dessert with a scoop of vanilla ice cream.
For storage, wrap the completely cooled loaf tightly in plastic wrap or aluminum foil. It will keep at room temperature for up to 3 days. I find the flavor actually improves on the second day as the banana flavor deepens. If your kitchen is warm or humid, store it in the refrigerator to prevent mold, but bring slices to room temperature before serving for the best texture.
This bread freezes beautifully. Wrap the cooled loaf in plastic wrap, then in a layer of aluminum foil, and place it in a freezer bag. It will keep for up to 3 months. To thaw, leave it at room temperature for a few hours or overnight in the refrigerator. You can also freeze individual slices for quick grab-and-go snacks—just wrap each slice separately.
For reheating, pop a slice in the microwave for 10-15 seconds for a soft, warm treat, or toast it for a crunchy exterior. The flavors continue to develop as it sits, so don’t be surprised if day-old banana bread tastes even better than fresh.
Nutritional Information & Benefits
Per slice (based on 10 slices per loaf), this banana bread contains approximately 220 calories, 8g fat, 34g carbohydrates, 3g protein, and 2g fiber. These values will vary slightly based on your specific ingredients and any add-ins.
Bananas are a great source of potassium, vitamin B6, and vitamin C. They also provide natural sweetness, which allows us to use less refined sugar than many traditional recipes. The oil provides healthy fats that help keep you full and satisfied. If you’re watching your sugar intake, you can reduce the sugar to 100g (½ cup) and rely on very ripe bananas for sweetness.
This recipe is naturally dairy-free if you use a plant-based oil. It can be made gluten-free and vegan with the substitutions listed above. It contains wheat and eggs in its standard form, so be mindful of allergies. For nut-free versions, simply omit the nuts or use seeds like pumpkin or sunflower seeds instead.
I love that this bread feels indulgent but uses wholesome, recognizable ingredients. It’s the kind of treat you can feel good about giving your family—real food that tastes like a hug.
Conclusion
This easy one-bowl banana bread has become a staple in my kitchen for good reason. It’s simple, forgiving, and always delivers a moist, tender loaf that everyone loves. The one-bowl method saves time and cleanup, the ingredients are affordable and accessible, and the result is genuinely delicious. Whether you’re a seasoned baker or someone who rarely turns on the oven, this recipe will make you look like a pro.
I love that this recipe came from a moment of letting go of my own stubbornness and listening to a seven-year-old’s simple question. Sometimes the best recipes are the ones that teach us something. I hope this banana bread brings you the same warmth and comfort it’s brought to my family.
I’d love to hear how yours turns out! Drop a comment below with your favorite add-ins or any tweaks you made. Did your kids request it again? Did you discover a new favorite variation? Share your banana bread stories—I read every single one. Happy baking, friends!
Frequently Asked Questions
Can I use frozen bananas for this recipe?
Absolutely! Frozen bananas work wonderfully. Thaw them completely at room temperature, then drain off any excess liquid before mashing. The texture will be slightly softer, but the flavor is even more concentrated. I often keep a bag of peeled, overripe bananas in my freezer specifically for this recipe.
Why did my banana bread turn out dry?
Dry banana bread usually comes from one of three issues: too much flour, over-baking, or not enough banana. Make sure you’re measuring your flour correctly by spooning it into the cup and leveling it off. Check your bread at 50 minutes with a toothpick, and use very ripe bananas for maximum moisture.
Can I make this recipe into muffins instead?
Yes! This batter makes about 12 standard muffins. Line a muffin tin with paper liners and fill each cup about two-thirds full. Bake at 180°C (350°F) for 18-22 minutes, or until a toothpick inserted into the center comes out clean. Muffins bake faster than a loaf, so start checking at 18 minutes.
How do I know when my banana bread is fully baked?
Insert a toothpick or cake tester into the center of the loaf. If it comes out clean or with a few moist crumbs attached, it’s done. If it comes out with wet batter, bake for another 5 minutes and check again. The top should be golden brown and cracked, and the edges should be pulling away slightly from the pan.
Can I reduce the sugar in this recipe?
Yes, you can reduce the sugar to 100g (½ cup) if your bananas are very ripe and sweet. The bread will be slightly less sweet but still delicious. I wouldn’t recommend going below that amount, as sugar contributes to the texture and moisture of the bread as well as the sweetness.
Pin This Recipe!
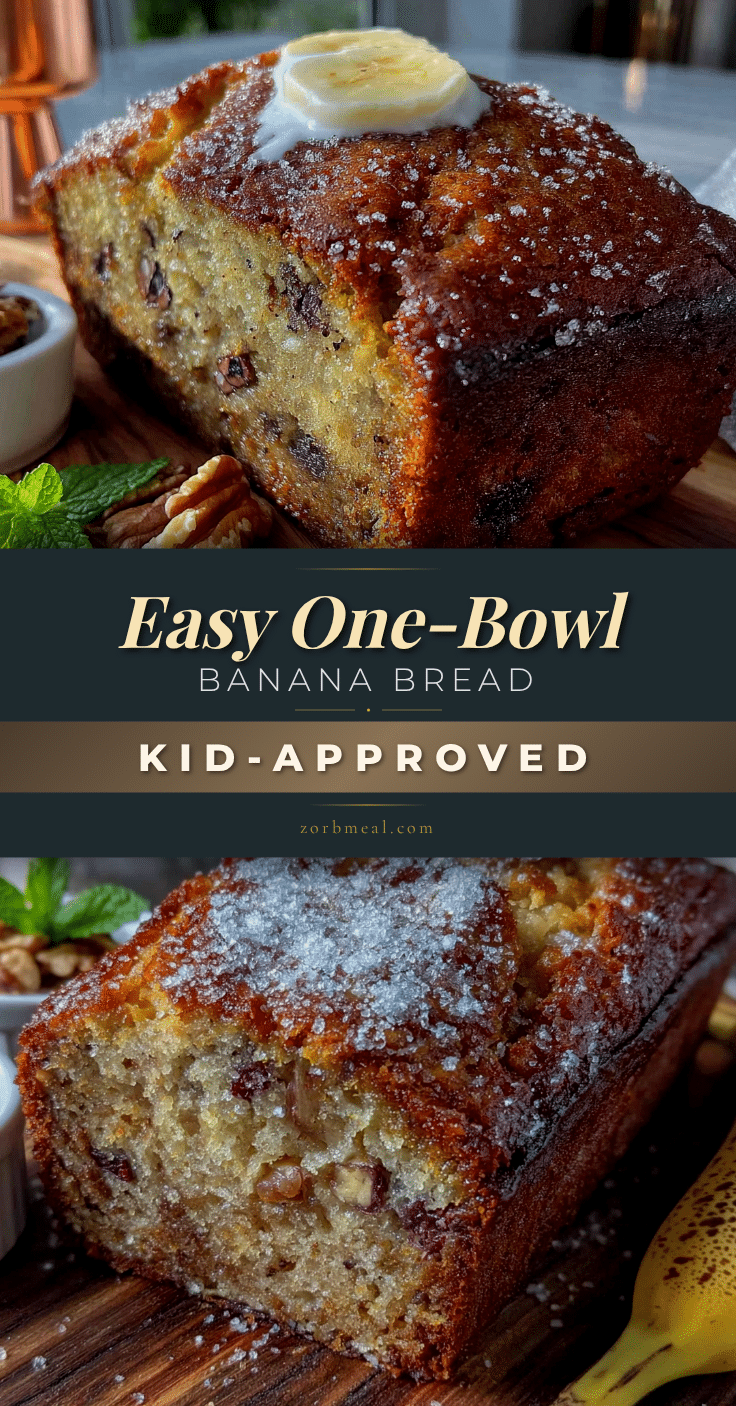
Easy One-Bowl Banana Bread: Best Homemade Recipe
This easy one-bowl banana bread is moist, tender, and comes together in under 15 minutes. It’s the perfect way to use up overripe bananas and requires minimal cleanup.
- Prep Time: 15 minutes
- Cook Time: 55 minutes
- Total Time: 1 hour 10 minutes
- Yield: 10 servings 1x
- Category: Dessert
- Cuisine: American
Ingredients
- 3 medium or 2 large overripe bananas, mashed
- 150g (¾ cup) granulated sugar
- 80ml (⅓ cup) vegetable oil (canola or sunflower)
- 2 large eggs, room temperature
- 1 teaspoon vanilla extract
- 240g (2 cups) all-purpose flour
- 1 teaspoon baking soda
- ½ teaspoon salt
- Optional: 100g (½ cup) chocolate chips, 60g (½ cup) chopped walnuts, or 80g (½ cup) dried cranberries
Instructions
- Preheat oven to 180°C (350°F). Grease a 9×5-inch loaf pan or line with parchment paper, leaving overhang on the long sides.
- Mash the bananas directly in a large mixing bowl using a fork or potato masher until mostly smooth with a few small lumps.
- Add sugar, oil, eggs, and vanilla extract to the mashed bananas. Whisk until well combined and glossy.
- Sprinkle flour, baking soda, and salt over the wet mixture. Do not stir yet. If using add-ins, scatter them over the flour.
- Fold the dry ingredients into the wet mixture using a wooden spoon or silicone spatula until just combined. Do not over-mix; a few lumps are fine.
- Pour the batter into the prepared loaf pan and smooth the top. Tap the pan on the counter once or twice to release air bubbles.
- Bake for 50-60 minutes, or until a toothpick inserted into the center comes out clean or with a few moist crumbs. If the top browns too quickly, tent with foil after 40 minutes.
- Cool in the pan for 10 minutes, then lift out using the parchment paper and transfer to a wire rack to cool completely.
- Slice and serve once completely cool. Use a serrated knife for clean slices.
Notes
For best results, use very ripe bananas with black spots. Do not over-mix the batter to avoid a tough loaf. Measure flour by spooning into the cup and leveling off. The bread can be stored at room temperature for up to 3 days or frozen for up to 3 months.
Nutrition
- Serving Size: 1 slice
- Calories: 220
- Sugar: 18
- Sodium: 200
- Fat: 8
- Saturated Fat: 1
- Carbohydrates: 34
- Fiber: 2
- Protein: 3
Keywords: banana bread, easy banana bread, one-bowl banana bread, moist banana bread, homemade banana bread, quick bread


