It was 11:47 PM on a random Tuesday in October, and I was absolutely desperate for something crunchy. Not just any crunch—I needed that specific, salty, satisfying crackle that only comes from something roasted and seasoned just right. I didn’t have any of my usual go-to snacks—no nuts, no chips, nothing—but sitting on my counter was a sad, half-carved pumpkin from the weekend’s decorating session that I hadn’t gotten around to tossing. I mean, honestly, who carves a pumpkin and then just forgets about the seeds? Me, apparently. So there I was, tired, slightly annoyed at my own forgetfulness, pulling stringy orange guts through my fingers at nearly midnight, thinking, “This is either going to be genius or a complete disaster.”
Let me tell you, the idea that arrived that night was simple: just clean them, toss them with olive oil and a generous amount of sea salt, and roast them until they were absolutely, undeniably crispy. No boiling, no complicated spice blends—just pure, straightforward pumpkin seed goodness. The kitchen was quiet except for the hum of the oven, and I remember thinking this was the kind of weird, impulsive cooking that happens when no one is watching. You know that feeling when you’re just following a hunch? That was me, standing in my socks on a cold kitchen floor, waiting for a snack I wasn’t even sure would work.
When I pulled that baking sheet out twenty-five minutes later, the smell hit me first—warm, nutty, and toasty. And the sound! The sizzle of the hot seeds hitting the cool air was oddly satisfying. I let them cool for maybe two minutes (who has that kind of patience at midnight?) and grabbed a handful. Honestly, I almost cried. They were perfect. Crispy, salty, with that deep roasted flavor that makes you wonder why you ever bought packaged snacks. I ate the entire batch standing over the sink, and I knew right then this wasn’t just a late-night fluke—this was my new fall ritual.
Why You’ll Love This Recipe
Let’s face it—there are a million ways to roast pumpkin seeds online, and most of them are just okay. But this recipe? It’s the one I come back to year after year, and here’s why it’s different:
- Quick & Easy: From pumpkin to snack in under 30 minutes, with only 5 minutes of prep. Perfect for those spontaneous fall cravings.
- Simple Ingredients: You only need pumpkin seeds, olive oil, and sea salt. That’s it. No weird grocery store runs.
- Perfect for Fall: Whether you’re carving pumpkins for Halloween, decorating for Thanksgiving, or just enjoying a cozy autumn evening, these seeds are the ultimate seasonal snack.
- Crowd-Pleaser: I’ve brought these to gatherings and watched people devour them. Kids love them, adults love them—they’re universally adored.
- Unbelievably Crispy: The texture is what sets this recipe apart. No chewy or rubbery seeds here—just pure, satisfying crunch that shatters when you bite into it.
What makes my version truly special is the technique. Most recipes tell you to boil the seeds first or dry them overnight, but I found that creates a tougher texture. My method—roasting them directly after cleaning and patting them dry—gives you that delicate, crispy result every single time. It’s not just another recipe; it’s the best version I’ve ever tasted, and I’ve tested dozens over the years.
This recipe is comfort food at its simplest. It’s the kind of snack that makes you close your eyes after the first bite, leaning against the kitchen counter with a satisfied sigh. It’s healthier than chips, faster than ordering takeout, and somehow feels like a warm hug on a chilly fall day.
What Ingredients You Will Need
This recipe uses just three simple, wholesome ingredients to deliver bold flavor and satisfying texture without any fuss. These are pantry staples that come together beautifully in under half an hour.
- Fresh Pumpkin Seeds (1 cup, about 4 ounces) — These come straight from your carving pumpkin. I prefer seeds from sugar pumpkins or standard carving pumpkins; both work great. The fresher, the better. (Pro tip: don’t rinse them too aggressively—a little pumpkin fiber adds flavor)
- Extra Virgin Olive Oil (1 tablespoon) — This helps the salt stick and promotes even browning. I recommend using a good-quality olive oil like California Olive Ranch for the best flavor, but any neutral oil like avocado or grapeseed works too.
- Coarse Sea Salt (1 teaspoon, plus more to taste) — Flaky sea salt like Maldon or fleur de sel gives the best texture and crunch. Regular table salt works in a pinch, but you’ll need to adjust the amount since it’s more concentrated.
Ingredient Selection Tips: When choosing a pumpkin for seed harvesting, look for one that feels heavy for its size and has a firm stem. Larger pumpkins tend to have bigger, meatier seeds. If you’re buying pre-harvested seeds from a store, check the package date and avoid any that look shriveled or discolored.
Substitution Guidance: For a dairy-free option, you’re already there—this recipe is naturally dairy-free. If you’re watching sodium, use a light hand with the salt or try a salt substitute. For a flavor twist, add a pinch of smoked paprika or garlic powder along with the salt. And if you don’t have fresh pumpkin seeds, you can use hulled pumpkin seeds (pepitas), but note they’ll cook faster and have a slightly different texture.
Equipment Needed
You don’t need much for this recipe, which is part of its beauty. Here’s what you’ll want on hand:
- Baking Sheet (rimmed, 13×18 inches) — A rimmed sheet prevents seeds from rolling off. I use my trusty Nordic Ware sheet pan, and it’s never let me down.
- Parchment Paper or Silicone Baking Mat — Not strictly necessary, but it makes cleanup a breeze. I’ve roasted directly on the pan too, and it works fine.
- Colander — For rinsing the seeds and separating them from the pumpkin guts.
- Kitchen Towel or Paper Towels — For patting the seeds dry. This step is crucial for crispiness.
- Mixing Bowl — For tossing the seeds with oil and salt.
- Spatula or Wooden Spoon — For stirring the seeds halfway through roasting.
Budget-Friendly Options: If you don’t have a rimmed baking sheet, a regular cookie sheet works—just watch for seeds rolling off. No parchment? No problem. Just grease the pan lightly with oil. And if you don’t have a colander, a fine-mesh strainer or even your hands work for separating seeds from pulp.
Preparation Method
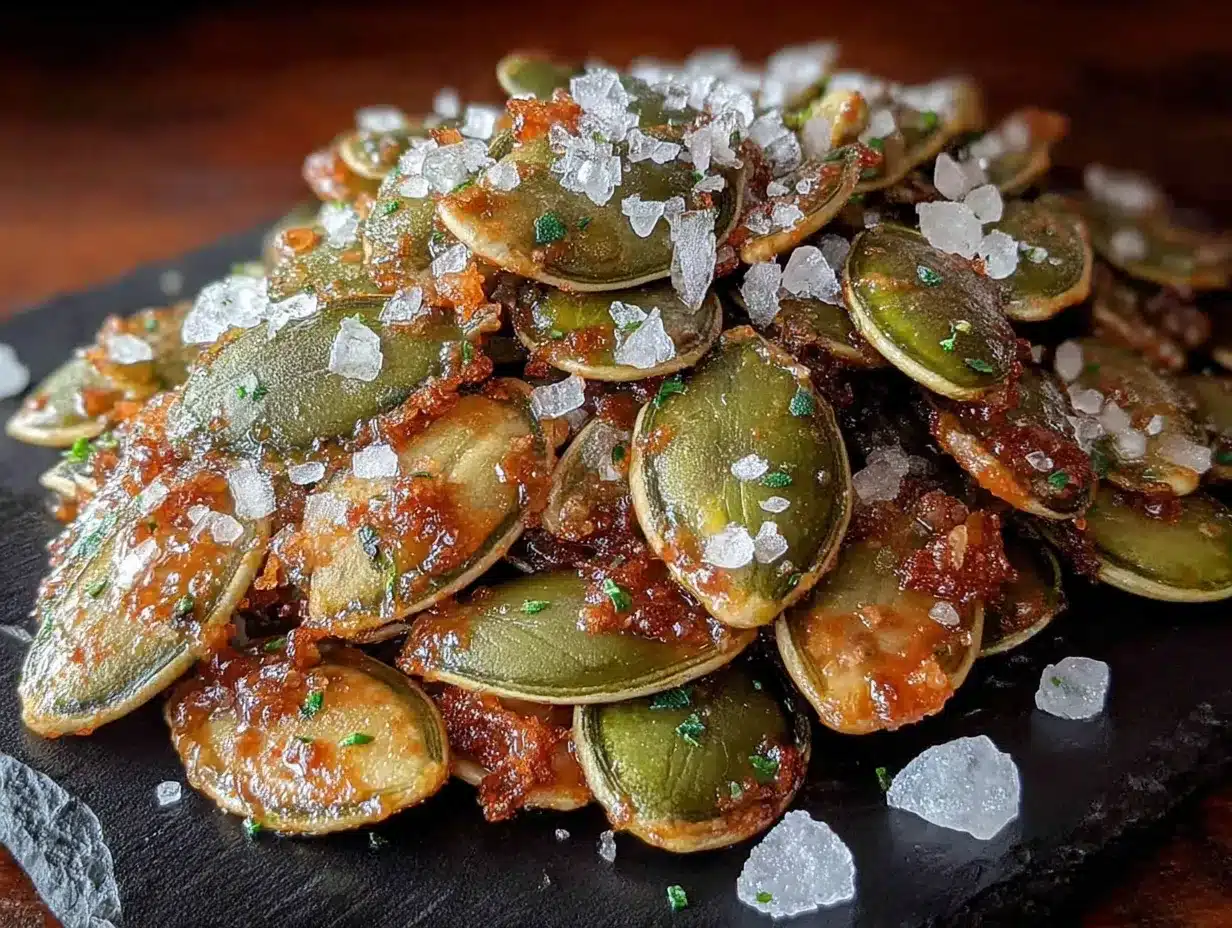
Follow these steps carefully, and you’ll have perfectly crispy, golden-brown pumpkin seeds every time.
- Preheat your oven to 350°F (175°C). Line a rimmed baking sheet with parchment paper or a silicone mat. Getting the oven hot before you start ensures even cooking.
- Separate the seeds from the pumpkin guts. Scoop the seeds and stringy pulp into a colander. Run cool water over them while using your fingers to separate the seeds from the fibers. Don’t worry about getting every last bit of pumpkin—a little fiber adds flavor and doesn’t affect the texture. (I once spent 20 minutes picking off every tiny string, and honestly, the seeds tasted the same.)
- Pat the seeds completely dry. Transfer the cleaned seeds to a clean kitchen towel or layer of paper towels. Press firmly to remove as much moisture as possible. This is the most important step for achieving crispiness. Wet seeds steam instead of roast, and nobody wants soggy seeds.
- Toss with oil and salt. Place the dried seeds in a mixing bowl. Add 1 tablespoon of olive oil and 1 teaspoon of coarse sea salt. Use your hands or a spatula to toss until every seed is evenly coated. The seeds should look glossy but not greasy.
- Spread in a single layer. Pour the seasoned seeds onto the prepared baking sheet. Use the back of a spoon or your fingers to spread them into one even layer. Overcrowding leads to steaming, so make sure no seeds are stacked on top of each other.
- Roast for 20-25 minutes, stirring halfway. Place the sheet in the preheated oven. After 10-12 minutes, pull it out and give the seeds a good stir with a spatula. This ensures even browning. Return to the oven and roast for another 10-13 minutes. The seeds are done when they’re golden brown and make a hollow sound when you tap one against the pan.
- Let them cool completely. Remove the baking sheet from the oven and let the seeds cool right on the pan for at least 10 minutes. They’ll continue to crisp up as they cool. I know it’s tempting to dig in immediately, but trust me—waiting makes them crunchier.
- Taste and adjust salt. Once cooled, give them a taste. Add a pinch more salt if needed, and toss gently. This is your last chance to perfect the seasoning.
Troubleshooting Tip: If your seeds come out chewy instead of crispy, they likely weren’t dried thoroughly before roasting, or they were overcrowded on the pan. Next time, pat them extra dry and use a larger baking sheet. If they’re burnt on the outside but soft inside, your oven runs hot—try reducing the temperature to 325°F next time.
Cooking Tips & Techniques
After years of making these seeds (and plenty of failed batches), I’ve learned a few tricks that make all the difference.
The Drying Secret: I cannot stress this enough—dry seeds are crispy seeds. After rinsing, I spread them on a towel and let them sit for 10-15 minutes before patting them dry. If you’re really impatient (I get it), you can use a salad spinner to remove excess water. Just be gentle so you don’t crack the seeds.
Don’t Skip the Stir: Halfway through roasting, always stir the seeds. The edges of the pan cook faster than the center, and stirring redistributes them for even browning. I learned this the hard way when I pulled out a batch with burnt edges and pale middles. Not my finest moment.
The Cool-Down is Crucial: Let the seeds cool completely on the baking sheet. If you transfer them to a bowl while they’re still warm, steam gets trapped and they lose their crunch. I once dumped hot seeds into a glass bowl and ended up with a sad, soggy mess. Learn from my mistakes!
Timing Strategy: Roast these seeds while you’re doing other kitchen tasks—cleaning up pumpkin carving mess, making soup, or just enjoying a glass of wine. The active prep time is only 5 minutes, so you can easily multitask.
Consistency Check: To test for doneness, listen for the sound. When you stir the seeds and they make a crisp, rattling sound against the pan, they’re close. When they look golden and smell nutty, they’re ready. Trust your senses more than the timer.
Variations & Adaptations
Once you’ve mastered the basic recipe, feel free to experiment. Here are some of my favorite variations:
- Spicy Chili Lime: Add 1/2 teaspoon chili powder, 1/2 teaspoon cumin, and the zest of one lime along with the salt. The tangy citrus balances the heat beautifully. I made this for a football party and they vanished in minutes.
- Sweet Cinnamon Sugar: Skip the salt and toss the seeds with 1 tablespoon melted butter, 1 tablespoon brown sugar, and 1/2 teaspoon cinnamon. Roast at 325°F for 15-18 minutes since sugar burns faster. These taste like autumn in a bowl.
- Garlic Parmesan: Add 1/2 teaspoon garlic powder and 2 tablespoons finely grated Parmesan cheese after roasting (add the cheese while the seeds are still warm so it sticks). This savory version is dangerous—I can’t stop eating it.
- Everything Bagel: Toss the seeds with 1 tablespoon everything bagel seasoning (poppy seeds, sesame seeds, garlic flakes, onion flakes, salt) before roasting. It’s like a bagel, but crunchier and way more snackable.
- Smoky Paprika: Add 1 teaspoon smoked paprika and 1/2 teaspoon black pepper to the basic recipe. The smoky flavor pairs perfectly with the nutty pumpkin seeds. This is my go-to for fall cocktail parties.
Dietary Adaptations: This recipe is naturally gluten-free, dairy-free, and vegan. For a lower-fat version, you can skip the oil entirely and dry-roast the seeds, but they won’t get as golden or crispy. For a nut-free snack (if you’re serving at a school event), these are perfect since they’re seed-based.
Serving & Storage Suggestions
These crispy sea salt roasted pumpkin seeds are incredibly versatile. Here’s how to serve and store them for maximum enjoyment:
Serving Temperature and Presentation: Serve at room temperature in a simple bowl or mason jar. They’re perfect as a standalone snack, but also wonderful sprinkled over soups (especially butternut squash or pumpkin soup), salads (try them on a kale Caesar), or even yogurt parfaits for a crunchy topping. For a party, I like to serve them in a wooden bowl alongside other fall snacks like dried cranberries and dark chocolate chips.
Complementary Pairings: These seeds pair beautifully with a crisp apple cider, a warm mug of spiced tea, or a cold beer (try a pumpkin ale for the full fall experience). They also go great alongside a cheese board—the salty crunch cuts through creamy brie or sharp cheddar.
Storage Instructions: Store completely cooled seeds in an airtight container at room temperature for up to 2 weeks. Do not refrigerate—the moisture in the fridge will make them lose their crispiness. If you live in a humid climate, add a silica gel packet (the kind you find in shoe boxes) to the container to absorb excess moisture.
Reheating Tips: If your seeds lose their crunch (it happens, especially in humid weather), spread them on a baking sheet and reheat at 300°F for 5 minutes. Let them cool completely before storing again. This trick has saved many a batch for me.
How Flavors Develop: These seeds taste best within the first 3 days, when they’re at peak crispiness. The salt flavor intensifies slightly over time, so if you’re making them ahead, go a little lighter on the salt initially.
Nutritional Information & Benefits
Pumpkin seeds aren’t just delicious—they’re packed with nutrition. Here’s the breakdown for a 1/4 cup serving (about 1 ounce) of roasted seeds:
| Nutrient | Amount |
|---|---|
| Calories | 150 |
| Protein | 7g |
| Fat | 13g (mostly healthy unsaturated fats) |
| Carbohydrates | 4g |
| Fiber | 2g |
| Magnesium | 37% of Daily Value |
| Zinc | 23% of Daily Value |
| Iron | 14% of Daily Value |
Health Benefits: Pumpkin seeds are rich in magnesium, which supports muscle function and sleep quality. The zinc content is great for immune health—perfect for the cold and flu season. They’re also a good source of antioxidants, including vitamin E and carotenoids, which help fight inflammation. Plus, the fiber and protein make them a satisfying snack that keeps you full between meals.
Dietary Considerations: This recipe is naturally gluten-free, dairy-free, and vegan. The only potential allergen is the seeds themselves (if you have a seed allergy). For low-sodium diets, reduce or omit the added salt.
Frequently Asked Questions
Do I have to boil the pumpkin seeds before roasting?
No! That’s a common myth. Boiling can actually make seeds tougher. My method of drying them thoroughly and roasting directly gives you a much crispier result. Skip the boiling step entirely.
Can I use seeds from any type of pumpkin?
Absolutely. Standard carving pumpkins work great, as do sugar pumpkins, butternut squash, or even acorn squash. The seeds might vary slightly in size, so adjust roasting time accordingly—smaller seeds cook faster.
Why are my pumpkin seeds chewy instead of crispy?
This usually happens for one of three reasons: they weren’t dried thoroughly before roasting, they were overcrowded on the pan, or they weren’t roasted long enough. Next time, pat them extra dry and spread them in a single layer.
How long do homemade roasted pumpkin seeds last?
Stored in an airtight container at room temperature, they’ll stay fresh and crispy for up to 2 weeks. If they lose their crunch, reheat them at 300°F for 5 minutes and let them cool completely.
Can I add other seasonings besides salt?
Definitely! This recipe is a great base for endless variations. Try chili powder and lime, cinnamon and sugar, garlic and Parmesan, or everything bagel seasoning. Just add the seasonings when you toss the seeds with oil.
Conclusion
This crispy sea salt roasted pumpkin seeds recipe is proof that the simplest things are often the best. With just three ingredients and 25 minutes, you can transform a kitchen byproduct into the most addictive fall snack you’ll ever make. It’s the kind of recipe that makes you feel resourceful and accomplished—like you’ve discovered a secret that everyone else is missing.
I love this recipe because it reminds me that good food doesn’t have to be complicated. It’s honest, it’s satisfying, and it makes the most of what’s already in your kitchen. Whether you’re carving pumpkins with your kids, hosting a cozy autumn gathering, or just craving something salty and crunchy late at night, these seeds deliver every single time.
So go ahead—scoop out those pumpkin seeds, give them a good rinse, and get roasting. And when you take that first bite and hear that perfect crunch, I want to hear about it. Leave a comment below and tell me how yours turned out, or share your own seasoning twist. Happy roasting, friends!
Pin This Recipe!
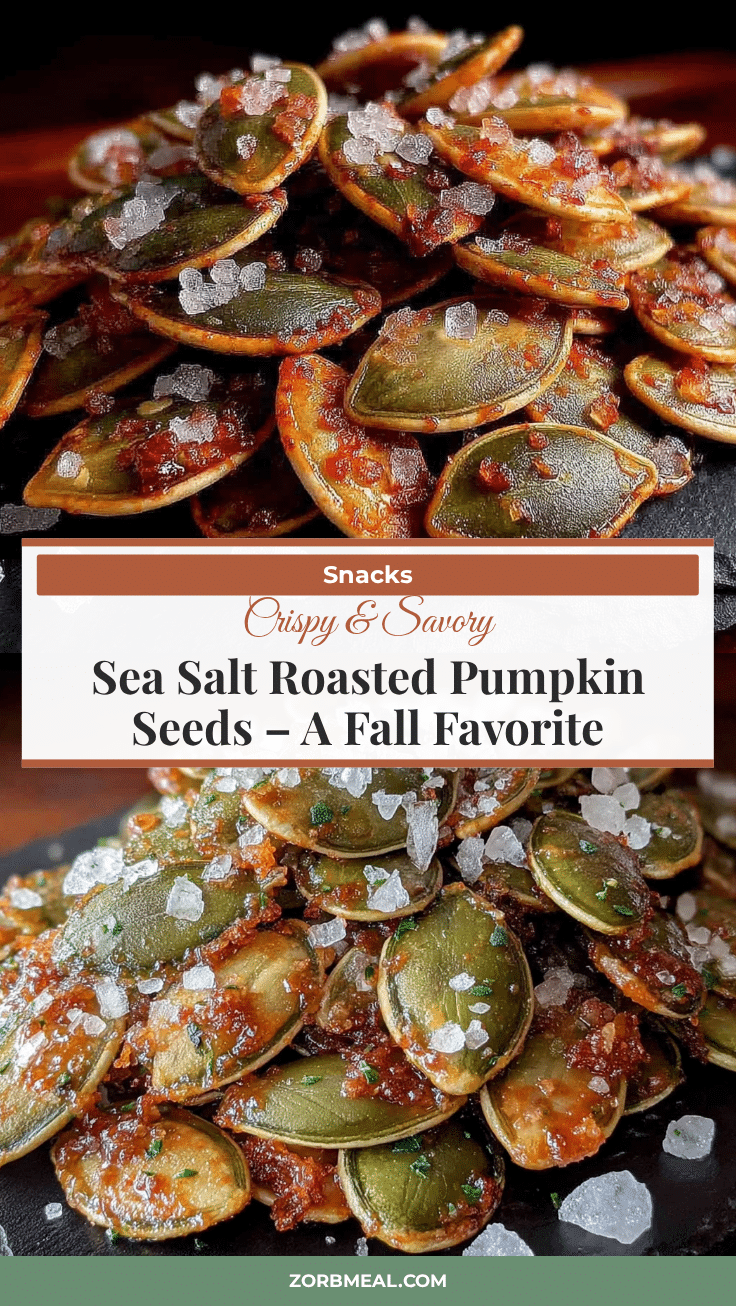
Best Crispy Sea Salt Roasted Pumpkin Seeds Recipe

Transform fresh pumpkin seeds into an irresistibly crunchy, salty snack with just three ingredients and 25 minutes. This simple recipe delivers perfectly crispy roasted pumpkin seeds every time, making it the ultimate fall treat.
- Prep Time: 5 minutes
- Cook Time: 25 minutes
- Total Time: 30 minutes
- Yield: 4 servings 1x
- Category: Snack
- Cuisine: American
Ingredients
- 1 cup fresh pumpkin seeds (about 4 ounces)
- 1 tablespoon extra virgin olive oil
- 1 teaspoon coarse sea salt (plus more to taste)
Instructions
- Preheat your oven to 350°F (175°C). Line a rimmed baking sheet with parchment paper or a silicone mat.
- Separate the seeds from the pumpkin guts. Scoop the seeds and stringy pulp into a colander. Run cool water over them while using your fingers to separate the seeds from the fibers. Don’t worry about getting every last bit of pumpkin—a little fiber adds flavor.
- Pat the seeds completely dry. Transfer the cleaned seeds to a clean kitchen towel or layer of paper towels. Press firmly to remove as much moisture as possible. This is the most important step for achieving crispiness.
- Toss with oil and salt. Place the dried seeds in a mixing bowl. Add 1 tablespoon of olive oil and 1 teaspoon of coarse sea salt. Use your hands or a spatula to toss until every seed is evenly coated.
- Spread in a single layer. Pour the seasoned seeds onto the prepared baking sheet. Use the back of a spoon or your fingers to spread them into one even layer. Make sure no seeds are stacked on top of each other.
- Roast for 20-25 minutes, stirring halfway. Place the sheet in the preheated oven. After 10-12 minutes, pull it out and give the seeds a good stir with a spatula. Return to the oven and roast for another 10-13 minutes. The seeds are done when they’re golden brown and make a hollow sound when you tap one against the pan.
- Let them cool completely. Remove the baking sheet from the oven and let the seeds cool right on the pan for at least 10 minutes. They’ll continue to crisp up as they cool.
- Taste and adjust salt. Once cooled, give them a taste. Add a pinch more salt if needed, and toss gently.
Notes
Dry seeds are crispy seeds—pat them thoroughly before roasting. Don’t skip the stir halfway through for even browning. Let seeds cool completely on the baking sheet to maximize crunch. For a flavor twist, add smoked paprika, garlic powder, or chili powder along with the salt.
Nutrition
- Serving Size: 1/4 cup (about 1 oun
- Calories: 150
- Sodium: 290
- Fat: 13
- Saturated Fat: 2
- Carbohydrates: 4
- Fiber: 2
- Protein: 7
Keywords: roasted pumpkin seeds, crispy pumpkin seeds, sea salt pumpkin seeds, fall snack, Halloween snack, easy pumpkin seeds, healthy snack


