The neighborhood cookie swap was in six hours and I’d completely forgotten. Everyone else would be bringing elaborate, multi-day preparations—a neighbor three doors down was famous for her browned butter sablé, and another had been testing a new recipe with imported Valrhona feves. I had a half-stick of butter that had been sitting out for about forty minutes, a bag of semi-sweet chips from the grocery run I’d meant to do yesterday, and honestly, a sinking feeling in my stomach.
I mean, I love to bake. But I’m not the person who preps a week ahead. I’m the person who remembers at 10 AM, panics, and starts pulling flour from the cabinet while the coffee’s still brewing. That morning, I was staring at my pantry thinking, there’s no way I can compete with this. The pressure was real. I could already picture the table lined with pristine tins and fancy parchment bundles, and me showing up with… what, exactly?
So I did what any reasonable person would do when backed into a corner—I went with the one recipe I knew by heart. The small batch one. The one that only makes eight cookies, because I figured I’d just double it and have enough to share. Maybe you’ve been there? That moment when you’re out of time and out of fancy ingredients, and you just have to trust the basics.
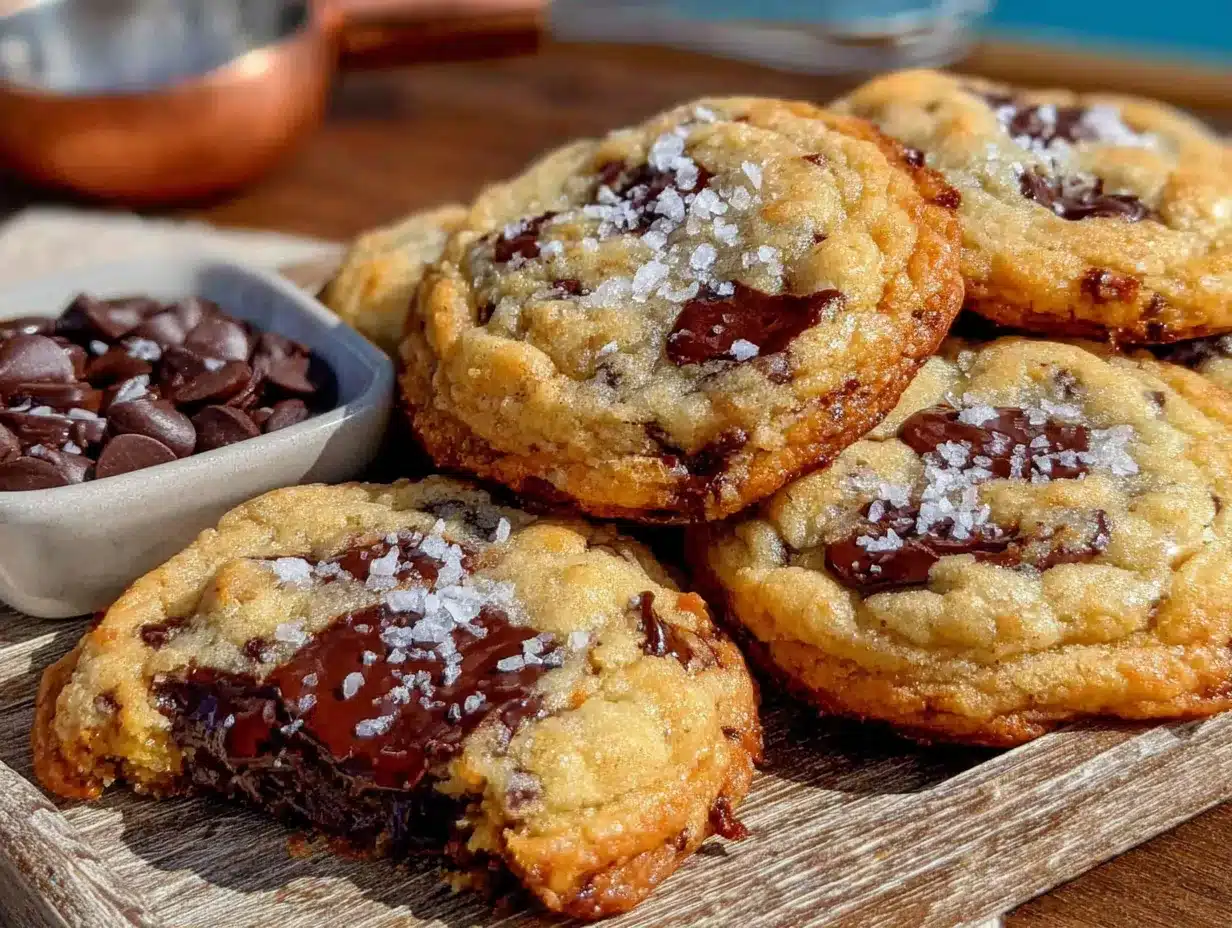
Here’s the thing I didn’t expect. I walked into that swap with a simple tin of small batch chocolate chip cookies—soft, gooey, still slightly warm from the oven—and they disappeared first. Not the sablé. Not the imported chocolate creations. My humble little cookies. Someone actually asked me for the recipe, and I had to admit it was the one I’d thrown together in a panic. Let me tell you, that moment of sheepish surprise never gets old. That’s why I keep making them. Not because they’re fancy, but because they’re real. And honestly? They taste like the kind of cookie you want to eat with a glass of cold milk and no one watching.
Why You’ll Love This Recipe
These aren’t just any cookies. After years of testing—and yes, a few batches that turned into flat, sad discs—I’ve nailed down the method for a soft, gooey center with just the right amount of chew. This recipe has been tested by my family, approved by my picky neighbor, and even survived a taste test from my friend who’s a pastry chef. She nodded slowly after the first bite and said, “Okay, I get it.” That’s the kind of approval that sticks with you.
- Quick & Easy: From start to finish, you’re looking at about 25 minutes. Perfect for that sudden craving or a last-minute dessert emergency.
- Simple Ingredients: No need for a specialty grocery run. You probably have everything in your kitchen right now—butter, sugar, an egg, flour, and chocolate chips.
- Perfect for Small Households: This recipe makes just 8 cookies. No more staring at a mountain of leftovers, wondering what to do with 3 dozen cookies.
- Crowd-Pleaser: I’ve brought these to potlucks, office parties, and even a book club meeting. They always get the same reaction—quiet at first, then a chorus of “wait, can I have another?”
- Unbelievably Delicious: The texture is what gets you. That soft, almost underbaked center with slightly crispy edges? It’s comfort food at its finest, and it happens every single time.
What makes this different from every other chocolate chip cookie recipe out there? It’s the technique. I use a slightly higher ratio of brown sugar to white, which gives you that chewy texture without making the cookies spread too thin. Plus, I chill the dough for just 15 minutes—long enough to firm up the butter, short enough that you’re not waiting around. This isn’t just another version. It’s the one I trust when I need a cookie that delivers on every single promise.
What Ingredients You Will Need
This recipe uses simple, wholesome ingredients to deliver that perfect soft and gooey texture. No weird additives, no obscure extracts—just the basics, done right. Most of these are pantry staples, so you’re probably already set.
- Unsalted butter, 4 tablespoons (57g), softened to room temperature. I prefer using unsalted so I can control the salt level. If you only have salted butter, just reduce the added salt to a pinch.
- Granulated sugar, 3 tablespoons (38g). Adds sweetness and helps with that slight crispiness on the edges.
- Light brown sugar, 3 tablespoons (42g), packed. This is the secret to the soft, chewy texture. The molasses in brown sugar keeps the cookies tender. I recommend Domino or C&H for consistent results.
- Large egg yolk, 1, at room temperature. Using just the yolk gives you richness without making the dough too wet. Save the white for an omelet tomorrow.
- Vanilla extract, ½ teaspoon. Pure vanilla extract makes a noticeable difference. I like Nielsen-Massey, but any good brand works.
- All-purpose flour, ½ cup (63g), spooned and leveled. Don’t scoop directly from the bag—you’ll pack in too much flour, and your cookies will be dry. Spoon it into the measuring cup, then level it off with a knife.
- Baking soda, ¼ teaspoon. Helps the cookies spread just enough and gives them a little lift.
- Salt, ¼ teaspoon. A little flaky sea salt on top before baking takes these to another level, but fine salt works fine in the dough.
- Semi-sweet chocolate chips, ⅓ cup (60g). I use Ghirardelli or Guittard for consistent melting. If you prefer dark chocolate, go for it—just know the cookies will be slightly less sweet.
- Optional: Flaky sea salt for sprinkling on top. Maldon is my go-to.
Substitution Guidance: If you’re out of brown sugar, you can use all granulated sugar, but the cookies will be crisper and less chewy. For a dairy-free option, use vegan butter sticks (not margarine from a tub). And if you only have whole wheat flour, you can substitute up to half the all-purpose flour—the cookies will be a bit denser but still delicious.
Equipment Needed
You don’t need a fancy kitchen to make these cookies. Here’s what you’ll actually use:
- Mixing bowls: One medium bowl for the wet ingredients, one small bowl for the dry. I have a set of glass nesting bowls I’ve used for years—they’re sturdy and easy to clean.
- Electric hand mixer or stand mixer: A hand mixer works perfectly. If you don’t have one, you can cream the butter and sugar with a wooden spoon—it just takes a little more elbow grease. I’ve done it both ways, and honestly, the arm workout is kind of satisfying.
- Rubber spatula: For scraping down the sides of the bowl and folding in the chocolate chips. A silicone spatula is ideal because it doesn’t scratch your bowls.
- Baking sheet: A standard half-sheet pan works great. If you only have a dark non-stick pan, keep an eye on the cookies—they can brown faster.
- Parchment paper or silicone baking mat: Parchment paper is cheap and disposable. A silicone mat is reusable and gives consistent results. I use both, depending on what’s clean.
- Cookie scoop or tablespoon: A 1.5-tablespoon cookie scoop makes uniform cookies. If you don’t have one, just use a regular spoon—your cookies will be slightly different sizes, but that’s part of the charm.
- Cooling rack: Lets air circulate so the bottoms don’t get soggy. If you don’t have one, you can slide the cookies off the baking sheet onto a clean counter after a few minutes.
Budget-friendly tip: Skip the fancy scoop and just use two spoons. And honestly, you don’t need a stand mixer for this small batch—a hand mixer or even a whisk works fine.
Preparation Method
- Preheat your oven to 350°F (175°C). Line a baking sheet with parchment paper or a silicone baking mat. This step matters—parchment paper prevents sticking and helps the cookies bake evenly. While the oven heats, get your ingredients ready.
- In a medium mixing bowl, cream together the softened butter, granulated sugar, and brown sugar. Use your hand mixer on medium speed for about 2 minutes, until the mixture looks light and fluffy. You want it to be pale in color and smooth. Scrape down the sides of the bowl with your spatula once halfway through. Personal tip: If your butter isn’t quite soft enough, microwave it for 5 to 7 seconds—no longer, or you’ll end up with melted butter and flat cookies.
- Add the egg yolk and vanilla extract to the butter mixture. Mix on low speed until just combined, about 15 seconds. Don’t overmix here—you’re not trying to incorporate air, just blend everything together. The mixture might look slightly curdled at this point, and that’s totally fine. It’ll come together when you add the flour.
- In a separate small bowl, whisk together the all-purpose flour, baking soda, and salt. Whisking ensures the baking soda and salt are evenly distributed. If you skip this step, you might end up with one cookie that tastes like a salt lick and another that’s flat. Trust me, I’ve been there.
- Gradually add the dry ingredients to the wet ingredients. Mix on low speed until just combined. You should see a few streaks of flour remaining—that’s your cue to stop. Overmixing develops gluten, which makes cookies tough and cakey instead of soft and tender.
- Fold in the chocolate chips using your rubber spatula. Gently fold until the chips are evenly distributed. If you’re feeling fancy, reserve a few chips to press onto the tops of the dough balls before baking—it makes the cookies look more bakery-style.
- Chill the dough for 15 minutes in the refrigerator. This is non-negotiable. Chilling solidifies the butter slightly, which prevents the cookies from spreading too much in the oven. You want thick, soft cookies, not flat, crispy ones. While the dough chills, wash your mixing bowls or just enjoy a quiet moment.
- Scoop the dough into 8 equal portions. Using a 1.5-tablespoon cookie scoop or a regular spoon, place the dough balls onto the prepared baking sheet, spacing them about 2 inches apart. They’ll spread a little, but not too much. Sensory cue: The dough should feel slightly cool and firm to the touch, not sticky or greasy.
- Optional but recommended: Sprinkle a tiny pinch of flaky sea salt on top of each dough ball. This step adds a wonderful contrast to the sweetness.
- Bake for 9 to 11 minutes, or until the edges are golden brown and the centers look slightly underdone. This is the most important visual cue: the centers should look puffy and soft, not fully set. They’ll continue baking from residual heat after you pull them out. I usually bake mine for exactly 10 minutes, and they come out perfect every time. If you like a slightly crispier cookie, go for 11 minutes.
- Let the cookies cool on the baking sheet for 5 minutes. This allows them to set up without becoming hard. After 5 minutes, transfer them to a cooling rack. Warning: They’ll be very soft at first—handle them gently. If you try to move them too soon, they’ll fall apart.
- Serve warm or at room temperature. Honestly, there’s nothing better than a warm cookie with a glass of cold milk. But they’re also fantastic the next day, especially if you microwave them for 10 seconds to bring back that gooey center.
Cooking Tips & Techniques
I’ve made this recipe more times than I can count, and I’ve learned a few things the hard way. Let me save you the trouble.
Room temperature ingredients matter. If your butter is too cold, it won’t cream properly with the sugar, and your cookies will be dense. If it’s too warm, the dough will spread into thin, greasy puddles. The sweet spot is when the butter gives slightly when you press it, but still holds its shape. And your egg yolk should be at room temperature too—just set it out 15 minutes before you start.
Don’t overmix the dough. This is probably the most common mistake I see. Once you add the flour, mix only until it disappears. If you keep going, you’ll develop gluten, and your cookies will be tough and bread-like instead of tender and soft. I’ve ruined entire batches this way, and it’s heartbreaking.
Chill the dough. I know it’s tempting to skip this step when you’re craving cookies immediately, but those 15 minutes make a huge difference. Without chilling, the butter is too soft and the cookies spread into flat, thin discs. With chilling, they stay thick and gooey. If you’re planning ahead, you can chill the dough for up to 24 hours—the flavor actually gets better.
Use a cookie scoop for uniform size. This isn’t just about looks. When all your cookies are the same size, they bake evenly. If some are bigger and some are smaller, you’ll end up with burnt edges and underdone centers. A cookie scoop costs about $5 and is worth every penny.
Bake one tray at a time. If you try to bake two trays at once, the heat circulates unevenly, and your cookies won’t bake consistently. I learned this when I was in a hurry for that cookie swap—I ended up with one tray of perfect cookies and one tray of sad, uneven ones. Just bake in batches. It takes a few extra minutes, but it’s worth it.
Variations & Adaptations
One of the best things about this recipe is how easily it adapts. Here are a few variations I’ve tried and loved:
- Double Chocolate Chip: Replace 1 tablespoon of flour with 1 tablespoon of unsweetened cocoa powder. Use dark chocolate chips instead of semi-sweet. The result is a rich, fudgy cookie that feels indulgent without being over-the-top.
- Nutty Crunch: Add ¼ cup of toasted chopped walnuts or pecans along with the chocolate chips. Toast them in a dry pan for 3-4 minutes until fragrant—it brings out their natural oils and adds incredible depth. I did this for a holiday party once, and they were gone in minutes.
- Gluten-Free Option: Substitute the all-purpose flour with a 1:1 gluten-free baking flour blend. I’ve tested this with Bob’s Red Mill 1-to-1 Baking Flour, and the texture is surprisingly close to the original. Just note that the cookies might spread slightly more, so chill the dough for 20 minutes instead of 15.
- Vegan Adaptation: Use vegan butter sticks and a flax egg (1 tablespoon ground flaxseed mixed with 3 tablespoons water, let sit for 5 minutes). The cookies will be a bit denser, but still delicious. I made these for a friend with dairy allergies, and she couldn’t tell the difference.
- Sea Salt & Dark Chocolate: Use dark chocolate chips (60-70% cacao) and increase the flaky sea salt on top. The bitterness of the dark chocolate pairs beautifully with the salt, creating a sophisticated flavor profile that feels grown-up but still comforting.
I’ve also tried adding a tablespoon of peanut butter to the dough for a peanut butter chocolate chip hybrid. It worked, but the cookies were a bit denser. If you’re feeling adventurous, give it a shot!
Serving & Storage Suggestions
These cookies are best served warm, when the chocolate is still melty and the centers are soft. I like to serve them on a simple plate with a glass of cold milk—classic, for good reason. If you’re feeling fancy, pair them with a scoop of vanilla bean ice cream for an impromptu ice cream sandwich. Or crumble them over a bowl of yogurt for a decadent breakfast (no judgment here).
For storage, let the cookies cool completely, then place them in an airtight container at room temperature. They’ll stay soft and gooey for up to 3 days. If you stack them, place a piece of parchment paper between layers to prevent sticking. I’ve found that they actually taste better on day two—the flavors meld together, and the texture becomes even more tender.
Freezer instructions: You can freeze the baked cookies for up to 3 months. Just wrap them individually in plastic wrap, then place them in a freezer-safe bag. To reheat, microwave one cookie for 10-15 seconds, or pop them in a 300°F (150°C) oven for 5 minutes. Alternatively, you can freeze the raw dough balls on a baking sheet, then transfer them to a freezer bag. Bake from frozen, adding 2-3 minutes to the baking time. This is my go-to for unexpected guests—I always have a batch of dough balls in the freezer.
Reheating tip: If your cookies have been sitting out for a day and lost their gooeyness, microwave them for 8-10 seconds. It brings back that fresh-from-the-oven texture almost perfectly. Just don’t overdo it, or they’ll become tough.
Nutritional Information & Benefits
While these cookies are definitely a treat, they’re made with simple, recognizable ingredients. Here’s the estimated nutritional breakdown per cookie (based on 8 cookies):
Estimated per cookie: Calories: 185 | Fat: 10g | Saturated Fat: 6g | Carbohydrates: 23g | Sugar: 14g | Protein: 2g | Sodium: 115mg | Fiber: 1g
Health benefits of key ingredients: The butter provides vitamin A and healthy fats (in moderation). Dark chocolate chips contain antioxidants called flavonoids, which may support heart health. The small batch size means you’re less likely to overindulge—portion control built right in!
Dietary considerations: This recipe contains dairy (butter) and gluten (flour). For a dairy-free version, use vegan butter. For a gluten-free version, use a 1:1 gluten-free flour blend. The recipe is nut-free as written, but check your chocolate chip label if you have severe allergies.
I believe in balance. These cookies are meant to be enjoyed as part of a healthy lifestyle—not as a daily staple, but as a delightful treat that brings joy without guilt. Life is too short for bad cookies, and these are anything but bad.
Frequently Asked Questions
Can I double this recipe?
Absolutely! Simply double all the ingredients. The baking time should stay the same, but you may need to bake in batches if your oven can’t fit two trays at once. I often double it when I’m bringing cookies to a gathering.
Why are my cookies flat?
Flat cookies usually mean the butter was too soft or the dough wasn’t chilled. Make sure your butter is at room temperature but not melted, and don’t skip the 15-minute chill. Also, check that your baking soda is fresh—expired baking soda won’t give the cookies enough lift.
Can I use margarine instead of butter?
I don’t recommend it. Margarine has a higher water content, which can make cookies spread too much and become greasy. If you need a dairy-free option, use vegan butter sticks—they have a similar fat content to butter and work much better.
How do I make the cookies extra gooey?
Bake them for 9 minutes instead of 10 or 11. The centers will look slightly underdone when you pull them out, but they’ll set as they cool. Also, use a higher ratio of brown sugar to white sugar—brown sugar adds moisture and keeps the centers soft.
Can I use a different type of chocolate?
Yes! Milk chocolate chips will make the cookies sweeter, while dark chocolate chips (60-70% cacao) will add a richer, less sweet flavor. You can also use chopped chocolate bars for irregular pools of melted chocolate throughout the cookie. I’ve tried all three, and each has its own charm.
Conclusion
These small batch chocolate chip cookies are proof that you don’t need complicated techniques or fancy ingredients to create something truly special. They’re soft, gooey, and packed with chocolate in every bite—the kind of cookie that makes you close your eyes after the first taste. Whether you’re baking for a last-minute event, a quiet night in, or just because you deserve a treat, this recipe delivers every single time.
I encourage you to make these your own. Play with the variations, adjust the bake time to your preference, and don’t be afraid to experiment. That’s the beauty of a simple recipe—it’s a starting point for your own creativity. And honestly, there’s no wrong way to enjoy a chocolate chip cookie.
If you give this recipe a try, I’d love to hear about it. Leave a comment below and let me know how they turned out—did you add nuts? Try the double chocolate version? Share your wins (and your funny baking mishaps) with our community. And if you loved them, don’t forget to save this recipe for later and share it with a friend who needs a little cookie therapy. Happy baking!
Pin This Recipe!
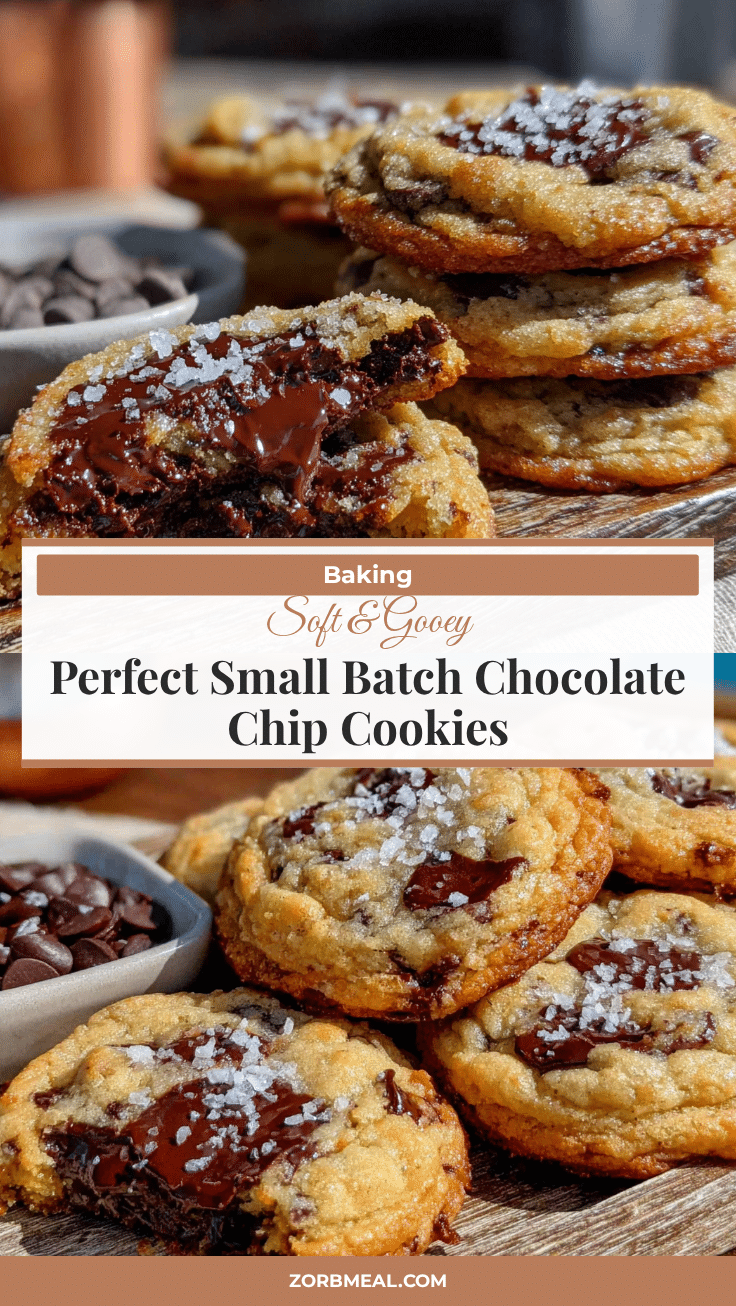
Best Small Batch Chocolate Chip Cookies – Soft & Gooey

These small batch chocolate chip cookies are soft, gooey, and made with simple pantry ingredients. Perfect for a last-minute dessert or a quiet night in, they deliver a crowd-pleasing texture with slightly crispy edges and a tender center.
- Prep Time: 15 minutes
- Cook Time: 10 minutes
- Total Time: 25 minutes
- Yield: 8 cookies 1x
- Category: Dessert
- Cuisine: American
Ingredients
- 4 tablespoons (57g) unsalted butter, softened to room temperature
- 3 tablespoons (38g) granulated sugar
- 3 tablespoons (42g) light brown sugar, packed
- 1 large egg yolk, at room temperature
- ½ teaspoon vanilla extract
- ½ cup (63g) all-purpose flour, spooned and leveled
- ¼ teaspoon baking soda
- ¼ teaspoon salt
- ⅓ cup (60g) semi-sweet chocolate chips
- Flaky sea salt for sprinkling (optional)
Instructions
- Preheat your oven to 350°F (175°C). Line a baking sheet with parchment paper or a silicone baking mat.
- In a medium mixing bowl, cream together the softened butter, granulated sugar, and brown sugar using a hand mixer on medium speed for about 2 minutes, until light and fluffy. Scrape down the sides of the bowl once halfway through.
- Add the egg yolk and vanilla extract to the butter mixture. Mix on low speed until just combined, about 15 seconds.
- In a separate small bowl, whisk together the all-purpose flour, baking soda, and salt.
- Gradually add the dry ingredients to the wet ingredients. Mix on low speed until just combined, with a few streaks of flour remaining.
- Fold in the chocolate chips using a rubber spatula until evenly distributed. Optionally, reserve a few chips to press onto the tops of the dough balls before baking.
- Chill the dough for 15 minutes in the refrigerator.
- Scoop the dough into 8 equal portions using a 1.5-tablespoon cookie scoop or a regular spoon. Place the dough balls onto the prepared baking sheet, spacing them about 2 inches apart.
- Optional: Sprinkle a tiny pinch of flaky sea salt on top of each dough ball.
- Bake for 9 to 11 minutes, or until the edges are golden brown and the centers look slightly underdone.
- Let the cookies cool on the baking sheet for 5 minutes, then transfer them to a cooling rack.
- Serve warm or at room temperature.
Notes
Chilling the dough for 15 minutes is non-negotiable to prevent spreading. For extra gooey cookies, bake for 9 minutes. Cookies can be stored in an airtight container at room temperature for up to 3 days. Freeze baked cookies for up to 3 months or raw dough balls for up to 3 months.
Nutrition
- Serving Size: 1 cookie
- Calories: 185
- Sugar: 14
- Sodium: 115
- Fat: 10
- Saturated Fat: 6
- Carbohydrates: 23
- Fiber: 1
- Protein: 2
Keywords: small batch chocolate chip cookies, soft and gooey cookies, easy cookie recipe, quick dessert, homemade cookies


