My neighbor, Mrs. Gable, watched me fumbling with a pumpkin that was clearly too big for my countertop and didn’t say anything at first. Then she just shook her head, laughed, and handed me a Tupperware container through the fence. Inside were these cookies—warm, speckled with cinnamon, and smelling like autumn had decided to move in permanently. She told me they were her grandmother’s recipe, but she’d added her own twist over the years. I stood there in my driveway, eating one, and honestly, I forgot about that giant pumpkin entirely.
The funny thing is, I didn’t even ask for the recipe that day. I just thanked her and asked what made them taste so different from regular snickerdoodles. “Brown butter and pumpkin,” she said, like it was the most obvious thing in the world. It took me three attempts to get it right on my own—the first batch came out too flat, the second one burned the brown butter (my kitchen smelled like a sad campfire), and the third one? That was the one. I knocked on her door with a plate of them, and she gave me a thumbs-up through the screen. That moment meant more than any written recipe ever could.
These cozy brown butter pumpkin snickerdoodle cookies have become my official fall baking project. I make them every October, sometimes twice if I’m feeling generous. The pumpkin keeps them soft and pillowy, while the brown butter adds this nutty, almost caramel-like depth that regular cookies just can’t touch. You know that feeling when you bite into something and it tastes exactly like the season? That’s what these are. Maybe you’ve been there—standing in your kitchen, flour on your shirt, wondering if the extra step is worth it. Let me tell you, browning that butter is always worth it.
Why You’ll Love This Recipe
After testing these cookies more times than I care to admit, I can confidently say this version beats every other pumpkin snickerdoodle I’ve tried. The secret is in the technique, not just the ingredients. Here’s why this recipe will become your go-to fall bake:
- Quick & Easy: From start to finish, you’re looking at about 30 minutes. Perfect for those sudden baking urges or when you need a quick dessert for a gathering.
- Simple Ingredients: No weird specialty items here. You probably have most of this in your pantry right now—flour, sugar, butter, pumpkin puree, and spices.
- Perfect for Fall Baking: These cookies scream autumn. They’re ideal for Halloween parties, Thanksgiving dessert tables, or just a cozy Sunday afternoon.
- Crowd-Pleaser: I’ve brought these to potlucks, work events, and family dinners. They disappear fast. Kids love the cinnamon-sugar coating, and adults appreciate the sophisticated brown butter flavor.
- Unbelievably Delicious: The texture is what gets everyone. Soft in the middle, slightly crisp on the edges, with that warm spiced coating that makes you reach for another one before you’ve finished the first.
What makes this recipe different from the rest? It’s the brown butter. Most pumpkin snickerdoodles skip this step, and honestly, they’re missing out. Browning the butter adds a nutty richness that pairs perfectly with the pumpkin and warm spices. Plus, I’ve figured out the exact ratio of pumpkin to flour so the cookies stay soft without being gummy. This isn’t just another version—it’s the version I keep coming back to year after year.
These cookies are the kind that make you close your eyes after the first bite. They’re comfort food reimagined—familiar enough to feel like home, but special enough to feel like an occasion. Perfect for impressing guests without stress, or turning a simple Tuesday into something memorable.
What Ingredients You Will Need
This recipe uses simple, wholesome ingredients that come together to create something truly special. Most of these are pantry staples, which makes these cookies perfect for spontaneous baking sessions.
- Unsalted butter – 1 cup (2 sticks), cut into pieces. I prefer using unsalted so I can control the salt level. Land O’Lakes or Kerrygold work beautifully here.
- Granulated sugar – 1 cup, divided. You’ll use most in the dough and save some for the cinnamon coating.
- Pumpkin puree – ½ cup, not pumpkin pie filling. Make sure it’s 100% pure pumpkin. Libby’s is my go-to brand because it’s consistently thick and not watery.
- Large egg – 1, at room temperature. Cold eggs can seize up the brown butter, so let it sit out for 15 minutes first.
- Vanilla extract – 1 teaspoon, pure if you have it. The good stuff makes a difference here.
- All-purpose flour – 1 ¾ cups, spooned and leveled. Don’t scoop directly from the bag—you’ll end up with too much flour and dry cookies.
- Cream of tartar – 1 teaspoon. This is what gives snickerdoodles their signature tangy flavor and soft texture. Don’t skip it!
- Baking soda – ½ teaspoon.
- Salt – ¼ teaspoon, plus a pinch for the coating.
- Pumpkin pie spice – 1 teaspoon. You can use store-bought or make your own with cinnamon, nutmeg, ginger, and cloves.
- Cinnamon – 2 tablespoons, for the coating. Saigon cinnamon has a stronger, sweeter flavor that works really well here.
Ingredient Tips: For the best texture, make sure your pumpkin puree isn’t too watery. If it looks thin, blot it with a paper towel before using. I’ve tried this recipe with gluten-free 1-to-1 flour blend, and it works great—just add an extra tablespoon of flour. For a dairy-free version, use vegan butter sticks, though the brown butter flavor won’t be as pronounced.
Equipment Needed
You don’t need fancy equipment for these cookies, which is part of their charm. Here’s what I use:
- Light-colored saucepan – Essential for browning butter. A dark pan makes it hard to see when the butter turns golden, and you’ll end up with burnt butter. Trust me, I learned this the hard way.
- Mixing bowls – One large, one medium. Glass or stainless steel works best.
- Whisk – For combining dry ingredients and smoothing out the brown butter mixture.
- Electric mixer – Hand mixer or stand mixer with paddle attachment. You can do this by hand, but the mixer makes it easier to cream the butter and sugar properly.
- Baking sheets – Two rimmed baking sheets. I prefer light-colored aluminum ones for even baking.
- Parchment paper or silicone baking mats – These prevent sticking and help the cookies bake evenly. Silicone mats are my favorite—they’re reusable and give consistent results.
- Cooling rack – Wire rack for cooling cookies properly. This prevents soggy bottoms.
- Cookie scoop – A 1.5-tablespoon scoop makes uniform cookies that bake evenly. If you don’t have one, use two spoons.
- Small shallow bowl – For the cinnamon-sugar coating mixture.
Budget-friendly tip: If you don’t have a light-colored saucepan, just watch the butter carefully and remove it from heat as soon as it turns golden. Your eyes are the best tool you have.
Preparation Method
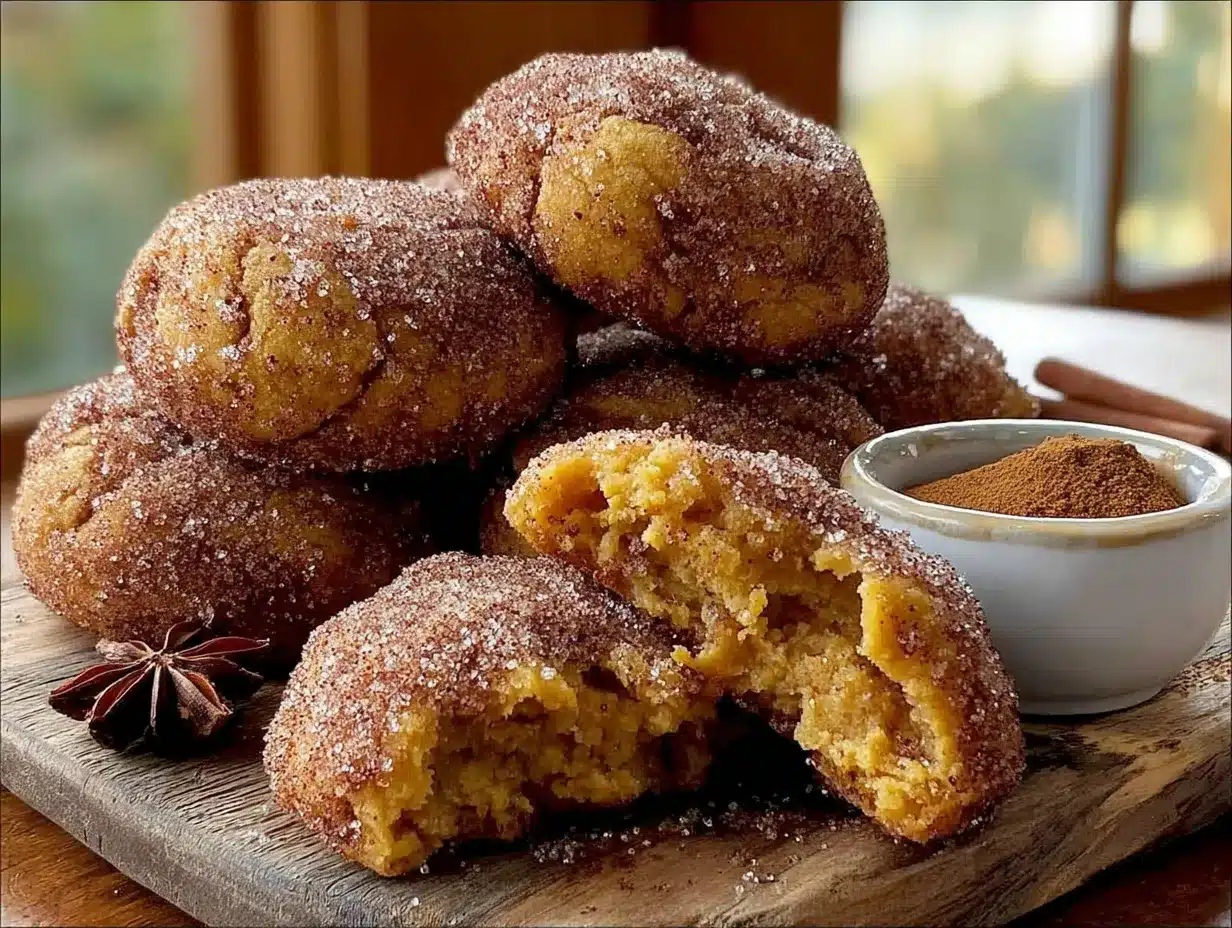
Let me walk you through this step by step. I’ve made these cookies dozens of times, so I’ve figured out all the little tricks that make the process smooth and the results perfect.
- Brown the butter: Place the butter pieces in a light-colored saucepan over medium heat. Stir constantly with a whisk or spatula. The butter will melt, then foam, then start to turn golden. Watch for little brown specks forming at the bottom—that’s when you know it’s working. Once it smells nutty and looks amber (about 5-7 minutes), remove it from heat immediately. Pour it into a heatproof bowl and let it cool for 10 minutes. Don’t skip this cooling step, or the heat will cook your egg later.
- Prep your workspace: While the butter cools, line your baking sheets with parchment paper or silicone mats. Preheat your oven to 350°F (175°C). This is also a good time to make sure your egg is at room temperature.
- Mix the wet ingredients: In a large bowl, combine the cooled brown butter with ¾ cup of granulated sugar. Beat with an electric mixer on medium speed until well combined, about 1 minute. Add the pumpkin puree, egg, and vanilla extract. Beat until smooth and creamy. The mixture might look a little separated at first—that’s normal. Just keep mixing until it comes together.
- Combine the dry ingredients: In a medium bowl, whisk together the flour, cream of tartar, baking soda, salt, and pumpkin pie spice. Make sure there are no lumps. This step ensures even distribution of the leavening agents and spices.
- Bring it together: Gradually add the dry ingredients to the wet mixture, mixing on low speed or stirring with a spatula. Mix just until the flour disappears—overmixing will make the cookies tough. The dough will be soft and slightly sticky, but it should hold together. If it feels too wet, add a tablespoon more flour.
- Chill the dough (important!): Cover the bowl with plastic wrap and refrigerate for at least 30 minutes. This step is non-negotiable. Chilling solidifies the brown butter and prevents the cookies from spreading too much. I’ve tried skipping this, and the cookies turned into flat, greasy pucks. Trust me on this one.
- Make the coating: In a small shallow bowl, mix together the remaining ¼ cup granulated sugar, 2 tablespoons cinnamon, and a pinch of salt. Stir until combined.
- Shape and coat: Using a cookie scoop or your hands, roll the chilled dough into 1.5-tablespoon balls (about 1.5 inches in diameter). Roll each ball in the cinnamon-sugar mixture until fully coated. Place them on the prepared baking sheets, spacing them about 2 inches apart. They will spread a bit, so give them room.
- Bake: Bake for 10-12 minutes, or until the edges are set and the tops look slightly cracked. The centers will still look soft and puffy—that’s perfect. Don’t overbake! They continue to set as they cool. I usually take them out at the 11-minute mark for that perfect soft texture.
- Cool: Let the cookies cool on the baking sheet for 5 minutes. This allows them to firm up without sticking. Then transfer them to a wire rack to cool completely. If you try to move them too soon, they’ll fall apart.
Sensory cues: When you’re browning the butter, listen for the sizzle to quiet down—that’s when the water has cooked off and the milk solids are toasting. The dough should feel soft but not sticky after chilling. When you roll the cookies in the coating, you should see a thick, even layer of cinnamon sugar. And when they come out of the oven, your kitchen should smell like a fall candle factory exploded—in the best way possible.
Cooking Tips & Techniques
I’ve made every mistake in the book with these cookies, so you don’t have to. Here are the lessons I learned the hard way:
Brown butter is your best friend, but it’s also a diva. The first time I made these, I walked away from the stove while browning the butter. Big mistake. It went from golden to burnt in about 30 seconds. Burnt butter tastes bitter and ruins the whole batch. Stay close, stir constantly, and remove it from heat the moment it turns amber. Also, don’t try to rush the cooling process. I once used warm brown butter, and the egg scrambled slightly when I added it. Not a good look.
Chill the dough, seriously. I know, I know—you’re hungry and you want cookies now. But skipping the chill time is the number one reason these cookies fail. The pumpkin adds extra moisture, and without chilling, the dough is too soft to hold its shape. The cookies spread into thin, flat discs that burn on the edges before the centers are done. Thirty minutes in the fridge makes all the difference. If you’re in a hurry, pop the dough in the freezer for 15 minutes instead.
Measure your flour correctly. This might seem basic, but it’s the most common mistake I see. Scooping flour directly from the bag packs it down, and you end up with way more than you need. Use a spoon to fluff the flour, then spoon it into your measuring cup and level it off with a knife. This simple step prevents dry, crumbly cookies.
Timing is everything. These cookies go from perfectly soft to overbaked in about 60 seconds. Start checking at the 10-minute mark. The edges should be golden and set, but the centers will look soft and slightly puffy. They might even look underdone—that’s what you want. They’ll continue to cook on the hot baking sheet while they cool.
Multitasking tip: While the butter cools, prep your dry ingredients and line your baking sheets. While the dough chills, clean up your workspace and preheat the oven. This way, you’re never standing around waiting.
Variations & Adaptations
One of the best things about this recipe is how flexible it is. Here are some variations I’ve tried and loved:
Pumpkin Spice Latte Version: Add 1 tablespoon of instant espresso powder to the dry ingredients. The coffee flavor enhances the pumpkin and brown butter, giving you a coffee-shop vibe at home. I tried this on a whim one rainy Sunday, and it was a game-changer.
Gluten-Free Adaptation: Substitute the all-purpose flour with a 1-to-1 gluten-free baking flour blend (I like Bob’s Red Mill). Add an extra tablespoon of flour to compensate for the lack of gluten structure. The texture will be slightly more tender, but still delicious. My gluten-sensitive friend couldn’t tell the difference.
Vegan Version: Use vegan butter sticks (like Miyoko’s) and a flax egg (1 tablespoon ground flaxseed mixed with 3 tablespoons water, let sit for 5 minutes). The brown butter flavor won’t be as deep, but the cookies are still soft and flavorful. I’ve made these for a vegan potluck, and they were gone in minutes.
Extra Spicy: Add ½ teaspoon ground ginger and ¼ teaspoon ground cloves to the dough. For the coating, mix in a pinch of cardamom with the cinnamon sugar. This version tastes like a chai latte in cookie form.
Chocolate Drizzle: Once the cookies are completely cool, drizzle them with melted dark chocolate. The bitterness of the chocolate balances the sweetness of the cookie perfectly. I did this for a holiday cookie exchange, and people went crazy for them.
Serving & Storage Suggestions
These cookies are best served slightly warm, when the edges are still a little crisp and the centers are soft and gooey. If you’re serving them at a gathering, arrange them on a rustic wooden board or a white platter to let the golden color and cinnamon coating shine. A dusting of extra cinnamon on top makes them look extra special.
What to serve with them: A glass of cold milk is the classic pairing, but these cookies also go beautifully with a hot cup of chai, spiced apple cider, or a pumpkin spice latte. For a dessert spread, serve them alongside vanilla ice cream or a dollop of whipped cream. They’re also fantastic crumbled over a bowl of vanilla yogurt for a quick breakfast treat (no judgment here).
Storage: Store the cookies in an airtight container at room temperature for up to 5 days. Place a slice of bread in the container to keep them soft—the cookies will absorb the moisture from the bread. I know it sounds weird, but it works like magic.
Freezing: These cookies freeze beautifully. You can freeze the baked cookies in a freezer-safe bag for up to 3 months. Thaw at room temperature for about 30 minutes before serving. Even better, freeze the unbaked dough balls (after coating them in cinnamon sugar) on a baking sheet, then transfer to a freezer bag. Bake directly from frozen, adding 2-3 minutes to the baking time. Fresh cookies anytime you want them!
Flavor development: Honestly, these cookies taste even better the next day. The spices meld together, and the texture becomes even softer. If you can resist eating them all on day one, you’re in for a treat on day two.
Nutritional Information & Benefits
Let’s be real—these are cookies, not health food. But they do have some redeeming qualities. Here’s the estimated nutrition per cookie (based on 24 cookies):
| Nutrient | Amount |
|---|---|
| Calories | 145 |
| Total Fat | 8g |
| Saturated Fat | 5g |
| Carbohydrates | 18g |
| Sugar | 10g |
| Protein | 2g |
| Fiber | 1g |
The good stuff: Pumpkin is packed with vitamin A and fiber, which is good for your eyes and digestion. Cinnamon has anti-inflammatory properties and can help regulate blood sugar. Brown butter, while indulgent, contains butyrate, a fatty acid that supports gut health. So technically, you could argue these cookies are practically a health food. I mean, that’s what I tell myself anyway.
Dietary considerations: These cookies contain dairy (butter), eggs, and gluten. For dairy-free and vegan options, see the variations section above. They’re nut-free as written, making them safe for school bake sales.
Conclusion
These cozy brown butter pumpkin snickerdoodle cookies are everything I love about fall baking. They’re warm, spiced, and comforting—the kind of cookie that makes you want to curl up with a blanket and a good book. The brown butter adds a depth of flavor that regular snickerdoodles just can’t match, and the pumpkin keeps them soft and tender for days.
What I love most about this recipe is how forgiving it is. Even if your brown butter gets a tiny bit too dark, or you forget to chill the dough long enough, these cookies still taste amazing. They’re the kind of recipe that builds confidence in the kitchen, because they reward you even when you make mistakes. And when you get them just right? Pure magic.
I’d love to hear how these turn out for you. Did you try any of the variations? Did your family devour them in record time? Drop a comment below and let me know—I read every single one. And if you snap a photo, tag me on Pinterest so I can see your beautiful creations. Happy baking, friends!
Frequently Asked Questions
Can I use pumpkin pie filling instead of pumpkin puree?
No, please don’t. Pumpkin pie filling is pre-sweetened and spiced, which will throw off the sugar and spice balance in this recipe. Stick with 100% pure pumpkin puree for the best results.
Why did my cookies turn out flat?
This usually happens for one of three reasons: the dough wasn’t chilled long enough, the butter was too warm when you mixed it, or you used too much pumpkin puree. Make sure to chill the dough for at least 30 minutes, and measure your pumpkin carefully.
Can I make these cookies ahead of time?
Absolutely! You can make the dough up to 3 days in advance and keep it in the fridge. Or freeze the baked cookies for up to 3 months. They’re perfect for holiday prep.
How do I know when the brown butter is done?
Watch for the butter to turn a golden amber color and smell nutty and toasty. You’ll see little brown specks forming at the bottom of the pan. Remove it from heat immediately—it goes from perfect to burnt very quickly.
Can I skip the cream of tartar?
You can substitute it with 2 teaspoons of lemon juice or white vinegar, but I really recommend keeping it. Cream of tartar gives snickerdoodles their signature tangy flavor and soft, chewy texture. Without it, they’re just sugar cookies.
Pin This Recipe!
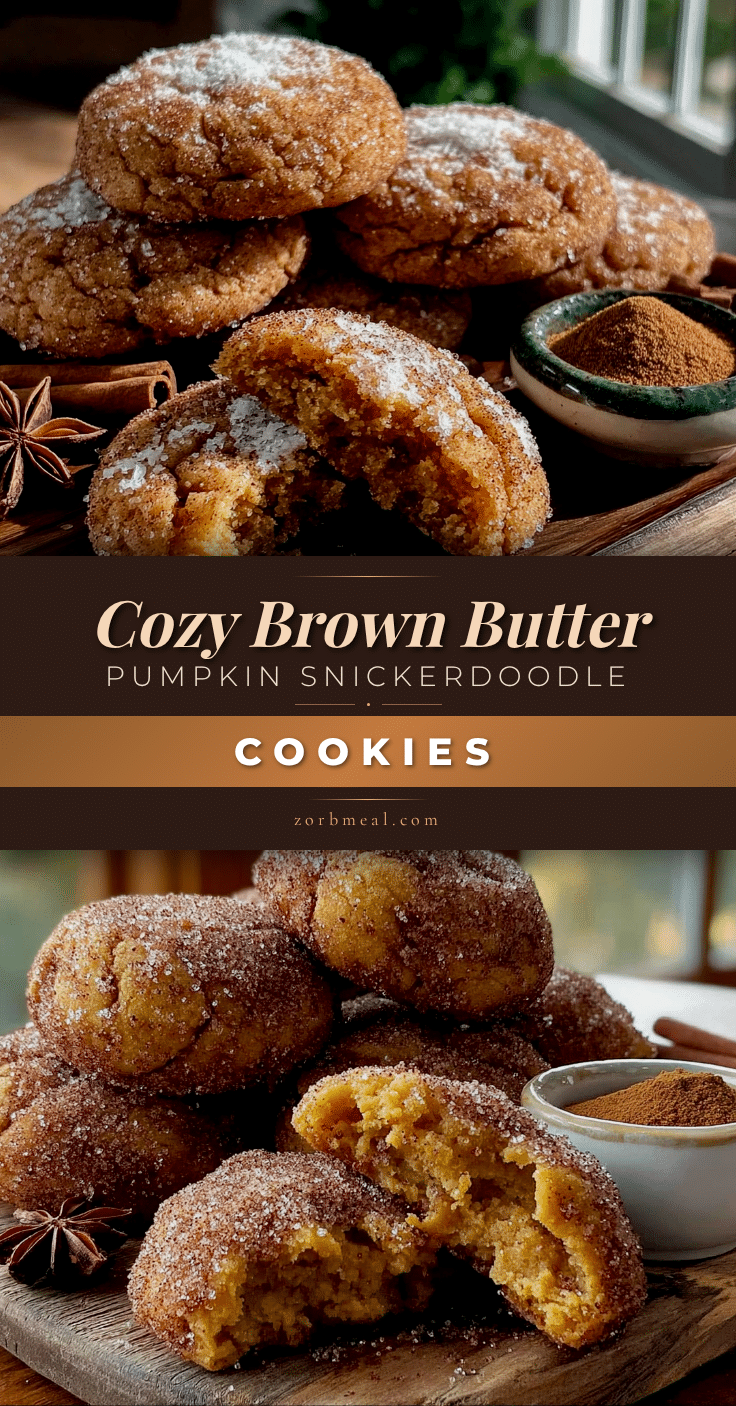
Cozy Brown Butter Pumpkin Snickerdoodle Cookies
These soft and pillowy pumpkin snickerdoodle cookies feature nutty brown butter and a warm cinnamon-sugar coating, making them the perfect fall treat.
- Prep Time: 15 minutes
- Cook Time: 11 minutes
- Total Time: 56 minutes
- Yield: 24 servings 1x
- Category: Dessert
- Cuisine: American
Ingredients
- 1 cup (2 sticks) unsalted butter, cut into pieces
- 1 cup granulated sugar, divided
- ½ cup pumpkin puree (not pumpkin pie filling)
- 1 large egg, at room temperature
- 1 teaspoon pure vanilla extract
- 1 ¾ cups all-purpose flour, spooned and leveled
- 1 teaspoon cream of tartar
- ½ teaspoon baking soda
- ¼ teaspoon salt, plus a pinch for the coating
- 1 teaspoon pumpkin pie spice
- 2 tablespoons cinnamon (for coating)
Instructions
- Brown the butter: Place butter pieces in a light-colored saucepan over medium heat. Stir constantly until melted, foamy, and amber with brown specks (5-7 minutes). Remove from heat immediately and pour into a heatproof bowl. Let cool for 10 minutes.
- Prep workspace: Line baking sheets with parchment paper or silicone mats. Preheat oven to 350°F (175°C). Ensure egg is at room temperature.
- Mix wet ingredients: In a large bowl, combine cooled brown butter with ¾ cup granulated sugar. Beat with an electric mixer on medium speed until well combined (about 1 minute). Add pumpkin puree, egg, and vanilla extract. Beat until smooth and creamy.
- Combine dry ingredients: In a medium bowl, whisk together flour, cream of tartar, baking soda, salt, and pumpkin pie spice until no lumps remain.
- Bring together: Gradually add dry ingredients to wet mixture, mixing on low speed or stirring with a spatula until just combined. Dough will be soft and slightly sticky.
- Chill dough: Cover bowl with plastic wrap and refrigerate for at least 30 minutes.
- Make coating: In a small shallow bowl, mix remaining ¼ cup granulated sugar, 2 tablespoons cinnamon, and a pinch of salt.
- Shape and coat: Using a cookie scoop or hands, roll chilled dough into 1.5-tablespoon balls (about 1.5 inches in diameter). Roll each ball in cinnamon-sugar mixture until fully coated. Place on prepared baking sheets, spacing 2 inches apart.
- Bake: Bake for 10-12 minutes, until edges are set and tops look slightly cracked. Centers will still look soft and puffy. Do not overbake.
- Cool: Let cookies cool on baking sheet for 5 minutes, then transfer to a wire rack to cool completely.
Notes
Chill the dough for at least 30 minutes to prevent spreading. Brown butter can burn quickly; watch carefully and remove from heat when amber. For best texture, measure flour correctly by spooning and leveling. Cookies taste even better the next day.
Nutrition
- Serving Size: 1 cookie
- Calories: 145
- Sugar: 10
- Sodium: 85
- Fat: 8
- Saturated Fat: 5
- Carbohydrates: 18
- Fiber: 1
- Protein: 2
Keywords: pumpkin snickerdoodle, brown butter cookies, fall cookies, pumpkin cookies, snickerdoodle recipe


