My friend Sarah asked why I couldn’t just pour the caramel sauce straight into the cream and freeze it. I remember standing in my kitchen, spoon mid-air, ready to launch into a whole lecture about ice cream bases and custards and the science of churning. I started to explain why that wouldn’t work—then stopped. Honestly, I had no good answer. I just assumed you needed a machine. So I handed her the whisk and said, “Fine, you try.”
She dumped cold heavy cream into a bowl, swirled in some homemade caramel, and started mixing. No eggs. No heating. No ice cream maker. I was certain it would turn into a icy, crystallized mess. But I kept my mouth shut and let her keep going. Thirty seconds later, she looked at me and said, “That’s it, right?” I mean, I felt like a fraud. Here I was, the one who writes about food for a living, and she just figured out something I’d been overcomplicating for years.
That night, we poured the mixture into a loaf pan, crossed our fingers, and stuck it in the freezer. Six hours later, we scooped out the creamiest, most decadent salted caramel ice cream I had ever tasted. No ice crystals. No weird texture. Just pure, silky, swirly goodness. Sarah just smiled at me. I had to admit she was right. This easy no-churn salted caramel ice cream is now the only version I make. Maybe you’ve been intimidated by homemade ice cream too? Let me tell you—this one changes everything.
Why You’ll Love This Recipe
This isn’t just another ice cream recipe. After testing this method at least a dozen times with friends and family, I can confidently say this version delivers restaurant-quality results with almost zero effort. Here is why this one stands out:
- No Machine Required: You don’t need an expensive ice cream maker or any special equipment. Just a bowl, a whisk, and a freezer.
- Quick & Easy: Active prep time is under 10 minutes. The hardest part is waiting for it to freeze.
- Simple Ingredients: You likely have everything in your kitchen right now—heavy cream, sweetened condensed milk, butter, sugar, and salt.
- Perfect for Hot Days: This is your go-to summer dessert that requires no oven and no fuss.
- Crowd-Pleaser: Every time I bring this to a gathering, people ask for the recipe. Kids and adults both go crazy for it.
- Unbelievably Creamy: The texture is so smooth and rich, you would never guess there is no churning involved.
What makes this recipe different from all the other no-churn versions out there? It is the homemade salted caramel. Most recipes use store-bought sauce, which can be too thin or overly sweet. Making your own caramel takes just 5 minutes and gives you total control over the flavor. The little bit of sea salt on top? That is the secret to making every bite pop. This is comfort food reimagined—faster, simpler, but with the same soul-soothing satisfaction that makes you close your eyes after the first bite.
What Ingredients You Will Need
This recipe uses simple, wholesome ingredients to deliver that bold salted caramel flavor and velvety texture without any fuss. Most of these are pantry staples, which makes this perfect for those sudden ice cream cravings.
For the Salted Caramel Sauce
- Granulated sugar – 1 cup (200g). This is the base of your caramel. Use white sugar for the cleanest flavor.
- Unsalted butter – 6 tablespoons (85g), cut into small cubes. I prefer using Kerrygold for its rich flavor, but any good-quality butter works.
- Heavy cream – 1/2 cup (120ml), at room temperature. Cold cream will cause the caramel to seize up, so let it sit out for 10 minutes first.
- Flaky sea salt – 1 teaspoon, plus more for sprinkling. I love Maldon sea salt for its delicate crunch, but any flaky salt will do.
- Vanilla extract – 1 teaspoon. Pure vanilla extract makes a difference here—skip the imitation stuff.
For the Ice Cream Base
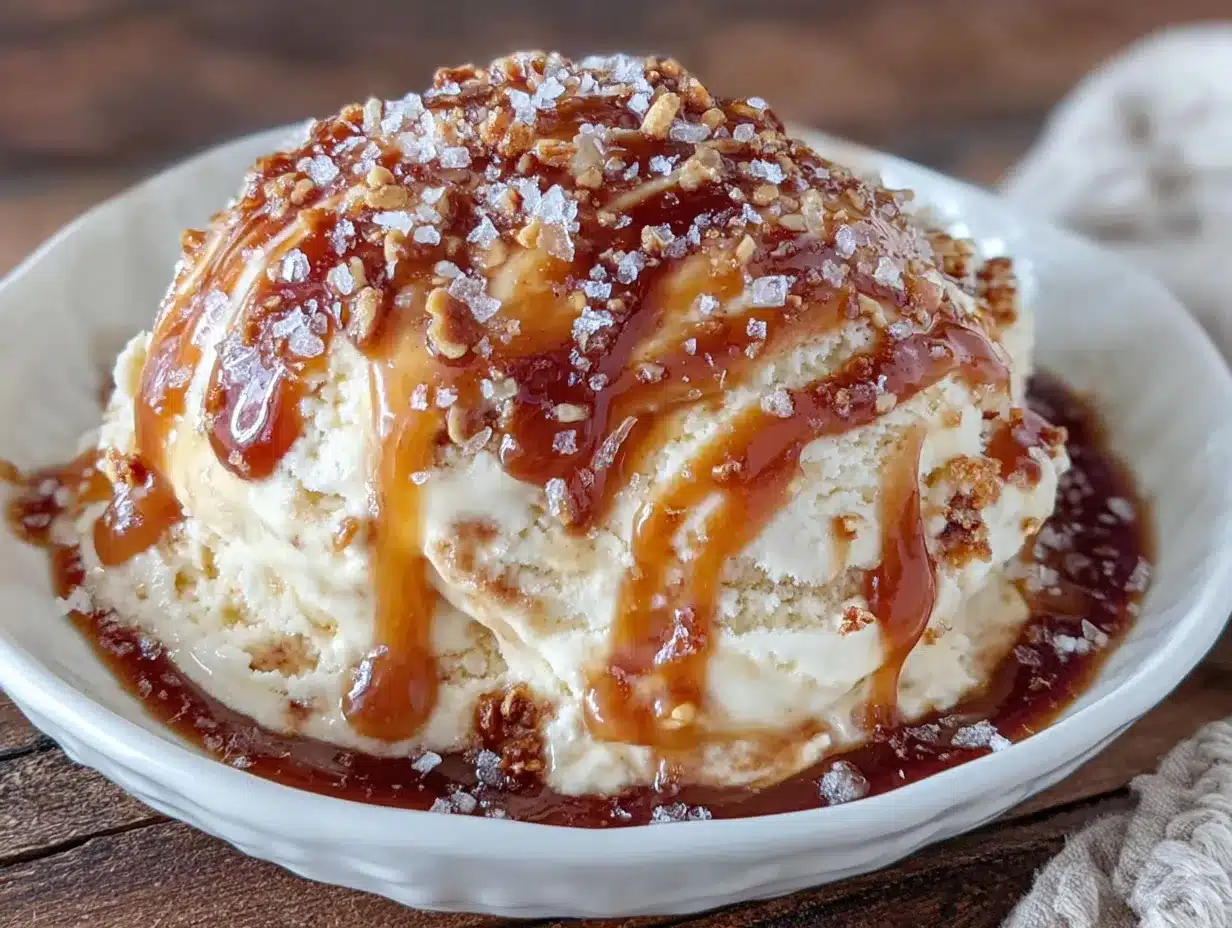
- Heavy cream – 2 cups (480ml), cold. This needs to be very cold for whipping properly. Keep it in the fridge until the last minute.
- Sweetened condensed milk – 1 can (14 ounces or 397g). This is the magic ingredient that makes no-churn ice cream work. It prevents ice crystals and gives that creamy texture.
- Vanilla extract – 1 teaspoon. Adds warmth and depth to the overall flavor.
For the caramel, I recommend using a heavy-bottomed saucepan. Thin pans can cause the sugar to burn unevenly. If you are in a pinch, you can use store-bought caramel sauce, but honestly, the homemade version takes this recipe from good to unforgettable. Look for a caramel that is thick and rich, not runny. If you need a dairy-free option, substitute the heavy cream with full-fat coconut cream and use a vegan butter alternative. The texture will be slightly different but still delicious.
Equipment Needed
You do not need much for this recipe, which is part of the beauty. Here is what you will need:
- Medium heavy-bottomed saucepan – For making the caramel. A light-colored pan helps you see the color of the sugar as it melts.
- Large mixing bowl – For whipping the cream. Glass or stainless steel works best.
- Hand mixer or stand mixer – You can whip the cream by hand with a whisk, but it will take about 5 minutes of vigorous work. A mixer makes it effortless.
- Rubber spatula – For folding everything together gently.
- Loaf pan or freezer-safe container – An 8×4 inch loaf pan works perfectly. You can also use a metal tin, which helps the ice cream freeze faster.
- Parchment paper – Optional but helpful for easy removal.
- Candy thermometer – Optional. I rarely use one for caramel, but it can be helpful if you are nervous about burning the sugar.
I have made this recipe with a cheap hand mixer I bought for $15, and it worked just fine. Do not feel like you need fancy equipment. The most important thing is having a good whisking arm or a mixer that can handle cold cream.
Preparation Method
This recipe comes together in three simple stages. Take your time with the caramel—it is the star of the show.
Step 1: Make the Salted Caramel Sauce
Place your saucepan over medium heat and add the granulated sugar in an even layer. Do not stir it yet. Let the sugar melt undisturbed for about 3-4 minutes. You will start to see the edges turning golden. Now, gently swirl the pan—do not use a spoon—to help the sugar melt evenly. Continue cooking until the sugar turns a deep amber color, like the color of a penny. This should take about 6-8 minutes total. Watch it closely; caramel can go from perfect to burnt in seconds.
Once the sugar is fully melted and amber, remove the pan from heat. Immediately add the cubed butter. The mixture will bubble up vigorously—that is normal. Whisk until the butter is completely melted and incorporated. Slowly pour in the room-temperature heavy cream while whisking constantly. The mixture will steam and bubble again. Keep whisking until smooth. Stir in the vanilla extract and flaky sea salt. Let the caramel cool for 15-20 minutes at room temperature. It will thicken as it cools.
Step 2: Whip the Cream
In your large mixing bowl, pour the cold heavy cream and vanilla extract. Using your hand mixer or stand mixer, whip the cream on medium-high speed until stiff peaks form. This takes about 3-4 minutes with a mixer. You are looking for peaks that hold their shape when you lift the beaters. Be careful not to overwhip, or you will end up with butter. The cream should look billowy and thick, like a cloud.
Step 3: Assemble and Freeze
Pour the sweetened condensed milk into the bowl with the whipped cream. Using your rubber spatula, gently fold everything together. Do not stir vigorously—you want to keep as much air in the mixture as possible. Fold until just combined, with no white streaks remaining.
Now, pour about half of the cream mixture into your loaf pan. Drizzle a generous amount of the cooled salted caramel sauce over the top—about 1/3 of the sauce. Use a knife or skewer to gently swirl it through the cream. Add the remaining cream mixture on top, then drizzle more caramel and swirl again. Reserve a little caramel for serving later. Sprinkle a pinch of flaky sea salt over the top for that signature salty crunch.
Cover the pan with plastic wrap or a lid and place it in the freezer. Freeze for at least 6 hours, but overnight is best. The ice cream needs time to set properly. After 6 hours, it will be scoopable but soft. After 12 hours, it is perfect.
Cooking Tips & Techniques
I have made this recipe more times than I can count, and I have definitely made my share of mistakes. Here is what I have learned the hard way so you do not have to.
Do not rush the caramel. The biggest mistake people make is stirring the sugar while it melts. Stirring causes the sugar to clump and crystallize. Just let it be. Swirl the pan gently once the edges start to turn golden. If you get sugar crystals on the sides of the pan, use a wet pastry brush to wash them down. This prevents the whole batch from seizing up.
Room temperature cream is crucial. When you add cold cream to hot caramel, it can cause the caramel to harden into chunks. I learned this the hard way when I ended up with caramel-flavored toffee bits instead of sauce. Let your cream sit out for 10 minutes before adding it.
Do not overwhip the cream. This is another rookie mistake I made. If you whip the cream too much, it becomes grainy and starts to separate into butter. Stop as soon as you see stiff peaks. The mixture should look smooth and glossy, not curdled.
Layer the caramel strategically. If you dump all the caramel into the cream at once, it sinks to the bottom. Swirling it in layers gives you those beautiful ribbons of caramel throughout every scoop.
Be patient with freezing. I know it is tempting to check after 4 hours, but the ice cream needs a full 6 hours minimum. If you scoop too early, it will be too soft and melt quickly. Patience pays off here.
Variations & Adaptations
This recipe is incredibly versatile. Here are some of my favorite ways to change it up.
Chocolate Salted Caramel: Add 1/2 cup of unsweetened cocoa powder to the cream mixture before folding. The chocolate and salted caramel combination is absolutely divine. I made this for a birthday party and it disappeared in minutes.
Vegan Version: Use full-fat coconut cream instead of heavy cream, and sweetened condensed coconut milk instead of the dairy version. Use vegan butter for the caramel. The texture is slightly less creamy but still incredibly satisfying. My vegan friend was thrilled when I brought this to a summer barbecue.
Nutty Crunch: Fold in 1/2 cup of toasted pecans or chopped salted almonds after swirling in the caramel. The crunch adds a wonderful contrast to the silky ice cream. I love this version for fall gatherings.
Espresso Salted Caramel: Add 1 tablespoon of instant espresso powder dissolved in 1 tablespoon of warm water to the cream mixture. The coffee flavor deepens the caramel and makes it taste even more sophisticated. Perfect for after-dinner indulgence.
Cookie Dough Swirl: Make a batch of edible cookie dough and fold it into the ice cream before freezing. The combination of salted caramel and cookie dough is pure nostalgia. My kids beg for this version every weekend.
Serving & Storage Suggestions
This ice cream is best served slightly softened. Take it out of the freezer about 5-10 minutes before scooping. Use a warm ice cream scoop for the cleanest scoops—just run it under hot water and dry it off.
For serving, I love to drizzle a little extra reserved salted caramel sauce over each scoop. A final sprinkle of flaky sea salt on top makes it look professional. You can also serve it in waffle cones, bowls, or even between two cookies for an ice cream sandwich. It pairs beautifully with warm brownies or a slice of apple pie.
For storage, keep the ice cream in an airtight container in the freezer. Press a piece of parchment paper directly onto the surface before sealing to prevent ice crystals from forming. It will stay fresh for up to 2 weeks, though honestly, it never lasts that long in my house.
If the ice cream becomes too hard after a few days, let it sit at room temperature for 10-15 minutes before scooping. The flavor actually develops and deepens after a day or two in the freezer, so leftovers taste even better.
Nutritional Information & Benefits
Here is the estimated nutritional breakdown per serving (based on 8 servings):
| Nutrient | Amount Per Serving |
|---|---|
| Calories | 420 |
| Total Fat | 28g |
| Saturated Fat | 17g |
| Cholesterol | 95mg |
| Sodium | 240mg |
| Total Carbohydrates | 40g |
| Sugars | 36g |
| Protein | 4g |
While this is definitely a treat, there are some redeeming qualities. The heavy cream provides a good dose of vitamin A and healthy fats that help keep you full. The sweetened condensed milk adds calcium for strong bones. And the sea salt? It contains essential minerals like magnesium and potassium. Of course, this is an indulgence, not a health food. But life is about balance, and sometimes you just need a scoop of homemade ice cream.
For those with dietary restrictions, please note this recipe contains dairy and gluten (check your vanilla extract). It is not suitable for vegans unless you use the substitutions mentioned above.
FAQs
Can I use store-bought caramel sauce instead of making my own?
Yes, you can absolutely use store-bought caramel sauce. Just make sure it is thick, not runny. Thin caramel will sink to the bottom and make the ice cream icy. Homemade is better, but in a pinch, store-bought works.
Why did my caramel turn into hard chunks?
This usually happens when you add cold cream to hot caramel. Always let your cream come to room temperature before adding it. Also, make sure you whisk constantly as you pour. If it does seize, gently reheat the mixture while whisking until smooth.
Can I make this without a mixer?
Yes, you can whip the cream by hand using a whisk. It will take about 5 minutes of steady whisking, but it is totally doable. Your arm might get a workout, but the result is the same.
How long does this ice cream last in the freezer?
It stays fresh for up to 2 weeks when stored in an airtight container. After that, it may develop ice crystals or become too hard. Pressing parchment paper onto the surface helps prevent this.
Can I use low-fat or skim milk instead of heavy cream?
No, this recipe requires heavy cream for the right texture. Low-fat milk will not whip properly and will result in an icy, thin ice cream. Stick with heavy cream for the best results.
Conclusion
This easy no-churn salted caramel ice cream is proof that you do not need fancy equipment or culinary training to make something truly special. It is creamy, rich, and packed with that perfect balance of sweet and salty. Every time I make it, I think back to that afternoon with Sarah and how she taught me to trust the simple approach.
I encourage you to make this your own. Add your favorite mix-ins, experiment with different salts, or double the caramel sauce because let us be honest—you can never have too much. Share it with friends on a hot summer evening, or keep it all to yourself for a late-night treat. No judgment here.
Have you tried this recipe? I would love to hear how it turned out for you. Drop a comment below and let me know what variations you tried. And if you loved it, share it with someone who needs a little homemade happiness in their life. Happy scooping!
PrintEasy No-Churn Salted Caramel Ice Cream Recipe
This easy no-churn salted caramel ice cream is creamy, rich, and packed with the perfect balance of sweet and salty. No ice cream maker required—just a bowl, a whisk, and a freezer for restaurant-quality results with almost zero effort.
- Prep Time: 10 minutes
- Cook Time: 10 minutes
- Total Time: 6 hours 20 minutes (including freezing time)
- Yield: 8 servings 1x
- Category: Dessert
- Cuisine: American
Ingredients
- 1 cup (200g) granulated sugar
- 6 tablespoons (85g) unsalted butter, cut into small cubes
- 1/2 cup (120ml) heavy cream, at room temperature
- 1 teaspoon flaky sea salt, plus more for sprinkling
- 1 teaspoon vanilla extract
- 2 cups (480ml) heavy cream, cold
- 1 can (14 ounces or 397g) sweetened condensed milk
- 1 teaspoon vanilla extract
Instructions
- Make the Salted Caramel Sauce: Place a heavy-bottomed saucepan over medium heat and add the granulated sugar in an even layer. Do not stir. Let the sugar melt undisturbed for about 3-4 minutes until the edges turn golden. Gently swirl the pan to help the sugar melt evenly. Continue cooking until the sugar turns a deep amber color (like a penny), about 6-8 minutes total. Watch closely to avoid burning.
- Remove the pan from heat. Immediately add the cubed butter. The mixture will bubble vigorously. Whisk until the butter is completely melted and incorporated.
- Slowly pour in the room-temperature heavy cream while whisking constantly. The mixture will steam and bubble again. Keep whisking until smooth. Stir in the vanilla extract and flaky sea salt. Let the caramel cool for 15-20 minutes at room temperature. It will thicken as it cools.
- Whip the Cream: In a large mixing bowl, pour the cold heavy cream and vanilla extract. Using a hand mixer or stand mixer, whip the cream on medium-high speed until stiff peaks form, about 3-4 minutes. Be careful not to overwhip. The cream should look billowy and thick.
- Assemble and Freeze: Pour the sweetened condensed milk into the bowl with the whipped cream. Using a rubber spatula, gently fold together until just combined, with no white streaks remaining. Do not stir vigorously to keep as much air in the mixture as possible.
- Pour about half of the cream mixture into a loaf pan. Drizzle a generous amount of the cooled salted caramel sauce over the top (about 1/3 of the sauce). Use a knife or skewer to gently swirl it through the cream.
- Add the remaining cream mixture on top, then drizzle more caramel and swirl again. Reserve a little caramel for serving later. Sprinkle a pinch of flaky sea salt over the top.
- Cover the pan with plastic wrap or a lid and freeze for at least 6 hours, but overnight is best. After 6 hours, it will be scoopable but soft. After 12 hours, it is perfect.
Notes
Do not rush the caramel. Let the sugar melt undisturbed without stirring to prevent crystallization. Use room temperature cream when adding to hot caramel to avoid hardening. Do not overwhip the cream—stop at stiff peaks. Layer the caramel strategically by swirling in layers for beautiful ribbons. Be patient with freezing—minimum 6 hours, overnight is best. For storage, press parchment paper onto the surface to prevent ice crystals. The ice cream stays fresh for up to 2 weeks in an airtight container.
Nutrition
- Serving Size: 1 scoop (about 1/2 c
- Calories: 420
- Sugar: 36
- Sodium: 240
- Fat: 28
- Saturated Fat: 17
- Carbohydrates: 40
- Protein: 4
Keywords: no-churn ice cream, salted caramel, homemade ice cream, easy ice cream, no machine ice cream, summer dessert


