There used to be a tiny bakery tucked between a laundromat and a used bookstore on the corner of Elm and 4th called “The Gilded Tart.” When they closed three winters ago—just a handwritten sign on the door one Tuesday, gone the next—I genuinely mourned their apple cider cookie. It wasn’t fancy. It wasn’t trendy. It was just this perfectly chewy, cinnamon-sugared disc of pure comfort that tasted like the best parts of autumn wrapped in a single bite. I tried other bakeries, other recipes, other versions that were either too cakey or too crispy or tasted like artificial apple flavoring. After eleven tries—eleven, let me tell you, my coworkers were getting tired of being taste-testers—I finally cracked it.
The secret, honestly, was patience. And reducing the apple cider down to a syrup, which I initially thought was a waste of time. But that first batch with the reduction? I closed my eyes after the first bite, and I swear I was right back in that little bakery, watching the steam fog up the windows while the rain came down outside. Maybe you’ve been there—that specific craving for a cookie that tastes like a hug, like coming home, like the first real cold snap of October. These cozy chewy apple cider cookies with cinnamon sugar are exactly that.
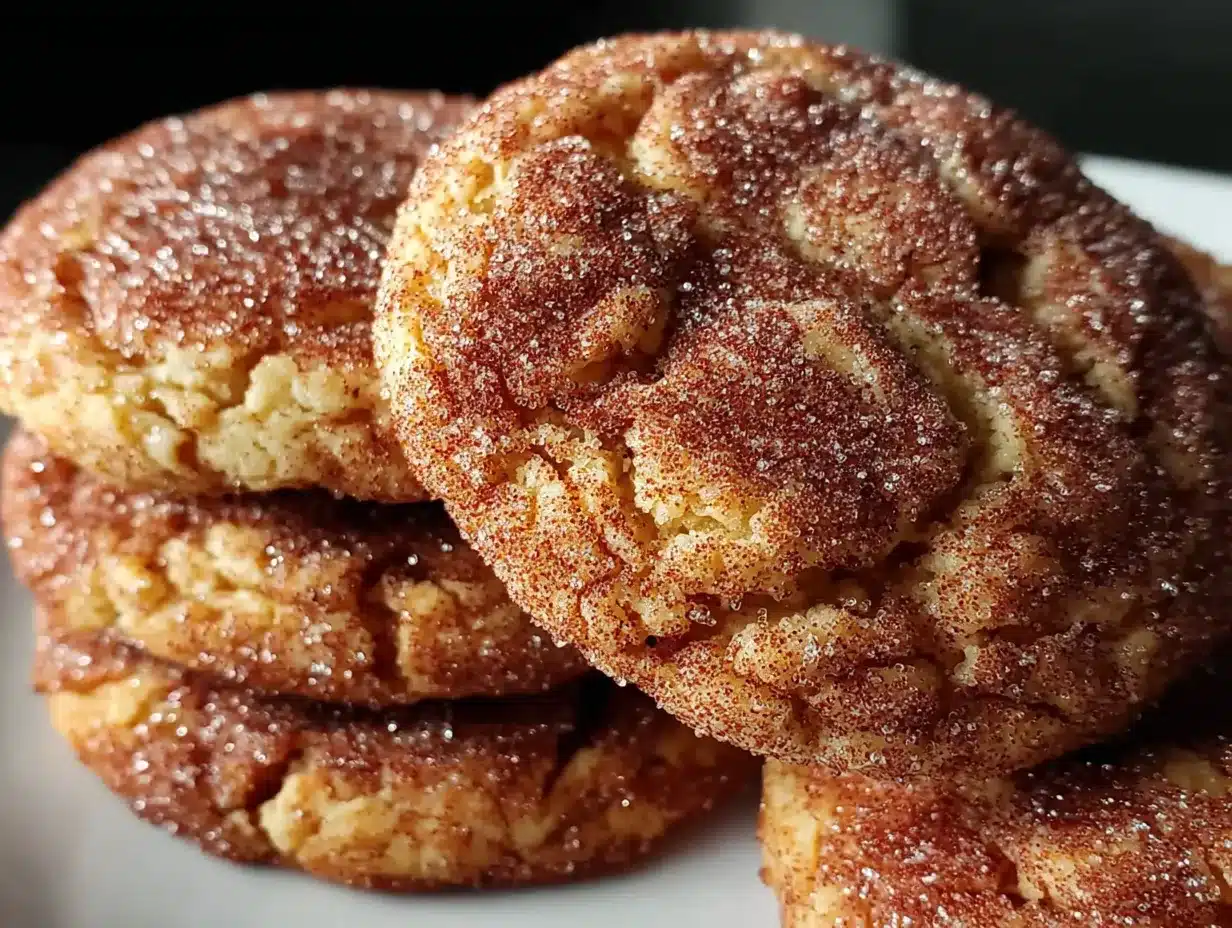
I kept tweaking the recipe until the texture was just right—soft in the center, slightly chewy at the edges, with that crackly cinnamon-sugar crust that shatters a little when you bite in. The apple flavor isn’t shy, either. It’s warm and fruity without being overwhelming, balanced by the spice blend and that essential hit of brown sugar. This recipe stayed with me because it’s not just a cookie. It’s a memory you can bake. And now, I’m sharing it so you can make your own.
Why You’ll Love This Recipe
These aren’t your average cookies. They bring together everything you want in a fall dessert without any of the fuss. I’ve tested this recipe more times than I care to admit, and each batch taught me something new about getting that perfect texture and flavor balance. Here’s why these cookies deserve a spot in your regular rotation:
- Quick & Easy: From start to finish, these come together in about 30 minutes. The dough chills for just 20 minutes, so you’re not waiting around all day for cookie satisfaction.
- Simple Ingredients: No fancy grocery trips needed. You likely have most of these pantry staples already—flour, butter, sugar, cinnamon. The apple cider is the star, and it’s easy to find this time of year.
- Perfect for Cozy Evenings: These cookies were made for cold weather, rainy afternoons, or those days when you just need something warm and familiar. They pair beautifully with a hot mug of tea or coffee.
- Crowd-Pleaser: I brought a batch to a neighborhood potluck last month, and they disappeared before the main course. Kids and adults alike go crazy for that cinnamon-sugar coating.
- Unbelievably Delicious: The texture is the real star here—chewy edges, soft centers, and that crackly top from the cinnamon sugar. It’s next-level comfort food in cookie form.
What makes this recipe different from the rest? It’s the reduced apple cider. Most recipes just dump in regular cider, which makes the dough too wet and leaves the apple flavor weak. By reducing it down, you concentrate all that fruity goodness into a syrup that infuses every bite. This isn’t just another apple cookie recipe—it’s the best version I’ve found after years of trial and error.
These cookies are the kind that make you close your eyes after the first bite. They’re comfort food reimagined—faster than a pie, easier than a cake, but with the same soul-soothing satisfaction. Perfect for impressing guests without stress, or turning a simple Tuesday night into something memorable.
What Ingredients You Will Need
This recipe uses simple, wholesome ingredients to deliver bold apple flavor and satisfying texture without any fuss. Most of these are pantry staples, but a few key players make all the difference. Here’s what you’ll need:
For the Cookies
- 1 cup (226g) unsalted butter, softened to room temperature (I prefer Kerrygold for its richness, but any good-quality butter works)
- 1 cup (200g) packed light brown sugar (dark brown sugar works too, for a deeper molasses flavor)
- 1/2 cup (100g) granulated sugar
- 1 large egg, room temperature
- 1 teaspoon vanilla extract (use pure, not imitation, for the best flavor)
- 1/2 cup (120ml) apple cider, reduced to about 3 tablespoons (see note below)
- 2 1/4 cups (280g) all-purpose flour (spooned and leveled—don’t scoop directly from the bag)
- 1 teaspoon baking soda
- 1/2 teaspoon baking powder
- 1/2 teaspoon salt
- 1 teaspoon ground cinnamon
- 1/2 teaspoon ground nutmeg (freshly grated if you have it—it makes a difference)
- 1/4 teaspoon ground cloves
For the Cinnamon Sugar Coating
- 1/4 cup (50g) granulated sugar
- 1 tablespoon ground cinnamon
Ingredient Notes & Tips: The apple cider reduction is non-negotiable here. Pour 1/2 cup of apple cider into a small saucepan and simmer over medium heat until it reduces to about 3 tablespoons—this takes roughly 10-12 minutes. Watch it carefully toward the end so it doesn’t burn. Let it cool completely before adding it to the dough. I recommend using fresh, unfiltered apple cider for the most authentic flavor. The unfiltered kind has more apple solids, which adds body and flavor to the reduction. If you can only find filtered apple juice, it will work but the flavor won’t be as robust.
For the butter, make sure it’s truly softened—not melted, not cold. You should be able to press your finger into it and leave an indent. If you forget to take it out ahead of time, cut it into small cubes and let it sit for 15 minutes. Don’t microwave it, or you’ll end up with greasy cookies.
The spices can be adjusted to your taste. If you love a stronger spice profile, add an extra 1/4 teaspoon of cinnamon. If cloves aren’t your thing, leave them out. I’ve also made these with a pinch of cardamom, which adds a lovely floral note that pairs beautifully with the apple.
Equipment Needed
You don’t need a professional bakery setup for these cookies. Here’s what I use and what you can substitute if needed:
- Mixing bowls: One large bowl for the wet ingredients, one medium for the dry. Glass or stainless steel works best—plastic can retain odors.
- Electric hand mixer or stand mixer: A hand mixer works perfectly. I’ve made these with a wooden spoon too, but it takes some elbow grease to get the butter and sugar properly creamed.
- Small saucepan: For reducing the apple cider. Any small pot works—just make sure it’s not too wide, or the liquid will evaporate too quickly.
- Baking sheets: Two standard half-sheet pans. If you only have one, let it cool completely between batches.
- Parchment paper or silicone baking mats: Parchment is cheaper and disposable; silicone mats are reusable and give consistent results. I use both, depending on what’s in my drawer.
- Cookie scoop: A 1.5-tablespoon scoop makes uniform cookies. If you don’t have one, use two spoons to portion the dough.
- Wire cooling rack: Essential for getting those crispy edges. If you don’t have one, let the cookies cool on the baking sheet for 5 minutes, then transfer to a plate.
- Measuring cups and spoons: For accuracy, especially with the flour. A kitchen scale is even better for consistent results.
My one splurge recommendation? A good-quality cookie scoop. I bought a OXO one three years ago, and it’s made every batch of cookies more consistent. They bake evenly, look professional, and it saves so much time. Worth every penny.
Preparation Method
Let’s get baking. Follow these steps carefully, and you’ll have the most perfect batch of cozy chewy apple cider cookies in no time.
- Reduce the apple cider. Pour 1/2 cup of apple cider into a small saucepan. Bring it to a simmer over medium heat, then reduce the heat to low. Let it bubble gently for 10-12 minutes, stirring occasionally, until it reduces to about 3 tablespoons. It should look syrupy and smell intensely of apples. Pour it into a small bowl and let it cool completely while you prepare the rest of the ingredients. Don’t skip this step—it’s the key to that concentrated apple flavor.
- Cream the butter and sugars. In a large mixing bowl, beat the softened butter, brown sugar, and granulated sugar together on medium speed for 2-3 minutes, until light and fluffy. You’ll see the mixture turn pale and increase in volume. Scrape down the sides and bottom of the bowl with a spatula halfway through. This step is crucial for creating air pockets that make the cookies tender.
- Add the wet ingredients. Beat in the egg, vanilla extract, and the cooled apple cider reduction. Mix on low speed until just combined. The mixture might look a little curdled at this point—don’t worry, that’s normal. It will come together once you add the dry ingredients.
- Whisk the dry ingredients. In a separate medium bowl, whisk together the all-purpose flour, baking soda, baking powder, salt, cinnamon, nutmeg, and cloves. Whisking ensures the spices and leavening agents are evenly distributed—no one wants a bite with too much baking soda.
- Combine wet and dry. Gradually add the dry ingredients to the wet mixture, mixing on low speed. Stop as soon as the flour disappears—overmixing develops gluten and makes the cookies tough. You should have a soft, slightly sticky dough that holds together when pressed.
- Chill the dough. Cover the bowl with plastic wrap and refrigerate for at least 20 minutes. This is important because the dough is quite soft from the cider reduction. Chilling firms it up, prevents excessive spreading, and develops the flavors. I’ve left it for up to 2 hours with even better results.
- Preheat the oven. While the dough chills, preheat your oven to 350°F (175°C). Line two baking sheets with parchment paper or silicone mats.
- Make the cinnamon sugar coating. In a small shallow bowl, stir together the 1/4 cup granulated sugar and 1 tablespoon cinnamon. Set aside.
- Shape and coat the cookies. Using a cookie scoop or two spoons, portion out rounded tablespoons of dough (about 1.5 tablespoons each). Roll each portion into a smooth ball between your palms. Drop each ball into the cinnamon sugar mixture and roll to coat generously. Place them on the prepared baking sheets, spacing them about 2 inches apart—they will spread.
- Bake. Bake for 10-12 minutes, or until the edges are set and lightly golden. The centers will look slightly puffy and underdone—that’s exactly what you want. They continue to bake on the hot sheet after you take them out. For chewier cookies, bake toward the shorter end of the range. For slightly crisper edges, go to 12 minutes.
- Cool. Let the cookies cool on the baking sheet for 5 minutes. This allows them to set properly. Then transfer them to a wire cooling rack to cool completely. The cinnamon sugar coating will crackle beautifully as they cool.
- Repeat. If you’re baking in batches, let the baking sheets cool completely before placing new dough on them. Warm sheets cause the cookies to spread too much.
Pro tip: For perfectly round cookies, use a round cookie cutter or a glass to gently scoot the edges while they’re still warm on the baking sheet. I learned this trick from a pastry chef friend, and it makes them look bakery-perfect every time.
Cooking Tips & Techniques
I’ve made plenty of mistakes with these cookies so you don’t have to. Here’s what I’ve learned the hard way:
Don’t skip the chill. I once got impatient and baked a batch straight from mixing. They spread into flat, greasy pucks that looked nothing like the pretty cookies in my head. The 20-minute chill firms up the butter and prevents excessive spreading. If you have time, chill for an hour—the flavor deepens beautifully.
Watch the cider reduction carefully. The first time I tried reducing apple cider, I walked away to answer a text. Big mistake. It went from perfect to burnt in about 30 seconds. Burnt apple cider smells awful and tastes worse. Stay close to the stove, especially in the last few minutes. The reduction is done when it coats the back of a spoon and has a syrupy consistency.
Measure flour correctly. This is probably the most common cookie mistake. Scooping directly from the bag packs in too much flour, making dry, cakey cookies. Instead, spoon the flour into your measuring cup, then level it off with a knife. If you want to be really precise, use a kitchen scale—280 grams is the sweet spot.
Room temperature ingredients matter. Cold egg or cold butter won’t cream properly with the sugar. Take your egg out of the fridge 30 minutes before starting. If you forgot, place it in a bowl of warm water for 5 minutes. The butter should be soft enough to leave a fingerprint but not greasy or melted.
Bake one sheet at a time. I know it’s tempting to cram both sheets in the oven, but the uneven heat leads to uneven baking. The top sheet will brown faster while the bottom one stays pale. Bake them one at a time on the middle rack for consistent results. Your patience will be rewarded.
Use a timer, not your eyes. These cookies go from perfectly chewy to overbaked quickly. Set a timer for 10 minutes, then check. If the edges are golden and the centers look slightly underdone, they’re ready. Remember, they continue baking on the hot sheet for another 5 minutes after you pull them out.
Variations & Adaptations
One of the best things about this recipe is how flexible it is. Here are some variations I’ve tried and loved:
Gluten-Free Version: Swap the all-purpose flour with a 1:1 gluten-free baking flour blend. I’ve had good results with Bob’s Red Mill and King Arthur brands. Add 1/4 teaspoon of xanthan gum if your blend doesn’t already include it. The texture will be slightly more delicate, but still deliciously chewy.
Dairy-Free Option: Use vegan butter sticks (not the spreadable kind in a tub) in place of regular butter. Miyoko’s and Earth Balance both work well. The cookies will spread a tiny bit more, so chill the dough for an extra 10 minutes.
Spiced Apple Cider Cookies: Add 1/2 teaspoon of ground ginger and a pinch of allspice to the dry ingredients. This gives the cookies a chai-like warmth that’s perfect for holiday cookie exchanges. I made a batch with this variation for Thanksgiving last year, and my aunt asked for the recipe three times.
Apple Cider Cookies with Glaze: Skip the cinnamon sugar coating and instead drizzle the baked cookies with a simple apple cider glaze. Mix 1 cup of powdered sugar with 2 tablespoons of reduced apple cider and 1/2 teaspoon of vanilla. Whisk until smooth and drizzle over cooled cookies. The glaze hardens into a crackly shell that’s absolutely gorgeous.
Add-Ins: Fold in 1/2 cup of dried cranberries, chopped pecans, or white chocolate chips after mixing the dough. The cranberries add tartness that balances the sweet apple flavor. Pecans add a lovely crunch. White chocolate brings extra sweetness and creaminess.
Bakery-Style Jumbo Cookies: Use a 3-tablespoon cookie scoop and increase the baking time to 14-16 minutes. You’ll get 12 large cookies instead of 24 regular ones. These are perfect for dunking in a tall glass of cold milk.
Serving & Storage Suggestions
These cookies are best served slightly warm, when the cinnamon sugar coating is still a little crackly and the centers are soft and tender. Let them cool on the baking sheet for 5 minutes, then transfer to a plate and enjoy immediately. If you can wait that long, that is.
For a cozy presentation, arrange the cookies on a rustic wooden board or a simple white plate. Sprinkle a little extra cinnamon sugar over the top for visual appeal. They pair beautifully with a hot cup of spiced chai, a mug of apple cider (of course), or a strong cup of coffee. For a dessert spread, serve them alongside vanilla ice cream or a dollop of whipped cream.
Storage: Store the cookies in an airtight container at room temperature for up to 5 days. Layer them with parchment paper between each layer to prevent sticking. The cinnamon sugar coating may soften slightly over time, but they’ll still be delicious.
Freezing Instructions: These cookies freeze beautifully. For baked cookies, let them cool completely, then place them in a single layer in a freezer-safe container or zip-top bag. Freeze for up to 3 months. Thaw at room temperature for about 30 minutes before serving. You can also freeze the unbaked dough balls. Roll them into balls, coat them in cinnamon sugar, and place them on a parchment-lined baking sheet. Freeze until solid, then transfer to a freezer bag. Bake directly from frozen, adding 2-3 minutes to the baking time.
Reheating: To bring back that fresh-from-the-oven warmth, pop a cookie in the microwave for 10-15 seconds. For a crispier exterior, reheat in a 300°F oven for 5 minutes. The smell alone is worth it.
Flavor note: These cookies actually taste even better the next day. The apple flavor mellows and blends with the spices, creating a more complex, well-rounded taste. So don’t be sad if you have leftovers—they’re a gift that keeps giving.
Nutritional Information & Benefits
While these are definitely a treat, they do have some redeeming qualities. Here’s the estimated nutrition per cookie (based on 24 cookies):
| Nutrient | Amount per Cookie |
|---|---|
| Calories | 165 |
| Total Fat | 8g |
| Saturated Fat | 5g |
| Cholesterol | 25mg |
| Sodium | 115mg |
| Total Carbohydrates | 23g |
| Dietary Fiber | 1g |
| Sugars | 14g |
| Protein | 2g |
The apple cider provides a small amount of vitamin C and antioxidants, while the cinnamon has anti-inflammatory properties. The brown sugar adds a touch of molasses, which contains small amounts of calcium, potassium, and iron. Of course, these are still cookies—they’re meant to be enjoyed in moderation as part of a balanced diet.
For those with dietary concerns, this recipe contains gluten, dairy, and eggs. For a gluten-free version, see the variations section above. The dairy-free option using vegan butter works well for those avoiding dairy.
Personally, I believe that food is about more than just nutrients. These cookies are about comfort, connection, and the simple joy of baking something delicious. Sometimes, that’s just as important as what’s on a nutrition label.
Conclusion
These cozy chewy apple cider cookies with cinnamon sugar are everything I hoped they would be—and more. They’re the cookie I’ve been chasing since that little bakery closed, and now I get to make them whenever the craving strikes. And honestly, the craving strikes a lot during apple season.
I hope you’ll try this recipe and make it your own. Maybe you’ll add extra cinnamon, or swap in some dried cranberries, or double the batch so you can freeze half for later. Whatever you do, don’t be afraid to experiment. That’s the beauty of baking—every batch teaches you something new.
I’d love to hear how these turn out for you. Did you make any variations? Did they disappear as fast as mine always do? Drop a comment below and let me know. And if you share them on social media, tag me—I want to see your beautiful creations. Happy baking, friends. May your kitchen smell like apples and cinnamon, and may your cookies always be perfectly chewy.
Frequently Asked Questions
Can I use apple juice instead of apple cider?
You can, but the flavor won’t be as rich. Apple juice is typically filtered and has less apple flavor than unfiltered cider. If you use juice, reduce it the same way, but consider adding an extra 1/4 teaspoon of cinnamon to boost the apple flavor.
Why did my cookies spread too much?
This usually happens for one of three reasons: the dough wasn’t chilled long enough, the butter was too soft or melted, or the flour was measured incorrectly. Make sure your butter is softened but not greasy, chill the dough for at least 20 minutes, and spoon and level your flour properly.
Can I make the dough ahead of time?
Absolutely. You can refrigerate the dough for up to 3 days before baking. Just wrap it tightly in plastic wrap to prevent it from drying out. You can also freeze the dough balls for up to 3 months—bake directly from frozen, adding 2-3 minutes to the baking time.
How do I get the perfect chewy texture?
The key is not overbaking. Pull the cookies out when the edges are set and golden but the centers still look slightly underdone. They’ll continue to bake on the hot sheet for 5 minutes. Also, using brown sugar instead of all granulated sugar adds moisture and creates a chewier texture.
Can I double this recipe?
Yes, this recipe doubles beautifully. Just make sure your mixing bowl is large enough to hold everything. When doubling, reduce the apple cider in two separate batches rather than trying to reduce a full cup at once—it takes too long and can burn more easily.
PrintCozy Chewy Apple Cider Cookies with Cinnamon Sugar

These perfectly chewy apple cider cookies are coated in cinnamon sugar and taste like the best parts of autumn. The secret is reducing apple cider to a syrup for concentrated flavor, creating a soft center with crackly edges.
- Prep Time: 20 minutes
- Cook Time: 12 minutes
- Total Time: 32 minutes
- Yield: 24 servings 1x
- Category: Dessert
- Cuisine: American
Ingredients
- 1 cup (226g) unsalted butter, softened
- 1 cup (200g) packed light brown sugar
- 1/2 cup (100g) granulated sugar
- 1 large egg, room temperature
- 1 teaspoon vanilla extract
- 1/2 cup (120ml) apple cider, reduced to 3 tablespoons
- 2 1/4 cups (280g) all-purpose flour
- 1 teaspoon baking soda
- 1/2 teaspoon baking powder
- 1/2 teaspoon salt
- 1 teaspoon ground cinnamon
- 1/2 teaspoon ground nutmeg
- 1/4 teaspoon ground cloves
- 1/4 cup (50g) granulated sugar (for coating)
- 1 tablespoon ground cinnamon (for coating)
Instructions
- Reduce the apple cider: Pour 1/2 cup apple cider into a small saucepan. Simmer over medium heat, then reduce to low. Let bubble gently for 10-12 minutes until syrupy and reduced to about 3 tablespoons. Cool completely.
- Cream the butter and sugars: In a large bowl, beat softened butter, brown sugar, and granulated sugar on medium speed for 2-3 minutes until light and fluffy. Scrape down sides.
- Add wet ingredients: Beat in egg, vanilla extract, and cooled apple cider reduction on low speed until just combined.
- Whisk dry ingredients: In a separate bowl, whisk together flour, baking soda, baking powder, salt, cinnamon, nutmeg, and cloves.
- Combine wet and dry: Gradually add dry ingredients to wet mixture, mixing on low until flour disappears. Dough will be soft and slightly sticky.
- Chill dough: Cover bowl with plastic wrap and refrigerate for at least 20 minutes (up to 2 hours).
- Preheat oven to 350°F (175°C). Line baking sheets with parchment paper or silicone mats.
- Make cinnamon sugar coating: In a small bowl, stir together 1/4 cup granulated sugar and 1 tablespoon cinnamon.
- Shape and coat cookies: Using a cookie scoop, portion rounded tablespoons of dough (about 1.5 tablespoons each). Roll into balls, then coat generously in cinnamon sugar mixture. Place on prepared sheets, 2 inches apart.
- Bake for 10-12 minutes, until edges are set and lightly golden. Centers should look slightly underdone.
- Cool on baking sheet for 5 minutes, then transfer to wire rack to cool completely.
- Repeat with remaining dough, letting baking sheets cool between batches.
Notes
The apple cider reduction is key—do not skip it. For best results, chill dough at least 20 minutes. Cookies continue to bake on hot sheet after removal. For perfectly round cookies, use a round cutter to scoot edges while warm. Store in airtight container at room temperature for up to 5 days. Freeze baked cookies for up to 3 months or unbaked dough balls for up to 3 months.
Nutrition
- Serving Size: 1 cookie
- Calories: 165
- Sugar: 14
- Sodium: 115
- Fat: 8
- Saturated Fat: 5
- Carbohydrates: 23
- Fiber: 1
- Protein: 2
Keywords: apple cider cookies, chewy cookies, cinnamon sugar cookies, fall cookies, apple cookies, easy cookie recipe


