The doorbell rang at 8:47 PM on a Tuesday that had already gone sideways. I was in sweatpants, the kids were technically supposed to be asleep, and my sister-in-law stood on the porch holding a bottle of wine and that look that said she needed to talk. Not a planned visit. Not a prepared-for-visit kitchen. I had maybe three ingredients that could pass for hospitality and a sudden, desperate need to make something that felt like an occasion out of thin air.
I opened the fridge. Half a block of cream cheese. A bag of marshmallows from a camping trip three months ago. Some random sprinkles left over from a birthday cake. And then I looked at the pantry and saw the cocoa mix. That’s when it clicked—not just hot chocolate, but a whole spread. A toppings bar. It started with what I had and turned into the most memorable impromptu night we’d had in ages. We sat there dipping spoons into little bowls of stuff, layering flavors, and honestly, the conversation flowed better because our hands were busy building the perfect mug.
That night, the Ultimate Hot Cocoa Toppings Bar was born out of necessity and a half-empty pantry. And it stuck. Because there’s something about giving people choices—even simple ones—that turns a basic drink into an experience. This isn’t about fancy ingredients or complicated recipes. It’s about the joy of customization, the thrill of that first sip when everything comes together just right. Let me show you how to set one up.
Why You’ll Love This Recipe
I’ve tested this setup at birthday parties, Christmas mornings, and even a few random Tuesday nights like that first one. Every single time, people hover around the toppings bar longer than they hover around the main food. That’s the magic of it.
- Incredibly Easy: No actual cooking required. Just prep bowls, pour toppings, and let people go wild. It takes maybe 10 minutes to set up.
- Perfect for Any Crowd: Kids love the sprinkles and marshmallows. Adults go for the caramel sauce and sea salt. Everyone finds their happy place.
- Budget-Friendly: Most of these toppings are pantry staples or cheap store finds. You don’t need specialty items to make it feel luxurious.
- Customizable for Every Diet: Use dairy-free chocolate milk or a keto-friendly base, and the toppings bar adapts right along with it.
- Visually Stunning: Little bowls of colorful toppings arranged on a tray? It photographs beautifully and makes people feel special before they even take a sip.
What makes this different from just handing someone a packet of cocoa mix is the experience. The act of choosing. The layering. The first bite of a marshmallow that’s been dusted with cinnamon and then melted into the hot chocolate. It’s not just a drink anymore—it’s an activity. And honestly, it’s the kind of thing that makes people linger a little longer, talk a little deeper, and remember the night.
What Ingredients You Will Need
This Ultimate Hot Cocoa Toppings Bar uses simple, everyday ingredients to create something that feels far more special than the sum of its parts. Most of these you probably already have in your pantry or can grab on a quick run to the store.
The Base
- Hot cocoa mix or homemade hot chocolate: Use your favorite brand or make a batch from scratch. I personally prefer Ghirardelli’s double chocolate mix for its richness, but Swiss Miss works perfectly too. For a dairy-free option, use a plant-based milk and cocoa powder with sugar.
- Milk or milk alternative: Whole milk gives the creamiest texture, but oat milk is my go-to for a slightly nutty flavor that pairs beautifully with chocolate. Almond milk works too, just watch for separation when adding acidic toppings.
Classic Toppings
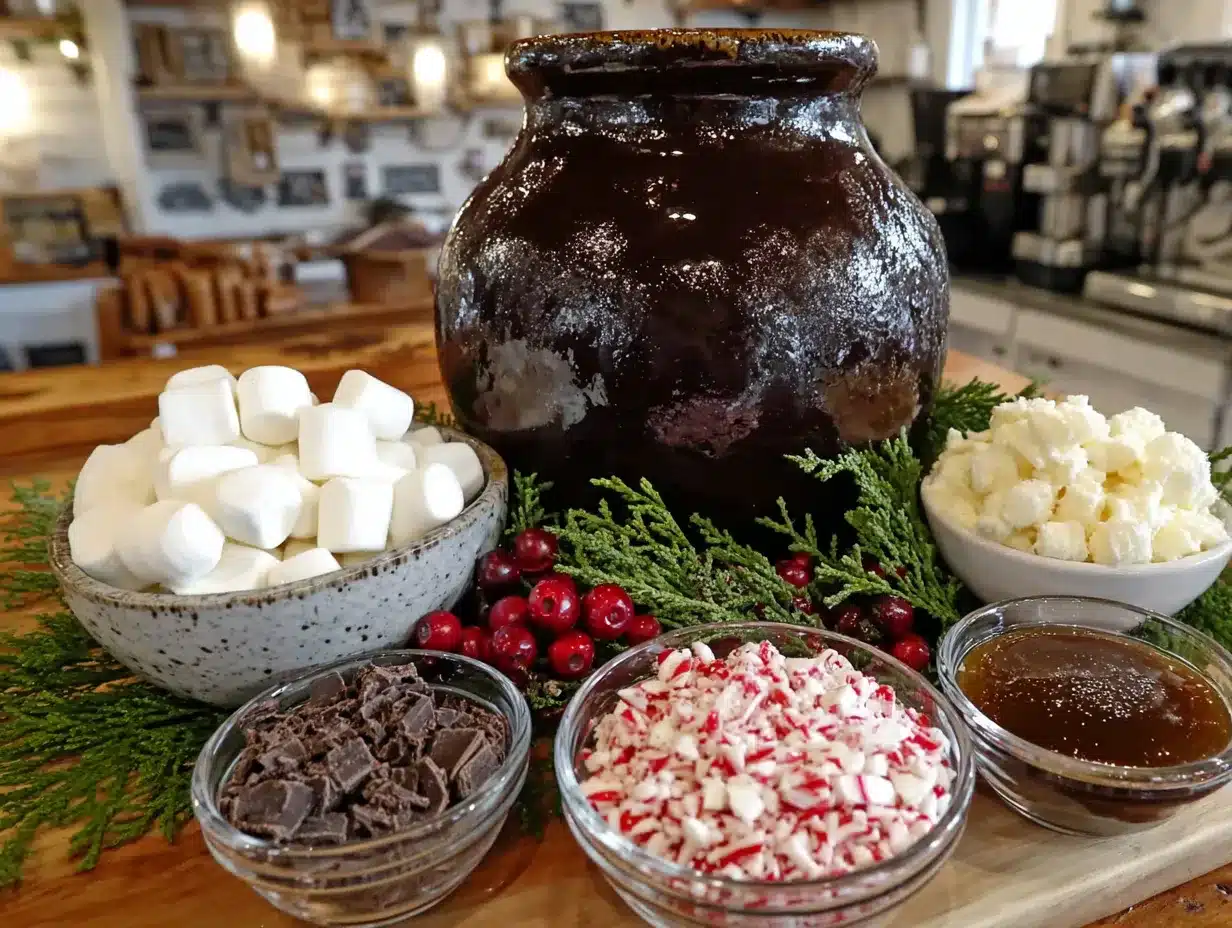
- Mini marshmallows: The standard. Get the colorful ones for holidays or stick with classic white. I like to toast a few with a kitchen torch for that campfire vibe.
- Whipped cream: Homemade is best (just heavy cream and a touch of vanilla), but canned works in a pinch. For a stable version that holds up longer, add a tablespoon of powdered sugar to your heavy cream before whipping.
- Chocolate shavings or curls: Use a vegetable peeler on a chocolate bar. Dark chocolate adds a nice bitterness that balances sweetness.
- Crushed candy canes or peppermint bits: Essential for winter months. I crush them in a zip-top bag with a rolling pin—it’s oddly satisfying and keeps the mess contained.
Indulgent Add-Ons
- Caramel sauce: Store-bought is fine, but warm it slightly so it drizzles easily. I recommend the one from Trader Joe’s or make your own with sugar, butter, and cream.
- Chocolate syrup: For the double-chocolate lovers. Hershey’s works, but a high-quality syrup like Torani makes a noticeable difference.
- Sea salt flakes: Maldon is my favorite. A tiny pinch on top of caramel or dark chocolate takes the whole thing to another level.
- Toasted coconut flakes: Toast them in a dry pan until golden. They add texture and a subtle sweetness that’s unexpected in hot chocolate.
Fun & Festive Options
- Sprinkles: Rainbow, holiday-themed, or even those tiny silver balls. Kids go crazy for these.
- Crumbled cookies: Oreos, shortbread, or graham crackers. Pulse them in a food processor for a finer crumb or leave them chunky for texture.
- Peanut butter or Nutella: A spoonful melted into the hot chocolate makes it instantly richer. Stir it in before adding other toppings.
- Cinnamon sticks or cocoa powder for dusting: A simple sprinkle on top of whipped cream adds visual appeal and a warm flavor note.
Substitution note: For a keto-friendly version, use sugar-free chocolate syrup, unsweetened whipped cream, and crushed pecans instead of cookies. For a vegan spread, swap dairy whipped cream for coconut-based cream and use vegan marshmallows (yes, they exist and they’re surprisingly good).
Equipment Needed
- Small bowls or ramekins: For holding each topping. I use a mix of white ceramic bowls and tiny glass jars for visual variety.
- Serving tray or large platter: Something to arrange everything on. A wooden cutting board works beautifully for a rustic look.
- Spoons or small tongs: One for each topping to avoid cross-contamination. Tiny spoons from a thrift store are perfect for this.
- Mugs: Assorted sizes and colors make the bar feel more inviting. I love using clear glass mugs so you can see the layers.
- Small pitcher or teapot: For holding the hot chocolate if you’re serving it separately from the toppings bar.
- Kitchen torch (optional): For toasting marshmallows or meringue. It’s a fun touch that impresses guests.
If you don’t have ramekins, use muffin tins—each cup holds a different topping perfectly. It’s a budget-friendly hack I learned from a party planning blog years ago and it works like a charm. Also, if you’re making this for a crowd, consider using a lazy Susan so everyone can reach everything without reaching across the table.
Preparation Method
- Choose your hot chocolate base. For a crowd, I recommend making a large batch on the stovetop. Combine 1 cup of cocoa powder, ½ cup of sugar, and a pinch of salt in a large pot. Whisk in 1 cup of water until smooth, then add 6 cups of milk (or your preferred alternative). Heat over medium, stirring occasionally, until hot but not boiling. This makes about 6-8 servings. For an even easier option, prepare individual packets of hot cocoa mix with hot water or milk in each mug.
- Prepare your toppings. This is where you can get creative. Start with the classics: mini marshmallows, whipped cream, and chocolate shavings. Then add 2-3 fun options like crushed candy canes, toasted coconut, or crumbled cookies. I usually aim for 8-10 toppings total—enough to feel abundant without overwhelming the table.
- Arrange the toppings bar. Place your small bowls or ramekins on the serving tray. Group similar toppings together: creamy ones (caramel, Nutella) on one side, crunchy ones (cookies, coconut) on another, and colorful ones (sprinkles, peppermint) in the center for visual pop. Leave space at the front for the mugs.
- Warm the syrups. If using caramel or chocolate syrup, warm them slightly so they drizzle easily. Place the bottles or bowls in a shallow dish of hot water for 5 minutes before serving. This small step makes a huge difference in how they coat the whipped cream.
- Set up the hot chocolate station. If serving from a pitcher, keep it warm by wrapping it in a kitchen towel or placing it on a warming tray. Alternatively, set up a small slow cooker on the “warm” setting—it keeps the hot chocolate at the perfect temperature for hours and looks charming on the table.
- Provide serving utensils. Place a small spoon or tongs in each topping bowl. This prevents the dreaded “marshmallow touched the sprinkles” situation and keeps everything tidy. I like to use different colored spoons for each bowl—it adds a playful touch.
- Let guests build their own. Encourage them to start with the hot chocolate, then add whipped cream or marshmallows first (they melt into the drink), followed by drizzles and crunchy toppings. But honestly, there’s no wrong way to do it. Some people layer everything at once, others add toppings gradually with each sip.
- Refill as needed. Keep extra toppings on standby in the kitchen. The marshmallows and whipped cream always go fastest, so have backups ready. If you’re using a slow cooker, stir the hot chocolate occasionally to prevent a skin from forming on top.
Troubleshooting tip: If your whipped cream deflates quickly, make sure your cream is very cold and your bowl is chilled. Add a tablespoon of powdered sugar for stability. If the hot chocolate tastes too thin, whisk in a tablespoon of cocoa powder mixed with a teaspoon of sugar until dissolved.
Cooking Tips & Techniques
I’ve set up this toppings bar more times than I can count, and I’ve made every mistake in the book. Here’s what I’ve learned the hard way so you don’t have to.
Don’t skip the warm syrups. The first time I did this, I put cold caramel sauce on the table. It globbed onto the whipped cream and refused to drizzle. Warm it slightly—just 10-15 seconds in the microwave or a quick bath in hot water—and it transforms into a silky ribbon that coats everything beautifully.
Watch your marshmallow-to-cocoa ratio. Too many marshmallows and the drink becomes a sugary mess. Too few and it feels sparse. I aim for about 5-6 mini marshmallows per mug, or one large toasted marshmallow on top. The key is balance—you want the chocolate flavor to shine through.
Timing is everything. Set up the toppings bar about 15 minutes before you plan to serve. This gives you time to arrange everything, warm the syrups, and make sure the hot chocolate is at the perfect temperature. If you set it up too early, the whipped cream might start to separate or the cookies might get stale.
One mistake I still make: Forgetting to put out napkins. The first time I hosted a toppings bar party, everyone had chocolate-sticky fingers and nowhere to wipe them. Now I always set out a stack of cloth napkins next to the mugs. It’s a small detail that makes the experience feel more polished.
Texture contrast is your secret weapon. The best hot chocolate mugs have a mix of creamy (whipped cream), crunchy (crushed cookies), and chewy (marshmallows) elements. I always include at least one topping from each category. It keeps every sip interesting and prevents the drink from feeling one-note.
Variations & Adaptations
This Ultimate Hot Cocoa Toppings Bar is endlessly customizable. Here are a few variations I’ve tried and loved.
Seasonal Variations
- Winter Wonderland: Add crushed candy canes, peppermint sticks, white chocolate shavings, and a dusting of edible glitter. It’s festive and feels magical.
- Spring Fling: Swap in freeze-dried strawberries, coconut flakes, and a drizzle of white chocolate. The fruity notes pair beautifully with the rich cocoa.
- Summer Sips: Use a cold chocolate milk base instead of hot. Top with ice cream, chocolate syrup, and a sprinkle of sea salt. It’s like a float but better.
- Fall Harvest: Add pumpkin spice seasoning, crushed graham crackers, and a caramel drizzle. It tastes like autumn in a mug.
Dietary Adaptations
- Vegan: Use oat milk for the base, coconut whipped cream, and vegan marshmallows (Dandies is a great brand). Most dark chocolate is naturally vegan, so shavings work perfectly.
- Keto/Low-Carb: Make the hot chocolate with unsweetened almond milk, cocoa powder, and a keto-friendly sweetener like erythritol. Top with sugar-free whipped cream, crushed pecans, and a pinch of cinnamon.
- Nut-Free: Skip the peanut butter and Nutella. Use sunflower seed butter instead for a similar creamy texture without the allergen risk.
Flavor Twists
- Spicy Mexican Hot Chocolate: Add a pinch of cayenne pepper and cinnamon to the cocoa base. Top with a cinnamon stick and a dollop of whipped cream. The heat sneaks up on you in the best way.
- Salted Caramel: Drizzle warm caramel sauce over the whipped cream and finish with a generous pinch of sea salt flakes. It’s my personal favorite—the salt cuts through the sweetness perfectly.
- Mint Chocolate Chip: Add a drop of peppermint extract to the hot chocolate. Top with crushed chocolate cookies and a drizzle of chocolate syrup. It tastes like a thin mint in liquid form.
I once tried a s’mores variation with crushed graham crackers, mini marshmallows, and a drizzle of chocolate syrup. I toasted the marshmallows with a kitchen torch right at the table, and everyone lost their minds. It’s become a staple at our campfire-themed parties now.
Serving & Storage Suggestions
Serve the hot chocolate immediately after preparing, while it’s still steaming hot. The toppings bar should be arranged at room temperature, with the syrups warmed just before serving. I like to set everything out on a large wooden board or a marble slab—it looks gorgeous and gives people room to build their mugs.
Complementary pairings: This toppings bar pairs beautifully with a plate of fluffy buttermilk pancakes for a cozy brunch, or with creamy classic deviled eggs for a more savory-sweet balance at a party. For a dessert spread, add a batch of crispy mini blueberry hand pies or fresh caprese skewers for a refreshing contrast.
Storage: Leftover hot chocolate can be stored in an airtight container in the refrigerator for up to 3 days. Reheat gently on the stovetop or in the microwave, whisking to recombine. The toppings should be stored separately: marshmallows in a sealed bag, cookies in an airtight container, and syrups in the refrigerator.
Reheating tips: If the hot chocolate has thickened in the fridge, add a splash of milk while reheating to restore the original consistency. Avoid boiling, as it can cause the milk to separate. For a quick fix, use an immersion blender to smooth it out.
Flavor development: The hot chocolate actually tastes better the next day. The flavors meld together and deepen overnight. I’ve been known to make a double batch just so I have leftovers for breakfast the next morning.
Nutritional Information & Benefits
Here’s an approximate nutritional breakdown for one serving of hot chocolate (using whole milk and standard toppings like marshmallows and whipped cream):
| Nutrient | Amount per Serving |
|---|---|
| Calories | 280-350 |
| Total Fat | 12-15g |
| Saturated Fat | 7-9g |
| Carbohydrates | 38-45g |
| Sugar | 28-35g |
| Protein | 8-10g |
| Calcium | 25% DV |
| Iron | 10% DV |
Health benefits: Dark chocolate (used in the shavings or as a topping) is rich in antioxidants called flavonoids, which can support heart health and reduce inflammation. Milk provides calcium and vitamin D for bone health. If you use oat milk, you’ll also get a good dose of fiber.
Dietary considerations: This recipe contains dairy and may contain gluten depending on your cookie topping choice. For a gluten-free version, use certified gluten-free cocoa mix and skip the cookies. For a lower-sugar option, use unsweetened cocoa powder and a sugar substitute in the base, and limit the sweet toppings.
Allergen note: Common allergens include milk, peanuts (from Nutella or peanut butter), tree nuts (from coconut), and wheat (from cookies). Always label your toppings clearly if serving to a crowd with known allergies.
Personally, I see this as a treat—not an everyday thing, but a wonderful way to bring people together. The joy it brings far outweighs the sugar content in my book.
Conclusion
This Ultimate Hot Cocoa Toppings Bar is proof that you don’t need a complicated recipe to create something memorable. It’s about the experience—the laughter, the choices, the little spoonfuls of joy that turn a simple drink into a shared moment. Whether you’re hosting a holiday party, a cozy night in, or just need to make a Tuesday feel special, this setup delivers every time.
I love how adaptable it is. You can go all out with a dozen toppings or keep it simple with just marshmallows and chocolate shavings. The magic is in the customization—every mug is a reflection of the person who built it. And honestly, that’s what makes it so fun to watch.
So go ahead, raid your pantry, grab some friends, and build the hot chocolate of your dreams. I’d love to hear what toppings you come up with—drop your favorite combination in the comments below! And if you try this at a party, tag me in your photos. There’s nothing better than seeing a table full of happy people and chocolate-stained smiles.
Frequently Asked Questions
Can I make the hot chocolate base ahead of time?
Absolutely. Make the hot chocolate up to 3 days in advance and store it in the refrigerator. Reheat gently on the stovetop or in the microwave, adding a splash of milk if it’s too thick. Just don’t add the toppings until you’re ready to serve.
What if I don’t have a slow cooker?
No problem at all. You can keep the hot chocolate warm in a large pot on the stovetop over very low heat, stirring occasionally. Or simply reheat individual mugs in the microwave as needed. A thermal carafe also works beautifully and keeps things hot for hours.
How many toppings should I offer?
I recommend 8-10 toppings for a balanced spread. Include a mix of creamy (whipped cream, caramel), crunchy (cookies, coconut), and colorful (sprinkles, peppermint) options. Any more than that and the table starts to feel cluttered. Any fewer and it might not feel like a “bar.”
Can I use this toppings bar for other drinks?
Yes, and it’s fantastic. The same setup works for coffee, hot apple cider, or even milkshakes. Just adjust the toppings to match the base drink—cinnamon for cider, chocolate shavings for coffee, fresh fruit for milkshakes. It’s a versatile concept that adapts to any occasion.
How do I keep the toppings from getting soggy?
Keep crunchy toppings like cookies and coconut in separate bowls and add them just before serving. If you’re setting up the bar in advance, cover the bowls with plastic wrap or small lids to maintain freshness. For marshmallows, use fresh ones from a sealed bag—stale marshmallows get hard and chewy.
Pin This Recipe!
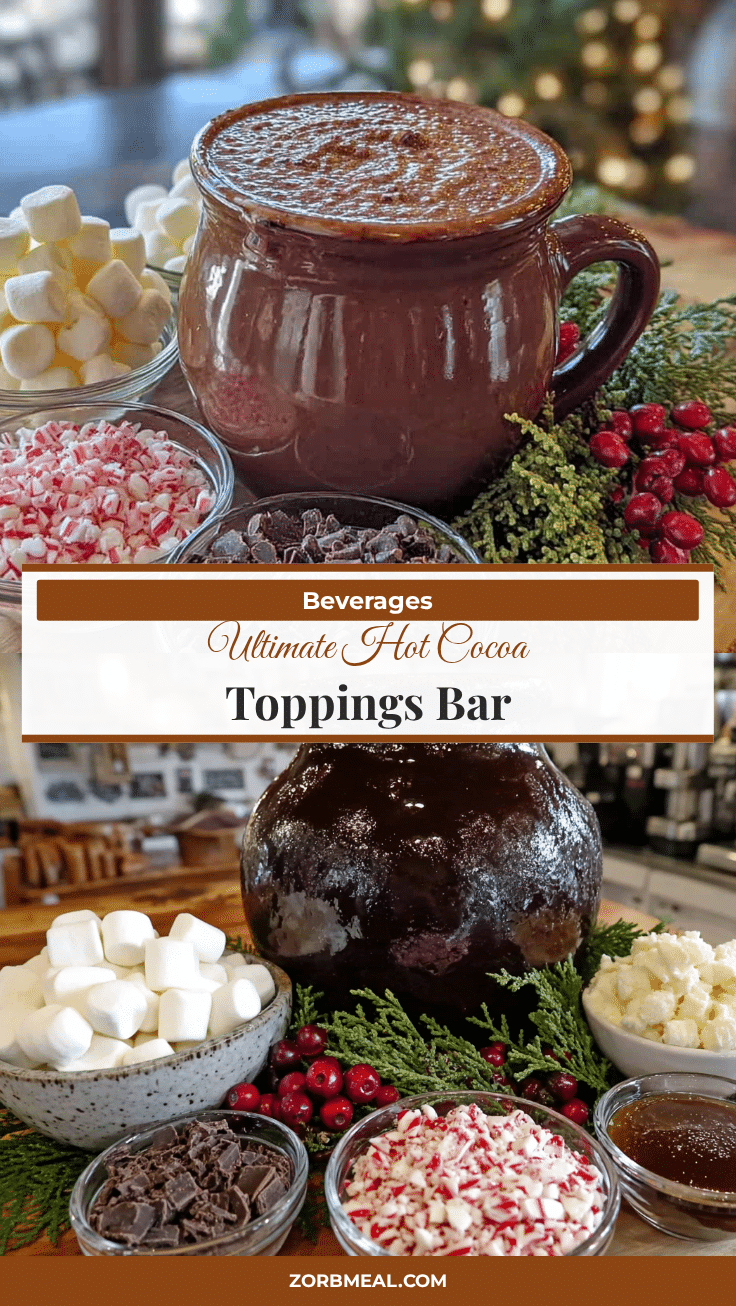
Ultimate Hot Cocoa Toppings Bar: 10 Easy Add-Ons

Turn a simple cup of hot chocolate into a memorable experience with this easy-to-set-up toppings bar. Featuring 10 easy add-ons, it’s perfect for parties, cozy nights, or impromptu gatherings.
- Prep Time: 10 minutes
- Cook Time: 10 minutes
- Total Time: 20 minutes
- Yield: 6-8 servings
- Category: Beverage
- Cuisine: American
Ingredients
- Hot cocoa mix or homemade hot chocolate (e.g., Ghirardelli double chocolate mix or Swiss Miss)
- Milk or milk alternative (whole milk, oat milk, or almond milk)
- Mini marshmallows
- Whipped cream (homemade or canned)
- Chocolate shavings or curls (dark chocolate recommended)
- Crushed candy canes or peppermint bits
- Caramel sauce (store-bought or homemade)
- Chocolate syrup (e.g., Hershey’s or Torani)
- Sea salt flakes (e.g., Maldon)
- Toasted coconut flakes
- Sprinkles (rainbow, holiday-themed, or silver balls)
- Crumbled cookies (Oreos, shortbread, or graham crackers)
- Peanut butter or Nutella
- Cinnamon sticks or cocoa powder for dusting
Instructions
- Choose your hot chocolate base. For a crowd, make a large batch on the stovetop: combine 1 cup cocoa powder, ½ cup sugar, and a pinch of salt in a large pot. Whisk in 1 cup water until smooth, then add 6 cups milk. Heat over medium, stirring occasionally, until hot but not boiling. Makes 6-8 servings. Alternatively, prepare individual packets of hot cocoa mix with hot water or milk.
- Prepare your toppings. Start with classics: mini marshmallows, whipped cream, and chocolate shavings. Add 2-3 fun options like crushed candy canes, toasted coconut, or crumbled cookies. Aim for 8-10 toppings total.
- Arrange the toppings bar. Place small bowls or ramekins on a serving tray. Group similar toppings together: creamy ones on one side, crunchy on another, colorful in the center. Leave space at the front for mugs.
- Warm the syrups. If using caramel or chocolate syrup, warm them slightly by placing the bottles or bowls in a shallow dish of hot water for 5 minutes before serving.
- Set up the hot chocolate station. If serving from a pitcher, keep it warm by wrapping it in a kitchen towel or placing it on a warming tray. Alternatively, use a small slow cooker on the ‘warm’ setting.
- Provide serving utensils. Place a small spoon or tongs in each topping bowl to prevent cross-contamination.
- Let guests build their own. Encourage them to start with hot chocolate, then add whipped cream or marshmallows first, followed by drizzles and crunchy toppings.
- Refill as needed. Keep extra toppings on standby in the kitchen. If using a slow cooker, stir the hot chocolate occasionally to prevent a skin from forming.
Notes
For a keto-friendly version, use sugar-free chocolate syrup, unsweetened whipped cream, and crushed pecans instead of cookies. For a vegan spread, swap dairy whipped cream for coconut-based cream and use vegan marshmallows. Keep crunchy toppings separate and add just before serving to prevent sogginess.
Nutrition
- Serving Size: 1 mug
- Calories: 280350
- Sugar: 2835
- Sodium: 200300
- Fat: 1215
- Saturated Fat: 79
- Carbohydrates: 3845
- Fiber: 23
- Protein: 810
Keywords: hot cocoa, toppings bar, hot chocolate, party, winter, dessert, easy, customizable


