By the third time I made this bark in a single week, I knew I had something special. Not because it was fancy — it’s literally chopped candy bars melted onto chocolate — but because the thing kept disappearing. Every time I turned around, another piece was gone. My husband took some to work, my kid traded a piece for extra screen time (yes, I accepted), and somehow I kept finding excuses to break off just one more corner. That’s the thing about this Easy Leftover Halloween Candy Bark. It doesn’t try to be anything other than what it is: a crunchy, salty, chocolatey mess of leftover candy that somehow feels brand new.
The best part? You don’t need to be a pastry chef or even a confident baker to pull this off. If you can melt chocolate and sprinkle stuff on top, you’ve got this. And honestly, after Halloween, when you’re staring down a pumpkin bucket full of half-eaten candy bars and fun-size Snickers you don’t really want to eat plain, this recipe is a lifesaver. It transforms that pile of odds and ends into something you’d actually serve at a party — or eat straight from the fridge at 11 p.m. (no judgment).
This bark has become my go-to for using up whatever candy survives the holiday. It’s quick, it’s forgiving, and it turns trash into treasure. If you’ve got a bag of mixed Halloween candy sitting around, you’re already halfway there.
Why You’ll Love This Recipe
- Quick & Easy: From start to finish, this bark comes together in about 20 minutes of active time. The hardest part is unwrapping the candy, and honestly, that’s kind of therapeutic.
- Simple Ingredients: You don’t need to buy anything special. Chocolate chips, pretzels, and whatever leftover candy you’ve got — that’s it. No fancy grocery trips required.
- Perfect for Post-Halloween: This is the ultimate way to use up that random mix of candy bars, lollipops, and foil-wrapped chocolates that no one wants to eat plain. It’s also great for holiday parties, bake sales, or gift-giving.
- Crowd-Pleaser: Every time I bring this to a gathering, it disappears faster than almost anything else. Kids love the candy pieces, adults love the salty-sweet pretzel crunch, and everyone loves that it’s not too complicated.
- Unbelievably Delicious: The combination of melted chocolate, crunchy pretzels, and chewy candy pieces creates a texture that’s next-level. It’s like a candy bar and a chocolate bark had a baby, and that baby is perfect.
What makes this recipe different from the dozens of other bark recipes out there is the method. Instead of just melting chocolate and sprinkling candy on top, I layer the pretzels directly into the chocolate so they stay crunchy and don’t fall off. And I use a mix of milk and dark chocolate for a balanced sweetness that doesn’t overwhelm. It’s a small tweak, but it makes a huge difference.
This isn’t just another recipe for using up Halloween candy. It’s the one that makes you look forward to having leftovers. It’s the kind of treat that makes you close your eyes after the first bite, because the salty-sweet-crunchy combo hits just right. Whether you’re making it for a party, a gift, or just because you need a chocolate fix, this bark delivers.
What Ingredients You Will Need
This recipe uses simple, pantry-friendly ingredients to deliver bold flavor and satisfying texture without any fuss. Most of these are things you probably already have in your kitchen, especially if you’ve just survived Halloween.
- 12 oz semi-sweet chocolate chips (I recommend Ghirardelli or Guittard for the smoothest melt. If you use generic brands, just be careful not to overheat them.)
- 6 oz milk chocolate chips (This adds a creamier sweetness that balances the semi-sweet. You can use all semi-sweet if you prefer a darker bark.)
- 1 cup crushed pretzels (Use mini pretzels or regular pretzel twists. Crush them into small pieces, but leave some larger chunks for texture. I like Snyder’s for their salty crunch.)
- 1 ½ cups assorted leftover Halloween candy, chopped (Think Snickers, Kit Kats, Reese’s cups, Twix, Milky Ways — anything with a soft center or caramel works best. Avoid hard candies like lollipops or jawbreakers, as they don’t melt well.)
- Optional: ¼ cup festive sprinkles (These are purely for looks, but they make the bark feel more special. I use orange and black sprinkles for Halloween, but any color works.)
- Optional: Flaky sea salt (A pinch on top right before the chocolate sets really elevates the salty-sweet contrast. Maldon is my go-to.)
Ingredient Tips: For the chocolate, don’t use chocolate chips that are old or have bloomed (that white powdery look) — they won’t melt smoothly. If you’re using candy bars with caramel, chop them into small pieces so the caramel doesn’t get too gooey. And if you’re using pretzels, make sure they’re fresh and crunchy, not stale. Stale pretzels will soften as the chocolate sets, and you’ll lose that satisfying crunch.
Substitution Guidance: If you’re dairy-free, use dairy-free chocolate chips and check your candy bars for dairy content. For a gluten-free version, use gluten-free pretzels (most candy bars are naturally gluten-free, but double-check labels). You can also swap the pretzels for broken-up graham crackers or potato chips for a different salty crunch.
Equipment Needed
You don’t need much for this recipe, which is part of the appeal. Here’s what you’ll need:
- Baking sheet — A standard half-sheet pan works perfectly. Line it with parchment paper for easy removal.
- Parchment paper — Non-negotiable. Without it, the bark will stick to the pan, and you’ll have a chocolatey mess on your hands.
- Medium microwave-safe bowl — For melting the chocolate. Glass or ceramic works best. Avoid plastic, as it can retain moisture and seize the chocolate.
- Rubber spatula — For stirring and spreading the chocolate. A silicone spatula is ideal because it doesn’t scratch your bowl and is easy to clean.
- Chef’s knife and cutting board — For chopping the candy bars. A serrated knife works well for candy with caramel or nougat, as it cuts through without squishing.
- Small bowl — For crushing the pretzels. You can also use a zip-top bag and a rolling pin if you prefer less mess.
Alternatives: If you don’t have a microwave, you can melt the chocolate using a double boiler on the stovetop. Just be careful not to let any water get into the chocolate, or it will seize. If you don’t have a rubber spatula, a wooden spoon works fine, but you’ll have a harder time spreading the chocolate evenly.
Personal Note: I’ve made this bark with both a cheap baking sheet and a high-end one, and honestly, the cheap one works just as well as long as it’s lined with parchment. Don’t overthink the equipment. The only thing I’d recommend splurging on is good chocolate — it makes a noticeable difference in the final texture and flavor.
Preparation Method
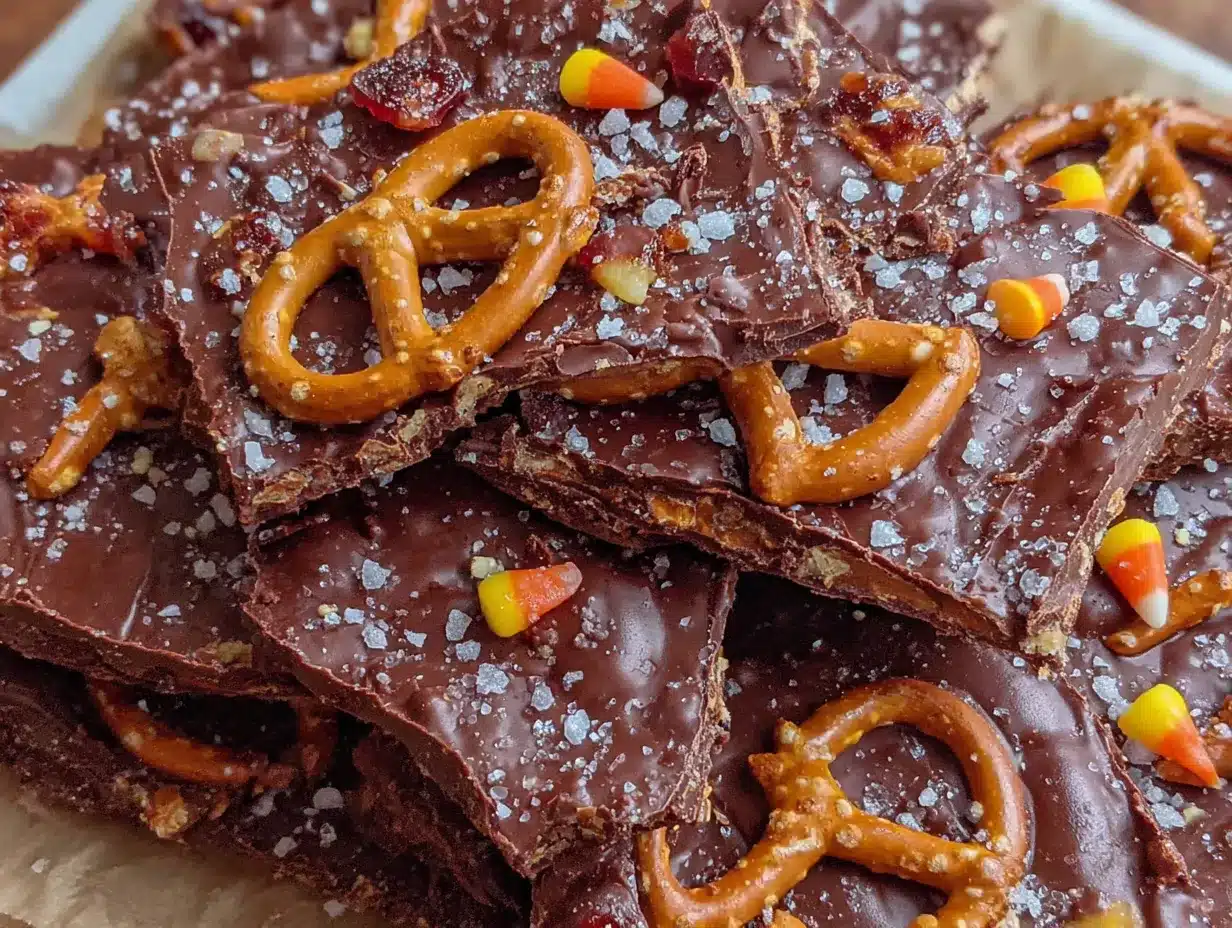
- Prep your workspace. Line a baking sheet with parchment paper, making sure the paper extends slightly over the edges for easy lifting later. Chop your leftover candy bars into small, bite-sized pieces — about ¼-inch chunks. Some pieces can be a little larger for visual appeal. Crush your pretzels into a mix of small pieces and larger chunks. Set everything aside.
- Melt the chocolate. Combine the semi-sweet and milk chocolate chips in a medium microwave-safe bowl. Microwave in 30-second intervals, stirring well after each interval, until the chocolate is completely smooth and glossy. This usually takes about 2 to 3 minutes total. Be careful not to overheat the chocolate — if it starts to look grainy or thick, you’ve gone too far. If that happens, stir in a teaspoon of coconut oil or vegetable oil to smooth it out.
- Add the pretzels. Once the chocolate is melted, stir in the crushed pretzels. Mix until the pretzels are evenly coated and distributed throughout the chocolate. The pretzels should be fully incorporated, not just sitting on top.
- Spread the chocolate mixture. Pour the chocolate-pretzel mixture onto the prepared baking sheet. Use a rubber spatula to spread it into an even layer, about ¼-inch thick. Don’t worry about making it perfect — a rustic, uneven edge is part of the charm. If you want a thinner bark, spread it a bit more; if you prefer a thicker, chunkier bark, keep it slightly thicker.
- Top with candy and sprinkles. While the chocolate is still wet and warm, sprinkle the chopped candy bars evenly over the surface. Press them gently into the chocolate with your fingers or the back of a spoon so they stick. If you’re using sprinkles or flaky sea salt, add them now. Work quickly — the chocolate sets fast, especially if your kitchen is cool.
- Set the bark. Place the baking sheet in the refrigerator for at least 30 minutes, or until the chocolate is completely firm and set. If you’re in a hurry, you can pop it in the freezer for 15 minutes, but watch it carefully — chocolate can bloom if it gets too cold too fast.
- Break into pieces. Once the bark is fully set, lift it out of the pan using the parchment paper. Place it on a cutting board and break it into irregular pieces with your hands. If you prefer clean edges, use a sharp knife to cut it into squares or triangles. Store in an airtight container in the refrigerator or at room temperature, depending on your climate.
Sensory Cues: When the chocolate is fully melted, it should look glossy and smooth, like thick syrup. When you spread it on the pan, it should hold its shape without running. When you press the candy into the chocolate, you should feel a slight resistance — if the chocolate is too runny, it hasn’t set enough; if it’s too firm, you waited too long.
Troubleshooting: If your chocolate seizes (turns grainy and stiff), don’t panic. Stir in a tablespoon of vegetable oil or coconut oil and whisk vigorously. It should smooth out. If your candy bars are too sticky to chop, pop them in the freezer for 10 minutes first. And if the bark doesn’t set properly, it might be because your chocolate was overheated or your kitchen is too warm. Try refrigerating it longer next time.
Cooking Tips & Techniques
Here are a few things I’ve learned from making this bark more times than I care to admit:
Don’t overmix the chocolate. When you stir the pretzels in, do it gently and just until combined. Overmixing can cause the chocolate to seize or become grainy, especially if you’re working in a cool kitchen. Also, if you stir too vigorously, you’ll break the pretzels into dust, and you want some texture.
Work in small batches. If you’re making a double batch, melt the chocolate in two separate bowls rather than one big one. Larger quantities of chocolate are harder to melt evenly and more prone to overheating. Plus, working in batches gives you more control over the spreading and topping process.
Timing is everything. The window between spreading the chocolate and adding the toppings is surprisingly short. Have all your chopped candy, pretzels, and sprinkles ready to go before you start melting the chocolate. I learned this the hard way — I once had to frantically chop a Snickers bar while the chocolate was already starting to set, and the bark ended up with bald spots.
Use a thermometer if you’re nervous. Chocolate should be melted to around 90°F for milk chocolate and 88°F for dark chocolate. If you don’t have a thermometer, just go by feel — the chocolate should be warm to the touch but not hot. If it’s too hot, it will seize or burn.
Let it set properly. I know it’s tempting to rush this step, but patience pays off. If you try to break the bark too early, it will be soft and messy. If you leave it in the fridge too long (like overnight), it might develop condensation, which can make the chocolate look dull. Aim for 30 to 45 minutes in the fridge, or until the bark is completely firm and snaps when you break it.
Variations & Adaptations
This recipe is endlessly adaptable, which is one of the reasons I love it. Here are a few variations I’ve tried and loved:
- Spicy Chocolate Bark: Add a pinch of cayenne pepper or a drizzle of hot honey to the melted chocolate before spreading. The heat pairs beautifully with the salty pretzels and sweet candy. I made this version for a Super Bowl party, and it was gone in minutes.
- Peanut Butter Lover’s Bark: Swirl in ¼ cup of creamy peanut butter into the melted chocolate before adding the pretzels. Then top with chopped Reese’s cups and salted peanuts. This one is dangerously addictive.
- White Chocolate Version: Swap the semi-sweet and milk chocolate for white chocolate chips. Use white chocolate–friendly candy bars like Kit Kats or white chocolate–covered pretzels. Add dried cranberries or freeze-dried strawberries for a pop of color and tartness.
- Vegan/Dairy-Free: Use dairy-free chocolate chips and check your candy bars for dairy. Most dark chocolate bars are naturally dairy-free, and there are plenty of vegan-friendly candy options available now. I’ve made this with Enjoy Life chocolate chips and it worked beautifully.
- Holiday-Themed Bark: Swap the Halloween candy for Christmas-themed candies (peppermint bark with crushed candy canes is a classic), Valentine’s Day chocolates, or Easter egg candies. The method stays the same — just change the toppings to match the occasion.
Personal Variation: My favorite version is what I call “Everything But The Kitchen Sink” bark. I use a mix of milk and dark chocolate, add crushed pretzels, chopped Snickers, chopped Kit Kats, a drizzle of caramel sauce, and a sprinkle of flaky sea salt. It’s over the top, but every bite is different, and that’s kind of the point.
Serving & Storage Suggestions
Serving: This bark is best served cold or at room temperature. I prefer it straight from the fridge — the chocolate stays firm and the pretzels stay crunchy. If you’re serving it at a party, arrange the pieces on a platter or in a decorative bowl. It also makes a great gift: just stack a few pieces in a clear cellophane bag tied with a ribbon.
Complementary Dishes: This bark pairs beautifully with a hot cup of coffee or a cold glass of milk. If you’re serving it as part of a dessert spread, it goes well with creamy classic vanilla bean layer cake or no-bake firecracker cheesecake bars for a fun contrast in textures. For a savory balance, I love serving it alongside creamy buffalo chicken dip at parties — the spicy, creamy dip offsets the sweet, salty bark perfectly.
Storage: Store the bark in an airtight container in the refrigerator for up to 2 weeks. If your kitchen is cool (below 70°F), you can store it at room temperature, but it might soften slightly. For longer storage, freeze the bark in a freezer-safe container or zip-top bag for up to 3 months. To thaw, transfer it to the refrigerator overnight or let it sit at room temperature for 15 minutes.
Reheating: This bark is meant to be eaten cold or at room temperature, so reheating isn’t really necessary. If you want to soften it slightly for a more gooey texture, let it sit at room temperature for 10 to 15 minutes before serving. Avoid microwaving it, as the chocolate will melt and the pretzels will get soggy.
Flavor Development: The bark actually tastes better after a day or two in the fridge. The flavors meld together, and the chocolate develops a deeper, more complex taste. The pretzels might soften slightly over time, but they’ll still have a good crunch for at least a week.
Nutritional Information & Benefits
This bark is definitely a treat, not a health food, but it does have some redeeming qualities. Here’s a rough nutritional breakdown per serving (about 2 ounces):
- Calories: 220-250
- Fat: 12-15g
- Carbohydrates: 28-32g
- Protein: 3-4g
- Fiber: 2-3g
- Sugar: 20-24g
Health Benefits: Dark chocolate is rich in antioxidants called flavonoids, which can help reduce inflammation and improve heart health. The pretzels provide a small amount of iron and B vitamins, though let’s be honest — you’re not eating this for the nutrients. The real benefit is the joy it brings, and sometimes that’s just as important.
Dietary Considerations: This recipe can be made gluten-free by using gluten-free pretzels, and dairy-free by using dairy-free chocolate and checking your candy labels. It’s naturally nut-free if you avoid candy bars with nuts, but always double-check labels for cross-contamination risks. If you’re watching your sugar intake, you can use sugar-free chocolate chips and candy, though the texture might be slightly different.
Personal Note: I don’t believe in demonizing treats. This bark is meant to be enjoyed in moderation — a small piece after dinner, a few pieces at a party, or a gift for someone you love. Life’s too short to skip the chocolate.
Conclusion
This Easy Leftover Halloween Candy Bark is the kind of recipe that turns a pile of odds and ends into something you’re actually excited to eat. It’s quick, forgiving, and endlessly adaptable — perfect for using up whatever candy survived the holiday. Whether you’re making it for a party, a gift, or just because you need a chocolate fix, it delivers every time.
I love this recipe because it’s proof that you don’t need fancy ingredients or complicated techniques to make something special. It’s just chocolate, pretzels, and a little bit of creativity. And honestly, that’s the best kind of recipe — one that feels like a win every single time.
So go ahead, dig through that Halloween stash, and give this bark a try. Customize it with your favorite candy bars, add a pinch of sea salt, or drizzle it with caramel. Whatever you do, I promise you’ll be glad you did. And if you make it, I’d love to hear about it — leave a comment below, share a photo, or tag me on social media. Happy snacking!
Frequently Asked Questions
Can I use white chocolate instead of milk or dark chocolate?
Absolutely! White chocolate works beautifully in this recipe. Just keep in mind that white chocolate is more delicate and can seize more easily, so melt it gently and stir frequently. You’ll also want to pair it with candy bars that complement white chocolate, like Kit Kats or white chocolate–covered pretzels.
How do I prevent the chocolate from seizing?
The number one cause of seized chocolate is water. Make sure your bowl and spatula are completely dry before you start melting. Also, avoid overheating — melt the chocolate in short bursts and stir often. If the chocolate does seize, stir in a tablespoon of vegetable oil or coconut oil to smooth it out.
Can I make this bark ahead of time?
Yes! This bark actually tastes better after a day or two in the fridge. You can make it up to 2 weeks in advance and store it in an airtight container in the refrigerator. If you’re making it for a party, I recommend making it at least 24 hours ahead so the flavors have time to meld.
What’s the best way to chop sticky candy bars?
Sticky candy bars like Snickers or Milky Ways can be a pain to chop. The trick is to pop them in the freezer for 10 to 15 minutes before chopping. This firms up the caramel and nougat, making them easier to cut without squishing. Use a serrated knife for the cleanest cuts.
Can I use potato chips instead of pretzels?
Absolutely! Potato chips add a different kind of salty crunch that works surprisingly well with chocolate. Just be aware that chips are more fragile than pretzels, so they’ll break into smaller pieces as you mix them in. I recommend crushing them gently and folding them in at the very end to preserve some of the larger pieces.
Pin This Recipe!
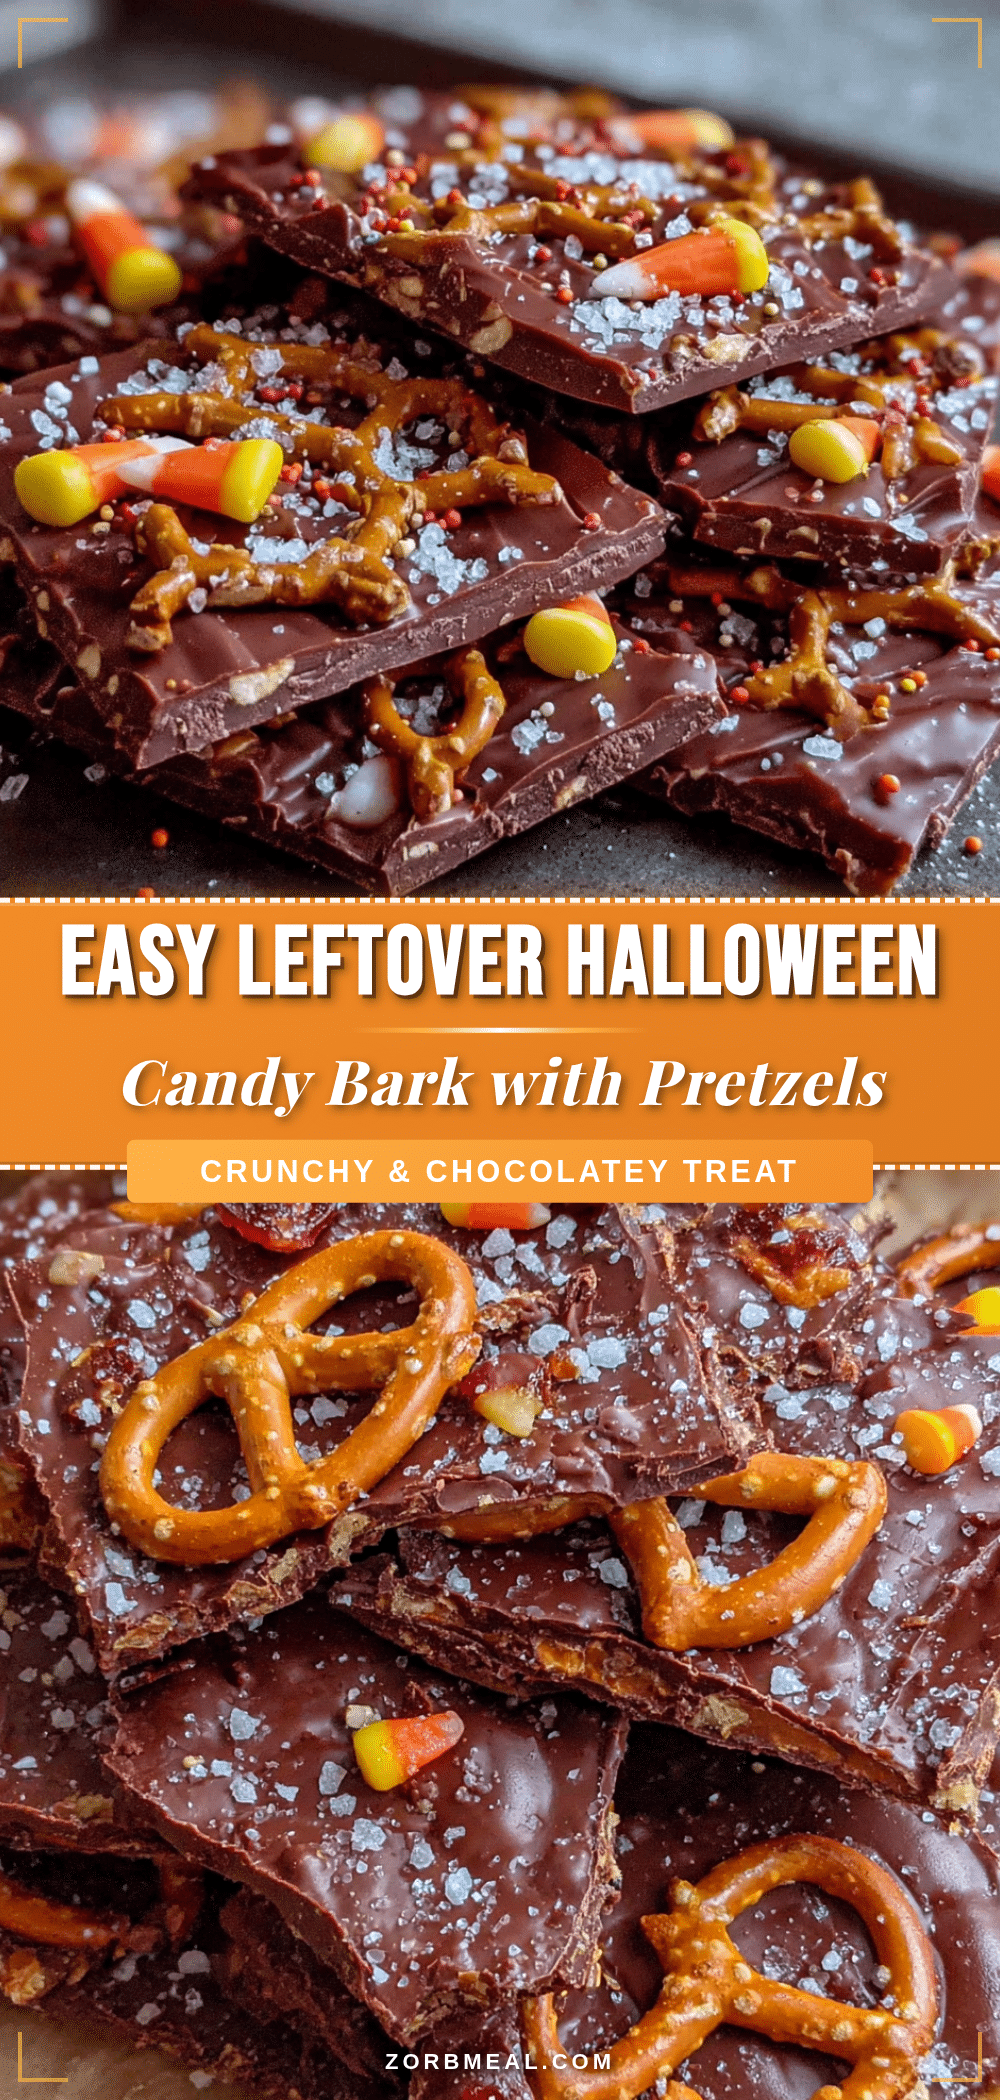
Easy Leftover Halloween Candy Bark: Best Chocolate Pretzel Recipe
This Easy Leftover Halloween Candy Bark transforms leftover candy into a crunchy, salty, chocolatey treat. With melted chocolate, crunchy pretzels, and chopped candy bars, it’s a quick and forgiving recipe that turns trash into treasure.
- Prep Time: 20 minutes
- Cook Time: 5 minutes
- Total Time: 55 minutes
- Yield: 12 servings 1x
- Category: Dessert
- Cuisine: American
Ingredients
- 12 oz semi-sweet chocolate chips
- 6 oz milk chocolate chips
- 1 cup crushed pretzels
- 1 ½ cups assorted leftover Halloween candy, chopped
- ¼ cup festive sprinkles (optional)
- Flaky sea salt (optional)
Instructions
- Line a baking sheet with parchment paper, extending slightly over edges. Chop leftover candy bars into ¼-inch chunks. Crush pretzels into a mix of small pieces and larger chunks. Set aside.
- Combine semi-sweet and milk chocolate chips in a medium microwave-safe bowl. Microwave in 30-second intervals, stirring well after each, until smooth and glossy (about 2-3 minutes total).
- Stir crushed pretzels into melted chocolate until evenly coated and distributed.
- Pour chocolate-pretzel mixture onto prepared baking sheet. Spread into an even layer about ¼-inch thick using a rubber spatula.
- While chocolate is still wet, sprinkle chopped candy bars evenly over surface. Press gently into chocolate. Add sprinkles or flaky sea salt if using.
- Refrigerate for at least 30 minutes until completely firm. For faster setting, freeze for 15 minutes.
- Lift bark out using parchment paper. Break into irregular pieces with hands or cut into squares with a sharp knife. Store in an airtight container in the refrigerator or at room temperature.
Notes
For best results, use fresh pretzels for crunch. If chocolate seizes, stir in 1 tablespoon vegetable or coconut oil. For sticky candy bars, freeze 10-15 minutes before chopping. Bark tastes better after 1-2 days in the fridge.
Nutrition
- Serving Size: 2 ounces
- Calories: 235
- Sugar: 22
- Sodium: 150
- Fat: 13.5
- Saturated Fat: 8
- Carbohydrates: 30
- Fiber: 2.5
- Protein: 3.5
Keywords: Halloween candy bark, chocolate pretzel bark, leftover candy recipe, easy dessert, no-bake dessert, holiday treat


