My husband looked up from his bowl and said, “This is the one. Don’t change a thing.” That never happens. He’s usually the type to suggest more cinnamon or a little less sugar, always tweaking. But with this apple crisp, he just kept eating, quiet and focused, scraping the sides of the bowl until there was nothing left but a faint buttery smear. I had been testing apple crisp recipes for weeks, trying to nail that perfect balance of tender, jammy fruit and a topping that stays crunchy even the next day. And honestly? I almost gave up. But watching him go back for a second bowl, unprovoked, told me I had finally cracked the code.
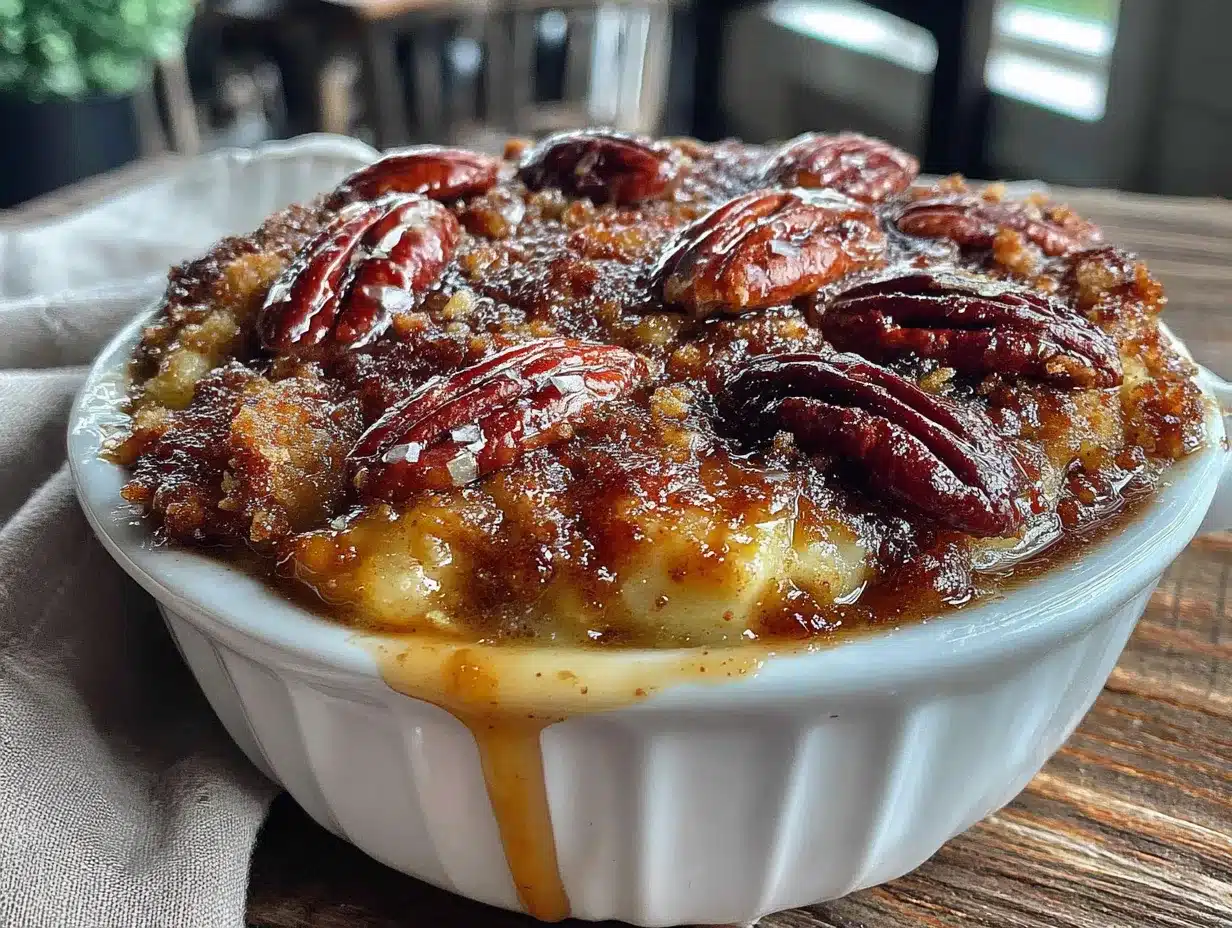
This best-ever apple crisp with pecans is the result of a lot of trial and error, a few burnt toppings, and one very patient family. It’s the kind of dessert that fills your kitchen with the smell of cinnamon and brown sugar, the kind that makes you want to curl up on the couch with a warm bowl and a scoop of vanilla ice cream. The apples get soft and almost caramelized underneath a blanket of buttery, nutty streusel that stays crisp for days. Yes, days. That’s the magic trick here.
I’m not saying this to brag. I’m saying it because I know what it’s like to follow a recipe that promises a crunchy topping and ends up with a soggy, sad mess. I’ve been there. This one is different. The pecans add a toasty crunch, the oats give it texture, and the secret ingredient? A tiny splash of lemon juice in the filling that keeps the apples from turning into complete mush. It’s a small detail, but it makes all the difference. You can trust this recipe because I’ve made every mistake so you don’t have to.
Why You’ll Love This Recipe
This isn’t just another apple crisp. I’ve tested this recipe more times than I care to admit, tweaking the ratio of butter to oats, the type of apple, the baking time. I wanted something that felt both special and approachable, something you could make for a holiday dinner or a random Tuesday night. And after all that testing, I can confidently say this is my best version.
- Quick & Easy : From start to finish, this comes together in about an hour, with only 15 minutes of active prep. Perfect for when you want a homemade dessert without spending all day in the kitchen.
- Simple Ingredients : You likely have everything you need already. Apples, oats, flour, butter, brown sugar, cinnamon, and pecans. No weird ingredients or special trips to the store.
- Perfect for Cozy Nights : This is the ultimate fall and winter dessert, but honestly, I make it year-round. It’s great for Thanksgiving, potlucks, or just a quiet night in.
- Crowd-Pleaser : I’ve brought this to family gatherings and work events, and it disappears every single time. Kids love it, adults love it. It’s hard to resist warm apples and a crunchy topping.
- Unbelievably Delicious : The texture is what gets me. Soft, jammy apples with a topping that stays crunchy even after sitting in the fridge. The pecans add a nutty depth that takes it over the top.
What makes this recipe different is the technique. Most recipes have you just toss the apples with sugar and bake, but I cook the apples slightly before assembling the crisp. This ensures they’re perfectly tender without getting mushy, and it prevents that watery layer that sometimes forms at the bottom of the dish. It’s a small extra step, but it makes a huge difference in the final texture.
This is the kind of dessert that makes you close your eyes after the first bite. It’s comfort food at its finest, warm and familiar, but with a little extra love that makes it feel special. And if you’re looking for another cozy dessert to add to your rotation, you might also enjoy this moist lemon raspberry pound cake for a bright, fruity alternative.
What Ingredients You Will Need
This recipe uses simple, wholesome ingredients that come together to create something truly special. The beauty of this apple crisp is that it doesn’t rely on fancy ingredients. Just good, honest staples that deliver big flavor.
For the Apple Filling
- 6 cups apples, peeled, cored, and sliced (about 6 medium apples, I recommend Honeycrisp or Granny Smith for the best balance of sweet and tart)
- 1/4 cup granulated sugar
- 1/4 cup light brown sugar, packed
- 1 tablespoon all-purpose flour (helps thicken the filling)
- 1 teaspoon ground cinnamon
- 1/4 teaspoon ground nutmeg (freshly grated if you have it)
- 1 tablespoon fresh lemon juice (this is the secret to keeping the apples from turning brown and adding a little brightness)
- 1 teaspoon vanilla extract
For the Pecan Streusel Topping
- 1 cup old-fashioned rolled oats (not quick oats, they get too soft)
- 1 cup all-purpose flour
- 1 cup light brown sugar, packed
- 1/2 cup chopped pecans (I like to toast them lightly first for extra flavor)
- 1/2 teaspoon ground cinnamon
- 1/4 teaspoon salt (don’t skip this, it balances the sweetness)
- 1/2 cup unsalted butter, cold and cut into small cubes
I’ve tried this with different apple varieties, and my personal favorite is a mix of Honeycrisp and Granny Smith. The Honeycrisp adds natural sweetness and holds its shape well, while the Granny Smith gives a nice tartness that cuts through the sweetness of the topping. If you can only find one type, go with Honeycrisp. They’re reliable and always delicious.
For the pecans, I recommend buying raw pecan halves and chopping them yourself. Pre-chopped pecans are often stale and can be uneven in size. Just a quick rough chop is all you need. You can also swap in walnuts or almonds if you prefer, but the pecans really shine here with their buttery flavor.
The butter should be cold. This is important for that crumbly, sandy texture we’re after. If the butter is too soft, the topping will be more like a dough and won’t crisp up as nicely. I pop my butter in the freezer for about 10 minutes before cutting it into the dry ingredients.
Equipment Needed
You don’t need a lot of fancy equipment for this recipe, which is part of why I love it. Here’s what you’ll need:
- 9×13-inch baking dish (or a similar 2.5-quart dish. I use a ceramic one for even baking)
- Large mixing bowls (one for the apples, one for the topping)
- Chef’s knife and cutting board (for peeling and slicing the apples)
- Vegetable peeler (a good one makes the job so much faster)
- Measuring cups and spoons
- Pastry cutter or two forks (for cutting the butter into the flour mixture. You can also use your fingers, but work quickly so the butter doesn’t warm up)
- Large skillet (for the quick stovetop cooking of the apples)
- Wooden spoon or spatula
- Aluminum foil (for covering the crisp if the topping browns too quickly)
If you don’t have a pastry cutter, don’t worry. Two forks work just fine, or you can even pulse the dry ingredients and cold butter in a food processor a few times. Just be careful not to overmix. You want pea-sized pieces of butter throughout the topping. That’s what creates those lovely crunchy bits.
I’ve used both glass and metal baking dishes for this recipe, and I prefer glass or ceramic. They heat more evenly and I find the crisp cooks more consistently. But a metal pan will work too, just keep an eye on the baking time as it may cook a little faster.
Preparation Method
Let’s get to the good part. I’ll walk you through each step so you end up with the perfect apple crisp every single time.
- Preheat and Prep: Preheat your oven to 350°F (175°C). Lightly grease your 9×13-inch baking dish with a little butter or non-stick spray. This helps prevent sticking and makes cleanup easier.
- Cook the Apples: In a large skillet over medium heat, combine the sliced apples, granulated sugar, brown sugar, flour, cinnamon, nutmeg, lemon juice, and vanilla extract. Cook for about 5-7 minutes, stirring occasionally, until the apples start to soften slightly and the sugars dissolve. The apples should still have a little bite to them. They’ll finish cooking in the oven. This step is key for preventing a watery crisp. Pour the apple mixture into your prepared baking dish and spread it into an even layer.
- Make the Streusel Topping: In a large mixing bowl, combine the oats, flour, brown sugar, chopped pecans, cinnamon, and salt. Whisk together until everything is evenly distributed. Add the cold, cubed butter. Using a pastry cutter or two forks, cut the butter into the dry ingredients until the mixture resembles coarse crumbs with some pea-sized pieces of butter still visible. You can also use your fingertips, but work quickly so the butter stays cold. If the mixture starts to feel warm, pop it in the fridge for a few minutes.
- Assemble the Crisp: Sprinkle the streusel topping evenly over the cooked apples. Don’t press it down. Leave it loose and crumbly so it bakes up crispy and textured. Make sure all the apples are covered, but it’s okay if a little filling peeks through around the edges.
- Bake: Place the baking dish on a rimmed baking sheet to catch any potential overflow. Bake for 35-40 minutes, or until the topping is golden brown and the filling is bubbly around the edges. If the topping is browning too quickly, tent loosely with aluminum foil for the last 10 minutes of baking.
- Cool and Serve: Let the apple crisp cool on a wire rack for at least 15-20 minutes before serving. This allows the filling to set up slightly, so it’s not too runny. Serve warm, topped with vanilla ice cream or a dollop of whipped cream.
A few things I’ve learned along the way: Don’t skip the stovetop step. I know it seems like extra work, but it’s the difference between a crisp with a thick, jammy filling and one with a pool of watery liquid at the bottom. Also, make sure your butter is really cold. Warm butter will get absorbed into the flour and oats, creating a dense, doughy topping instead of a light, crunchy one. If your kitchen is warm, you can chill the topping for 15 minutes before baking.
For the best results, use a mix of apple varieties. I’ve already mentioned Honeycrisp and Granny Smith, but Fuji or Braeburn work well too. Avoid Red Delicious, they turn into mush and don’t have enough flavor. And if you’re feeling adventurous, you can add a handful of fresh or dried cranberries to the apple mixture for a tart pop of color.
Cooking Tips & Techniques
Over the years, I’ve made every mistake possible with apple crisp. The topping was too dense, the filling was too watery, the apples were undercooked. But each failure taught me something, and now I’m sharing all those hard-won lessons with you.
Don’t overmix the topping. This is probably the most common mistake. When you cut the butter into the dry ingredients, you want to stop when you see pea-sized pieces. If you keep mixing, the butter will get too incorporated and the topping will be more like a shortbread crust than a crumbly streusel. It will still taste good, but it won’t have that signature crunch.
Use old-fashioned oats, not quick oats. Quick oats are cut finer and break down more during baking, leading to a softer, mushier texture. Old-fashioned oats hold their shape and give the topping a wonderful chewy-crunchy texture. Steel-cut oats are too hard and won’t cook through properly, so stick with rolled oats.
Toast your pecans. This is a small step that makes a big difference. Spread the chopped pecans on a baking sheet and toast them in a 350°F oven for 5-7 minutes, or until they’re fragrant and lightly golden. Keep a close eye on them because they burn quickly. Toasted pecans have a deeper, nuttier flavor that really elevates the whole dish.
Let the crisp rest before serving. I know it’s tempting to dig in right away, but giving the crisp 15-20 minutes to cool allows the filling to thicken. If you serve it too soon, the juices will be runny and the topping might slide off. Patience pays off here.
Cover the edges if needed. Sometimes the edges of the topping brown faster than the center. If that happens, cover just the edges with strips of aluminum foil and continue baking. This is a trick I learned from making pies, and it works perfectly for crisps too.
And here’s a tip for making ahead: You can assemble the entire crisp (without baking) and store it in the refrigerator for up to 24 hours. When you’re ready to bake, add about 10 minutes to the baking time since you’re starting from cold. This is a lifesaver for holidays or dinner parties.
Variations & Adaptations
One of the best things about this recipe is how flexible it is. I’ve tried all sorts of variations over the years, and here are some of my favorites.
Gluten-Free Version: Swap the all-purpose flour for a good gluten-free 1-to-1 baking flour blend. I’ve used this substitution several times and it works beautifully. The topping might be slightly more delicate, but it still crisps up nicely. Just make sure your oats are certified gluten-free if that’s a concern.
Dairy-Free Version: Use a high-quality vegan butter in place of regular butter. I like the block-style vegan butters for baking because they have a higher fat content and behave more like dairy butter. Coconut oil can also work, but the texture will be slightly different and it will add a subtle coconut flavor.
Seasonal Twists: In the fall, add a tablespoon of pumpkin pie spice to the apple filling for extra warmth. In the summer, swap half the apples for ripe pears or peaches. You’ll need to adjust the sugar slightly depending on the sweetness of the fruit. In the winter, add a handful of dried cranberries or chopped dried figs to the filling for a festive touch.
Nut-Free Version: If you have a nut allergy or just don’t have pecans on hand, you can leave them out entirely. The topping will still be delicious. You can also replace the pecans with an equal amount of sunflower seeds or pumpkin seeds for a similar crunch. Or add extra oats to make up the volume.
Extra Crunchy Topping: If you’re like me and you love a super crunchy topping, add 1/4 cup of sliced almonds to the streusel along with the pecans. The almonds get beautifully golden and add another layer of texture. You can also add a tablespoon of sesame seeds for a nutty, savory note.
I once made a version with a tablespoon of bourbon added to the apple filling, and it was incredible. The bourbon adds a smoky warmth that pairs perfectly with the brown sugar and pecans. Just cook it for an extra minute on the stovetop to burn off some of the alcohol. It’s a grown-up twist that I highly recommend.
If you’re looking for another cozy fall dessert, try this rustic nectarine galette recipe with creamy almond filling. It has a similar free-form, homey feel and the almond filling is divine.
Serving & Storage Suggestions
This apple crisp is best served warm, straight from the oven. The contrast between the hot, jammy apples and the cold, creamy ice cream is pure magic. But it’s also delicious at room temperature, and honestly, I’ve eaten it cold straight from the fridge for breakfast more times than I’d like to admit.
Serving Temperature: Let the crisp cool for at least 15-20 minutes after baking. This allows the filling to set up. Serve it in bowls with a generous scoop of vanilla ice cream, a dollop of whipped cream, or a drizzle of heavy cream. For an extra indulgence, add a drizzle of caramel sauce.
Complementary Dishes: This apple crisp pairs beautifully with a cup of hot coffee or a mug of spiced apple cider. If you’re serving it as part of a larger meal, it’s the perfect ending to a hearty fall dinner like BBQ pulled pork sliders or a cozy bowl of soup.
Storage: Cover the baking dish tightly with plastic wrap or aluminum foil and store in the refrigerator for up to 5 days. The topping will lose some of its crunch over time, but the flavor will still be amazing.
Reheating: To bring back some of that crispy texture, reheat individual portions in a 350°F oven for about 10 minutes, or in the microwave for 30-60 seconds. The microwave is faster, but the oven does a better job of re-crisping the topping. You can also reheat the entire dish in the oven at 350°F for 15-20 minutes.
Freezing: You can freeze the unbaked crisp for up to 3 months. Assemble the crisp in a freezer-safe baking dish, wrap it tightly in plastic wrap and then aluminum foil, and freeze. When you’re ready to bake, thaw it in the refrigerator overnight and then bake as directed, adding about 10 minutes to the baking time. You can also freeze the baked crisp. Let it cool completely, then wrap and freeze. Thaw in the refrigerator and reheat in the oven.
The flavors actually develop and deepen over time. The second day, the apples have absorbed more of the caramelized juices and the spices have melded together beautifully. It’s still delicious, just with a softer topping. I actually prefer the texture of the filling on day two, but I miss the crunch of the fresh topping.
Nutritional Information & Benefits
While this is definitely a dessert, it does have some redeeming qualities. The apples are a good source of fiber and vitamin C, and the pecans provide healthy fats and protein. Plus, oats are packed with soluble fiber, which is great for heart health.
Here’s the approximate nutritional breakdown per serving (based on 12 servings):
- Calories: 380
- Fat: 16g
- Saturated Fat: 7g
- Carbohydrates: 58g
- Fiber: 5g
- Sugar: 38g
- Protein: 4g
These values are estimates and will vary based on the specific ingredients you use and the size of your servings. If you’re looking to lighten it up, you can reduce the sugar in the topping by a quarter cup, or use a sugar substitute. You can also use a lighter hand with the butter in the topping, but it won’t be as crispy.
For those with dietary concerns, this recipe contains gluten (from the flour and oats), dairy (from the butter), and tree nuts (from the pecans). It can be adapted as I mentioned in the variations section. If you’re serving a crowd with different dietary needs, you might also want to try this fresh watermelon feta mint salad as a lighter, refreshing option.
Honestly, I don’t make this crisp for its health benefits. I make it because it makes people happy. But it’s nice to know that it’s not completely devoid of nutritional value. It’s comfort food, plain and simple, and sometimes that’s exactly what we need.
Conclusion
This best-ever apple crisp with pecans is more than just a recipe. It’s the dessert I turn to when I want to make someone feel loved. It’s the one I bring to potlucks and holiday dinners, the one that gets requested again and again. And now it can be yours too.
I hope you give this recipe a try and make it your own. Add more cinnamon if that’s your thing, throw in some dried cranberries, or double the pecan topping. There’s no wrong way to make it. The only rule is to serve it warm, preferably with a scoop of vanilla ice cream melting into all those nooks and crannies.
If you make this recipe, I’d love to hear about it. Leave a comment below and let me know how it turned out. Did you make any substitutions? Did your family love it as much as mine does? Your feedback helps me create better recipes, and I genuinely love hearing from you. Don’t forget to share this recipe with someone who needs a little comfort in their life. Happy baking!
Frequently Asked Questions
Can I use quick oats instead of old-fashioned oats?
I don’t recommend it. Quick oats are finer and will break down during baking, resulting in a softer, less crunchy topping. Old-fashioned rolled oats hold their shape and give the streusel that wonderful texture. If you only have quick oats, you can use them, but expect a different outcome.
What are the best apples for apple crisp?
I recommend a mix of sweet and tart apples. Honeycrisp and Granny Smith are my go-to combination. Honeycrisp adds natural sweetness and holds its shape, while Granny Smith provides a nice tartness. Fuji, Braeburn, or Pink Lady also work well. Avoid Red Delicious, they turn mushy and lack flavor.
Can I make this apple crisp ahead of time?
Absolutely. You can assemble the entire crisp (without baking) and store it in the refrigerator for up to 24 hours. When you’re ready to bake, add about 10 minutes to the baking time since you’re starting from a cold dish. You can also freeze the unbaked crisp for up to 3 months.
Why is my apple crisp watery?
This usually happens when the apples release too much liquid during baking. Cooking the apples on the stovetop before assembling the crisp helps prevent this. The flour in the filling also helps thicken the juices. Make sure you’re not overfilling the dish, and let the crisp rest for 15-20 minutes after baking so the filling can set up.
How do I reheat apple crisp so the topping stays crunchy?
The best way is to reheat it in the oven. Place individual portions in a 350°F oven for about 10 minutes. The microwave is faster, but it will make the topping soft. If you’re reheating the entire dish, cover it with foil and bake at 350°F for 15-20 minutes, then uncover for the last 5 minutes to crisp up the topping.
Pin This Recipe!

Best-Ever Apple Crisp with Pecans – Easy Homemade Recipe
This best-ever apple crisp with pecans features tender, jammy apples under a buttery, nutty streusel topping that stays crunchy for days. A splash of lemon juice keeps the apples from turning mushy, making this the perfect comfort dessert for any occasion.
- Prep Time: 15 minutes
- Cook Time: 40 minutes
- Total Time: 55 minutes
- Yield: 12 servings 1x
- Category: Dessert
- Cuisine: American
Ingredients
- 6 cups apples, peeled, cored, and sliced (about 6 medium apples, Honeycrisp or Granny Smith recommended)
- 1/4 cup granulated sugar
- 1/4 cup light brown sugar, packed
- 1 tablespoon all-purpose flour
- 1 teaspoon ground cinnamon
- 1/4 teaspoon ground nutmeg
- 1 tablespoon fresh lemon juice
- 1 teaspoon vanilla extract
- 1 cup old-fashioned rolled oats
- 1 cup all-purpose flour
- 1 cup light brown sugar, packed
- 1/2 cup chopped pecans
- 1/2 teaspoon ground cinnamon
- 1/4 teaspoon salt
- 1/2 cup unsalted butter, cold and cut into small cubes
Instructions
- Preheat your oven to 350°F (175°C). Lightly grease a 9×13-inch baking dish with butter or non-stick spray.
- In a large skillet over medium heat, combine the sliced apples, granulated sugar, brown sugar, flour, cinnamon, nutmeg, lemon juice, and vanilla extract. Cook for 5-7 minutes, stirring occasionally, until the apples start to soften slightly and the sugars dissolve. Pour the apple mixture into the prepared baking dish and spread into an even layer.
- In a large mixing bowl, combine the oats, flour, brown sugar, chopped pecans, cinnamon, and salt. Whisk together until evenly distributed. Add the cold, cubed butter. Using a pastry cutter or two forks, cut the butter into the dry ingredients until the mixture resembles coarse crumbs with some pea-sized pieces of butter still visible.
- Sprinkle the streusel topping evenly over the cooked apples. Do not press it down; leave it loose and crumbly.
- Place the baking dish on a rimmed baking sheet. Bake for 35-40 minutes, or until the topping is golden brown and the filling is bubbly around the edges. If the topping browns too quickly, tent loosely with aluminum foil for the last 10 minutes.
- Let the apple crisp cool on a wire rack for at least 15-20 minutes before serving. Serve warm, topped with vanilla ice cream or whipped cream.
Notes
Don’t skip the stovetop step for the apples; it prevents a watery crisp. Use cold butter for a crumbly topping. Toast pecans for extra flavor. Let the crisp rest before serving to allow the filling to set. Can be assembled up to 24 hours ahead and refrigerated before baking.
Nutrition
- Serving Size: 1 serving
- Calories: 380
- Sugar: 38
- Sodium: 95
- Fat: 16
- Saturated Fat: 7
- Carbohydrates: 58
- Fiber: 5
- Protein: 4
Keywords: apple crisp, pecan apple crisp, easy apple crisp, best apple crisp, fall dessert, apple dessert, streusel topping


