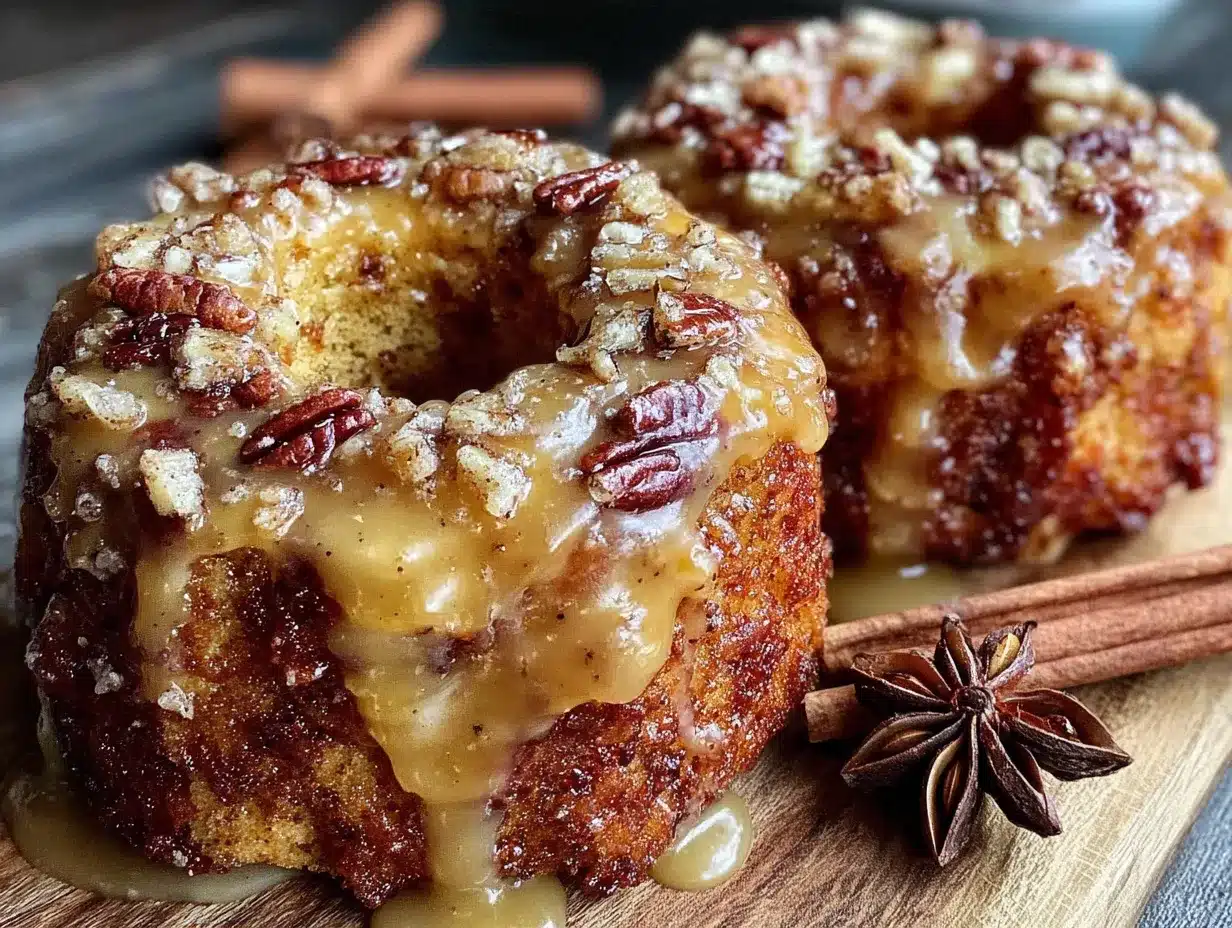
The way the maple glaze shatters just slightly when you bite through it—that thin, brittle shell giving way to the soft, spiced crumb underneath—that’s the whole reason I make these. Everything else is just the journey to get there.
I wasn’t even trying to develop a donut recipe that day. It was mid-October, and I had a can of pumpkin puree staring at me from the fridge, leftover from a batch of soup I’d made two nights before. You know how it is—that half-can of pumpkin that sits there, judging you, until you either use it or toss it. I couldn’t bear to throw it away. So I started pulling flour and sugar out of the cabinets, thinking maybe I’d make a quick bread. But then I saw the donut pan collecting dust on the top shelf, and something clicked.
The first batch came out okay. Edible, sure. But the texture was dense—like a muffin that forgot it was supposed to be a donut. So I tweaked things. Swapped some butter for oil. Added a little more buttermilk. Played with the leavening until the rise felt right. And by the third attempt, I had these golden rings of autumn in my hands. The glaze was a happy accident—I was out of powdered sugar for a traditional icing, so I grabbed the maple syrup and let it simmer until it thickened into something magical.
Honestly? These are the donuts that made me believe baked donuts could be just as good as fried. Maybe better. Because you can eat three without feeling like you need a nap afterward. And the smell that fills your kitchen? Pure October in a pan.
Why You’ll Love This Recipe
Let me tell you what makes these pumpkin spice donuts different from every other recipe you’ve bookmarked. I’ve tested this one more times than I care to admit, and here’s what I’ve learned:
- No Frying Required : These come together in under 30 minutes, start to finish. No deep fryer, no thermometer, no oil splatters on your stovetop. Just mix, pipe, bake, and glaze.
- Simple Pantry Ingredients : You probably have most of this stuff already. Canned pumpkin, flour, sugar, eggs, butter, and a few spices. No weird specialty items that’ll sit in your cupboard forever.
- Perfect for Fall Mornings : Whether it’s a cozy weekend breakfast, a Thanksgiving brunch, or just a Tuesday that needs a little warming up—these donuts fit right in.
- Crowd-Pleaser Status : I brought a batch to a neighborhood potluck last fall, and they were gone in fifteen minutes. One neighbor asked for the recipe before she even finished her first one.
- That Maple Glaze Though : The glaze is what makes these unforgettable. It sets up with a slight crackle on top, but stays soft and sticky underneath. It’s the kind of glaze you want to lick off your finger.
What really sets this recipe apart is the texture. Most baked donuts lean toward cakey—which is fine, but not what I was after. I wanted something that had a little chew, a little tenderness, but still felt light. The secret? A combination of oil and melted butter, plus a touch of buttermilk for acidity that keeps the crumb soft. I tested it with all butter, and the donuts came out too dense. All oil, and they felt greasy. This balance? It’s the sweet spot.
These aren’t just good for baked donuts. They’re good donuts, period. The kind that makes you close your eyes after the first bite. The kind that tastes like a crisp fall morning, even if you’re eating them in your pajamas at noon.
What Ingredients You Will Need
This recipe uses simple, wholesome ingredients to deliver that cozy pumpkin spice flavor and tender texture without any fuss. Most of these are pantry staples, which makes these donuts perfect for spontaneous baking cravings.
For the Donuts
- All-purpose flour – 1 ¾ cups (210g). Spoon and level it—don’t scoop straight from the bag or you’ll end up with dense donuts.
- Granulated sugar – ¾ cup (150g). Just enough sweetness without overpowering the pumpkin.
- Light brown sugar, packed – ¼ cup (50g). Adds moisture and a hint of molasses depth.
- Baking powder – 1 ½ teaspoons. For lift.
- Baking soda – ½ teaspoon. Helps with browning and rise.
- Pumpkin pie spice – 2 teaspoons. I use store-bought for convenience, but you can mix your own (see notes below).
- Ground cinnamon – ½ teaspoon. Because you can never have too much cinnamon.
- Salt – ½ teaspoon. Balances the sweetness.
- Pumpkin puree – ¾ cup (180g). Not pumpkin pie filling—make sure you grab 100% pure pumpkin. Libby’s is my go-to.
- Buttermilk – ½ cup (120ml), room temperature. If you don’t have buttermilk, add 1 ½ teaspoons of lemon juice or vinegar to regular milk and let it sit for 5 minutes.
- Large egg – 1, room temperature.
- Unsalted butter – 3 tablespoons (42g), melted and slightly cooled.
- Vegetable oil – 2 tablespoons (30ml). Use a neutral oil like canola or avocado.
- Vanilla extract – 1 teaspoon. Pure, not imitation, if you can swing it.
For the Maple Glaze
- Pure maple syrup – ½ cup (120ml). Not pancake syrup—the real stuff. Grade A dark amber works beautifully here.
- Powdered sugar – 1 cup (120g), sifted to avoid lumps.
- Unsalted butter – 2 tablespoons (28g), softened.
- Vanilla extract – ½ teaspoon.
- Pinch of salt – Just a tiny one, to cut the sweetness.
Ingredient Tips and Notes
For the pumpkin pie spice, I’ve tested both store-bought and homemade. If you want to make your own, mix 1 teaspoon cinnamon, ½ teaspoon ginger, ¼ teaspoon nutmeg, ¼ teaspoon allspice, and ⅛ teaspoon cloves. That’ll give you about 2 teaspoons total. I personally prefer the homemade version because the ginger comes through a little brighter, but the store-bought blend works perfectly fine when you’re in a hurry.
The buttermilk is non-negotiable here—it reacts with the baking soda to give the donuts their tender crumb. If you’re dairy-free, you can use almond milk with a splash of apple cider vinegar, but the texture will be slightly less tender. I tested it once with oat milk, and honestly? It worked, but the crumb was a bit more fragile.
For the maple syrup, don’t use the artificially flavored stuff. It has a different consistency and won’t reduce properly for the glaze. Spend the extra couple of dollars on real maple syrup—it makes a noticeable difference.
Equipment Needed
You don’t need a lot of fancy gear for these donuts, which is part of what makes them so approachable. Here’s what you’ll need:
- Donut pan – A standard 6-cavity donut pan. I use a Wilton non-stick pan and it works beautifully. If you only have one pan, you’ll need to bake in batches.
- Piping bag or zip-top bag – For piping the batter into the pan. You can also use a spoon, but piping gives you cleaner, more even donuts.
- Mixing bowls – One large, one medium. Nothing fancy needed.
- Whisk – For combining dry ingredients.
- Rubber spatula – For folding the wet into the dry without overmixing.
- Cooling rack – Placing the warm donuts on a rack lets air circulate so they don’t get soggy on the bottom.
- Small saucepan – For simmering the maple glaze.
- Pastry brush – Optional, but helpful for applying the glaze evenly if you want a thinner coat.
If you don’t have a donut pan, you can make these as donut holes in a mini muffin tin—just reduce the baking time to 8-10 minutes. I’ve done it before when I forgot my donut pan at a friend’s house, and they turned out great. The texture is a little different (more surface area means slightly crisper edges), but nobody complained.
Preparation Method
- Preheat and prep the pan. Preheat your oven to 350°F (175°C). Lightly grease your donut pan with non-stick spray or melted butter. I like using a baking spray with flour—it gives a little extra insurance against sticking.
- Mix the dry ingredients. In a large bowl, whisk together the all-purpose flour, granulated sugar, brown sugar, baking powder, baking soda, pumpkin pie spice, cinnamon, and salt. Make sure everything is evenly distributed—you don’t want a pocket of baking soda ruining one donut.
- Combine the wet ingredients. In a medium bowl, whisk together the pumpkin puree, buttermilk, egg, melted butter, vegetable oil, and vanilla extract until smooth. The mixture should be a beautiful deep orange color at this point.
- Fold wet into dry. Pour the wet ingredients into the dry ingredients. Use a rubber spatula to fold gently, just until no streaks of flour remain. Do not overmix—overmixing develops gluten and makes the donuts tough. A few small lumps are totally fine.
- Fill the pan. Transfer the batter to a piping bag or a zip-top bag with the corner snipped off. Pipe the batter into each donut cavity, filling about ⅔ to ¾ full. Don’t overfill, or the holes will close up as they bake. If you’re using a spoon, drop about 2 tablespoons of batter into each cavity and spread it evenly.
- Bake. Bake for 10-12 minutes, or until the donuts spring back when lightly touched and a toothpick inserted into the thickest part comes out clean. The edges should be lightly golden. My oven runs hot, so I check at 10 minutes. Yours might need the full 12.
- Cool in the pan. Let the donuts cool in the pan for 3-4 minutes. This helps them set so they don’t fall apart when you remove them. Then transfer to a wire rack to cool completely. If you’re baking in batches, let the pan cool slightly before greasing and refilling.
- Make the glaze. While the donuts cool, make the maple glaze. In a small saucepan over medium heat, combine the maple syrup, butter, vanilla extract, and salt. Stir until the butter is melted and the mixture is smooth. Bring it to a gentle simmer and let it cook for 2-3 minutes, stirring occasionally. It should thicken slightly—you’ll notice it coats the back of a spoon.
- Add powdered sugar. Remove the saucepan from the heat. Gradually whisk in the sifted powdered sugar, stirring until the glaze is smooth and glossy. If it seems too thick, add a teaspoon of milk or water. If it’s too thin, let it cool for a minute—it will thicken as it cools.
- Glaze the donuts. Once the donuts are completely cool, dip the top of each donut into the glaze, letting any excess drip off. Place them back on the wire rack, glazed side up. The glaze will set in about 15-20 minutes, forming that signature slightly crackly top.
- Serve and enjoy. For the best experience, serve the donuts within a few hours of glazing. The glaze stays soft and the donuts stay tender. If you’re making them ahead, hold the glaze and apply it just before serving.
Cooking Tips & Techniques
Over the course of testing this recipe (and eating more donuts than I’d like to admit), I’ve picked up a few tricks that make a real difference.
Don’t overmix the batter. This is the number one mistake people make with baked donuts. Mix until the flour is just incorporated, then stop. Overmixing develops gluten, and gluten makes donuts tough. You want tender, not tough. I learned this the hard way when my first batch came out like hockey pucks.
Room temperature ingredients matter. Cold buttermilk and cold eggs will seize the melted butter, creating lumps in your batter. Take them out of the fridge 30 minutes before you start baking. If you forgot, place the egg in a bowl of warm water for 5 minutes, and microwave the buttermilk for 10 seconds—just enough to take the chill off.
Pipe, don’t spoon. I know it’s an extra step, but piping the batter gives you much more even donuts. If you spoon it in, you’ll likely end up with some cavities overfilled and some underfilled. The piping bag gives you control. Plus, it’s oddly satisfying.
Let the glaze simmer properly. The 2-3 minutes of simmering is crucial. It reduces the maple syrup slightly, concentrating the flavor and helping the glaze set up with that nice crackly top. If you skip this step, the glaze will be too thin and will just soak into the donuts instead of sitting on top.
Cool completely before glazing. I know it’s tempting to glaze warm donuts, but warm donuts will absorb the glaze and leave you with a soggy, sticky mess. Patience pays off here. Let them cool fully on the wire rack—about 20 minutes—before you dip them.
One more thing: if your glaze starts to thicken up while you’re working, just set the saucepan over very low heat for a few seconds and stir. It’ll loosen right up. Don’t microwave it, or you might scorch the sugar.
Variations & Adaptations
One of the best things about this recipe is how easy it is to adapt. Here are a few ways I’ve tweaked it depending on what I have on hand or who I’m feeding:
Gluten-Free Version : Substitute the all-purpose flour with a 1:1 gluten-free baking flour blend. I’ve tested this with Bob’s Red Mill 1:1, and the texture was surprisingly close to the original. Add 1 teaspoon of xanthan gum if your blend doesn’t already include it. The donuts will be slightly more delicate, so handle them gently when removing from the pan.
Dairy-Free Version : Use melted coconut oil or vegan butter in place of the regular butter, and substitute the buttermilk with almond milk mixed with 1 ½ teaspoons of lemon juice. The texture will be a touch less tender, but still delicious. For the glaze, use vegan butter and make sure your powdered sugar is vegan-friendly.
Chocolate Pumpkin Spice Donuts : Add ¼ cup of unsweetened cocoa powder to the dry ingredients and reduce the flour to 1 ½ cups. The chocolate and pumpkin spice combo is surprisingly good—think pumpkin spice meets mocha. I made these for a Halloween party and they disappeared fast.
Bourbon Maple Glaze : Add 1 tablespoon of bourbon to the glaze along with the maple syrup. Simmer for an extra minute to cook off the alcohol. The bourbon adds a warm, smoky depth that pairs beautifully with the pumpkin spice. This is my personal favorite for adult gatherings.
Mini Donut Holes : Use a mini muffin tin instead of a donut pan. Fill each cavity about ¾ full and bake for 8-10 minutes. You’ll get about 24 mini donut holes. They’re perfect for snacking and great for kids’ lunchboxes.
If you’re a fan of pumpkin spice in other forms, you might also enjoy our moist lemon raspberry pound cake for a fruity twist, or our decadent chocolate espresso bundt cake when you need a coffee fix with your dessert.
Serving & Storage Suggestions
These donuts are best enjoyed the day they’re made, but they’ll keep for a couple of days if stored properly.
Serving : Serve the donuts at room temperature. The glaze should be set but still slightly soft—that’s when it’s at its best. I like to arrange them on a pretty plate with a dusting of extra cinnamon on top. They’re perfect with a hot cup of coffee, a chai latte, or a glass of cold milk. For a brunch spread, pair them with our fluffy buttermilk pancakes for a carb-loaded morning that nobody will regret.
Storage : Place leftover donuts in an airtight container at room temperature. They’ll stay fresh for up to 2 days. Don’t refrigerate them—the fridge dries out baked goods and makes the glaze lose its luster. If you need to store them longer, freeze the unglazed donuts (see below).
Freezing : Bake and cool the donuts completely, but don’t glaze them. Place them in a single layer on a baking sheet and freeze for 1-2 hours, until solid. Transfer to a freezer-safe bag or container, separating layers with parchment paper. They’ll keep for up to 3 months. When you’re ready to serve, thaw at room temperature for about 30 minutes, then make the glaze fresh and dip them. The glaze doesn’t freeze well, so always add it after thawing.
Reheating : If you’re eating leftover donuts (glazed or unglazed), pop them in a 300°F (150°C) oven for 5 minutes. This warms them through and crisps up the edges slightly. Don’t microwave them—the microwave turns the glaze into a sticky mess and makes the donuts rubbery.
One thing I’ve noticed: the flavors actually deepen a bit on day two. The pumpkin spice settles in, and the maple glaze melds with the donut. So if you can resist eating them all on day one, day two is a treat.
Nutritional Information & Benefits
Here’s the thing about these donuts—they’re a treat, not a health food. But they’re not as bad as you might think, especially compared to their fried counterparts.
Estimated per donut (based on 12 donuts) : Calories: 245, Fat: 9g, Saturated Fat: 4g, Cholesterol: 35mg, Sodium: 210mg, Carbohydrates: 38g, Fiber: 1.5g, Sugar: 22g, Protein: 3.5g.
Pumpkin is the star ingredient here, and it brings some legit benefits. It’s packed with vitamin A (beta-carotene), which supports eye health and immune function. It also has fiber, which helps with digestion and keeps you feeling full. Plus, it adds moisture to the donuts without needing extra fat—so you’re getting a tender crumb with less butter than you’d think.
Maple syrup contains antioxidants and minerals like zinc and manganese. It’s still sugar, so don’t go overboard, but it’s a more natural sweetener than refined white sugar. The real stuff has a lower glycemic index than table sugar, meaning it won’t spike your blood sugar quite as dramatically.
Dietary Considerations : This recipe contains gluten, dairy, and eggs. For gluten-free and dairy-free options, see the variations section above. The donuts are nut-free as written, but check your spice blends if you have severe allergies.
I’m not a nutritionist, and I don’t pretend to be. But I do believe in balance—enjoying treats like these in moderation, alongside plenty of whole foods. A donut or two with your morning coffee? That’s a good day.
Conclusion
These baked pumpkin spice donuts with maple glaze are everything I want in a fall treat. They’re tender and spiced, with that glossy glaze that cracks just a little when you bite in. They come together in under 30 minutes, use simple ingredients, and fill your kitchen with the kind of smell that makes people wander in asking, “What are you making?”
I’ve made these for lazy Sunday mornings, for Thanksgiving brunch, for neighbors who needed a little pick-me-up. And every time, someone asks for the recipe. That’s how I know it’s a keeper.
If you make these donuts, I’d love to hear how they turn out. Did you try any of the variations? Did the glaze set the way you wanted? Leave a comment below and let me know—I read every single one. And if you share a photo on social media, tag me so I can see your beautiful creations. Happy baking, friends.
Frequently Asked Questions
Can I use fresh pumpkin instead of canned?
Yes, but you’ll need to roast and puree it first. Fresh pumpkin has more water content than canned, so you’ll want to drain the puree through a cheesecloth or fine-mesh strainer for about 30 minutes before using. Otherwise, the batter will be too wet and the donuts won’t rise properly. I’ve done it both ways, and honestly, canned is more consistent and saves time.
Why did my donuts stick to the pan?
This usually happens if the pan wasn’t greased well enough or if you didn’t let them cool in the pan long enough. Make sure you use a generous amount of non-stick spray, especially in the crevices. And don’t rush the cooling—3-4 minutes in the pan is essential for the donuts to set. If you’re still having trouble, try a silicone donut pan, which releases more easily than metal.
Can I make the batter ahead of time?
I don’t recommend it. The leavening agents (baking powder and baking soda) start reacting as soon as they hit the wet ingredients, so the batter loses its lift over time. If you need to prep ahead, mix the dry ingredients and wet ingredients separately, then combine them just before baking. You can also freeze the baked, unglazed donuts for up to 3 months.
My glaze turned out too thick/thin—what went wrong?
If your glaze is too thick, you probably added too much powdered sugar or let it simmer too long. Stir in a teaspoon of milk or water at a time until it reaches the right consistency. If it’s too thin, you either didn’t simmer it long enough or added too much liquid. Return it to low heat and let it simmer for another minute, stirring constantly. The glaze should coat the back of a spoon—that’s your visual cue.
Can I make these without a donut pan?
Absolutely. Use a mini muffin tin to make donut holes instead. Fill each cavity about ¾ full and bake for 8-10 minutes. You’ll get about 24 mini donut holes. They’re perfect for snacking and great for kids. You can also shape the batter into rings on a parchment-lined baking sheet, but they’ll spread a bit and won’t look as neat as pan-baked donuts.
Pin This Recipe!
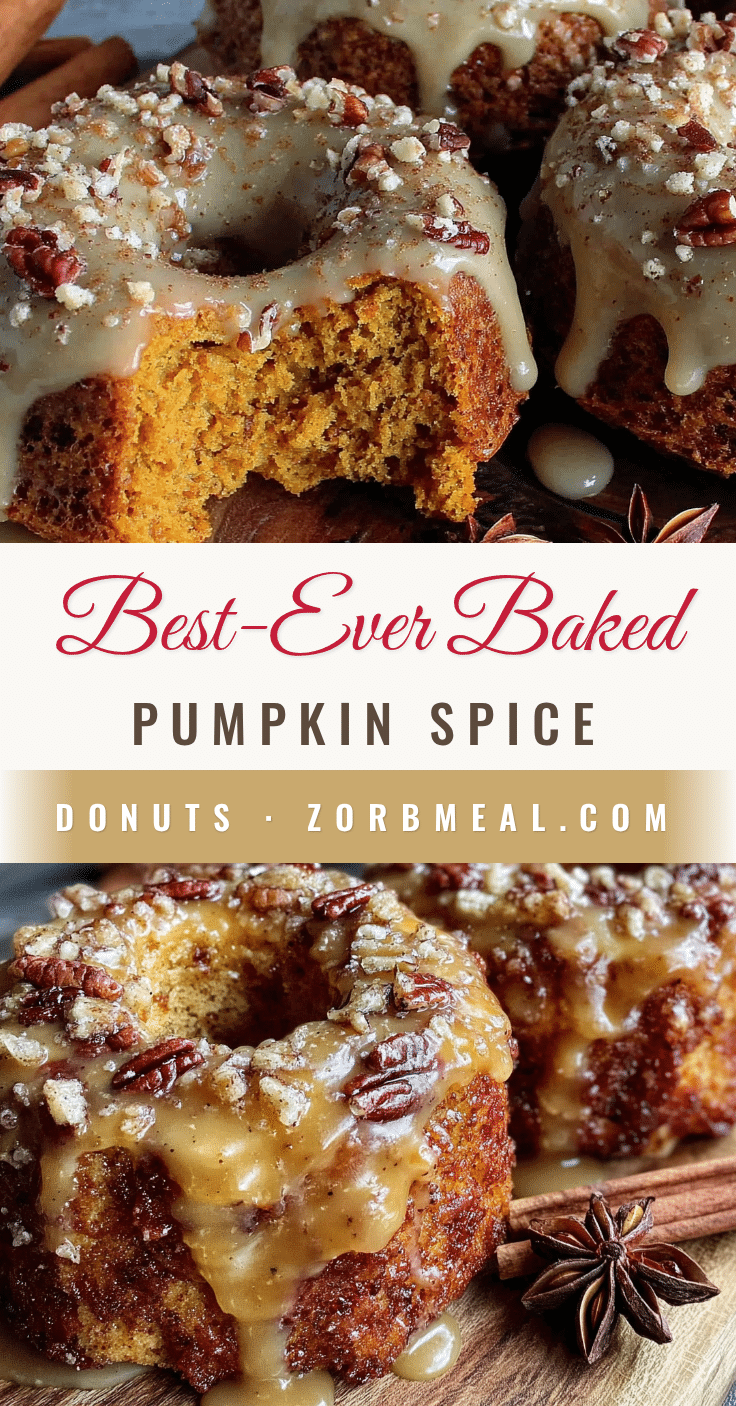
Best Baked Pumpkin Spice Donuts with Easy Maple Glaze
Tender, spiced baked donuts with a glossy maple glaze that cracks slightly when you bite in. Made with simple pantry ingredients and ready in under 30 minutes, these are the perfect fall treat without the fuss of frying.
- Prep Time: 15 minutes
- Cook Time: 12 minutes
- Total Time: 27 minutes
- Yield: 12 servings 1x
- Category: Dessert
- Cuisine: American
Ingredients
- 1 ¾ cups (210g) all-purpose flour
- ¾ cup (150g) granulated sugar
- ¼ cup (50g) packed light brown sugar
- 1 ½ teaspoons baking powder
- ½ teaspoon baking soda
- 2 teaspoons pumpkin pie spice
- ½ teaspoon ground cinnamon
- ½ teaspoon salt
- ¾ cup (180g) pumpkin puree (100% pure, not pie filling)
- ½ cup (120ml) buttermilk, room temperature
- 1 large egg, room temperature
- 3 tablespoons (42g) unsalted butter, melted and slightly cooled
- 2 tablespoons (30ml) vegetable oil (neutral like canola or avocado)
- 1 teaspoon vanilla extract
- ½ cup (120ml) pure maple syrup (not pancake syrup)
- 1 cup (120g) powdered sugar, sifted
- 2 tablespoons (28g) unsalted butter, softened
- ½ teaspoon vanilla extract
- Pinch of salt
Instructions
- Preheat oven to 350°F (175°C). Lightly grease a standard 6-cavity donut pan with non-stick spray or melted butter.
- In a large bowl, whisk together flour, granulated sugar, brown sugar, baking powder, baking soda, pumpkin pie spice, cinnamon, and salt until evenly distributed.
- In a medium bowl, whisk together pumpkin puree, buttermilk, egg, melted butter, vegetable oil, and vanilla extract until smooth.
- Pour wet ingredients into dry ingredients. Fold gently with a rubber spatula just until no streaks of flour remain. Do not overmix; a few small lumps are fine.
- Transfer batter to a piping bag or zip-top bag with the corner snipped off. Pipe batter into each donut cavity, filling about ⅔ to ¾ full.
- Bake for 10-12 minutes, until donuts spring back when lightly touched and a toothpick inserted into the thickest part comes out clean. Edges should be lightly golden.
- Let donuts cool in the pan for 3-4 minutes, then transfer to a wire rack to cool completely.
- While donuts cool, make the glaze: In a small saucepan over medium heat, combine maple syrup, 2 tablespoons softened butter, ½ teaspoon vanilla extract, and a pinch of salt. Stir until butter is melted and mixture is smooth. Bring to a gentle simmer and cook for 2-3 minutes, stirring occasionally, until slightly thickened.
- Remove saucepan from heat. Gradually whisk in sifted powdered sugar until glaze is smooth and glossy. If too thick, add a teaspoon of milk or water; if too thin, let cool for a minute.
- Once donuts are completely cool, dip the top of each donut into the glaze, letting excess drip off. Place back on wire rack, glazed side up. Let glaze set for 15-20 minutes until slightly crackly.
- Serve within a few hours for best texture. If making ahead, store unglazed donuts and glaze just before serving.
Notes
Do not overmix the batter to avoid tough donuts. Room temperature ingredients help prevent lumps. For the glaze, simmering the maple syrup for 2-3 minutes is crucial for a crackly top. Cool donuts completely before glazing to prevent sogginess. If glaze thickens, reheat gently over low heat.
Nutrition
- Serving Size: 1 donut
- Calories: 245
- Sugar: 22
- Sodium: 210
- Fat: 9
- Saturated Fat: 4
- Carbohydrates: 38
- Fiber: 1.5
- Protein: 3.5
Keywords: pumpkin spice donuts, baked donuts, maple glaze, fall donuts, pumpkin donuts, easy donut recipe


