I want a snack that actually does something for me. Not just fills space in my stomach for twenty minutes before I’m hungry again. Not something that leaves that weird processed aftertaste on my tongue. I want protein, I want peanut butter, and I want it in my mouth in under five minutes without turning on the oven. That’s not a lot to ask, is it?
Honestly, most “healthy” snacks in the store are either overpriced or underwhelming. You know the ones—they promise energy but taste like cardboard mixed with regret. I’ve been down that aisle too many times. So I started making my own. These Easy No-Bake Peanut Butter Protein Balls came out of a genuine need: I needed something portable, something satisfying, and something that didn’t require me to wash a sink full of dishes afterward. (Let’s face it, that’s half the battle right there.)
The first batch I made was purely experimental. I grabbed what I had in the pantry—peanut butter that was almost empty, some oats I bought for a different recipe, and a scoop of chocolate protein powder I’d been ignoring. I mixed it all together with my hands, rolled it into balls, and stuck them in the fridge. Ten minutes later, I ate one. Then another. Then I texted my sister, “I think I just accidentally made the perfect snack.” She agreed. And now here we are.
These little guys aren’t just good. They’re the kind of good that makes you wonder why you ever bought pre-packaged protein snacks in the first place. They’re chewy, slightly sweet, and packed with enough peanut butter flavor to satisfy that craving without going overboard. Plus, they hold up surprisingly well in a lunchbox or gym bag—no crumbly mess, no sticky fingers situation. Just pure, no-bake magic.
I’ve made these more times than I can count now, and I still get excited every time I roll a new batch. There’s something deeply satisfying about making your own food that actually tastes like food, you know? So let’s get into it.
Why You’ll Love This Recipe
I’ve tested this recipe about a dozen times to get the ratios just right. Too much peanut butter and they fall apart. Too much protein powder and they’re dry and chalky. This version? It’s the Goldilocks of protein balls—just right.
- Quick & Easy: Five minutes of active time. That’s it. No baking, no waiting, no complicated steps. Mix, roll, eat. Done.
- Simple Ingredients: You probably have most of these in your kitchen right now. No weird superfood powders or specialty items that cost twenty dollars a bag.
- Perfect for Busy Days: Stash these in your bag for work, school, road trips, or post-workout refueling. They’re portable and don’t need refrigeration for a few hours.
- Crowd-Pleaser: I’ve brought these to potlucks and gatherings, and they disappear faster than the cookies. Kids love them, adults love them, and nobody guesses they’re “healthy.”
- Unbelievably Satisfying: The combination of peanut butter, oats, and protein powder creates a texture that’s chewy but not dense, sweet but not cloying. It hits that spot between a snack and a mini-meal.
What makes these different from every other protein ball recipe out there? It’s the texture, honestly. I spent way too long figuring out how to keep them from being either too sticky or too crumbly. The secret is in how you combine the ingredients—and I’ll walk you through every step so yours turn out perfect on the first try.
These aren’t just another recipe to add to your collection. They’re the kind of snack that makes you feel good about eating something quick. No guilt, no compromise, just delicious fuel.
What Ingredients You Will Need
This recipe uses simple, pantry-friendly ingredients that come together to create something genuinely satisfying. No fancy health food store runs required.
- 1 cup creamy peanut butter (natural or regular, but make sure it’s well-stirred if using natural; I personally prefer Skippy Natural because it holds together better than some runny organic brands)
- 1 cup old-fashioned rolled oats (not quick oats—they get too mushy; old-fashioned give the balls a nice chewy texture)
- 1/2 cup chocolate or vanilla protein powder (I use chocolate whey protein for that dessert-like flavor, but plant-based works too; just note that some plant proteins can make the balls drier, so you might need an extra tablespoon of peanut butter)
- 1/3 cup honey or maple syrup (honey gives a slightly thicker consistency; maple syrup makes them a bit softer—both work great)
- 1/4 cup mini chocolate chips (optional but highly recommended; they add little bursts of sweetness that make these feel like a treat)
- 1 teaspoon vanilla extract (pure vanilla is best, but imitation works in a pinch)
- Pinch of salt (skip this if your peanut butter is already salted; otherwise, that tiny pinch makes a big difference)
Ingredient notes and substitutions:
If you’re allergic to peanuts, almond butter or sunflower seed butter work beautifully here. Just keep in mind that sunflower seed butter can react with baking soda in other recipes, but since we’re not baking, you’re totally fine. For a gluten-free version, make sure your oats are certified gluten-free—most are, but it’s worth checking the label. And if you want to skip the protein powder entirely, add an extra 1/4 cup of oats and 2 tablespoons of peanut butter to compensate. They won’t have as much protein, obviously, but they’ll still taste amazing.
I’ve also made these with crunchy peanut butter when I ran out of creamy, and honestly? The little peanut pieces add a nice texture. So don’t stress if that’s what you have on hand.
Equipment Needed
The beauty of this recipe is how little equipment it requires. No mixer, no food processor, no fancy gadgets.
- Large mixing bowl (any size works, but bigger is easier for mixing without spilling)
- Rubber spatula or wooden spoon (for initial mixing; your hands will do the final mixing)
- Measuring cups and spoons (for accurate ingredient portions)
- Baking sheet or plate (lined with parchment paper for easy cleanup)
- Small cookie scoop or tablespoon (for uniform balls; I use a 1.5-tablespoon scoop and it’s perfect)
That’s it. Seriously. If you have hands and a bowl, you’re basically set. I’ve made these in hotel rooms with just a plastic bowl and a fork before. Not ideal, but completely doable. The parchment paper isn’t strictly necessary either—you can roll them directly onto a clean plate—but it makes transferring them to a container much easier.
One tip: if your hands get sticky while rolling (which they probably will), lightly wet them with cold water. It helps the mixture slide off your fingers without sticking to your palms. Learned that trick after my first batch turned into a sticky mess all over my hands.
Preparation Method
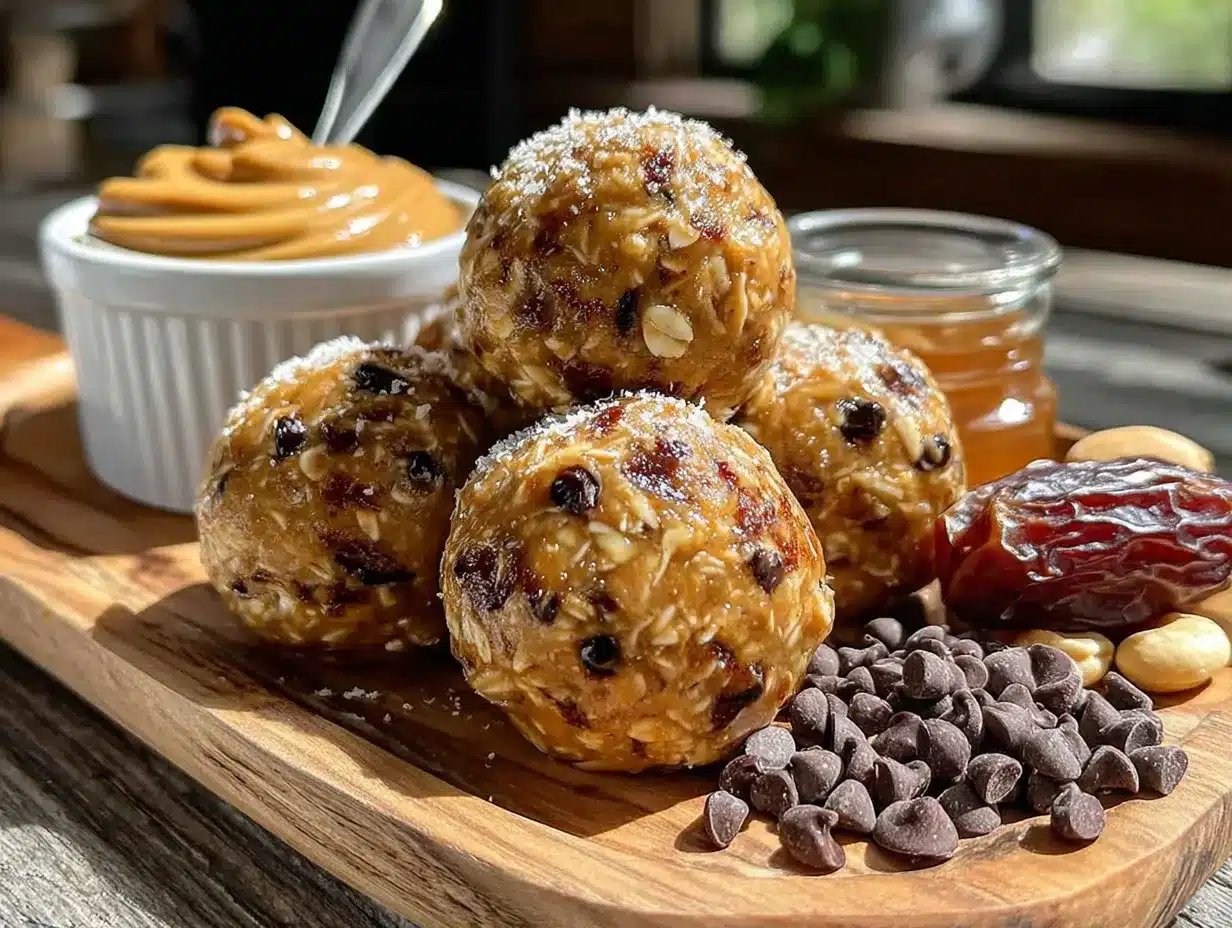
Alright, let’s get rolling—literally. This is the easiest part of your day, I promise.
- Combine the wet ingredients first. In your large mixing bowl, add the peanut butter, honey (or maple syrup), and vanilla extract. Stir them together until they’re fully combined and smooth. This takes about 30 seconds. Don’t rush this step—if the peanut butter and honey aren’t properly mixed, you’ll end up with pockets of sweetness in some balls and not enough in others.
- Add the dry ingredients. Pour in the rolled oats, protein powder, and salt (if using). Stir everything together with your spatula or spoon until it starts coming together. At first it’ll look dry and crumbly—that’s normal. Keep mixing. The oats will absorb some moisture from the peanut butter and honey, and the mixture will gradually become cohesive.
- Switch to your hands. Once the spatula stops being effective (usually after about a minute), get in there with your hands. Squeeze and knead the mixture together. This is the most important part. You want to make sure every oat is coated and the protein powder is fully incorporated. If the mixture feels too dry and won’t hold together when squeezed, add a tablespoon of peanut butter or honey. If it’s too sticky and wet, add a tablespoon of oats. I’ve had to adjust based on the brand of peanut butter before—some are oilier than others.
- Fold in the chocolate chips. Once the base mixture is well combined and holds together when pressed, add the mini chocolate chips. Knead them in gently with your hands until they’re evenly distributed. Don’t overmix at this point or the chocolate chips might start melting from the warmth of your hands.
- Roll into balls. Using your cookie scoop or a tablespoon, portion out the mixture. Roll each portion between your palms to form a smooth ball. Aim for about 1 to 1.5 inches in diameter. You should get roughly 18 to 20 balls, depending on how big you make them. I usually get exactly 18 because I like them a little generous.
- Chill and set. Place the rolled balls on your parchment-lined baking sheet or plate. Pop them in the refrigerator for at least 20 to 30 minutes. This step is crucial—it firms them up and makes the texture perfect. They’ll be a bit soft at room temperature, but after chilling, they hold their shape beautifully.
- Store and enjoy. Transfer the chilled balls to an airtight container. Keep them in the refrigerator for up to two weeks, or in the freezer for up to three months. (Spoiler: they never last that long in my house.)
Sensory cues to watch for: The mixture should feel like a slightly stiff cookie dough when you squeeze it in your hand. It shouldn’t crumble apart, but it also shouldn’t leave a greasy residue on your palm. If it feels too oily, add a bit more oats. If it feels too dry and cracked, add a splash more honey or a teaspoon of water. Trust your hands—they know what dough should feel like.
Prep tip: If you’re making these with kids (which is a fantastic idea, by the way), let them do the rolling. It’s messy and fun, and they’re more likely to eat something they helped make. My nephew calls these “energy cookies” and asks for them every time he visits.
Cooking Tips & Techniques
I’ve made a lot of mistakes so you don’t have to. Here’s what I’ve learned.
Don’t overmix or undermix. This is the biggest issue I see people run into. If you undermix, you’ll get pockets of dry protein powder that taste chalky. If you overmix, the peanut butter can start to separate and make the balls greasy. Mix just until everything is evenly distributed and holds together. You’ll know it’s right when you can squeeze a handful and it stays in a ball without crumbling.
Temperature matters. If your kitchen is hot and humid, the peanut butter will be softer and the mixture might feel stickier. In that case, pop the bowl in the fridge for 10 minutes before rolling. If your kitchen is cold, the mixture might feel stiffer—that’s fine, just roll with it (pun intended).
Protein powder varies wildly. Different brands have different absorbencies. Whey protein tends to be less absorbent than plant-based proteins. If you’re using a new brand, start with 1/3 cup instead of 1/2 cup, then add more if needed. I learned this the hard way when I switched brands and ended up with dry, crumbly balls that wouldn’t hold together. Waste of good ingredients.
Let the mixture rest before rolling. After mixing, let it sit for 5 minutes. This gives the oats time to absorb some moisture, which makes the mixture easier to work with and gives you a better texture. I know you’re impatient (I am too), but those five minutes make a difference.
Use a cookie scoop for consistency. If you want uniform balls that look professional, use a small cookie scoop. It also makes the process faster and less messy. If you don’t have one, just eyeball it—they don’t have to be perfect.
Variations & Adaptations
This recipe is incredibly forgiving and adaptable. Here are some ways to switch it up.
Chocolate Peanut Butter Dream: Use chocolate protein powder and add an extra tablespoon of cocoa powder. Roll the finished balls in cocoa powder for a truffle-like finish. I made these for a friend who claims she doesn’t like “healthy snacks,” and she ate six in one sitting.
Vegan Version: Substitute the honey with maple syrup or agave nectar, and use a plant-based protein powder. Make sure your chocolate chips are vegan-friendly (most dark chocolate chips are). Everything else is already plant-based. These turn out slightly softer than the honey version, but they’re just as delicious.
Nut-Free Option: Swap the peanut butter for sunflower seed butter or WowButter (a soy-based peanut butter alternative). The texture will be similar, though sunflower seed butter has a slightly different flavor profile—it’s earthier and a bit more savory. I actually love the combination of sunflower seed butter with chocolate chips. It’s unexpected but really good.
Add-in Ideas: Shredded coconut, chia seeds, flax seeds, hemp hearts, dried cranberries, chopped nuts, or even a pinch of cinnamon. Just don’t go overboard—keep the total add-ins to about 1/4 cup so the mixture doesn’t get too dry or fall apart.
Holiday Version: Around Christmas, I add a drop of peppermint extract and use white chocolate chips instead of regular chocolate. For fall, I add pumpkin pie spice and a tablespoon of pumpkin puree (reduce the honey slightly to compensate for the extra moisture). These little tweaks make them feel festive without any extra effort.
Serving & Storage Suggestions
These protein balls are best served chilled or at cool room temperature. If you take them out of the fridge and let them sit for more than 30 minutes, they’ll soften up significantly. That’s not a bad thing—they’re still delicious—but they won’t hold their shape as well. So if you’re packing them for lunch, keep them in a small cooler bag or eat them within an hour of taking them out of the fridge.
What to serve with them: These are fantastic on their own, but they also pair beautifully with a glass of cold milk, a cup of coffee, or a protein shake. For a more substantial snack, I’ll eat two or three alongside an apple or a handful of almonds. They’re also great crumbled over Greek yogurt or oatmeal for a quick breakfast boost.
Storage: Store in an airtight container in the refrigerator for up to two weeks. I use a glass container with a tight-fitting lid, and they stay fresh and chewy the whole time. If you’re storing them in the freezer (which I highly recommend), place them in a single layer on a baking sheet until frozen solid, then transfer them to a freezer bag. They’ll keep for up to three months. You can eat them straight from the freezer—they’re firm but not rock-hard, and they thaw in about 5 minutes at room temperature.
Reheating: Not that you need to, but if you want them softer, microwave one for 8 to 10 seconds. It’ll warm the peanut butter and make it almost like a warm cookie. Dangerous territory, honestly—I’ve eaten four in a row this way.
Flavor development: These actually taste better the next day. The oats absorb more moisture overnight, and the flavors meld together. So if you can resist eating them all right away, you’re in for a treat.
Nutritional Information & Benefits
Here’s the approximate nutritional breakdown for one protein ball (based on the recipe making 18 balls):
| Nutrient | Amount per ball |
|---|---|
| Calories | 145 |
| Protein | 7g |
| Carbohydrates | 14g |
| Fiber | 2g |
| Sugar | 8g |
| Fat | 8g |
| Saturated Fat | 2g |
| Sodium | 95mg |
These numbers will vary depending on the exact brands you use, but this gives you a solid ballpark. The protein content makes them a great post-workout snack, while the healthy fats from peanut butter keep you full and satisfied. Oats provide slow-burning complex carbs for sustained energy, and the honey gives you a quick boost when you need it.
If you’re watching your sugar intake, you can reduce the honey to 1/4 cup and add an extra tablespoon of peanut butter. The balls won’t be as sweet, but they’ll still be tasty. For a lower-fat option, use powdered peanut butter (reconstituted with water) instead of regular peanut butter. Just note that the texture will be different—less rich and slightly more dense.
These are naturally gluten-free if you use certified gluten-free oats, and they’re easily made vegan with the substitutions I mentioned earlier. The only common allergen is peanuts, but that’s easily swapped.
Conclusion
Look, I’m not saying these Easy No-Bake Peanut Butter Protein Balls will change your life. But they might change your afternoon snack situation, and honestly, that’s kind of a big deal. They’re quick enough for busy days, satisfying enough to curb real hunger, and simple enough that you’ll actually make them instead of grabbing something from a wrapper.
What I love most about this recipe is how adaptable it is. You can tweak it based on what you have in your pantry, adjust the sweetness to your liking, or add whatever mix-ins you’re craving. It’s a blueprint, not a rigid formula. And once you make them a few times, you won’t even need the recipe anymore—you’ll just know how it should feel and taste.
So go ahead and give these a try. Make a batch today, stash them in the fridge, and thank yourself tomorrow when you’re hungry and need something good in five seconds flat. If you make them your own way—maybe with a different nut butter, or extra chocolate chips, or a sprinkle of sea salt on top—I’d love to hear about it. Drop a comment below and tell me how yours turned out. And if you loved them, share this recipe with a friend who needs a better snack in their life. Happy rolling!
Frequently Asked Questions
Can I make these without protein powder?
Absolutely. Just replace the protein powder with an extra 1/4 cup of oats and 2 tablespoons of peanut butter. They won’t have as much protein, but they’ll still taste great and have a similar texture.
Why are my protein balls too dry and crumbly?
This usually happens when the protein powder absorbs too much moisture. Add a tablespoon of peanut butter or honey at a time until the mixture holds together when squeezed. Different protein powder brands behave differently, so you might need to adjust.
Can I use quick oats instead of old-fashioned oats?
You can, but the texture will be different. Quick oats are more finely processed and will make the balls softer and less chewy. Old-fashioned oats give a better texture and hold up better in storage.
How long do these last at room temperature?
They’re fine at room temperature for about 4 to 6 hours, but they’ll soften significantly. For best texture and food safety, keep them refrigerated. If you’re taking them on a road trip or to work, use an insulated lunch bag with an ice pack.
Can I freeze these protein balls?
Yes, and I actually recommend it. Freeze them in a single layer on a baking sheet, then transfer to a freezer bag. They’ll keep for up to three months. You can eat them straight from the freezer or let them thaw for 5 minutes at room temperature.
Pin This Recipe!
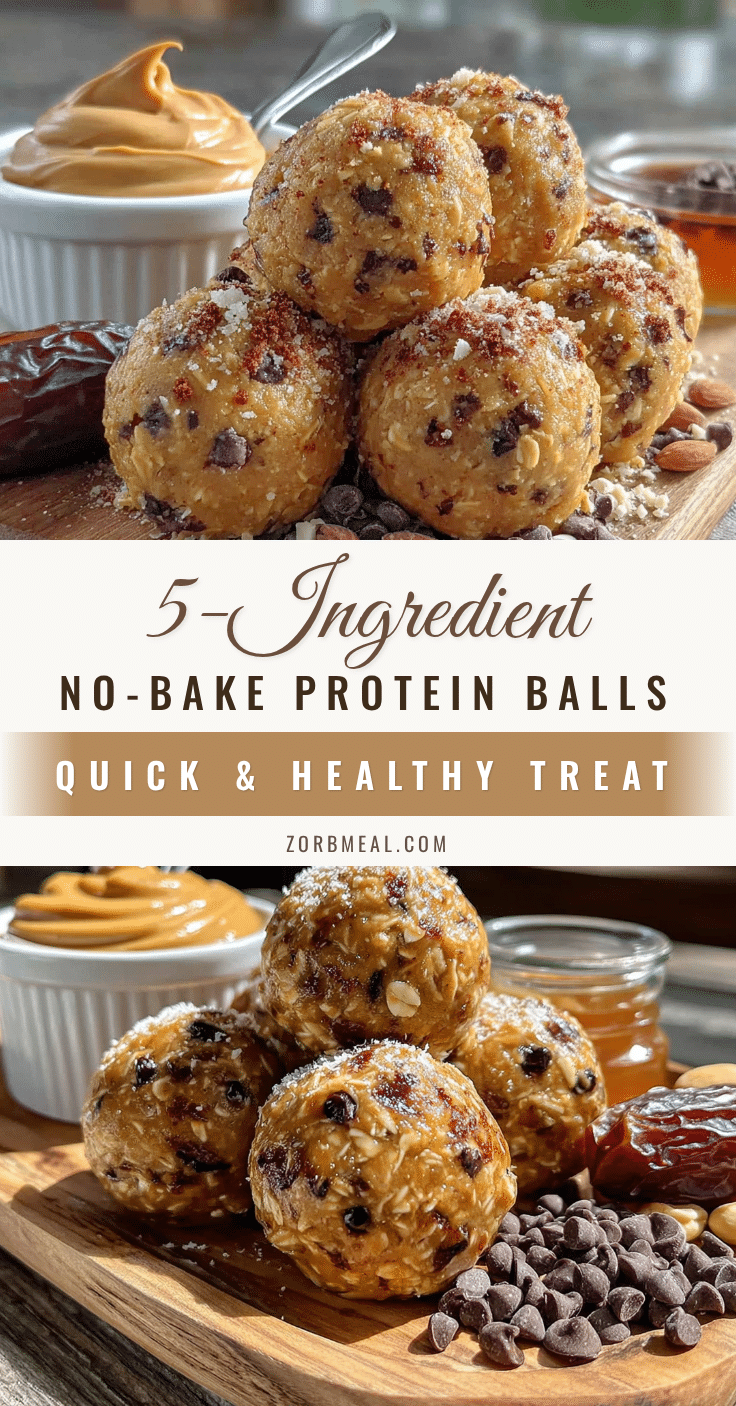
Easy No-Bake Peanut Butter Protein Balls: Best 5-Minute Snack

These Easy No-Bake Peanut Butter Protein Balls are the perfect quick snack, packed with protein and peanut butter flavor. Ready in just 5 minutes with simple pantry ingredients, they’re chewy, satisfying, and ideal for busy days.
- Prep Time: 5 minutes
- Cook Time: 0 minutes
- Total Time: 5 minutes
- Yield: 18 servings 1x
- Category: Snack
- Cuisine: American
Ingredients
- 1 cup creamy peanut butter (natural or regular, well-stirred if natural)
- 1 cup old-fashioned rolled oats (not quick oats)
- 1/2 cup chocolate or vanilla protein powder
- 1/3 cup honey or maple syrup
- 1/4 cup mini chocolate chips (optional)
- 1 teaspoon vanilla extract
- Pinch of salt (skip if peanut butter is salted)
Instructions
- Combine the wet ingredients first. In a large mixing bowl, add the peanut butter, honey (or maple syrup), and vanilla extract. Stir together until fully combined and smooth, about 30 seconds.
- Add the dry ingredients. Pour in the rolled oats, protein powder, and salt (if using). Stir with a spatula or spoon until it starts coming together. The mixture will look dry and crumbly at first; keep mixing until cohesive.
- Switch to your hands. Once the spatula is no longer effective, use your hands to squeeze and knead the mixture together until every oat is coated and the protein powder is fully incorporated. If too dry, add a tablespoon of peanut butter or honey; if too sticky, add a tablespoon of oats.
- Fold in the chocolate chips. Once the base mixture holds together when pressed, add the mini chocolate chips and knead gently until evenly distributed. Do not overmix to avoid melting the chips.
- Roll into balls. Using a cookie scoop or tablespoon, portion out the mixture and roll each portion between your palms into smooth balls about 1 to 1.5 inches in diameter. You should get roughly 18 to 20 balls.
- Chill and set. Place the rolled balls on a parchment-lined baking sheet or plate and refrigerate for at least 20 to 30 minutes to firm up.
- Store and enjoy. Transfer the chilled balls to an airtight container. Refrigerate for up to two weeks or freeze for up to three months.
Notes
For best texture, let the mixture rest for 5 minutes before rolling. If your hands get sticky, lightly wet them with cold water. These taste even better the next day as flavors meld. For a nut-free version, use sunflower seed butter or WowButter.
Nutrition
- Serving Size: 1 ball
- Calories: 145
- Sugar: 8
- Sodium: 95
- Fat: 8
- Saturated Fat: 2
- Carbohydrates: 14
- Fiber: 2
- Protein: 7
Keywords: no-bake, peanut butter, protein balls, healthy snack, easy snack, gluten-free option, vegan option