Three bags of Jello on the counter, a toddler clinging to my leg, and twenty minutes before the school Halloween party started. That was the moment I realized I had completely forgotten about the dessert table sign-up. I stood there staring at the pantry like it might magically produce something impressive. And you know what? It kind of did. I spotted those little boxes of orange and yellow Jello I bought on a whim, remembered the half-empty container of Cool Whip in the freezer, and thought, well, this is either going to be brilliant or a total disaster.
Honestly, it turned out way better than I expected. I layered them in those little plastic cups I had from a birthday party last year, and they looked exactly like candy corn. The kids at the party devoured them. One mom even asked for the recipe, which felt like a small victory considering I threw it together in a panic. These Easy Candy Corn Layered Jello Cups for Halloween became my go-to last-minute trick ever since. They are so simple, but they look like you actually planned ahead. That is my favorite kind of recipe, honestly. The kind that saves you when you least expect it.
Why You’ll Love This Recipe
I have made these Easy Candy Corn Layered Jello Cups for Halloween at least a dozen times now, and I can tell you with confidence that they are foolproof. They are the kind of dessert that looks way more complicated than it actually is, which is always a win in my book. Here is why I keep coming back to them.
- Quick & Easy: From start to finish, these take about 20 minutes of active work. The hardest part is waiting for the layers to set in the fridge.
- Simple Ingredients: You only need Jello, water, and Cool Whip. No fancy baking supplies or obscure grocery items. You probably have most of this stuff already.
- Perfect for Halloween Parties: These cups are the star of any Halloween dessert table. Kids love them, adults love them, and they fit right in with other spooky snacks.
- Crowd-Pleaser: I have brought these to school parties, neighborhood gatherings, and even a work potluck. They always disappear first. Always.
- Unbelievably Cute: The layered look mimics candy corn perfectly. It is festive without being over-the-top, and the creamy texture is just right.
What makes these different from other Jello desserts is the texture. By folding Cool Whip into the Jello mixture, you get this light, fluffy, almost mousse-like consistency instead of that wobbly, firm Jello texture. It makes a huge difference. Plus, the layering technique is super forgiving. Even if your layers are not perfectly straight, they still look great. I have learned that from experience, trust me. This recipe is the kind that makes you look like a kitchen pro without actually having to be one.
What Ingredients You Will Need
This recipe uses simple, pantry-friendly ingredients to create a dessert that looks like it came from a bakery. The magic is in the layering and the creamy texture, not in complicated components. Here is everything you need.
- Box of orange Jello (3 oz) – This is the middle layer. I prefer the brand name, but store brand works fine too.
- Box of yellow Jello (3 oz) – This is the bottom layer. You want a bright, sunny yellow for that candy corn look.
- Boiling water (1 cup per box of Jello) – You will need this to dissolve the Jello powder completely.
- Cold water (1/2 cup per box of Jello) – This helps cool the mixture down before you add the Cool Whip.
- Cool Whip (8 oz tub) – This is what makes the Jello light and fluffy. You can use the regular or lite version. I have used both and they work the same.
- Ice cubes (about 1 cup per layer) – These help speed up the cooling process so you can add the Cool Whip without melting it.
For the topping, you will need an additional half tub of Cool Whip and some optional decorations. I like to add a few candy corn pieces on top for garnish, but sprinkles work great too. If you want to get really fancy, you can add a dollop of whipped cream and a drizzle of caramel sauce. But honestly, they look perfect just as they are.
One thing I have learned through trial and error is to use the small 3-ounce boxes of Jello, not the larger ones. The larger boxes will throw off the ratios and make the layers too thick. Also, make sure your Cool Whip is fully thawed before you start. Cold Cool Whip does not fold into the Jello mixture evenly, and you will end up with lumps. I learned that the hard way during my first attempt. If you are looking for another easy dessert that uses similar ingredients, you might enjoy these festive red, white, and blue layered Jello cups for a different holiday twist.
Equipment Needed
You do not need much for this recipe, which is part of why I love it. Here is what you will need.
- Small mixing bowls (2 to 3) – You will need one for each Jello color. I use my regular Pyrex bowls.
- Whisk – For dissolving the Jello and folding in the Cool Whip.
- Measuring cups – For the boiling water and cold water.
- Small plastic cups (7 to 9 oz size) – These are perfect for individual servings. I get mine at the dollar store.
- Refrigerator – You will need space to let the layers set. A flat spot on a shelf works best.
- Spoon or small ladle – For spooning the Jello mixture into the cups without making a mess.
If you do not have plastic cups, you can use small glass jars or even shot glasses for a mini version. I have also used those little dessert cups with lids, which are great for transporting to parties. The key is to use clear cups so the layers are visible. That is the whole point of this dessert, after all. If you are looking for another handheld party snack, these savory bacon-wrapped smokies are always a hit too.
Preparation Method
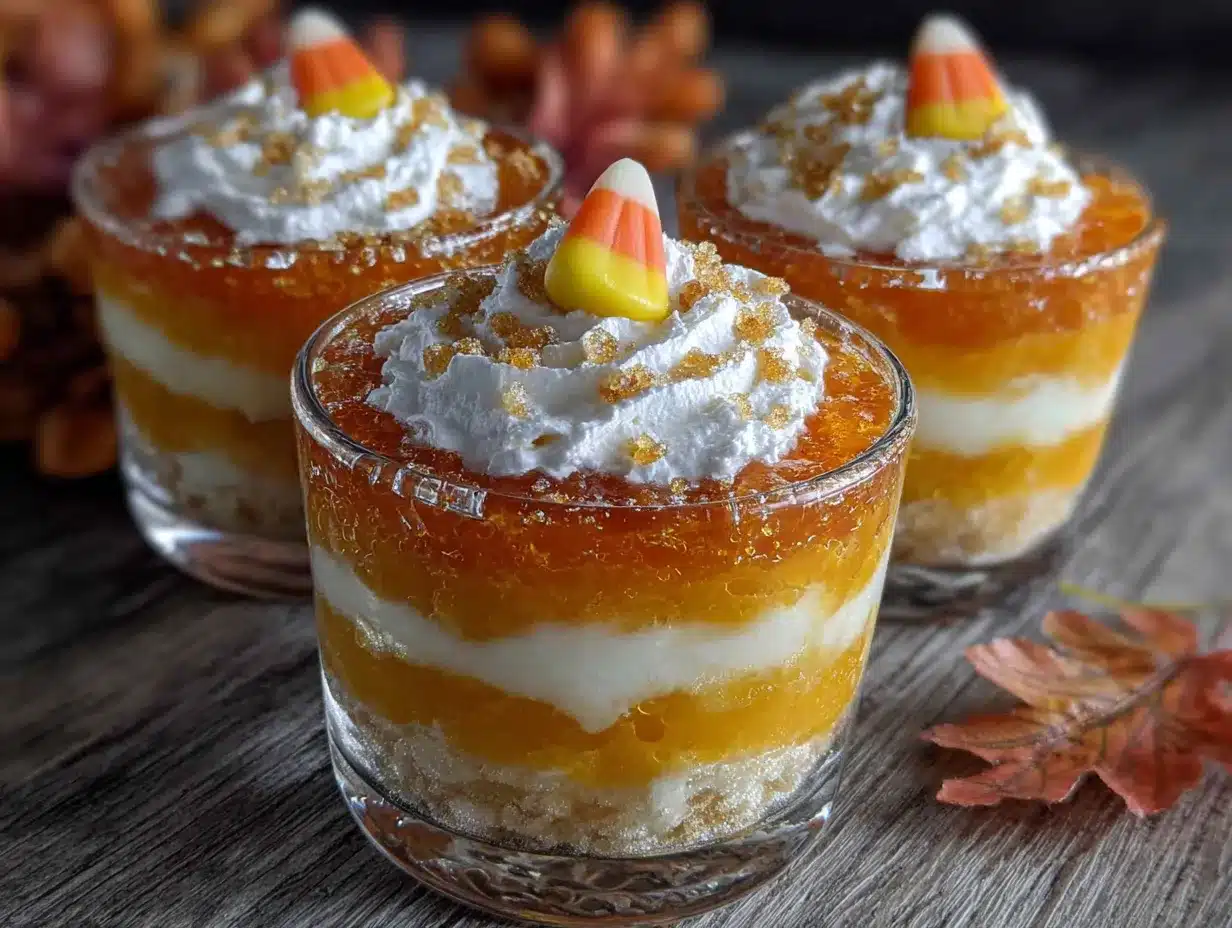
Now for the fun part. Here is how to make these Easy Candy Corn Layered Jello Cups for Halloween step by step. I will share all the little tricks I have picked up along the way.
- Prepare the yellow layer first. In a small bowl, combine the yellow Jello powder with 1 cup of boiling water. Stir for about 2 minutes until the powder is completely dissolved. Then add 1/2 cup of cold water and about 1 cup of ice cubes. Stir until the ice is mostly melted and the mixture feels cool to the touch. This usually takes about 3 to 4 minutes.
- Add the Cool Whip. Once the yellow Jello mixture is cool, scoop out about 1/3 of the Cool Whip tub (roughly 2/3 cup) and fold it into the mixture. Use a gentle folding motion, not stirring, to keep the mixture light and fluffy. You want it to be uniform in color with no white streaks.
- Fill the cups. Spoon the yellow mixture into your plastic cups, filling them about 1/3 of the way up. Pop them in the fridge for about 20 to 25 minutes. You want the layer to be set but still slightly tacky on top, not completely firm. This helps the next layer stick.
- Prepare the orange layer. While the yellow layer sets, repeat the process with the orange Jello. Dissolve the powder in 1 cup of boiling water, add 1/2 cup cold water and ice cubes, and let it cool. Fold in another 1/3 of the Cool Whip tub until smooth.
- Add the orange layer. Carefully spoon the orange mixture on top of the set yellow layer. Fill the cups to about 2/3 full. Return them to the fridge for another 20 to 25 minutes.
- Prepare the topping. For the top layer, you will use the remaining 1/3 of the Cool Whip. You can leave it plain for a white top, or you can mix in a little bit of vanilla extract for extra flavor. I usually leave it plain because it looks more like candy corn that way.
- Finish the cups. Once the orange layer is set, spoon the plain Cool Whip on top. Spread it gently to create a smooth, white layer. This is the top of your candy corn.
- Chill and serve. Refrigerate the cups for at least 2 hours, or overnight if you have time. The longer they set, the cleaner the layers will be when you eat them. Right before serving, you can add a few candy corn pieces on top for decoration.
A few things I have learned from making these over and over. First, do not rush the cooling step. If you add the Cool Whip to hot Jello, it will melt and you will end up with a soupy mess. The ice cube trick really works, just make sure the mixture feels cool, not warm, before you fold in the Cool Whip. Second, be patient with the layers. I know it is tempting to pour the next layer on before the previous one is set, but trust me, they will run together and you will lose that beautiful candy corn look. It is worth the wait.
Cooking Tips & Techniques
After making these Easy Candy Corn Layered Jello Cups for Halloween more times than I can count, I have picked up a few tricks that make the process smoother. Here are my best tips.
Use the ice cube trick every time. This is the most important tip I can give you. Adding ice cubes to the Jello mixture cools it down quickly so you can add the Cool Whip right away. Without this step, you have to wait for the mixture to cool on its own, which takes forever. I have tried both methods, and the ice cube method is hands down faster and more reliable.
Do not overmix the Cool Whip. When you fold the Cool Whip into the Jello, use a gentle hand. Overmixing will deflate the Cool Whip and make your layers dense instead of light and fluffy. You want to see a uniform color, but you do not need to be aggressive about it. A few gentle folds and you are good.
Level your cups. Before you pour the Jello mixture into the cups, make sure they are sitting on a flat surface in the fridge. If they are tilted, your layers will be uneven. I learned this the hard way when I made a batch for a party and half of them looked lopsided. Now I always check the fridge shelf first.
Plan your timing. Each layer needs about 20 to 25 minutes to set. That means the whole process takes about an hour of active plus waiting time. I usually start these in the morning or the night before I need them. That way, I am not rushing around right before the party. If you are planning a whole Halloween spread, these festive firework-themed Rice Krispie treats on sticks are another easy option that pairs well with these cups.
One mistake I made early on was using too much Jello mixture per cup. I filled them too full and the layers looked squished. Now I aim for each layer to be about 1/3 of the cup height. It looks much more balanced and professional.
Variations & Adaptations
One of the best things about this recipe is how easy it is to change up. Here are some variations I have tried and loved.
Spooky Halloween Colors: Instead of yellow and orange, try using lime green and purple Jello for a witchy twist. The layering technique is exactly the same, just swap the colors. I made these for a Halloween party last year and they were a huge hit. The kids thought they looked like potions.
Dairy-Free Version: You can use a dairy-free whipped topping like Coconut Whipped Cream instead of Cool Whip. The texture will be slightly different, but it still works well. Just make sure the whipped topping is fully thawed before you fold it in. I have tested this with a few different brands and they all work fine.
Boozy Adult Version: For a grown-up party, you can add a splash of vodka or coconut rum to each layer before it sets. Just replace a tablespoon of the cold water with the alcohol. The layers will still set, but you will get a nice little kick. I did this for a Halloween cocktail party and everyone loved them.
Mini Shot Glass Version: If you are serving a crowd, use small shot glasses instead of regular cups. The layers will be thinner, so they set faster. These are perfect for parties where people want to grab and go. Plus, they look adorable.
Different Flavors: You are not limited to orange and yellow. Try using strawberry and lemon for a red and yellow combo, or blueberry and lime for a more colorful look. The key is to use contrasting colors so the layers stand out. I have even made a rainbow version with four layers for a birthday party, and it was stunning.
If you are looking for another crowd-friendly dessert, these easy no-bake firecracker cheesecake bars are perfect for summer celebrations and have a similar no-fuss approach.
Serving & Storage Suggestions
These Easy Candy Corn Layered Jello Cups for Halloween are best served cold, straight from the fridge. The texture is light and creamy, almost like a mousse, and the cold temperature makes it extra refreshing. I like to serve them with a small spoon and maybe a few extra candy corn pieces on the side for decoration.
For parties, set up a little dessert table with these cups as the centerpiece. They look great next to other Halloween treats like cupcakes or cookies. I usually put them on a platter or a tray so people can grab one easily. If you are worried about them sliding around, a little bit of sticky tack on the bottom of each cup works wonders.
Storage: These cups will keep in the fridge for up to 3 days. Just make sure they are covered with plastic wrap or a lid so they do not absorb any odors from the fridge. The layers will stay intact for the first 2 days, but after that, they might start to blend together a little. They still taste fine, they just will not look as pretty.
Freezing: I do not recommend freezing these. The Cool Whip can get grainy when thawed, and the layers will separate. If you need to make them ahead, just make them the day before and keep them in the fridge. That is what I do for all my parties.
Reheating: These are meant to be served cold, so no reheating is necessary. If you take them out of the fridge and they seem too firm, let them sit at room temperature for about 5 minutes before serving. That should soften them up just enough.
One thing I have noticed is that the flavors meld together a bit after a day in the fridge. The orange and yellow Jello flavors blend into a sort of creamy citrus taste that is really pleasant. So do not be afraid to make them a day ahead. They actually get better with time.
Nutritional Information & Benefits
Let me be real with you. These are a treat, not a health food. But that does not mean they do not have a place in a balanced diet. Here is the rough nutritional breakdown for one cup, assuming you use regular Jello and Cool Whip.
- Calories: Approximately 120 to 150 per cup
- Fat: 5 to 7 grams (mostly from the Cool Whip)
- Sugar: 15 to 18 grams (from the Jello and Cool Whip)
- Carbohydrates: 20 to 25 grams
- Protein: 1 to 2 grams
The good news is that these are relatively low in calories compared to a slice of cake or a brownie. Each cup is a single serving, so portion control is built right in. Plus, they are gluten-free and nut-free, which makes them safe for most people with common allergies. If you are using sugar-free Jello and lite Cool Whip, you can cut the calories and sugar by about half.
From a wellness perspective, I see these as a fun, festive treat that does not derail your whole day. They are perfect for a Halloween party where you want to enjoy something sweet without overdoing it. And honestly, the joy they bring to kids and adults alike is worth the few grams of sugar.
Conclusion
These Easy Candy Corn Layered Jello Cups for Halloween have become a staple in my kitchen for good reason. They are simple, they are cute, and they always impress. Whether you are throwing a Halloween party, sending treats to your kid’s school, or just want a fun dessert to make with the family, these cups deliver every time.
I love that they are forgiving enough for beginners but impressive enough for experienced bakers. The layering technique is so satisfying to watch come together, and the end result looks like you spent hours on it. But between you and me, we know the secret. It is all about the Jello and the Cool Whip.
Go ahead and give these a try. Customize the colors, add your favorite toppings, and make them your own. I would love to hear how they turn out for you. Drop a comment below and let me know what variations you tried, or share a photo of your cups on social media. Tag me so I can see your creations. Happy Halloween, and happy cooking!
Frequently Asked Questions
Can I use sugar-free Jello for this recipe?
Yes, absolutely. Sugar-free Jello works perfectly in this recipe. Just follow the same instructions. The layers will set the same way, and the taste is very similar. I have used sugar-free Jello many times and never noticed a difference in texture.
How long do the layers need to set?
Each layer needs about 20 to 25 minutes in the fridge to set properly. The top layer needs at least 2 hours, but overnight is best. The longer they set, the cleaner the layers will be when you eat them. Patience really pays off here.
Can I use homemade whipped cream instead of Cool Whip?
You can, but the texture will be different. Homemade whipped cream is less stable than Cool Whip, so the layers might not hold up as well. If you want to try it, make sure your whipped cream is very stiff and fold it in gently. I have tried it, and it works, but Cool Whip gives a more consistent result.
How many cups does this recipe make?
This recipe makes about 8 to 10 cups, depending on the size of your cups. If you use smaller cups or shot glasses, you will get more servings. I usually get about 9 cups from a standard batch using 7-ounce cups.
Can I make these ahead of time?
Yes, these are perfect for making ahead. You can make them up to 2 days in advance. Just keep them covered in the fridge. The layers will stay intact for the first 2 days. After that, they might start to blend, but they will still taste great.
Pin This Recipe!
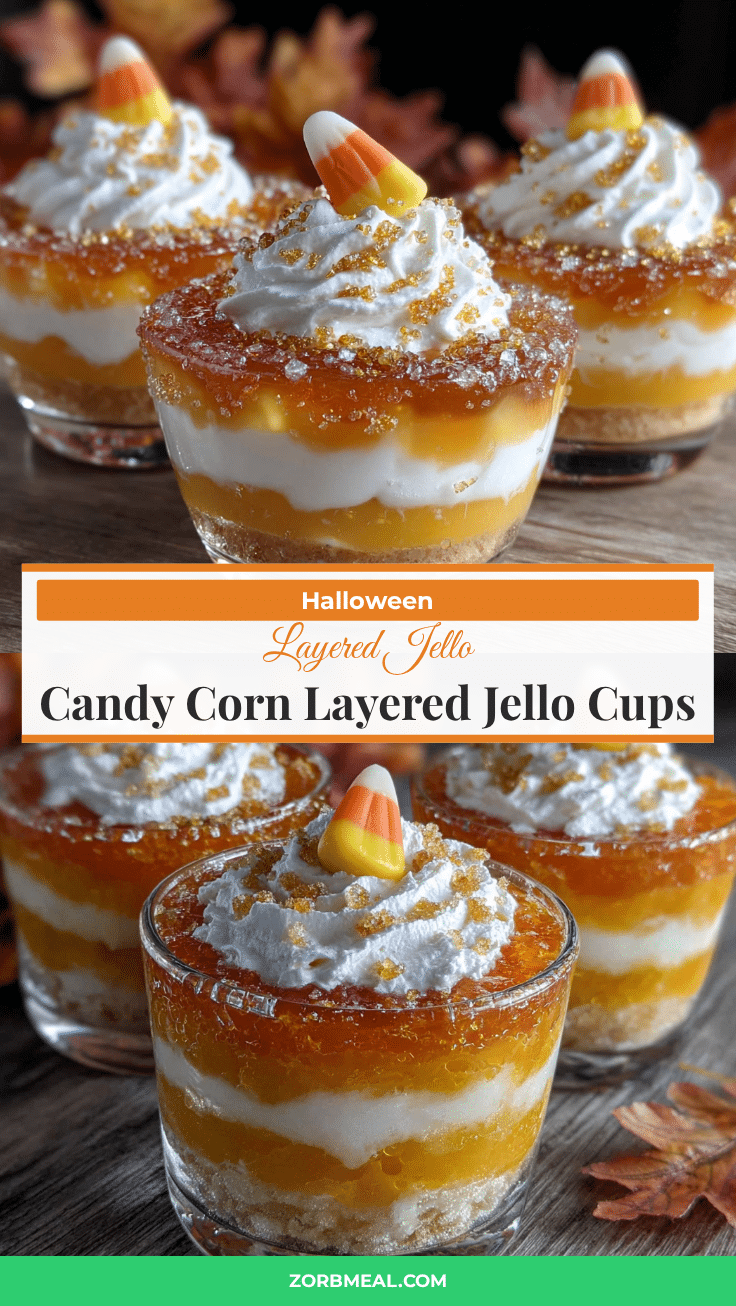
Easy Candy Corn Layered Jello Cups: Best Halloween Dessert
These Easy Candy Corn Layered Jello Cups are a quick, no-bake Halloween dessert that looks like candy corn. Made with just Jello, Cool Whip, and water, they are perfect for parties and always a crowd-pleaser.
- Prep Time: 20 minutes
- Cook Time: 0 minutes
- Total Time: 2 hours 40 minutes (includes chilling)
- Yield: 8-10 servings 1x
- Category: Dessert
- Cuisine: American
Ingredients
- 1 box (3 oz) orange Jello
- 1 box (3 oz) yellow Jello
- 2 cups boiling water (1 cup per box)
- 1 cup cold water (1/2 cup per box)
- 1 cup ice cubes (about 1 cup per layer)
- 1 tub (8 oz) Cool Whip, thawed
- Optional: candy corn pieces for garnish
Instructions
- Prepare the yellow layer: In a small bowl, combine yellow Jello powder with 1 cup boiling water. Stir for 2 minutes until dissolved. Add 1/2 cup cold water and about 1 cup ice cubes. Stir until ice is mostly melted and mixture feels cool.
- Fold in Cool Whip: Scoop out about 1/3 of the Cool Whip tub (roughly 2/3 cup) and fold it into the cooled yellow Jello mixture until uniform and fluffy.
- Fill cups: Spoon the yellow mixture into plastic cups, filling about 1/3 full. Refrigerate for 20-25 minutes until set but slightly tacky.
- Prepare the orange layer: Repeat the process with orange Jello: dissolve in 1 cup boiling water, add 1/2 cup cold water and ice cubes, cool, then fold in another 1/3 of the Cool Whip.
- Add orange layer: Carefully spoon the orange mixture on top of the set yellow layer, filling cups to about 2/3 full. Refrigerate for another 20-25 minutes.
- Prepare topping: Use the remaining 1/3 of the Cool Whip. Leave plain or mix in a little vanilla extract.
- Finish cups: Once orange layer is set, spoon plain Cool Whip on top to create the white layer.
- Chill and serve: Refrigerate for at least 2 hours, or overnight. Garnish with candy corn pieces before serving.
Notes
Use 3 oz boxes of Jello, not larger ones. Ensure Cool Whip is fully thawed before folding. Do not rush cooling step; use ice cubes to cool mixture quickly. Be patient with layers to prevent them from running together. For best results, make a day ahead.
Nutrition
- Serving Size: 1 cup
- Calories: 120150
- Sugar: 1518
- Sodium: 80100
- Fat: 57
- Saturated Fat: 45
- Carbohydrates: 2025
- Protein: 12
Keywords: candy corn jello cups, Halloween dessert, layered jello, no-bake dessert, easy Halloween treat, jello cups, Cool Whip dessert


