I need something my kids will actually eat without complaint. I need it to be fast because mornings are chaos. And I need it to hold up in a lunchbox until noon without getting soggy or falling apart. That is a lot to ask from one little wrap, honestly. But these turkey and cheese pinwheels deliver on every single front.
These little spirals have become our lunchbox MVP. They come together in under 15 minutes, use ingredients I always have on hand, and somehow feel both fun and practical. My kids call them “snack sushi” which is adorable and also happens to make them eat every bite. Let me walk you through why this recipe works and how you can make it your own.
Why You’ll Love This Recipe
- Quick & Easy: From start to finish, these pinwheels take about 10 minutes to assemble. No cooking required! Just roll, slice, and pack.
- Simple Ingredients: You need a tortilla, some cream cheese, turkey slices, and cheese. That is it. Nothing fancy, nothing expensive.
- Perfect for Lunchboxes: These hold up beautifully in a lunchbox for hours. No sogginess, no mess, just perfect little spirals that stay intact.
- Crowd-Pleaser: Kids love them. Adults love them. They disappear at parties and make the perfect after-school snack.
- Unbelievably Customizable: Swap the filling, change the wrap, add veggies. This recipe is a template, not a rulebook.
What makes these different from every other pinwheel recipe out there? It is the cream cheese layer. Most recipes just slap meat and cheese on a tortilla and roll it up. But that cream cheese spread acts like glue, holding everything together while adding richness and tang. It prevents the turkey from sliding around and keeps the whole thing from drying out. Trust me on this one.
What Ingredients You Will Need
This recipe uses simple, everyday ingredients you probably already have in your fridge. That is the beauty of it. No special shopping trips, no obscure items.
- Large flour tortillas (10-inch size works best) – You can use whole wheat, spinach, or sun-dried tomato wraps for color and flavor. I like the burrito-sized ones for maximum rolling surface.
- 8 ounces cream cheese, softened to room temperature – This is the glue that holds everything together. Make sure it is soft so it spreads easily without tearing the tortilla. I use full-fat for best flavor, but reduced-fat works fine too.
- 1/2 teaspoon garlic powder – Optional but recommended. It adds a subtle savory note that makes the filling pop.
- 1/4 teaspoon onion powder – Another optional boost. Together with garlic powder, it creates that deli-style flavor profile.
- 8-10 slices deli turkey breast – Go for good quality here. I like oven-roasted or honey smoked turkey. Avoid the super thin shaved stuff because it tears easily. You want slices that hold together.
- 8-10 slices provolone or cheddar cheese – Provolone melts nicely and has a mild flavor kids love. Cheddar adds sharper taste. Swiss works great too. Use whatever cheese your family enjoys.
- Optional add-ins: Fresh spinach leaves, thinly sliced bell peppers, shredded lettuce, or even a thin layer of pesto or hummus. These add crunch and nutrition but are totally optional.
I recommend using Philadelphia cream cheese for best texture. It spreads like a dream and doesn’t leave lumps. For tortillas, Mission brand burrito-size wraps roll up without cracking. If you can find them, the spinach or tomato basil wraps add beautiful color and a tiny bit of extra flavor.
Equipment Needed
You do not need much for this recipe. That is part of why I love it.
- Cutting board – A large, flat surface for rolling and slicing. Wood or plastic, either works.
- Sharp knife – This is important. A dull knife will squish the pinwheels and make a mess. A sharp chef’s knife or serrated bread knife gives clean cuts.
- Butter knife or offset spatula – For spreading the cream cheese mixture evenly. An offset spatula is my secret weapon here.
- Plastic wrap or parchment paper – For wrapping the rolls tightly before chilling. This keeps them from unraveling.
- Small mixing bowl – To soften and mix the cream cheese with seasonings.
- Fork or spoon – For mixing.
- Refrigerator – You need to chill the rolls for at least 30 minutes before slicing. Do not skip this step.
- Toothpicks (optional) – If you are packing these for a lunchbox, toothpicks help keep them together and make them easier to eat.
If you don’t have plastic wrap, parchment paper works just fine. And if you don’t have an offset spatula, a regular butter knife will do the job. This recipe is forgiving.
Preparation Method

- Soften the cream cheese. Take the cream cheese out of the fridge about 30 minutes before you start. If you forgot, microwave it in 10-second bursts until soft but not melted. You want it spreadable, not runny.
- Mix the spread. In a small bowl, combine the softened cream cheese with garlic powder and onion powder. Stir until smooth and fully combined. Taste it. Adjust seasonings if needed. I sometimes add a pinch of salt and pepper too.
- Prepare your work surface. Lay a large flour tortilla flat on your cutting board. Make sure it is at room temperature – cold tortillas crack when you roll them.
- Spread the cream cheese. Using your offset spatula or butter knife, spread a thin, even layer of the cream cheese mixture over the entire surface of the tortilla. Go all the way to the edges. This seals the roll and prevents gaps.
- Layer the turkey. Place 4-5 slices of turkey evenly over the cream cheese. Overlap them slightly so there are no bare spots. You want every bite to have turkey in it.
- Layer the cheese. Place 4-5 slices of cheese on top of the turkey. Again, overlap slightly. If you are using provolone, tear the slices in half and arrange them to cover the surface.
- Add any extras. If you are using spinach leaves, bell peppers, or other add-ins, lay them in a single layer over the cheese. Don’t pile them too thick or the roll will be hard to slice.
- Roll it up tight. Starting at one edge, roll the tortilla tightly toward the other edge. Use your fingers to keep the filling tucked in as you go. Roll like you mean it – a loose roll will fall apart later.
- Wrap and chill. Wrap the rolled tortilla tightly in plastic wrap or parchment paper. Twist the ends like a candy wrapper to secure it. Place it in the fridge for at least 30 minutes, or up to 24 hours. This step is non-negotiable. Chilling firms up the cream cheese and makes slicing clean.
- Slice into pinwheels. When you are ready to serve, unwrap the roll and place it on your cutting board. Using a sharp knife, slice the roll into 1/2-inch to 3/4-inch pieces. Use a gentle sawing motion – don’t press straight down or you will squish them.
- Arrange and serve. Place the pinwheels on a plate or pack them directly into lunchboxes. If packing for later, arrange them in a single layer in an airtight container with a paper towel on the bottom to absorb any moisture.
One thing I learned the hard way – if your knife starts sticking to the cream cheese, wipe it clean between cuts. A dirty knife drags the filling and makes messy slices. Keep a damp paper towel nearby and wipe after every few cuts.
Cooking Tips & Techniques
I have made these pinwheels probably fifty times by now. Here is what I have learned.
Don’t overfill. I know it is tempting to pile on the turkey and cheese. But too much filling makes the roll fat and hard to slice. The pinwheels will bulge and fall apart. Keep it moderate – two thin layers of meat and cheese is plenty.
Room temperature tortillas are key. Cold tortillas crack when you roll them. Leave them on the counter for 10 minutes before you start. If you are in a rush, microwave them for 10 seconds to soften them up.
Use a serrated knife for clean cuts. A serrated bread knife slices through the tortilla without squishing it. A sharp chef’s knife also works. But a dull knife will ruin your pinwheels every time.
Chill time matters. I know 30 minutes feels like forever when you are hungry. But rushing this step leads to smeared, messy pinwheels. The cream cheese needs to firm up so the slices hold their shape. If you have time, chill for an hour. The difference is noticeable.
Double wrap for lunchboxes. If you are packing these for school, wrap the individual pinwheels in plastic wrap or place them in a small container with a tight lid. They can dry out if left exposed to air in the lunchbox.
Make ahead for busy mornings. You can assemble the rolls the night before and slice them in the morning. Or slice them the night before and store them in the fridge. They hold up beautifully for 24 hours.
I once tried to slice a roll straight from the fridge without letting it sit for even five minutes. The cream cheese was still too soft and the whole thing turned into a sticky mess. Learn from my mistake. Give it the full chill time.
Variations & Adaptations
This recipe is basically a blank canvas. Here are some of my favorite variations.
Ham and Swiss Pinwheels: Swap the turkey for deli ham and the provolone for Swiss cheese. Add a thin layer of Dijon mustard to the cream cheese for extra tang. This is my husband’s favorite version.
Veggie Cream Cheese Pinwheels: Skip the meat entirely. Spread the cream cheese, then layer with thinly sliced cucumber, shredded carrots, bell peppers, and fresh spinach. Add a sprinkle of everything bagel seasoning on top for crunch.
Buffalo Chicken Pinwheels: Mix shredded cooked chicken with cream cheese and buffalo sauce. Spread on the tortilla, add some shredded cheddar, and roll. This is a game day favorite and honestly, it reminds me of our creamy buffalo chicken dip but in portable form.
Italian Pinwheels: Use salami, pepperoni, and provolone. Spread the cream cheese with a little Italian seasoning mixed in. Add some roasted red peppers if you have them. These taste like a sub sandwich in spiral form.
Breakfast Pinwheels: Scramble some eggs, let them cool, then layer them on the cream cheese with cooked breakfast sausage or bacon and cheddar cheese. Roll and slice for a breakfast on the go.
Gluten-Free Option: Use gluten-free tortillas or large lettuce leaves. Lettuce wraps are delicate but work if you roll them gently and use toothpicks to hold them together.
Dairy-Free Option: Use dairy-free cream cheese and your favorite dairy-free cheese slices. The texture will be slightly different, but the flavor is still great.
My personal favorite variation is the Italian one. I add a thin layer of pesto to the cream cheese and it takes everything to another level. If you like fresh caprese skewers, you will love this spin.
Serving & Storage Suggestions
These pinwheels are best served cold or at room temperature. I like to arrange them on a platter with the cut sides facing up so you can see all the beautiful layers. For lunchboxes, pack them in a small container with a lid. Add a few cherry tomatoes, some cucumber slices, or a handful of grapes on the side for a complete meal.
They are perfect for parties too. Arrange them on a large plate with a bowl of ranch dressing or honey mustard for dipping. They disappear fast, so make a double batch if you are feeding a crowd. They pair beautifully with other finger foods like creamy classic deviled eggs or a fresh strawberry balsamic bruschetta for a full spread.
Storage: Store leftover pinwheels in an airtight container in the refrigerator for up to 3 days. Place a paper towel at the bottom of the container to absorb any moisture. Change the paper towel if it gets wet. The pinwheels will stay fresh and the tortillas will not get soggy.
Freezing: You can freeze the uncut rolls wrapped tightly in plastic wrap and then in foil. Freeze for up to 2 months. Thaw in the refrigerator overnight before slicing. Do not freeze already sliced pinwheels – the texture suffers.
Reheating: These are meant to be served cold, so no reheating needed. But if you want a warm version, pop them in the microwave for 10-15 seconds. The cheese will get melty and the tortilla will soften. It is a different experience, but still delicious.
Flavors actually get better after a few hours in the fridge. The cream cheese spreads its seasoning throughout the roll, and the turkey and cheese meld together. I often make these the night before and they taste even better the next day.
Nutritional Information & Benefits
Here is the estimated nutrition for one pinwheel (based on 8 pinwheels per wrap, using full-fat cream cheese and provolone):
- Calories: 120-140 per pinwheel
- Protein: 8-10g
- Fat: 8-10g
- Carbohydrates: 6-8g
- Fiber: 1g
- Sugar: 1g
- Sodium: 350-400mg
These pinwheels are a good source of protein from the turkey and cheese, which helps keep kids full until lunchtime. The cream cheese adds calcium and a little healthy fat for satiety. If you use whole wheat tortillas, you get extra fiber and B vitamins.
For a lower-calorie version, use reduced-fat cream cheese and low-fat cheese slices. You can also use lettuce wraps instead of tortillas for a low-carb option. Just be gentle when rolling – lettuce is delicate.
Potential allergens: Dairy (cream cheese, provolone), gluten (tortillas). Check your tortilla labels for gluten content if needed. Some brands use wheat flour, others are gluten-free.
I love that these pinwheels feel indulgent but are actually pretty balanced. They have protein, carbs, and fat in a nice ratio. Perfect for active kids or adults who need a midday energy boost without the crash.
Conclusion
These easy turkey and cheese pinwheel wraps are the answer to your lunchbox struggles. They are fast, simple, and endlessly customizable. You can make them in 10 minutes flat, and they hold up beautifully for hours. No sogginess, no mess, just perfect little spirals that kids and adults both love.
I love how this recipe has become a staple in our house. It started as a quick fix for school lunches, and now it is something we make for parties, picnics, and lazy weekend snacks. The cream cheese layer is the secret that makes everything work. It binds the filling, adds flavor, and keeps the roll intact.
Go ahead and make a batch tonight. Experiment with different fillings. Add some veggies. Make it your own. And when you do, come back and tell me about it. I would love to hear what combinations you come up with. Drop a comment below or tag me in your photos. Happy rolling!
Frequently Asked Questions
Can I make these pinwheels ahead of time?
Yes, absolutely. You can assemble the rolls up to 24 hours in advance and keep them wrapped in the fridge. Slice them just before serving for the freshest look. Or slice them ahead and store in an airtight container with a paper towel. They stay good for up to 3 days.
How do I keep pinwheels from getting soggy in a lunchbox?
The cream cheese layer actually helps prevent sogginess by creating a barrier between the tortilla and the moist fillings. Also, make sure your turkey and cheese are not wet. Pat them dry with a paper towel if needed. Pack the pinwheels in a container with a tight lid and add a paper towel at the bottom to absorb any excess moisture.
Can I use low-fat cream cheese?
Yes, reduced-fat or Neufchâtel cream cheese works fine. The texture will be slightly softer, so make sure to chill the roll well before slicing. The flavor will still be great. Avoid fat-free cream cheese – it is too soft and tends to make the pinwheels mushy.
What is the best way to slice pinwheels without squishing them?
Use a sharp serrated knife and a gentle sawing motion. Do not press straight down. Chill the roll for at least 30 minutes before slicing. Wipe the knife clean between cuts to prevent sticking. If you have one, an electric knife works beautifully for clean, even slices.
Can I freeze turkey and cheese pinwheels?
Yes, you can freeze the uncut rolls. Wrap them tightly in plastic wrap and then in foil. Freeze for up to 2 months. Thaw in the refrigerator overnight before slicing. Do not freeze already sliced pinwheels – the texture becomes watery and the tortillas get soggy.
Pin This Recipe!
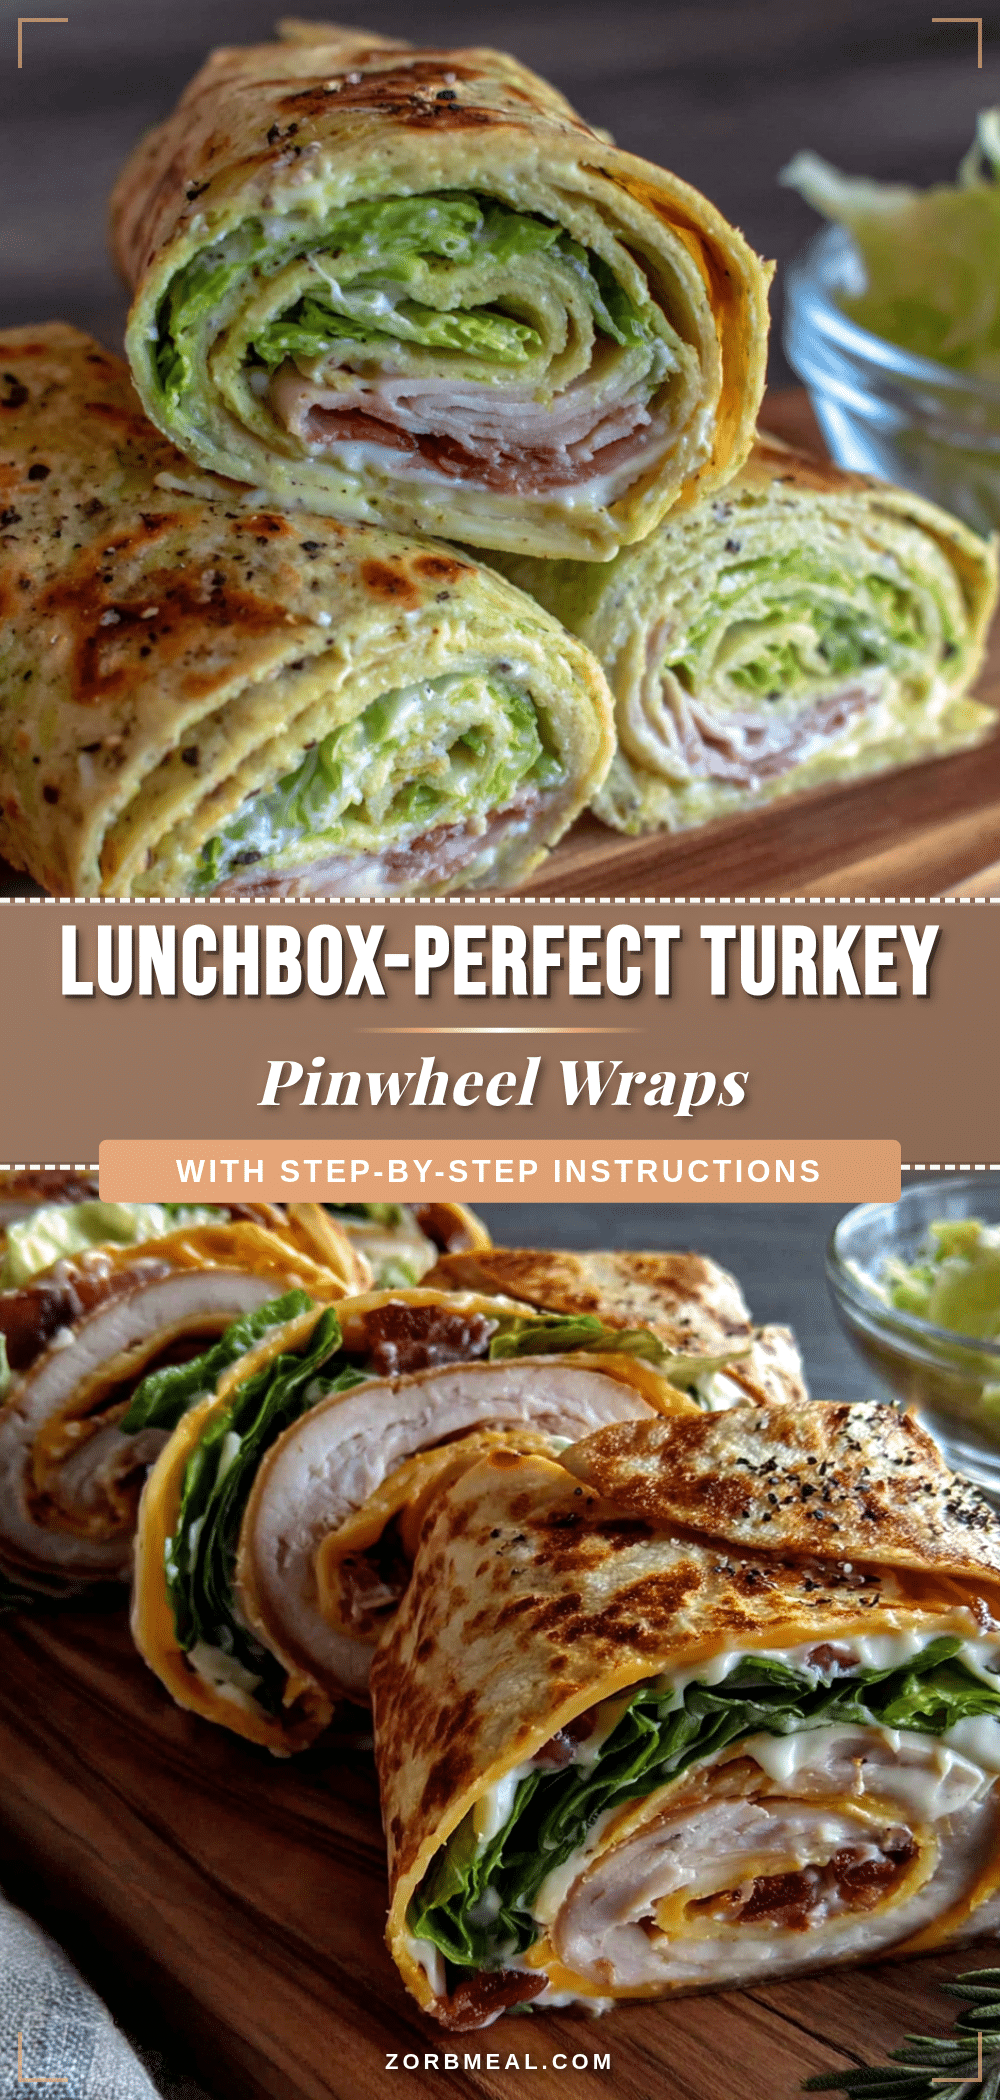
Easy Turkey and Cheese Pinwheel Wraps: Best Lunchbox Idea

These easy turkey and cheese pinwheel wraps are the answer to your lunchbox struggles. They are fast, simple, and endlessly customizable, made in 10 minutes flat and hold up beautifully for hours.
- Prep Time: 10 minutes
- Cook Time: 0 minutes
- Total Time: 40 minutes (includes 30 minutes chilling)
- Yield: 4 servings (32 pinwheels) 1x
- Category: Lunch
- Cuisine: American
Ingredients
- 4 large flour tortillas (10-inch size)
- 8 ounces cream cheese, softened to room temperature
- 1/2 teaspoon garlic powder
- 1/4 teaspoon onion powder
- 8–10 slices deli turkey breast
- 8–10 slices provolone or cheddar cheese
- Optional: fresh spinach leaves, thinly sliced bell peppers, shredded lettuce, pesto, or hummus
Instructions
- Soften the cream cheese by leaving it out for 30 minutes or microwaving in 10-second bursts until soft but not melted.
- In a small bowl, combine softened cream cheese with garlic powder and onion powder. Stir until smooth. Adjust seasonings to taste.
- Lay a large flour tortilla flat on a cutting board. Ensure it is at room temperature.
- Spread a thin, even layer of the cream cheese mixture over the entire surface of the tortilla, going all the way to the edges.
- Place 4-5 slices of turkey evenly over the cream cheese, overlapping slightly to cover the surface.
- Place 4-5 slices of cheese on top of the turkey, overlapping slightly.
- If using optional add-ins (spinach, bell peppers, etc.), lay them in a single layer over the cheese.
- Starting at one edge, roll the tortilla tightly toward the other edge, keeping the filling tucked in.
- Wrap the rolled tortilla tightly in plastic wrap or parchment paper, twisting the ends to secure. Refrigerate for at least 30 minutes, or up to 24 hours.
- When ready to serve, unwrap the roll and place on a cutting board. Using a sharp knife, slice into 1/2-inch to 3/4-inch pieces using a gentle sawing motion.
- Arrange on a plate or pack into lunchboxes. For lunchboxes, place in a single layer in an airtight container with a paper towel to absorb moisture.
Notes
Don’t overfill the tortilla. Use room temperature tortillas to prevent cracking. Chill for at least 30 minutes before slicing for clean cuts. Wipe knife clean between cuts to prevent sticking. For lunchboxes, double wrap or use airtight container with paper towel. Can be made up to 24 hours ahead. Freeze uncut rolls for up to 2 months.
Nutrition
- Serving Size: 1 pinwheel
- Calories: 130
- Sugar: 1
- Sodium: 375
- Fat: 9
- Saturated Fat: 5
- Carbohydrates: 7
- Fiber: 1
- Protein: 9
Keywords: turkey pinwheels, cheese pinwheels, lunchbox ideas, easy lunch, kid-friendly lunch, no-cook recipe, turkey and cheese wraps, pinwheel wraps