By the fourth batch in three days, I finally understood what the nutty, almost caramelized smell was trying to tell me. The butter wasn’t just browning—it was transforming into something that would make these cookies unforgettable. I stood there, spatula in hand, watching the deep amber liquid swirl in the pan, and I knew this was going to be the recipe that broke my “just okay” cookie streak.
Let me tell you, the first three batches were… fine. Edible. The kind of cookie you’d politely eat at a work meeting. But that fourth batch? The one where I stopped rushing and actually let the butter talk to me? That was the one where the pumpkin, the warm cinnamon, and that gloriously nutty brown butter finally clicked. It wasn’t just a cookie anymore—it was a moment.
Honestly, I’ve been chasing that feeling ever since. These Brown Butter Pumpkin Snickerdoodle Cookies are the result of a very specific, very delicious obsession. They’re soft in the middle, slightly crisp at the edges, and rolled in a cinnamon-sugar coat that crackles when you bite into it. The pumpkin keeps them tender, the brown butter adds this deep, almost toffee-like richness, and the whole thing tastes like autumn decided to throw a party in your mouth.
I wasn’t looking for another pumpkin recipe, you know? But sometimes the best things find you when you’re not searching. These cookies stuck because they felt real—earthy, warm, a little bit messy, and absolutely worth every single repeat.
Why You’ll Love This Recipe
I’ve tested these cookies more times than I care to admit, and here’s the honest truth: they’re the perfect balance of cozy and impressive. You get the nostalgic snickerdoodle chew with a sophisticated brown butter twist that makes people think you spent hours in the kitchen. (Spoiler: you didn’t.)
- Quick & Easy: From start to finish, you’re looking at about 30 minutes of active work. The dough needs a quick chill, but the payoff is worth every minute.
- Simple Ingredients: Nothing fancy here. Pumpkin puree, butter, sugar, flour, and spices—all stuff you probably already have in your pantry.
- Perfect for Fall Baking: These are made for crisp afternoons, Thanksgiving dessert tables, and those cozy weekend mornings when you just want something warm and sweet.
- Crowd-Pleaser: I brought a batch to a potluck last week, and they disappeared before the appetizers. Kids love the cinnamon-sugar coating; adults go crazy for that brown butter depth.
- Unbelievably Delicious: The texture is next-level—soft, pillowy centers with slightly crispy edges. And the flavor? It’s like pumpkin pie and snickerdoodles had a beautiful, buttery baby.
What makes this recipe different from all the others? It’s the brown butter, hands down. Most pumpkin snickerdoodles just swap in pumpkin puree and call it a day. But browning the butter first adds a nutty, almost caramel-like complexity that cuts through the sweetness and makes the pumpkin flavor sing. It’s a small extra step that changes everything. This isn’t just another pumpkin cookie—it’s the one you’ll keep coming back to.
What Ingredients You Will Need
This recipe uses simple, wholesome ingredients to deliver bold flavor and satisfying texture without the fuss. Most of these are pantry staples, which makes these cookies dangerously easy to whip up on a whim.
- Unsalted butter, 1 cup (2 sticks) — Use unsalted so you control the salt level. I prefer Kerrygold for its rich flavor, but any good-quality butter works. You’ll be browning this, so don’t skimp.
- Granulated sugar, 1 cup (200g) — Regular white sugar gives the cookies their classic structure and sweetness. You’ll also need extra for rolling.
- Light brown sugar, ½ cup (100g), packed — Adds moisture and a subtle molasses note that pairs beautifully with the brown butter.
- Pumpkin puree, ½ cup (120g) — Make sure it’s 100% pure pumpkin, not pumpkin pie filling. Libby’s is my go-to for consistent texture and flavor.
- Large egg, 1, room temperature — Room temperature eggs incorporate more evenly into the batter. If you forget, just place the egg in a bowl of warm water for 5 minutes.
- Vanilla extract, 2 teaspoons — Pure vanilla extract makes a difference here. The brown butter and vanilla together are pure magic.
- All-purpose flour, 2 cups (250g) — Spoon and level your flour for accuracy. Scooping directly from the bag can pack in too much flour and make your cookies dense.
- Cream of tartar, 2 teaspoons — This is the secret to the classic snickerdoodle tang and chewy texture. Don’t skip it—baking soda alone won’t give you the same result.
- Baking soda, 1 teaspoon — Helps the cookies spread and rise just enough.
- Salt, ½ teaspoon — Balances the sweetness and enhances the brown butter flavor. I use fine sea salt.
- Ground cinnamon, 1 teaspoon (for dough) + 3 tablespoons (for coating) — Cinnamon is non-negotiable here. It’s what makes a snickerdoodle a snickerdoodle.
- Ground nutmeg, ½ teaspoon — Adds warmth and depth. Freshly grated is best if you have it.
- Ground ginger, ¼ teaspoon — A tiny amount, but it brightens the pumpkin flavor beautifully.
- Ground cloves, ⅛ teaspoon — Optional, but I love the little hint of holiday spice it brings.
For the cinnamon-sugar coating:
- Granulated sugar, ¼ cup (50g)
- Ground cinnamon, 3 tablespoons
Equipment Needed
You don’t need a fancy bakery setup for these cookies, but a few key tools make the process smoother. Here’s what I use every time:
- Light-colored saucepan or skillet — Essential for browning butter. A dark pan makes it hard to see the color change, and you’ll end up with burnt butter. Trust me on this one.
- Stand mixer or hand mixer — Either works fine. A stand mixer frees up your hands, but a hand mixer does the job just as well.
- Large mixing bowls — One for dry ingredients, one for wet.
- Whisk — For combining dry ingredients evenly.
- Rubber spatula — For scraping down the bowl and folding in the flour mixture.
- Cookie scoop (1.5-tablespoon size) — Ensures uniform cookies that bake evenly. If you don’t have one, use two spoons.
- Baking sheets — Rimmed baking sheets work best. Line them with parchment paper or a silicone baking mat.
- Cooling rack — Lets air circulate around the cookies so they cool evenly without getting soggy bottoms.
- Small bowl — For the cinnamon-sugar coating mixture.
If you don’t have a stand mixer, don’t worry. I’ve made these cookies with nothing but a wooden spoon and some elbow grease, and they turned out just as delicious. The key is to cream the butter and sugars really well—about 3 minutes of vigorous mixing.
Preparation Method
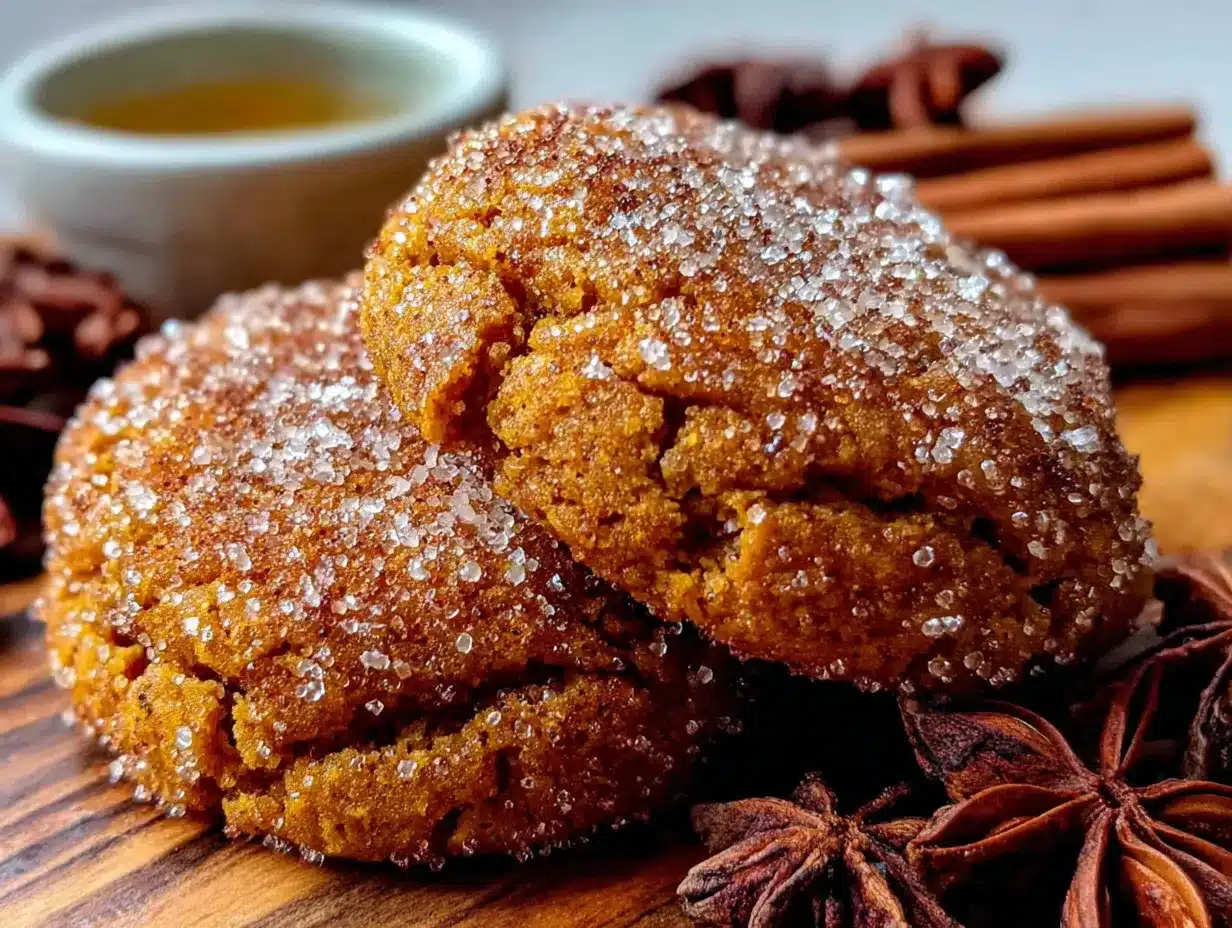
Let’s get to the fun part. Follow these steps carefully, and you’ll have a batch of the best Brown Butter Pumpkin Snickerdoodle Cookies you’ve ever tasted.
- Brown the butter. Place the butter in a light-colored saucepan over medium heat. Stir occasionally with a rubber spatula or wooden spoon. The butter will melt, then foam, then start to crackle and pop. After about 5-7 minutes, you’ll see golden brown specks forming at the bottom. The butter will smell nutty and amazing. Once it reaches a deep amber color, remove it from the heat immediately and pour it into a heatproof bowl. Let it cool for 10-15 minutes—you want it warm, not hot, so it doesn’t cook the egg later.
- Mix the dry ingredients. In a medium bowl, whisk together the all-purpose flour, cream of tartar, baking soda, salt, 1 teaspoon cinnamon, nutmeg, ginger, and cloves. Set aside.
- Cream the butter and sugars. In a large mixing bowl, combine the cooled brown butter, granulated sugar, and packed light brown sugar. Beat with a hand mixer or stand mixer on medium speed for 2-3 minutes until light and fluffy. The mixture should look smooth and slightly airy.
- Add the wet ingredients. Add the pumpkin puree, room temperature egg, and vanilla extract. Mix on low speed until just combined. The batter will look a little curdled at this point—don’t panic, that’s normal. The pumpkin and butter don’t fully emulsify, but the flour will bring everything together.
- Combine wet and dry. Gradually add the dry ingredient mixture to the wet ingredients, mixing on low speed until just incorporated. Use a rubber spatula to scrape down the sides and bottom of the bowl. Be careful not to overmix—stop as soon as you don’t see any more streaks of flour.
- Chill the dough. Cover the bowl with plastic wrap and refrigerate for at least 30 minutes, or up to 24 hours. Chilling is crucial here. It firms up the butter so the cookies don’t spread into flat puddles in the oven. Plus, it gives the flavors time to meld and deepen.
- Preheat and prep. When you’re ready to bake, preheat your oven to 350°F (175°C). Line two baking sheets with parchment paper or silicone baking mats.
- Make the cinnamon-sugar coating. In a small bowl, whisk together the ¼ cup granulated sugar and 3 tablespoons ground cinnamon.
- Shape and coat the cookies. Using a 1.5-tablespoon cookie scoop, portion out the dough and roll each portion into a smooth ball. Drop each ball into the cinnamon-sugar mixture and roll until completely coated. Place the coated dough balls on the prepared baking sheets, spacing them about 2 inches apart.
- Bake. Bake for 10-12 minutes, or until the edges are set and slightly golden. The centers will look soft and puffy—that’s exactly what you want. They’ll continue to set as they cool.
- Cool. Let the cookies cool on the baking sheet for 5 minutes. This allows them to firm up without breaking. Then transfer them to a wire rack to cool completely. The smell in your kitchen right now is absolutely criminal.
Cooking Tips & Techniques
I’ve made every mistake in the book with these cookies, so you don’t have to. Here are the lessons I learned the hard way:
Watch the butter like a hawk. The first time I browned butter, I got distracted by a text message and ended up with burnt, bitter butter that ruined the whole batch. Brown butter goes from perfect to ruined in about 30 seconds. Once you see those amber specks and smell that nutty aroma, pull it off the heat immediately.
Don’t skip the chill. I know, I know—you want cookies now. But if you bake the dough without chilling, you’ll get thin, greasy cookies that spread into one giant cookie sheet. Chill for at least 30 minutes, and you’ll get thick, soft, perfectly puffy cookies.
Use a cookie scoop for uniform sizing. This isn’t just about aesthetics. When all your cookies are the same size, they bake evenly. No more burnt edges on small cookies while the big ones are still raw in the middle.
Underbake slightly. Pull the cookies out when the edges are set but the centers still look soft and slightly underdone. They’ll continue baking on the hot sheet for those 5 minutes of cooling. Overbaked snickerdoodles are dry and crumbly—not what we’re going for.
Room temperature ingredients matter. Cold egg or cold pumpkin puree can seize the brown butter and make the dough stiff. Let everything sit out for 20-30 minutes before you start. Your cookies will thank you.
Multitask like a pro. While the butter is browning, measure out your dry ingredients. While the dough chills, clean up your kitchen and preheat the oven. Good timing makes the whole process feel effortless.
Variations & Adaptations
One of the best things about this recipe is how flexible it is. Here are some variations I’ve tried and loved:
Gluten-Free Version: Substitute the all-purpose flour with a 1:1 gluten-free baking flour blend. I’ve used Bob’s Red Mill 1-to-1 Baking Flour with great results. The texture is slightly more tender, but the flavor is spot on. Add an extra tablespoon of flour if the dough feels too sticky.
Dairy-Free Adaptation: Use a high-quality vegan butter stick (not margarine) for browning. Miyoko’s and Country Crock Plant Butter work well. The browning process takes a bit longer, and the nutty flavor is slightly milder, but the cookies are still delicious.
Spice It Up: If you love a stronger spice profile, add ¼ teaspoon of cardamom or allspice to the dough. I made a batch with cardamom last Thanksgiving, and they were gone before the turkey even hit the table.
Pumpkin Seed Topping: Before baking, press a few raw pumpkin seeds (pepitas) into the top of each coated dough ball. They toast in the oven and add a lovely crunch and visual appeal.
Maple Glaze Drizzle: For an extra decadent touch, whisk together ½ cup powdered sugar, 2 tablespoons maple syrup, and 1 tablespoon milk. Drizzle over cooled cookies. It turns them into a showstopper dessert.
Air Fryer Method: Yes, you can make these in an air fryer! Preheat to 325°F (160°C). Place 4-6 dough balls in the basket, leaving space between them. Bake for 6-8 minutes, checking at the 6-minute mark. The bottoms get slightly crispier, but the centers stay perfectly soft.
Serving & Storage Suggestions
These cookies are best served slightly warm, when the centers are still soft and the cinnamon-sugar coating is at its crackliest. I like to serve them with a cold glass of milk or a hot cup of chai tea. For a dessert spread, they pair beautifully with classic vanilla bean layer cake or a scoop of vanilla ice cream.
If you’re bringing them to a gathering, arrange them on a rustic wooden board or a white platter. The golden-brown cookies with their cinnamon-sugar coating look gorgeous against a simple backdrop. For a fall-themed party, I’ve served them alongside honey bourbon baked beans for a sweet-savory combo that always surprises people.
Storage: Store the cookies in an airtight container at room temperature for up to 5 days. Place a piece of bread in the container to keep them soft—the cookies will absorb the moisture from the bread, and the bread will get stale. It’s an old baker’s trick that works like magic.
Freezing: You can freeze either the baked cookies or the raw dough. For baked cookies, let them cool completely, then layer them in a freezer-safe container with parchment paper between layers. Freeze for up to 3 months. Thaw at room temperature for about 30 minutes. For raw dough, scoop and roll the dough balls, coat them in cinnamon-sugar, and freeze them on a baking sheet. Once frozen solid, transfer to a freezer bag. Bake directly from frozen, adding 2-3 minutes to the baking time.
Flavor development: These cookies actually taste better the next day. The brown butter flavor deepens, and the spices meld together beautifully. If you can resist eating them all on day one, you’re in for a treat on day two.
Nutritional Information & Benefits
Here’s the approximate nutritional breakdown for one cookie (based on 24 cookies per batch):
| Nutrient | Amount per Cookie |
|---|---|
| Calories | 165 |
| Total Fat | 8g |
| Saturated Fat | 5g |
| Cholesterol | 25mg |
| Sodium | 95mg |
| Total Carbohydrates | 22g |
| Dietary Fiber | 1g |
| Sugars | 14g |
| Protein | 2g |
While these are definitely a treat, the pumpkin puree adds a good dose of vitamin A and fiber. Pumpkin is rich in antioxidants like beta-carotene, which supports eye health and immune function. The cinnamon in the coating has anti-inflammatory properties and can help regulate blood sugar levels. And hey, a little brown butter never hurt anyone—everything in moderation, right?
These cookies are vegetarian-friendly but not vegan or dairy-free in their standard form. They contain gluten, dairy, and eggs. For dietary adaptations, check the variations section above.
Conclusion
These Brown Butter Pumpkin Snickerdoodle Cookies are more than just a seasonal treat—they’re the kind of recipe that becomes a tradition. The nutty brown butter, the warm pumpkin spice, the crackly cinnamon-sugar coating—every bite is a little piece of autumn perfection.
I love this recipe because it feels special without being fussy. It’s the cookie you make when you want to impress but don’t have all day. It’s the cookie that makes your kitchen smell like a bakery. And it’s the cookie that people will ask you for again and again.
Now I want to hear from you. Have you tried browning butter before? What’s your favorite fall cookie? Drop a comment below and let me know—I read every single one. And if you make these cookies, tag me on social media so I can see your beautiful bakes. Happy baking, friends!
Frequently Asked Questions
Why did my cookies turn out flat?
Flat cookies usually mean the dough wasn’t chilled long enough, or the butter was too warm when you mixed it. Make sure you chill the dough for at least 30 minutes, and let the brown butter cool to room temperature before creaming it with the sugar.
Can I use pumpkin pie spice instead of individual spices?
Absolutely. Substitute 2 teaspoons of pumpkin pie spice for the cinnamon, nutmeg, ginger, and cloves in the dough. Keep the 3 tablespoons of cinnamon in the coating as is—that’s what makes it a snickerdoodle.
How do I know when the butter is properly browned?
Look for three signs: the butter will smell nutty and toasty, it will have turned a deep amber color, and you’ll see small golden-brown specks at the bottom of the pan. If you see black specks or smell anything burnt, you’ve gone too far.
Can I make the dough ahead of time?
Yes! The dough can be refrigerated for up to 3 days in an airtight container. You can also freeze the shaped, coated dough balls for up to 3 months. Bake from frozen, adding 2-3 minutes to the baking time.
My cookies came out dry. What went wrong?
Dry cookies are usually a sign of overbaking or too much flour. Pull the cookies out when the edges are set but the centers still look soft. Also, make sure you’re measuring your flour correctly—spoon it into the measuring cup and level it off with a knife instead of scooping directly from the bag.
Pin This Recipe!
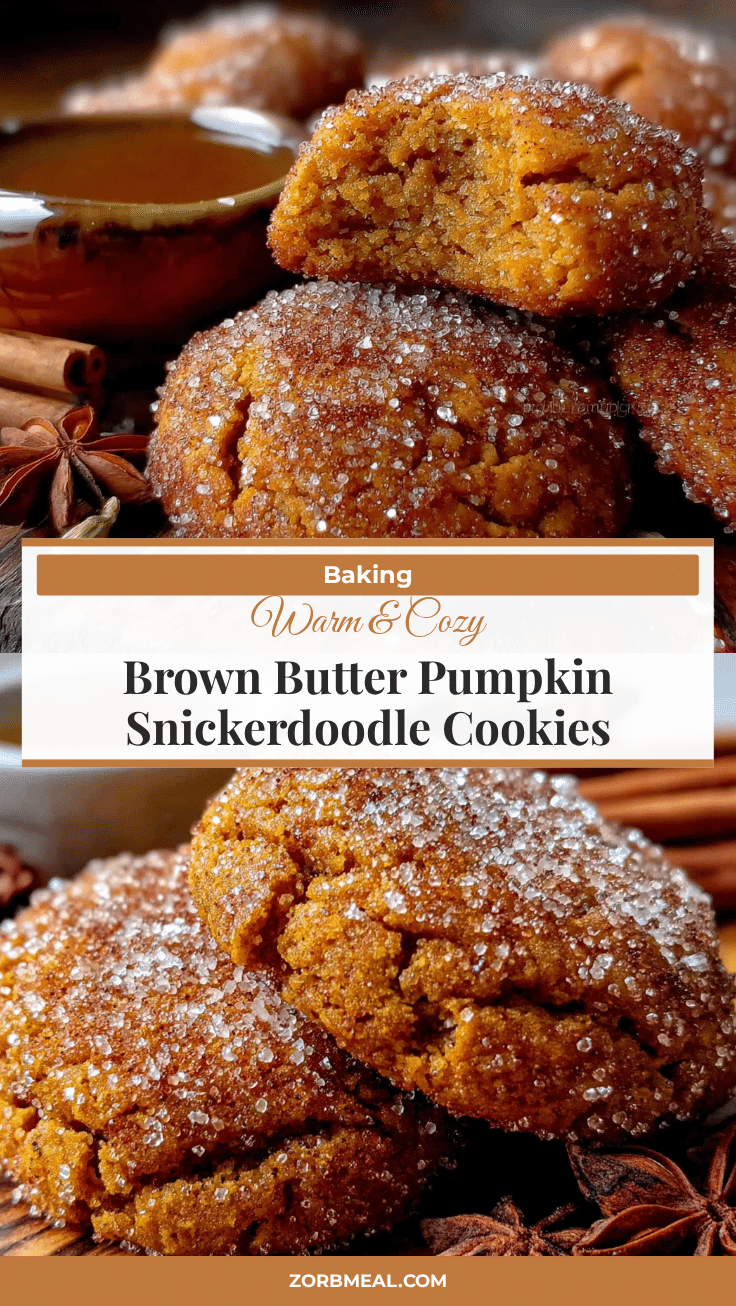
Best Brown Butter Pumpkin Snickerdoodle Cookies
These Brown Butter Pumpkin Snickerdoodle Cookies are soft in the middle, slightly crisp at the edges, and rolled in a cinnamon-sugar coat that crackles when you bite into it. The pumpkin keeps them tender, the brown butter adds a deep, almost toffee-like richness, and the whole thing tastes like autumn decided to throw a party in your mouth.
- Prep Time: 30 minutes
- Cook Time: 12 minutes
- Total Time: 1 hour 12 minutes (including 30 minutes chilling)
- Yield: 24 cookies 1x
- Category: Dessert
- Cuisine: American
Ingredients
- 1 cup (2 sticks) unsalted butter
- 1 cup (200g) granulated sugar
- ½ cup (100g) light brown sugar, packed
- ½ cup (120g) pumpkin puree (100% pure pumpkin)
- 1 large egg, room temperature
- 2 teaspoons vanilla extract
- 2 cups (250g) all-purpose flour
- 2 teaspoons cream of tartar
- 1 teaspoon baking soda
- ½ teaspoon salt
- 1 teaspoon ground cinnamon (for dough)
- ½ teaspoon ground nutmeg
- ¼ teaspoon ground ginger
- ⅛ teaspoon ground cloves
- ¼ cup (50g) granulated sugar (for coating)
- 3 tablespoons ground cinnamon (for coating)
Instructions
- Brown the butter: Place the butter in a light-colored saucepan over medium heat. Stir occasionally with a rubber spatula or wooden spoon. The butter will melt, then foam, then start to crackle and pop. After about 5-7 minutes, you’ll see golden brown specks forming at the bottom. The butter will smell nutty and amazing. Once it reaches a deep amber color, remove it from the heat immediately and pour it into a heatproof bowl. Let it cool for 10-15 minutes—you want it warm, not hot, so it doesn’t …
- Mix the dry ingredients: In a medium bowl, whisk together the all-purpose flour, cream of tartar, baking soda, salt, 1 teaspoon cinnamon, nutmeg, ginger, and cloves. Set aside.
- Cream the butter and sugars: In a large mixing bowl, combine the cooled brown butter, granulated sugar, and packed light brown sugar. Beat with a hand mixer or stand mixer on medium speed for 2-3 minutes until light and fluffy. The mixture should look smooth and slightly airy.
- Add the wet ingredients: Add the pumpkin puree, room temperature egg, and vanilla extract. Mix on low speed until just combined. The batter will look a little curdled at this point—don’t panic, that’s normal.
- Combine wet and dry: Gradually add the dry ingredient mixture to the wet ingredients, mixing on low speed until just incorporated. Use a rubber spatula to scrape down the sides and bottom of the bowl. Be careful not to overmix—stop as soon as you don’t see any more streaks of flour.
- Chill the dough: Cover the bowl with plastic wrap and refrigerate for at least 30 minutes, or up to 24 hours.
- Preheat and prep: When you’re ready to bake, preheat your oven to 350°F (175°C). Line two baking sheets with parchment paper or silicone baking mats.
- Make the cinnamon-sugar coating: In a small bowl, whisk together the ¼ cup granulated sugar and 3 tablespoons ground cinnamon.
- Shape and coat the cookies: Using a 1.5-tablespoon cookie scoop, portion out the dough and roll each portion into a smooth ball. Drop each ball into the cinnamon-sugar mixture and roll until completely coated. Place the coated dough balls on the prepared baking sheets, spacing them about 2 inches apart.
- Bake: Bake for 10-12 minutes, or until the edges are set and slightly golden. The centers will look soft and puffy—that’s exactly what you want.
- Cool: Let the cookies cool on the baking sheet for 5 minutes. Then transfer them to a wire rack to cool completely.
Notes
Watch the butter carefully when browning—it goes from perfect to burnt in about 30 seconds. Don’t skip chilling the dough; it prevents the cookies from spreading too much. Underbake slightly for the best texture; the cookies continue to set as they cool. Room temperature ingredients are important for proper incorporation.
Nutrition
- Serving Size: 1 cookie
- Calories: 165
- Sugar: 14
- Sodium: 95
- Fat: 8
- Saturated Fat: 5
- Carbohydrates: 22
- Fiber: 1
- Protein: 2
Keywords: brown butter, pumpkin, snickerdoodle, cookies, fall baking, cinnamon sugar, pumpkin cookies, snickerdoodle cookies


