I figured a freezer-friendly pocket made with sunflower seed butter would taste exactly like the real thing—sweet, salty, and satisfying, but maybe a little earthier. It took about the first bite for that assumption to get completely rewritten. The sunbutter gave it this rich, almost nutty depth that the original never had, and the jelly—well, it stayed exactly where it belonged, no oozing, no mess, just a perfect pocket of breakfast nostalgia that my kids actually asked for again the next morning. And then again the week after.
I wasn’t trying to reinvent the lunchbox classic. Honestly, I was just tired of watching my nephew stare at the peanut butter and jelly sandwiches at every school party, unable to have one. Nut-free classrooms are a reality for so many families, and the pre-packaged alternatives? Let’s just say they taste like cardboard dressed up as a snack. So I started messing around in my kitchen one Sunday afternoon, and these Homemade Sunbutter & Jelly Freezer Pockets came out of that very ordinary, very sticky experiment.
What surprised me most wasn’t just the flavor—it was how well they froze. I made a batch, tossed them in the freezer, and forgot about them for two weeks. When I pulled one out and warmed it up, the crust was still flaky, the sunbutter filling was creamy, and the jelly was that perfect sweet-tart pop. It felt like a small victory, honestly. Like I’d cracked a code I didn’t even know existed.
These pockets aren’t just a substitute. They’re their own thing—a warm, portable, nut-free treat that makes school mornings, road trips, and after-school snacks feel a little more special without any extra stress. And that’s the kind of recipe that sticks with you.
Why You’ll Love This Recipe
If you’ve ever stared at a nut-free label in the grocery store and felt a little defeated, this one’s for you. Here’s why these pockets are worth every bit of effort:
- Nut-Free & School-Safe : Sunflower seed butter is completely nut-free, making these pockets perfect for nut-free classrooms, lunchboxes, or anyone with tree nut or peanut allergies.
- Freezer-Friendly for Busy Mornings : Make a big batch on the weekend, freeze them, and grab one whenever you need a quick breakfast or snack. They reheat beautifully in minutes.
- Simple, Real Ingredients : No preservatives, no weird additives, no hydrogenated oils. Just butter, flour, sunbutter, and your favorite jelly.
- Kid-Approved & Parent-Trusted : My own kids are picky eaters—the kind who inspect their food like it might bite back—and they devoured these without a single complaint.
- Customizable to Your Taste : Swap the jelly for jam, change up the filling, or add a sprinkle of cinnamon. This recipe is a blank canvas that still tastes amazing.
What makes these pockets different from the store-bought version is the texture. The homemade crust is buttery and flaky, not dry or crumbly. The sunbutter filling stays creamy even after freezing, and the jelly doesn’t turn into a sugary puddle. It’s the kind of pocket that makes you close your eyes after the first bite—not because it’s fancy, but because it tastes like something real.
And honestly? Knowing exactly what went into them gives me peace of mind. No hidden allergens, no questionable ingredients. Just good food made with intention.
What Ingredients You Will Need
This recipe uses simple, wholesome ingredients that come together to create a pocket that’s both sturdy and tender. Most of these are pantry staples, which makes this a great last-minute project when you’re craving something warm and nostalgic.
- All-purpose flour (2 ½ cups / 300g) – The base of the dough. I’ve used both unbleached and bleached, and both work fine. For a slightly sturdier pocket, you can substitute up to half with whole wheat pastry flour.
- Unsalted butter (1 cup / 226g, cold and cubed) – Cold butter is key for a flaky crust. I prefer Kerrygold or any European-style butter for its higher fat content, but standard unsalted butter works just as well.
- Ice water (6-8 tablespoons / 90-120ml) – You might not need all of it. Add it one tablespoon at a time until the dough just comes together.
- Salt (½ teaspoon) – Enhances the flavor of the crust and balances the sweetness of the filling.
- Granulated sugar (1 tablespoon) – Just a touch to add a hint of sweetness to the dough. You can omit it if you prefer a savory pocket.
- Sunflower seed butter (sunbutter) (¾ cup / 192g) – Use unsweetened or lightly sweetened. I recommend SunButter brand for its smooth texture and neutral flavor. Avoid the natural kind that separates too much; it can make the filling oily.
- Your favorite jelly or jam (½ cup / 160g) – Strawberry, grape, raspberry, or even apricot works beautifully. I like using a seedless jam for a smoother texture, but chunky jam adds a nice pop of fruit.
- Egg wash (1 large egg + 1 tablespoon water) – For brushing on top to get that golden, glossy finish.
- Turbinado or coarse sugar (for sprinkling, optional) – Adds a lovely crunch on top. Totally optional, but highly recommended.
One thing I’ve learned: don’t skip chilling the dough. It makes a world of difference in how flaky the pockets turn out. And if you’re using a natural sunbutter that’s a bit runny, give it a good stir before measuring to ensure even consistency.
Equipment Needed
You don’t need a lot of fancy tools for this recipe, and that’s part of what makes it so approachable. Here’s what you’ll want to have on hand:
- Large mixing bowl – For making the dough. A glass or stainless steel bowl works best.
- Pastry cutter or two forks – To cut the cold butter into the flour. If you have a food processor, you can use that instead for a faster, more even result.
- Rolling pin – For rolling out the dough to an even thickness. If you don’t have one, a clean wine bottle works in a pinch.
- Parchment paper – Lining your baking sheet prevents sticking and makes cleanup a breeze.
- Baking sheet – A rimmed sheet pan works best to catch any potential leaks.
- Pastry brush – For applying the egg wash. A silicone brush is easy to clean, but a natural bristle one works too.
- Sharp knife or pizza cutter – For cutting the dough into rectangles or squares.
- Fork – For crimping the edges of the pockets and sealing them shut.
- Freezer-safe bag or container – For storing the unbaked or baked pockets in the freezer.
I’ve made these pockets using just a bowl and a fork before, and they turned out great. The key is keeping everything cold and not overworking the dough. A food processor can speed things up, but honestly, there’s something satisfying about cutting the butter into the flour by hand.
Preparation Method
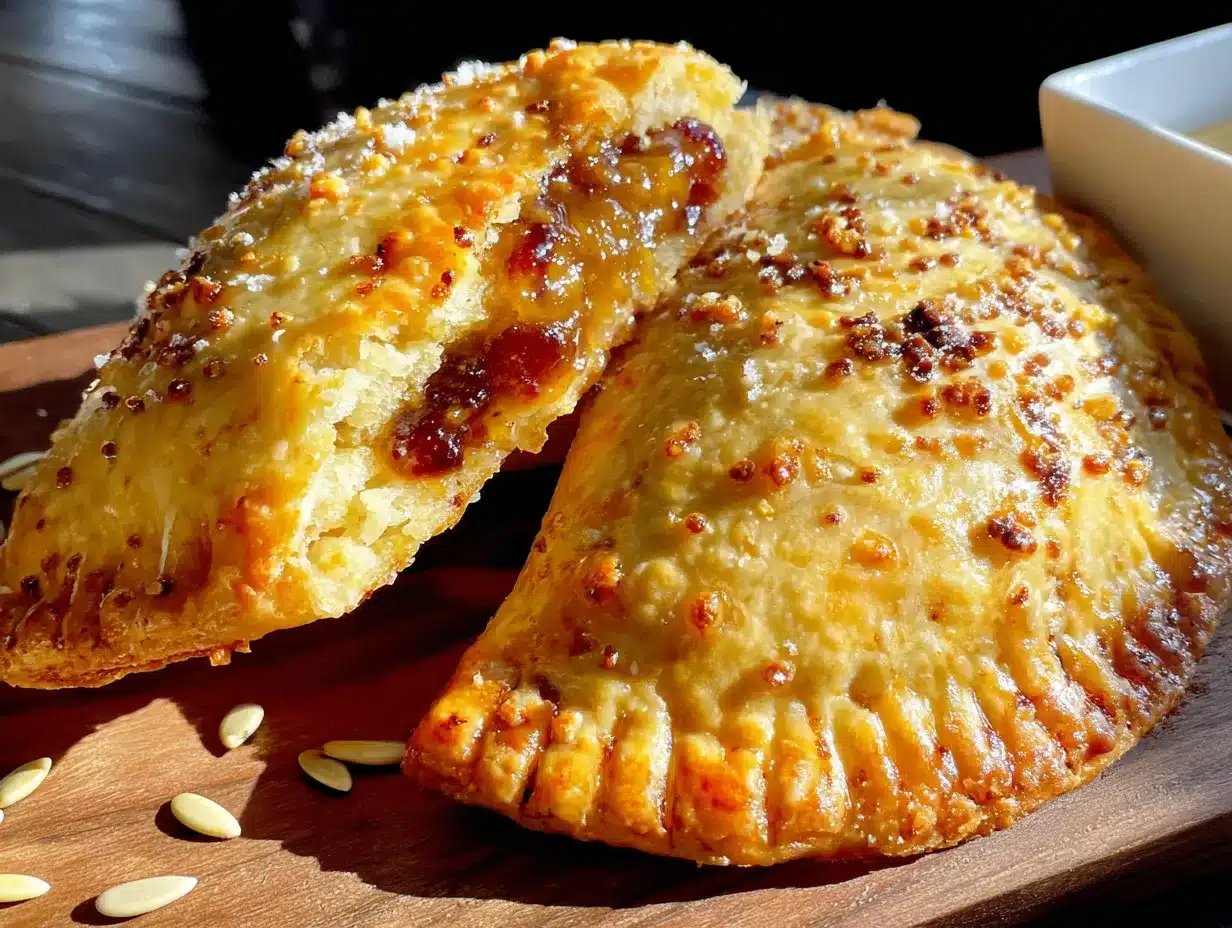
Let’s walk through this step by step. I’ve made this recipe more times than I can count, and I’ve learned a few tricks along the way that make the process smoother and the results more consistent.
Step 1: Make the Dough
In a large mixing bowl, whisk together the all-purpose flour, salt, and sugar. Add the cold, cubed butter. Using a pastry cutter or two forks, cut the butter into the flour until the mixture resembles coarse crumbs with some pea-sized butter pieces remaining. Drizzle in the ice water, one tablespoon at a time, tossing with a fork after each addition. Stop adding water as soon as the dough holds together when squeezed. It should feel moist but not sticky.
Step 2: Chill the Dough
Turn the dough out onto a lightly floured surface and gently bring it together into a disc. Wrap it in plastic wrap and refrigerate for at least 30 minutes, or up to overnight. This step is non-negotiable—chilled dough is much easier to roll out and results in a flakier crust.
Step 3: Prepare the Filling
While the dough chills, mix the sunbutter with a teaspoon of jelly or jam to loosen it slightly if it feels too thick. This helps it spread more evenly and prevents it from pulling away from the crust during baking. Set aside.
Step 4: Roll and Cut the Dough
Preheat your oven to 375°F (190°C). Line a baking sheet with parchment paper. On a lightly floured surface, roll the chilled dough out to about ⅛-inch thickness. Use a sharp knife or pizza cutter to cut the dough into rectangles—roughly 4×6 inches each. You should get about 8 to 10 rectangles, depending on how thick you roll it.
Step 5: Assemble the Pockets
Place a heaping tablespoon of the sunbutter mixture onto the center of half of the rectangles. Top with about a teaspoon of jelly or jam. Be careful not to overfill—less is more here. Place a second rectangle on top of each filled one. Use a fork to crimp the edges firmly, sealing the pocket completely. Poke a few small holes on top with the fork to allow steam to escape.
Step 6: Egg Wash and Bake
Brush the tops of the pockets with the egg wash. Sprinkle with turbinado or coarse sugar if using. Bake for 18-22 minutes, or until the tops are golden brown and the filling is bubbly. Let them cool on the baking sheet for 5 minutes before transferring to a wire rack.
Step 7: Freeze or Serve
Once completely cooled, you can serve them immediately or freeze them. To freeze, place the cooled pockets in a single layer on a baking sheet and freeze for 1 hour. Then transfer to a freezer-safe bag or container. They’ll keep for up to 3 months.
Cooking Tips & Techniques
I’ve had my fair share of pocket mishaps—leaky fillings, soggy bottoms, dough that wouldn’t cooperate. Here’s what I’ve learned so you don’t have to make the same mistakes.
Keep Everything Cold
The biggest secret to a flaky crust is cold butter. If your dough starts to feel warm or sticky while you’re working with it, pop it back in the fridge for 10 minutes. I’ve done this mid-rolling before, and it saved the batch.
Don’t Overfill
I know it’s tempting to pile on the jelly, but too much filling will cause the pockets to burst open during baking. A tablespoon of sunbutter and a teaspoon of jelly is the sweet spot. Trust me on this one—I’ve cleaned up jelly explosions more times than I’d like to admit.
Crimp Thoroughly
Use a fork to press the edges firmly. If you’re worried about them opening up, you can also brush a little water along the edges before sealing. That extra bit of moisture helps the dough stick together.
Let Them Cool Completely
If you try to freeze warm pockets, they’ll trap steam and get soggy. Let them cool completely on a wire rack before freezing. I usually let them sit for at least an hour.
Reheating from Frozen
To reheat, pop a frozen pocket in a 350°F (175°C) oven for 10-12 minutes, or in an air fryer at 325°F (160°C) for 5-7 minutes. The microwave works in a pinch, but the crust won’t be as crispy. For a quick school morning, I often microwave for 30 seconds and then finish in the toaster oven.
Variations & Adaptations
One of the best things about this recipe is how easy it is to change up. Here are a few variations I’ve tried and loved:
- Berry Bliss : Swap the jelly for a mixed berry jam and add a handful of fresh blueberries or raspberries to the filling. The burst of fresh fruit is incredible.
- Chocolate Sunbutter : Mix a tablespoon of cocoa powder into the sunbutter before filling. It gives the pockets a subtle chocolate flavor without being overly sweet.
- Savory Version : Omit the sugar from the dough and skip the jelly. Fill the pockets with sunbutter and a sprinkle of flaky sea salt, or try sunbutter with sliced bananas for a savory-sweet twist.
- Gluten-Free Option : Substitute the all-purpose flour with a 1:1 gluten-free baking flour blend. I’ve used Bob’s Red Mill with good results. The texture will be slightly more crumbly, but still delicious.
- Vegan Adaptation : Use vegan butter and replace the egg wash with a mixture of plant milk and maple syrup. The pockets won’t be as golden, but they’ll still taste great.
I once made a batch with apricot jam and a pinch of cinnamon mixed into the sunbutter. It tasted like a warm hug on a cold morning. Don’t be afraid to experiment—the worst that can happen is you’ll have a delicious mistake.
Serving & Storage Suggestions
These pockets are incredibly versatile when it comes to serving. Here’s how I like to enjoy them:
- Serving Temperature : Serve warm for the best texture. The crust is flakiest when fresh out of the oven or reheated. Room temperature is fine too, especially for lunchboxes.
- Presentation : Dust with a little powdered sugar or drizzle with a simple glaze made from powdered sugar and milk for a bakery-style finish. It’s optional, but it looks pretty on a brunch table.
- Pairings : These pockets go beautifully with a hot cup of coffee, a glass of cold milk, or a fluffy buttermilk pancakes spread for a weekend breakfast spread. They also make a great addition to a cozy sausage and egg breakfast casserole for a hearty brunch.
- Storage : Store baked pockets in an airtight container at room temperature for up to 2 days, or in the refrigerator for up to a week. For longer storage, freeze them as described above.
- Reheating Tips : The best way to reheat is in a toaster oven or air fryer. If you’re in a hurry, the microwave works, but the crust will be softer. For a crispy exterior, try reheating in a skillet over medium heat for a minute on each side.
One thing I’ve noticed: the flavors actually meld together beautifully after a day in the fridge. The sunbutter seems to get creamier, and the jelly infuses the surrounding crust. So don’t be afraid to make them ahead of time.
Nutritional Information & Benefits
While these pockets are definitely a treat, they do offer some nutritional perks, especially compared to store-bought versions.
- Estimated per pocket (based on 8 servings) : Calories: 320, Fat: 18g, Carbohydrates: 36g, Protein: 6g, Fiber: 2g, Sugar: 12g
- Sunflower Seed Butter Benefits : Rich in vitamin E, magnesium, and healthy fats. It’s also a good source of plant-based protein, making these pockets more satisfying than a plain jam sandwich.
- Dietary Considerations : This recipe is naturally nut-free, dairy-free if you use vegan butter, and can be made gluten-free with a simple flour swap. It’s also free of common allergens like peanuts and tree nuts.
- Potential Allergens : Contains wheat (gluten) and eggs. The egg wash can be omitted or replaced with plant milk for a vegan version.
I love that I can feel good about giving these to my kids. They’re not health food, but they’re made with real ingredients, and that counts for a lot in my book. Plus, knowing exactly what’s in them means no hidden sugars or preservatives.
Conclusion
These Homemade Sunbutter & Jelly Freezer Pockets are proof that nut-free doesn’t mean flavor-free. They’re warm, flaky, and filled with that perfect sweet-and-creamy combo that makes classic PB&J so beloved, but with a twist that’s entirely their own. Whether you’re packing school lunches, prepping for a road trip, or just craving a little nostalgia, these pockets deliver every single time.
I love that this recipe gives me control over what goes into my family’s food. No mystery ingredients, no questionable processing—just butter, flour, sunbutter, and jelly, made with my own hands. And the best part? They freeze beautifully, so I always have a homemade snack ready when I need it most.
If you try this recipe, I’d love to hear how it goes. Did you stick with the classic jelly filling, or did you try a fun variation? Leave a comment below or tag me in your photos—I’m always looking for new ideas. And if you’re a fan of quick, make-ahead breakfasts, you might also enjoy this creamy blueberry cream cheese stuffed french toast for another morning win.
Happy baking, friends. You’ve got this.
Frequently Asked Questions
Can I use a different nut-free butter?
Absolutely! Tahini (sesame seed paste) or wowbutter (soy-based) work well. Just keep in mind that tahini has a stronger flavor, so it will change the taste slightly.
Can I make these ahead and freeze them unbaked?
Yes! Assemble the pockets, place them on a parchment-lined baking sheet, and freeze until solid. Then transfer to a freezer bag. When ready to bake, brush with egg wash and bake straight from frozen, adding 5-7 minutes to the baking time.
How do I prevent the pockets from leaking?
Don’t overfill, and make sure to crimp the edges thoroughly. Poking a few holes on top also helps steam escape, which reduces the chance of bursting. If you’re still worried, you can brush the edges with a little water before sealing.
Can I use homemade jelly or jam?
Of course! Homemade jam works beautifully. Just make sure it’s not too runny, or it might make the pockets soggy. If your jam is very loose, you can cook it down a bit on the stove to thicken it before using.
How long do these keep in the freezer?
Baked pockets will keep for up to 3 months in a freezer-safe bag or container. Unbaked pockets can be frozen for up to 2 months. Just make sure they’re well-wrapped to prevent freezer burn.
Pin This Recipe!

Homemade Sunbutter & Jelly Freezer Pockets: Easy Nut-Free Recipe

These Homemade Sunbutter & Jelly Freezer Pockets are a nut-free, freezer-friendly twist on the classic PB&J. Made with simple, real ingredients, they’re perfect for school lunches, busy mornings, and road trips.
- Prep Time: 30 minutes
- Cook Time: 20 minutes
- Total Time: 50 minutes
- Yield: 8 servings 1x
- Category: Breakfast
- Cuisine: American
Ingredients
- 2 ½ cups (300g) all-purpose flour
- 1 cup (226g) unsalted butter, cold and cubed
- 6–8 tablespoons (90-120ml) ice water
- ½ teaspoon salt
- 1 tablespoon granulated sugar
- ¾ cup (192g) sunflower seed butter (sunbutter)
- ½ cup (160g) your favorite jelly or jam
- 1 large egg (for egg wash)
- 1 tablespoon water (for egg wash)
- Turbinado or coarse sugar (for sprinkling, optional)
Instructions
- Make the Dough: In a large mixing bowl, whisk together the all-purpose flour, salt, and sugar. Add the cold, cubed butter. Using a pastry cutter or two forks, cut the butter into the flour until the mixture resembles coarse crumbs with some pea-sized butter pieces remaining. Drizzle in the ice water, one tablespoon at a time, tossing with a fork after each addition. Stop adding water as soon as the dough holds together when squeezed.
- Chill the Dough: Turn the dough out onto a lightly floured surface and gently bring it together into a disc. Wrap it in plastic wrap and refrigerate for at least 30 minutes, or up to overnight.
- Prepare the Filling: While the dough chills, mix the sunbutter with a teaspoon of jelly or jam to loosen it slightly if it feels too thick. Set aside.
- Roll and Cut the Dough: Preheat your oven to 375°F (190°C). Line a baking sheet with parchment paper. On a lightly floured surface, roll the chilled dough out to about ⅛-inch thickness. Use a sharp knife or pizza cutter to cut the dough into rectangles—roughly 4×6 inches each. You should get about 8 to 10 rectangles.
- Assemble the Pockets: Place a heaping tablespoon of the sunbutter mixture onto the center of half of the rectangles. Top with about a teaspoon of jelly or jam. Place a second rectangle on top of each filled one. Use a fork to crimp the edges firmly, sealing the pocket completely. Poke a few small holes on top with the fork to allow steam to escape.
- Egg Wash and Bake: Brush the tops of the pockets with the egg wash. Sprinkle with turbinado or coarse sugar if using. Bake for 18-22 minutes, or until the tops are golden brown and the filling is bubbly. Let them cool on the baking sheet for 5 minutes before transferring to a wire rack.
- Freeze or Serve: Once completely cooled, you can serve them immediately or freeze them. To freeze, place the cooled pockets in a single layer on a baking sheet and freeze for 1 hour. Then transfer to a freezer-safe bag or container. They’ll keep for up to 3 months.
Notes
Keep everything cold for a flaky crust. Don’t overfill the pockets to prevent leaking. Crimp edges thoroughly. Let pockets cool completely before freezing. Reheat in a 350°F oven for 10-12 minutes or in an air fryer at 325°F for 5-7 minutes.
Nutrition
- Serving Size: 1 pocket
- Calories: 320
- Sugar: 12
- Sodium: 180
- Fat: 18
- Saturated Fat: 10
- Carbohydrates: 36
- Fiber: 2
- Protein: 6
Keywords: sunbutter and jelly pockets, nut-free freezer pockets, homemade freezer pockets, sunbutter recipe, nut-free breakfast, school-safe snacks, freezer-friendly pockets