My kitchen was a mess—flour dusted the counters, and a half-empty bag of cocoa sat next to a lonely box of chocolate chips. It was 3 PM, and an unannounced group of neighborhood kids had just shown up, buzzing with anticipation for something sweet. The fridge was nearly bare except for a carton of eggs and a tub of cream cheese. I didn’t have a plan, just the urge to whip up something quick with the dark chocolate hiding in the pantry. That’s how these Perfect Witch Hat Dark Chocolate Cupcakes with Black Velvet Frosting came to be.
The whole scene was chaotic: kids chatting about costumes, the scent of melting chocolate mixing with the faint vanilla from the frosting, and me trying to keep things together while improvising. Honestly, I wasn’t expecting much, but as the cupcakes baked and the frosting thickened, a quiet pride settled in. These cupcakes weren’t just a last-minute save—they became the highlight of the afternoon, a treat that felt both spooky and indulgent, perfect for Halloween or any time you want a little magic in your day.
There’s something about the contrast of the dark chocolate with the deep black velvet frosting that feels mysterious and festive. It’s got that rich, almost haunting allure, and I love how the witch hat design adds a playful touch without needing fancy decorations. This recipe stuck with me because it’s approachable, a bit unexpected, and honestly just plain fun. You don’t need a fully stocked kitchen or hours of prep to pull off something this special.
Why You’ll Love This Recipe
From my kitchen to yours, these Perfect Witch Hat Dark Chocolate Cupcakes with Black Velvet Frosting have been tested and tweaked through multiple batches to get just right. Here’s why I think you’ll find them irresistible:
- Quick & Easy: Ready in under 45 minutes, making them perfect for last-minute Halloween parties or spontaneous sweet cravings.
- Simple Ingredients: Most of these you probably have on hand—no need to run to specialty stores or hunt down rare items.
- Perfect for Halloween: The witch hat design adds a spooky charm that’s fun for kids and adults alike without being over the top.
- Crowd-Pleaser: The deep chocolate flavor paired with smooth black velvet frosting consistently gets a thumbs-up from everyone who tries them.
- Unbelievably Delicious: The cupcakes are moist with a rich cocoa punch, while the frosting is silky and just sweet enough to balance the bitterness—trust me, you’ll want seconds.
What sets this recipe apart is the use of a black velvet frosting that’s creamy, not grainy, achieved by blending cream cheese with cocoa powder and a touch of black food coloring for that perfect midnight hue. The witch hat shape isn’t just a cute gimmick; it’s easy enough for beginners but impressive enough to wow your guests. I’ve made these for neighborhood parties and even paired them with savory bites like creamy buffalo chicken dip to balance the flavors, and they always steal the show.
This recipe isn’t just a dessert—it’s a little celebration in cupcake form. It’s the kind of treat that makes you pause and savor, the kind that feels special even when it’s made from whatever you’ve got lying around. And honestly, isn’t that the best kind of cooking?
What Ingredients You Will Need
This recipe uses straightforward, pantry-friendly ingredients to create cupcakes with bold chocolate flavor and a smooth, velvety frosting that holds its shape. Here’s what you’ll need:
- For the Cupcakes:
- All-purpose flour (1 ½ cups / 190 g) – provides structure
- Granulated sugar (1 cup / 200 g) – for sweetness
- Unsweetened cocoa powder (¾ cup / 75 g) – I recommend a good quality Dutch-processed cocoa for deeper flavor
- Baking powder (1 teaspoon) – helps the cupcakes rise
- Baking soda (½ teaspoon) – for leavening and tenderness
- Salt (¼ teaspoon) – balances sweetness
- Large eggs (2, room temperature) – binds and enriches
- Whole milk (¾ cup / 180 ml) – adds moisture (can substitute almond milk for dairy-free)
- Vegetable oil (½ cup / 120 ml) – keeps cupcakes moist
- Vanilla extract (1 teaspoon) – enhances flavor
- Boiling water (½ cup / 120 ml) – intensifies cocoa flavor and helps batter bloom
- For the Black Velvet Frosting:
- Cream cheese (8 oz / 225 g, softened) – for creamy texture
- Unsalted butter (½ cup / 115 g, softened) – richness and stability
- Powdered sugar (3 cups / 360 g) – smooth sweetness
- Unsweetened cocoa powder (2 tablespoons) – for depth and color
- Black gel food coloring (as needed) – for that signature witchy black color
- Vanilla extract (1 teaspoon) – flavor enhancer
- Decoration and Assembly:
- Mini chocolate cones (one per cupcake) – to form the witch hat tops
- Black licorice strings or thin black icing lines – to create hatbands
Most of these ingredients are staples in my kitchen, and I love how easy it is to swap things out. For a gluten-free version, you can try a 1:1 gluten-free flour blend, and coconut sugar works well instead of granulated sugar for a different flavor profile. If you want to experiment with frosting colors, a hint of purple or green gel can give playful twists.
Equipment Needed
Making these witch hat cupcakes doesn’t require fancy gadgets, but having the right tools definitely makes things smoother:
- Muffin tin: standard 12-cup size works perfectly
- Cupcake liners: black or dark-colored liners add to the spooky vibe but any will do
- Mixing bowls: a couple of medium-sized ones for dry and wet ingredients
- Electric hand mixer or stand mixer: speeds up batter mixing and frosting whipping (though whisk and elbow grease totally work too!)
- Measuring cups and spoons: for precise measurements (essential for baking!)
- Spatula and wooden spoon: for folding and mixing
- Piping bag with round or star tip: for neat frosting application (optional, but makes the witch hats look sharp)
- Cooling rack: to let cupcakes cool evenly without sogginess
If you don’t have a piping bag, a zip-top bag with a corner cut off works just fine for frosting. I once forgot to buy cupcake liners and ended up greasing the tin with a little butter—worked just as well, though the cleanup was a bit more hands-on. For the mini chocolate cones, you can find them at most grocery stores or online, but if you’re feeling creative, ice cream cones trimmed to size make a fun substitute.
Preparation Method
- Preheat the oven to 350°F (175°C): Line a 12-cup muffin tin with cupcake liners. This takes about 10 minutes, including gathering ingredients.
- Mix dry ingredients: In a large bowl, sift together 1 ½ cups flour, 1 cup sugar, ¾ cup cocoa powder, 1 teaspoon baking powder, ½ teaspoon baking soda, and ¼ teaspoon salt. Whisk them to combine evenly. This ensures no lumps and an even rise.
- Combine wet ingredients: In a separate bowl, beat 2 room-temperature eggs, ¾ cup milk, ½ cup vegetable oil, and 1 teaspoon vanilla extract until smooth. This step takes around 2 minutes with a mixer.
- Make the batter: Gradually add the wet mixture to the dry ingredients, stirring gently with a spatula or mixer on low speed. Once combined, slowly pour in ½ cup boiling water while mixing. The batter will be thin—that’s normal and actually helps the cupcakes stay moist.
- Fill cupcake liners: Pour batter into liners, filling about ⅔ full to leave room for rising. Use a small scoop or spoon for even portions. This takes about 5 minutes.
- Bake: Place the tin in the oven and bake for 18-22 minutes. To test doneness, insert a toothpick in the center—it should come out with a few moist crumbs. Avoid overbaking or cupcakes will dry out.
- Cool completely: Transfer cupcakes to a cooling rack after 5 minutes in the tin. Let them cool fully before frosting, about 30 minutes. Patience here saves you from melting frosting!
- Prepare the black velvet frosting: Beat 8 oz softened cream cheese with ½ cup softened butter until creamy. Gradually add 3 cups powdered sugar and 2 tablespoons cocoa powder, mixing on low to avoid powder clouds. Add vanilla and black gel food coloring a drop at a time until you get a rich, deep black. Taste and adjust sweetness if needed.
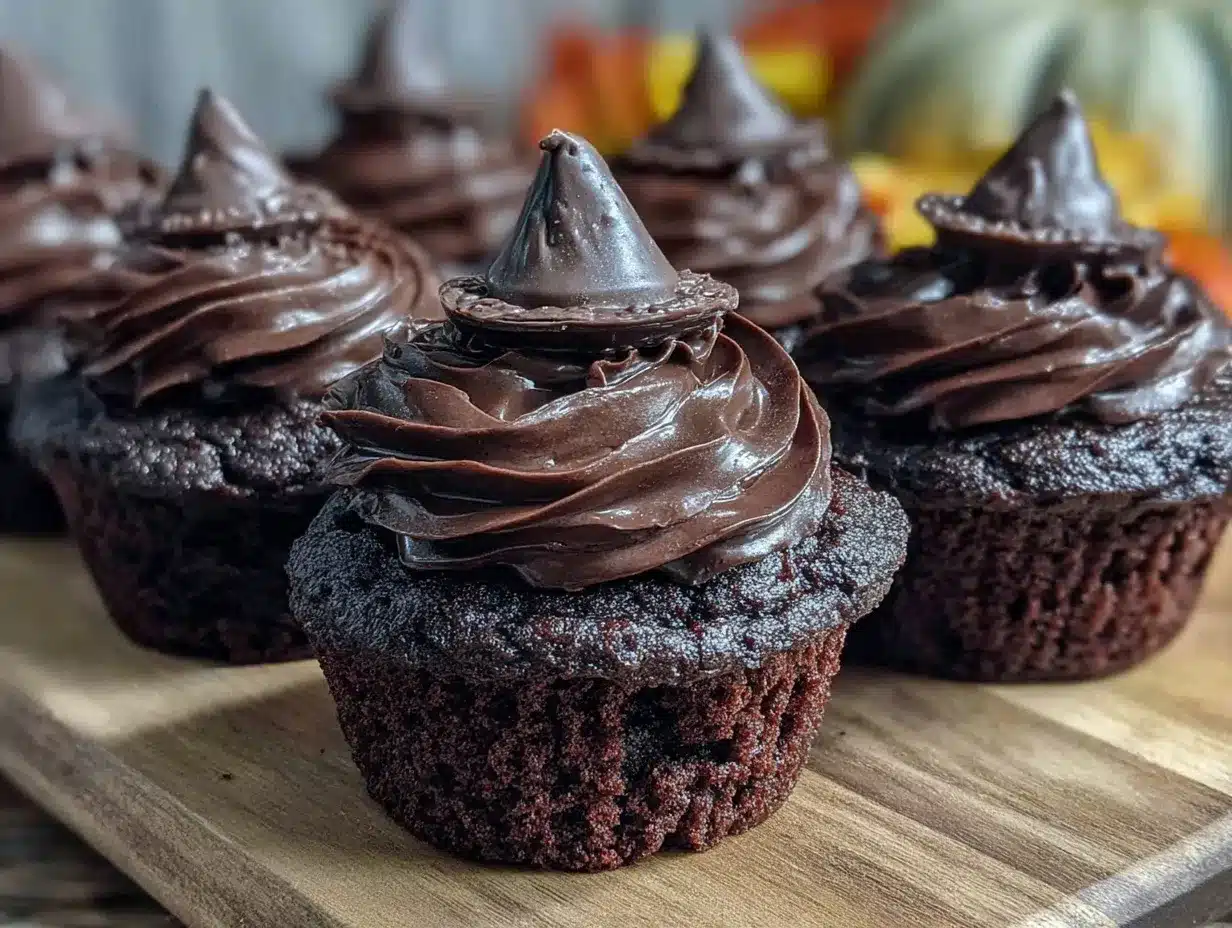
- Decorate: Pipe or spread frosting onto cooled cupcakes in a cone shape. Place a mini chocolate cone on top to form the witch hat. Use black licorice or thin icing lines around the base of the cone to mimic hatbands. This finishing touch takes about 15 minutes but totally ups the fun factor.
Quick tip: If your frosting feels too soft to hold shape, refrigerate for 10 minutes before decorating. Also, I learned the hard way that piping the frosting straight onto warm cupcakes makes a mess—cooling is key!
Cooking Tips & Techniques
For cupcakes this rich and visually striking, a few tricks help keep everything on point:
- Use room temperature ingredients: Eggs, milk, and butter soften mixing and prevent curdling. I occasionally forget this and end up with lumpy batter, so take a moment to prep.
- Sift the cocoa powder: Cocoa tends to clump, so sifting ensures smooth batter and frosting without gritty bits.
- Don’t overmix: Once wet and dry ingredients combine, mix just until incorporated. Overmixing can lead to dense cupcakes, and nobody wants that.
- Boiling water is your friend: It unlocks the cocoa’s flavor and gives the batter a nice, thin consistency for moist cupcakes.
- Chill frosting if necessary: Cream cheese frosting can soften quickly, so a brief chill helps it hold the witch hat shape better.
- Practice piping on parchment paper: Before frosting cupcakes, test your piping technique to get comfortable shaping the hats.
- Multitasking tip: Start your frosting prep as cupcakes bake to save time—softening cream cheese and butter early is a good move.
I remember one batch where I skipped the boiling water—it was a sad, dry disaster. Lesson learned: that water makes all the difference. Also, pairing these cupcakes with savory dishes like honey bourbon baked beans at a Halloween gathering creates a perfect sweet-and-savory balance.
Variations & Adaptations
Want to switch things up? These cupcakes are a great base for creative twists:
- Vegan version: Swap eggs for flax eggs (1 tablespoon ground flaxseed + 3 tablespoons water per egg), use plant-based milk, and replace cream cheese and butter with vegan alternatives.
- Spiced chocolate: Add a teaspoon of cinnamon or a pinch of cayenne to the batter for a warm, unexpected kick.
- Seasonal twist: Swap the mini chocolate cones for orange or purple ice cream cones, and use matching colored frosting for a festive look.
- Flavor swap: Add a teaspoon of espresso powder to the batter to enhance the chocolate flavor even more.
- Nutty upgrade: Fold in chopped toasted pecans or walnuts into the batter for texture contrast.
One time, I replaced the black velvet frosting with a ghostly white cream cheese swirl and added edible glitter for a party. It was a hit but honestly, the black frosting has that perfect Halloween vibe I keep coming back to. Don’t hesitate to experiment with different toppings like sprinkles or edible eyes for extra fun.
Serving & Storage Suggestions
These witch hat cupcakes are best served at room temperature so the frosting is soft and creamy. They make a striking centerpiece for Halloween parties or a fun treat after a spooky movie night.
Pair them with warm drinks like hot cocoa or spiced apple cider to complement the deep chocolate flavor. For a savory offset, consider serving alongside fresh caprese skewers for a balanced spread.
Store cupcakes in an airtight container in the refrigerator for up to 3 days. Because of the cream cheese frosting, refrigeration is a must to keep things fresh. Bring them back to room temperature before serving for the best texture.
You can freeze unfrosted cupcakes wrapped tightly in plastic wrap and foil for up to 2 months. Thaw completely before frosting and decorating. Leftover frosting can be refrigerated in a sealed container for up to a week.
Flavors tend to deepen after a day, so if you can wait, the chocolate becomes even richer and the frosting more luscious. Just be sure to keep the witch hats intact during storage!
Nutritional Information & Benefits
Each cupcake (including frosting) has approximately:
| Calories | Fat | Carbohydrates | Protein |
|---|---|---|---|
| 320 kcal | 18 g | 38 g | 4 g |
The recipe includes wholesome ingredients like cocoa powder, which contains antioxidants, and cream cheese providing a modest amount of calcium and protein. Using dark cocoa powder adds depth without extra sugar, keeping sweetness balanced.
For those with dietary needs, swapping to almond flour or plant-based alternatives makes these cupcakes adaptable for gluten-free or dairy-free diets. Be mindful of allergens like eggs, dairy, and wheat when serving to guests.
From my own lens, these cupcakes feel like a treat that doesn’t stray too far from homemade goodness. They satisfy sweet cravings while letting you control quality and freshness—much better than store-bought Halloween candy overload.
Conclusion
If you’re looking for a Halloween cupcake recipe that’s both fun to make and a little bit magical, these Perfect Witch Hat Dark Chocolate Cupcakes with Black Velvet Frosting are a winner. They come together quickly, need no fancy skills, and bring a rich, chocolatey delight with a spooky twist that kids and adults love.
Feel free to customize the frosting color, add your own decorations, or try out one of the variations to make these cupcakes your own. I keep coming back to this recipe not just because it’s delicious, but because it turns an unexpected moment or last-minute gathering into something memorable.
Give it a try, and drop a comment sharing your own witchy cupcake creations or any fun Halloween baking stories. There’s nothing better than swapping ideas and seeing how a simple recipe turns into a festive tradition. Happy baking, and may your treats be as delightful as your company!
FAQs
Can I make these cupcakes gluten-free?
Yes, you can substitute the all-purpose flour with a 1:1 gluten-free baking flour blend. Just make sure it contains xanthan gum for structure.
How do I get the black frosting so dark without it tasting bitter?
Using cream cheese frosting with cocoa powder helps balance bitterness. Add black gel food coloring gradually until you reach the desired shade without overusing cocoa.
Can I prepare these cupcakes ahead of time?
Absolutely! You can bake and freeze the unfrosted cupcakes up to 2 months in advance. Thaw completely before frosting and decorating.
What if I don’t have mini chocolate cones for the witch hats?
Ice cream cones trimmed to size work well, or you can skip the cone and pipe the frosting into a pointed hat shape for a similar effect.
How should I store leftover cupcakes?
Store in an airtight container in the fridge for up to 3 days. Let them come to room temperature before serving for the best flavor and texture.
Pin This Recipe!
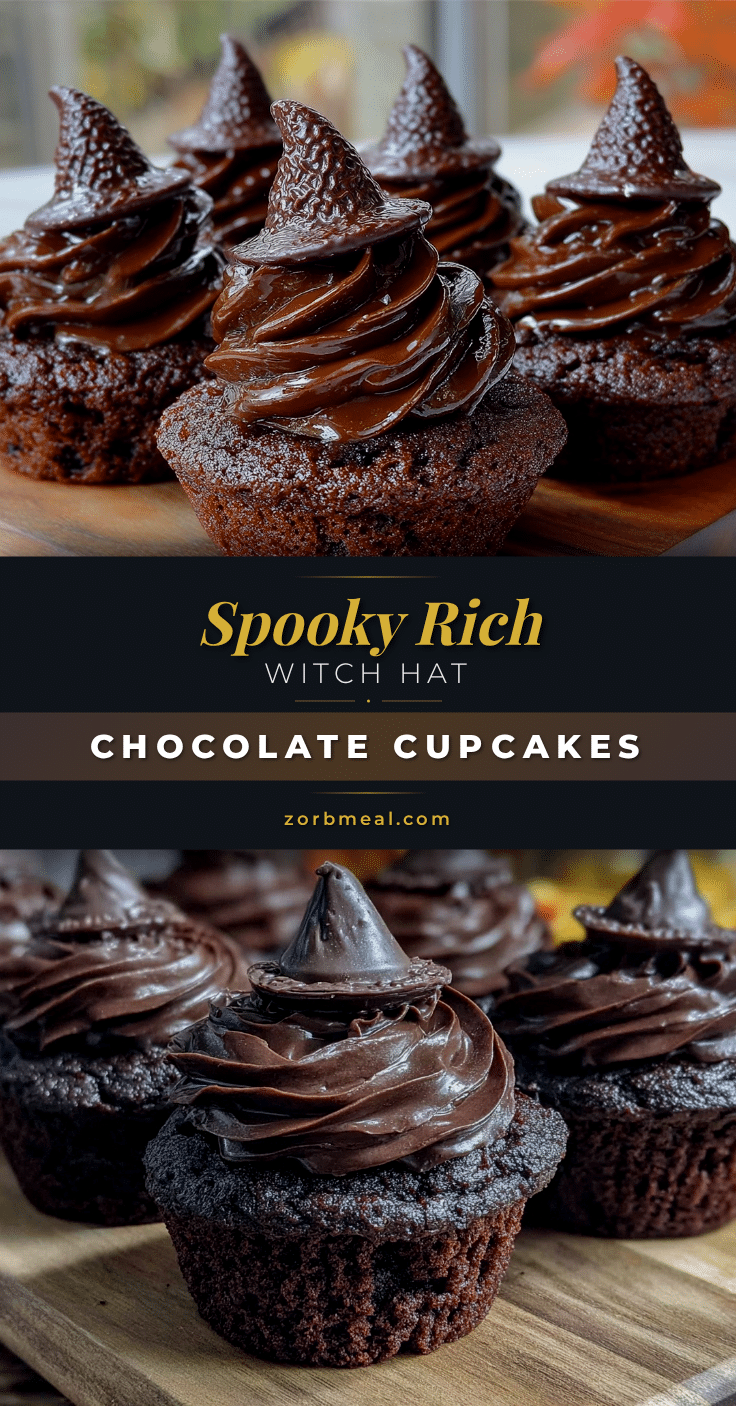
Perfect Witch Hat Dark Chocolate Cupcakes
These rich and moist dark chocolate cupcakes topped with creamy black velvet frosting are a quick and easy Halloween treat that delights kids and adults alike with their spooky witch hat design.
- Prep Time: 15 minutes
- Cook Time: 22 minutes
- Total Time: 45 minutes
- Yield: 12 servings 1x
- Category: Dessert
- Cuisine: American
Ingredients
- 1 ½ cups all-purpose flour (190 g)
- 1 cup granulated sugar (200 g)
- ¾ cup unsweetened cocoa powder (75 g), preferably Dutch-processed
- 1 teaspoon baking powder
- ½ teaspoon baking soda
- ¼ teaspoon salt
- 2 large eggs, room temperature
- ¾ cup whole milk (180 ml), or almond milk for dairy-free
- ½ cup vegetable oil (120 ml)
- 1 teaspoon vanilla extract
- ½ cup boiling water (120 ml)
- 8 oz cream cheese, softened (225 g)
- ½ cup unsalted butter, softened (115 g)
- 3 cups powdered sugar (360 g)
- 2 tablespoons unsweetened cocoa powder
- Black gel food coloring, as needed
- 1 teaspoon vanilla extract
- Mini chocolate cones (one per cupcake)
- Black licorice strings or thin black icing lines for decoration
Instructions
- Preheat the oven to 350°F (175°C). Line a 12-cup muffin tin with cupcake liners.
- In a large bowl, sift together flour, sugar, cocoa powder, baking powder, baking soda, and salt. Whisk to combine evenly.
- In a separate bowl, beat eggs, milk, vegetable oil, and vanilla extract until smooth.
- Gradually add the wet mixture to the dry ingredients, stirring gently. Slowly pour in boiling water while mixing; the batter will be thin.
- Fill cupcake liners about two-thirds full with batter using a scoop or spoon.
- Bake for 18-22 minutes or until a toothpick inserted in the center comes out with a few moist crumbs.
- Cool cupcakes in the tin for 5 minutes, then transfer to a cooling rack to cool completely, about 30 minutes.
- For the frosting, beat cream cheese and butter until creamy. Gradually add powdered sugar and cocoa powder, mixing on low speed.
- Add vanilla extract and black gel food coloring drop by drop until a deep black color is achieved. Adjust sweetness if needed.
- Pipe or spread frosting onto cooled cupcakes in a cone shape.
- Place a mini chocolate cone on top of each cupcake to form the witch hat.
- Use black licorice strings or thin icing lines around the base of the cone to mimic hatbands.
Notes
Use room temperature ingredients for best results. Sift cocoa powder to avoid clumps. Do not overmix batter to keep cupcakes light and moist. Boiling water enhances cocoa flavor and thins batter for moist cupcakes. Chill frosting if too soft before decorating. Cool cupcakes completely before frosting to prevent melting. Piping frosting on parchment paper before decorating helps practice shaping witch hats.
Nutrition
- Serving Size: 1 cupcake
- Calories: 320
- Fat: 18
- Carbohydrates: 38
- Protein: 4
Keywords: Halloween cupcakes, dark chocolate cupcakes, witch hat cupcakes, black velvet frosting, easy Halloween treats, spooky desserts


